Table of Contents
Advertisement
Operating Instructions
EN
ID5V92KMW/UK
ID5V92KMW/UK
ID5V92KMW/UK
ID5V92KMW/UK
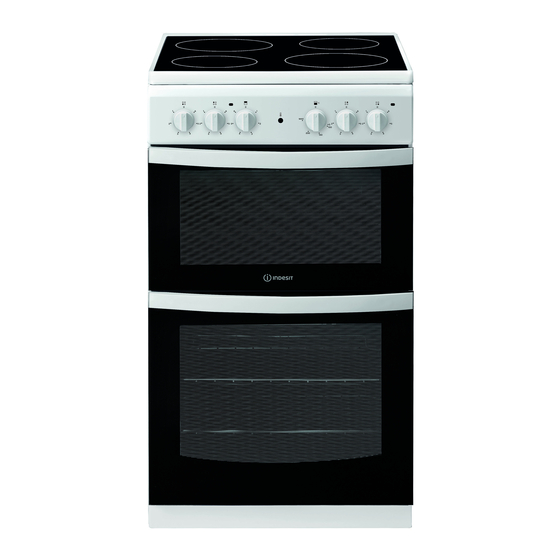
50cm Free Standing Electric Cooker
Contents
Safety Information, 2
Introduction , 5
Use of hotplates , 8
Grilling , 10
Grill Chart, 11
Meat, 13
Conventional Oven cooking charts -
|Baking, 14
If it Still Won't Work... /
Disposal of the appliance , 19
Guarantee information/
Key Contacts, 20
Installation, 21
You must read these instructions prior to using
your appliance and retain them for future use.
EN
EN
Advertisement
Table of Contents

Related Manuals for Indesit ID5V92KMW/UK


Summary of Contents for Indesit ID5V92KMW/UK
-
Page 1: Table Of Contents
Operating Instructions 50cm Free Standing Electric Cooker Contents Safety Information, 2 Features, control panel 4 Introduction , 5 ID5V92KMW/UK ID5V92KMW/UK ID5V92KMW/UK ID5V92KMW/UK Installation tips, 6 Use of hotplates , 8 Hotplates General Information Notes , 7 Choosing Your Utensils ,10... - Page 2 be vigilant when cooking foods rich in fat, oil or when adding alcoholic beverages - risk of fire. Use SAFETY INSTRUCTIONS oven gloves to remove pans and accessories. At the end of cooking, open the door with caution, IMPORTANT TO BE READ AND OBSERVED allowing hot air or steam to escape gradually Before using the appliance, read these safety before accessing the cavity - risk of burns.
- Page 3 WARNING: In order to prevent the For further information on the treatment, recovery and recycling of household electrical appliances, contact your local authority, the appliance from tipping, the retention chain collection service for household waste or the store where you purchased provided must be installed.
-
Page 4: Features, Control Panel
Features, panel control HOB VENTILATION SLOTS 1700W 1200W 1700W 1200W Hob Hot Indicators CONTROL PANEL GRILL/MEAT PAN WITH REMOVABLE HANDLE AND WIRE FOOD SUPPORT GRILL DOOR SWITCH GRILL MODEL & SERIAL NUMBER GRILL DOOR REMOVABLE MAIN OVEN INNER GLASS W I R E W O R K DOOR SHELF SUPPORTS... -
Page 5: Introduction
Introduction When the cooker is first used an odour may be To help you make the best use of your cooker, emitted. This will cease after a period of use. PLEASE READ THIS BOOKLET CAREFULLY. Your new cooker is guaranteed and will give lasting Our policy is one of continual improvement in design service. -
Page 6: Installation Tips
Installation tips Positioning the Cooker WARNING – THIS APPLIANCE MUST BE WARNING – THIS APPLIANCE MUST BE WARNING – THIS APPLIANCE MUST BE WARNING – THIS APPLIANCE MUST BE WARNING – THIS APPLIANCE MUST BE The height of the E A R T H E D . E A R T H E D . -
Page 7: Use Of Hotplates
Hotplate Use of Hotplates Ceramic Hob Note: Under no circumstances should the hob be used CAUTION: IF AT ANY TIME A CRACK IN THE with aluminium foil in contact with the hob surface. SURFACE BECOMES VISIBLE, DISCONNECT THE APPLIANCE IMMEDIATELY FROM THE SUPPLY. The controls set the hotplates at six pre-set power levels. -
Page 8: Hotplates General Information Notes
Hotplate Do Not Do Not Do Not Do Not Do Not Hotplates General Information Notes PANS SHOULD Do not Do not Do not cook directly on the hob surface without Do not Do not a cooking utensil, as this will result in damage to the surface of the hob. -
Page 9: Choosing Your Utensils ,10
Hotplate Choosing Your Utensils Stainless steel pans with a sandwich base of aluminium and copper are excellent conductors of heat. If using stainless steel saucepans with Do not use utensils with rough bases. aluminium and copper sandwich bases on ceramic and halogen hobs, the use of these pans must be in Do not use lightweight utensils with thin, distorted or accordance with the saucepan manufacturers’... -
Page 10: Grilling
Grilling ‘hooks’ embrace the edge of the pan (fig. 1) Grilling 2. Make sure that the middle part of the handle fits A switch operated by the door changes the heating exactly the protruding support of the pan (fig .2) and element configuration between grill and oven holds the pan from the bottom. -
Page 11: Grill Chart
Grill Chart Pre - heat the grill for 5 minutes on maximum control setting before grilling GRILL CHART The settings in the above guide have been developed to cook food successfully without excessive fat spitting and splashing. Food Grill Setting Approximate Cooking time Toasting of Bread 3 - 10 mins. -
Page 12: Conventional Oven
Main Oven Oven Control (f) Potatoes for roasting only require to be brushed Heating of the oven is achieved by turning control with cooking oil or melted fat. clockwise to the required temperature scale on the (g)It is not necessary to baste when roasting in an control panel, as recommended in the temperature electric oven and stock or liquid should not be charts. -
Page 13: Conventional Oven Cooking Charts
Conventional Oven - Cooking Chart MEAT Note: Where times are stated, they are approximate only. Conventional Oven Meat Pre- Temperature Time (approx.) Position in heat °C Oven 25-30 mins per 450g Beef 190/200 (1lb) + 25 mins over. 25-30 mins per 450g Lamb 190/200 (1lb) + 25 mins over. - Page 14 Cooking Chart- Baking Conventional Oven Cooking Food Pre- Position in Oven Temperature and Time heat from bottom Scones 210/220°C approx. 10-15 mins. Runners 1 & 3 Small Cakes 180/190°C approx. 30-35 mins. Runners 1 & 3 170/180°C 6˝ "-7" tins approx. 20 mins. Victoria Sandwich Runners 1 &...
-
Page 15: Using The Main Oven For Other Functions ,15
Using the Main Oven for Other Functions ‘S’ SLOW Setting Points to consider when preparing food for “SLOW” cooking: This is used for slow cooking, keeping food warm and warming plates for short periods. Extra care should be 1. Make sure that the dishes to be used will fit into taken when warming bone china, as it may be the oven ensuring enough room for air to circulate. -
Page 16: Care And Cleaning ,16
Care and Cleaning Cleaning the glass door with 3 panels TOP OVEN DOORS ..1 1 1 1 Open the door fully. Removing the retaining Removing the retaining bar depress carefully the clips on both sides of the bar. Pull the trim up gently until the retainer is released. - Page 17 Care and maintenance TURN OFF THE MAIN SWITCH AND ENSURE THE COOKER IS COLD BEFORE CLEANING. BEFORE SWITCHING ON AGAIN, ENSURE THAT ALL CONTROLS ARE IN THE OFF POSITION. Do not use steam cleaning Carry out the required Do not use wire wool, abrasive equipment.
- Page 18 Please refer to the enclosed warranty leaflet for more information on the warranty. A complete product specification, including the energy efficiency ratings for this oven, can be read and downloaded from our website www.indesit.com...
-
Page 19: Cooking Results Not Satisfactory
Cooking Results Not Satisfactory? Problem Check Grilling Uneven cooking front Ensure that the grill pan is positioned centrally below to back the grill element. Fat splattering Ensure that the grill is not set to too high a temperature. Oven Baking Ensure that the oven shelves are level by using a Uneven rising of cake spirit level on the rod shelf and adjusting, using... -
Page 20: Something Wrong
Something Wrong with your Cooker Before contacting your nearest Service Centre/Installer, check the problem guide below; there may be nothing wrong with your cooker. Problem Slight odour or small amount of This is normal and should cease after a short period. smoke when using the cooker for the first time. - Page 21 Min. 750 mm Min. 400 mm Min. Min. min. 10 mm min. 10 mm min. 10 mm = mm...
- Page 24 Whirlpool EMEA S.p.A. Via Carlo Pisacane n.1 20016 Pero (MI), Italy VAT number: IT00693740425 11/2018 - W11293241 www.indesit.com XEROX FABRIANO...
Need help?
Do you have a question about the ID5V92KMW/UK and is the answer not in the manual?
Questions and answers