Indesit KD6C35 Operating Instructions Manual

Indesit KD6C35 Operating Instructions Manual

Free standing electric cooker

Advertisement

Operating Instructions
GB
English, 1
KD6C35
KDP60
KT6C3
KD6C35W S
KDP60C S
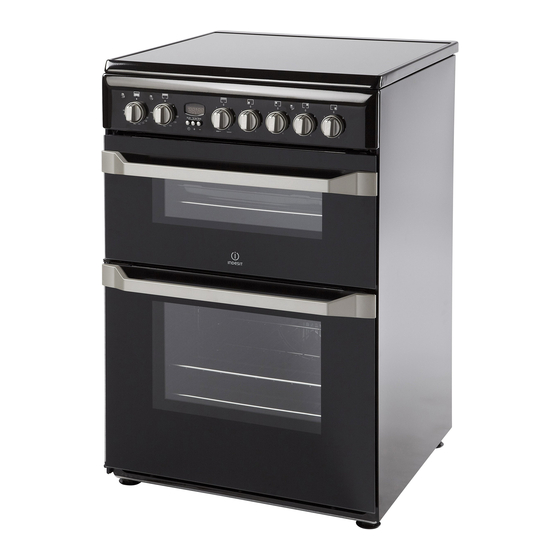
Free Standing Electric Cooker
Contents
Clock/Minute Minder Operation (KD6C35 and
KDP60 only), 8-9
Grill, 14
You must read these instructions prior to using
your appliance and retain them for future use.
GB

Advertisement

Table of Contents
loading

Summary of Contents for Indesit KD6C35

  • Page 1: Table Of Contents

    Contents WARNING, 2 Introduction, 3 English, 1 Installation, 4 Safety Information, 5 Features, 6 Control Panel, 7 Clock/Minute Minder Operation (KD6C35 and KDP60 only), 8-9 Temperature Conversion Chart, 10 Ceramic Hob, 11-12 KD6C35 KDP60 Grill Pan and Handle, 13 KT6C3...
  • Page 2: Warning

    WARNING WARNING: The appliance and its The internal surfaces of the accessible parts become hot compartment (where present) may during use. become hot. Care should be taken to avoid Never use steam cleaners or touching heating elements. pressure cleaners on the appliance. Children less than 8 years of age Remove any liquid from the lid shall be kept away unless...
  • Page 3: Introduction

    Introduction Your new appliance is guaranteed* and will give Technical Characteristics lasting service.This guarantee is only applicable if the appliance has been installed in accordance with the installation instructions detailed in this booklet. To help make best use of your cooking equipment, Top Oven please read this booklet carefully.
  • Page 4: Installation

    Installation Siting the Cooker WARNING - THIS APPLIANCE MUST BE EARTHED. The cooker is designed to fit between kitchen cabinets spaced 600mm apart. Mains Connection The space either side need only be sufficient to allow Your cooker should have been checked to ensure that withdrawal of the cooker for servicing and cleaning.
  • Page 5: Safety Information

    Safety Information Never When used properly your appliance is completely • Never stare at Halogen heating units safe but as with any electrical product there are • Never leave children unsupervised where a cooking certain precautions that must be observed. appliance is installed as all surfaces will be hot PLEASE READ THE PRECAUTIONS BELOW during and after its use.
  • Page 6: Features

    Features 1200W Ceramic 1800W Ceramic 1800W Ceramic 1200W Ceramic Clock/Minute Minder: Control panel (Models KD6C35 and (varies per model) KDP60 only) Model number and Serial number Conventional label Grill Grill pan food support Grill pan with Models KD6C35 and fixed/detachable...
  • Page 7: Control Panel

    Left Right Right Main Grill Front Rear Rear Front oven Main oven neon Hob hot neon Top oven neon KD6C35 and KDP60 Clock / Minute Minder Right Right Grill Left Left Main Rear Front Front Rear oven oven Operating controls when the grill is in use...
  • Page 8 Clock and Minute Minder CLOCK OPERATION To Set Time of Day 00.00 Step 1 Check that the electricity supply to the cooker is turned on. Step 2 When switched on the display will show 0.00 flashing intermittently. Step 3 Press the " "...
  • Page 9 Clock and Minute Minder MINUTE MINDER OPERATION 00 . 20 To Set the Minute Minder Step 1 Press the "+" button until the required time is set. A "Bell" symbol will light up. During setting the time adjusts in 10 second intervals up to a maximum of 99mins 50secs.
  • Page 10: Temperature Conversion Chart

    Temperature Conversion Chart Condensation Condensation may become evident on the inner door Main and water may drip through the vent. This is normal Main Fan °F Conventional when heat and moisture are present and may be a Mark Oven Oven result of any of the following: 1.
  • Page 11: Ceramic Hob

    WARNING: DO NOT USE THE HOB IF IT IS CRACKED. TO AVOID ELECTRIC SHOCK - SWITCH OFF AT THE COOKER MAINS CONTROL SWITCH IMMEDIATELY AND CONTACT YOUR NEAREST SERVICE OFFICE (see KEY CONTACTS, back page). Ratings of Cooking Zones Model Front Left Front Right Back Left Back Right KD6C35 Ceramic Ceramic Ceramic Ceramic KDP6 1800W 1200W 1200W...
  • Page 12 Care of the Ceramic Hob 4. Do not try to fry too much food at a time, especially frozen food. This only lowers the temperature of the Always Always Always ensure that the bottom of the pan is both clean oil or fat too much, resulting in greasy food.
  • Page 13: Grill Pan And Handle

    Grill Pan and Handle GRILL PAN AND HANDLE the grill pan handle is detachable from the pan to facilitate cleaning and storage. Fix the pan handle securely before use: 1. Fit the handle to the grill pan so that the external ‘hooks’...
  • Page 14: Grill

    Setting the Grill under the hot grill, directly on the shelf on the first or second position from the bottom of the oven, Door in according to the depth of the dish (KD6C35 and grilling KDP60 only). position Open the Grill door to the grilling position. i.e. fully.
  • Page 15: Guide To Grilling

    Guide To Grilling Pre - heat the grill for 5 minutes on maximum control setting before grilling. GRILL CHART Food Grill Setting Approximate Cooking Time Toasting of Bread 4 / Max 3 - 10 mins. products Small cuts of meat, 4 / Max for 4 mins.
  • Page 16: Top Oven Cookery Notes

    Top Oven Cookery Notes The top oven should be used to cook small quantities Operation of food.The oven is designed so that the grill element To heat the oven, turn the control knob clockwise.The operates at a reduced heat output, this is combined top oven pilot light will come on and remain on until with a heating element situated underneath the floor of the oven reaches the required temperature.The pilot...
  • Page 17: Main Oven Cookery Notes

    Main Oven Cookery Notes The oven is fitted with wirework shelf supports and two Oven positions rod shelves. Since the distribution of heat in the circulaire fan oven is very even, most foods will cook satisfactorily on any To heat the oven turn the knob clockwise, selecting shelf position, but the shelves should be evenly the require temperature between 80°C (176°F) and spaced.
  • Page 18: Oven Temperature Charts

    Oven Temperature Charts - Meat Top Oven Cooking (KD6C35 and KDP60 only) Meat Pre-heat Temperature °C Time (approx.) Position in Oven Beef/ Lamb 170/180 35 mins per 450g (1lb) + 35 mins over. (slow roasting) Beef/ Lamb 190/200 35-40 mins per 450g (1lb)
  • Page 19: Oven Temperature Charts

    Oven Temperature Charts - Baking Top Oven Cooking (KD6C35 and KDP60 only) Baking Pre-heat Temperature °C Time in mins. Position in Oven Scones 210/220 10-15 Runner 2 from bottom of oven Small Cakes 180/190 20-25 Runner 2 from bottom of oven...
  • Page 20: Care And Cleaning

    Care and Cleaning with a clean wet cloth, (even if the instructions for use TURN OFF THE MAIN SWITCH AND ENSURE THE suggest otherwise), as they can have an etching effect COOKER IS COLD BEFORE CLEANING. when reheated. Then wipe dry. BEFORE SWITCHING ON AGAIN, ENSURE THAT To maintain hob in good condition, we would ALL CONTROLS ARE IN THE OFF POSITION.
  • Page 21: Cleaning The Doors

    Care and Cleaning Take care that the rating label edges are not lifted Using a suitable cloth to protect the fingers grip the during cleaning, and furthermore that the lettering is light glass dome, unscrew anti-clockwise and lift. not blurred or removed. Reach into the aperture and unscrew the lamp anti- clockwise.
  • Page 22 Care and Cleaning NEVER OPERATE THE COOKER WITHOUT THE INNER DOOR GLASS IN POSITION. Refit the door inner glass as follows. 1. NOTE: The inner door glass has a special reflective coating on one side. Replace the door inner glass so that the statement: "IMPORTANT THIS FACE TOWARDS THE OVEN"...
  • Page 23: Cooking Results Not Satisfactory

    Cooking Results Not Satisfactory? Problem Check E nsure th at the g rill p an is p ositioned ce ntrally b elow Grilling U neven cooking front to b ack the g rill element. Fat splattering E nsure th at the g rill is not set to too hig h a setting. E nsure th at the oven shelves are level by using a spirit level on the rod shelf and a djusting the w heels/feet.
  • Page 24: Something Wrong With Your Cooker

    Something Wrong with your Cooker? Before contacting your nearest Service Centre/ Installer, check the problem guide below; there may be nothing wrong with your cooker. Problem Slight odour or small amount of smoke when grill / oven used for This is normal and should cease after a short period. first time If you find that the timer display is blank, then it is likely that there is no electricity supply to your oven.
  • Page 25 Notes...
  • Page 26: If It Still Won't Work

    If it Still Won't Work Contact the Service Office Disposal of your product To minimise the risk of injury to children please If something is still wrong with your appliance after dispose of your product carefully and safely. Remove you have been through the 'Something Wrong' list: all doors and lids.
  • Page 27: Guarantee Information

    We have a dedicated team who can provide free advice and assistance with your appliance if you experience any technical difficulties within the first 90 days of ownership. Simply call our Indesit Service Hotline on 08448 224 224 (ROI 0818 313 413) for telephone assistance, or, where necessary, to arrange for an engineer to call.
  • Page 28: Service Information

    05/2012 - 195103703.00 XEROX FABRIANO After Sales Service No one is better placed to care for your Indesit appliance during the course of its working life than us - the manufacturer. Essential Contact Information Indesit Service We are the largest service team in the country offering you access to 400 skilled telephone advisors and 1100 fully qualified engineers on call to ensure you receive fast, reliable, local service.

This manual is also suitable for:

Kdp60Kt6c3Kd6c35w sKdp60c sId60c2 s

Table of Contents