Table of Contents
Advertisement
Quick Links
Advertisement
Table of Contents

Related Manuals for Taga Harmony RB-1650BT


Summary of Contents for Taga Harmony RB-1650BT
- Page 1 RB-1650BT IN-CEILING ACTIVE SPEAKER SYSTEM Instruction Manual Edition 02-2024...
- Page 2 Congratulations for purchasing TAGA Harmony speaker System! TAGA Harmony installation speakers provide superior sound performance and amazing value. The RB-1650BT is a perfect solution for residential as well as commercial installations in restaurants, pubs, shops, conferencing rooms, fitness clubs and classrooms. KEY FEATURES:...
- Page 3 • Please do not dismantle any parts of the speakers as this may void your warranty - servicing should be done only by a qualified TAGA Harmony repair center. • When connecting the System make sure to power off your audio equipment (power mixer, sound processor, audio sources etc.).
-
Page 4: Table Of Contents
Contents Safety Instructions Remote Controller Front and Rear Panel Configuration and Hooking Up the System Placement Speaker Mounting Operation Play via Bluetooth ® Painting Installing the Grille Kit Content Specifications... -
Page 5: Safety Instructions
Safety Instructions IMPORTANT READ THIS SECTION CAREFULLY BEFORE PROCEEDING! An exclamation mark in a triangle is intended to alert the user to the presence of important operating and maintenance (servicing) instructions in the literature accompanying the appliance. WARNING: TO REDUCE THE RISK OF FIRE OR ELECTRIC SHOCK, DO NOT EXPOSE THIS APPARATUS OR THE POWER ADAPTER TO RAIN OR MOISTURE, AND OBJECTS FILLED WITH LIQUIDS, SUCH AS VASES, SHOULD NOT BE PLACED ON THIS APPARATUS OR ON THE POWER ADAPTER. - Page 6 Safety Instructions 1. Read Instructions - All the safety and operating instructions 13. Overloading - Do not overload wall outlets, extension cords or should be read before the product is operated. integral convenience receptacles as this can result in a risk of fire 2.
- Page 7 Batteries- Safety Instructions IMPORTANT READ THIS SECTION CAREFULLY BEFORE PROCEEDING! Make sure to insert the battery aligning the correct polarity - the positive and negative ends should be facing in the correct direction as marked on equipment. Incorrect fitting may cause leakage or, in extreme cases, fire or even an explosion.
- Page 8 Batteries- Safety Instructions Remember that small button cell batteries such as used in some hearing aids, toys, games and other appliances, may be easily swallowed by young children and this is dangerous. Keep loose button cells away from young children. Make sure appliance battery compartments are securely closed.
-
Page 9: Remote Controller
Remote Controller • Always use AAA bateries and do not use the rechargeable batteries. • If the batteries run out, remove the old batteries and replace them with new ones within several minutes. • If the batteries are placed incorrectly, thay can cause explosion. •... - Page 10 Remote Controller Power - ON Button Power - OFF Button VOLUME Up Button MUTE Button VOLUME Down Button Direct function Button LINE function Button ( LINE) Bluetooth Priority - ON Button ® Bluetooth Priority - OFF Button ® Bluetooth function Button ®...
-
Page 11: Front And Rear Panel
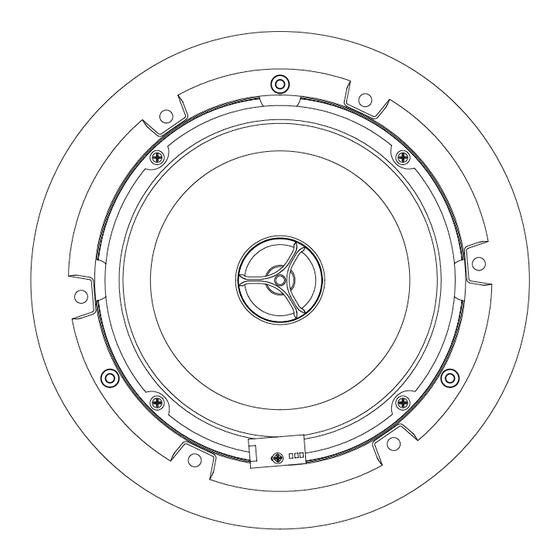
Front and Rear Panel The System consists of 2 speakers: Active (Master) Speaker and Passive (Slave) speaker. Master Speaker - Front Panel IR Receiver (Front) Status LED: Red (Operation) Status LED: Yellow (LINE IN) Status LED: Blue (Bluetooth) - Page 12 Front and Rear Panel Master Speaker - Rear Panel POWER input terminal - Phoenix Connector [ORANGE color] SLAVE SPEAKER OUTPUT terminal - Phoenix Connector [+ and -] [GREEN color] DAISY-CHAIN LOOP THROUGH - IN and OUT 3.5 mm (1/8”) sockets LINE IN input [RCA Left and Right / 3.5 mm (1/8”)] IR RECEIVER switch 10.
- Page 13 Front and Rear Panel Slave Speaker - Rear Panel 12. MASTER SPEAKER INPUT terminal – Spring Clips [+ and -]...
-
Page 14: Configuration And Hooking Up The System
Configuration and Hooking up the System Power Adapter Smatphone, tablet, etc. DC Power Cable Speaker cable RS-232 cable RCA-RCA interconnect 3.5 mm mini jack - mini jack CD player etc. interconnect Home Automation System Smartphone, tablet, etc. Note! Make sure that the Adapter Power Cable is disconnected from the Power Adapter and the wall outlet. - Page 15 Configuration and Hooking up the System Connecting Master with Slave Speaker Connect the Master and the Slave speaker with each other using a provided 2-conduc- tor speaker cable (black and white). The cable is ended with a Phoenix plug at one end and 2 bare conductors on the other. Insert the Phoenix plug into the SLAVE SPEAKER OUTPUT terminal on the Master speaker.
- Page 16 Configuration and Hooking up the System Connecting Multiple Systems (Daisy-Chain) Another set 3.5 mm mini jack - mini jack interconnect Speaker cable You can connect multiple systems (sets) together - there is no limit to number of sets. It is called a Daisy-Chain connection. The first set in a chain is a “Master set”...
- Page 17 Configuration and Hooking up the System Connecting Audio Equipment With Built-In Analog Output If you want to play music from audio source devices equipped with an analog output (CD player, Satellite tuner, Network streamer, Music player, Smartphone, Laptop etc.) choose the corresponding interconnect cables and connect the devices to the analog inputs (LINE IN).
-
Page 18: Rs-232 Control Codes
Configuration and Hooking up the System RS-232 control codes A command string is built of 95 and then the command code repeated twice e.g. Power ON send 95 and then send 11 twice. Each part of the code should be preceded by “0x” e.g. 0x95 0x11 0x11. RS-232 Communication Setup : Baud rate 9600 ;... - Page 19 Configuration and Hooking up the System To request the current status of each speaker parameter, send the commands as shown in below chart. RS-232 CODES Program Name Function Return Code Description 16 bytes Normal working status = 1 95 d0 d0 STANDBY Speaker working status Off status and standby status = 0...
- Page 20 The DC Power Cable of the Power Adapter is ended with the Phoenix plug – insert it firmly into the POWER input terminal (ORANGE color). External audio equipment connection options: Input / Output Input / Output Connection cable RB-1650BT external equipment LINE IN R/L input Output – RCA sockets RCA-RCA interconnect (not supplied) LINE IN 3.5 mm input...
-
Page 21: Placement
Place the speakers at least 60 cm (2 feet) away from corners and other surfaces which may interfere or reflect sound (like tall furniture). To add extra bass and definition to your system we recommend TAGA Harmony Custom Instal- lations or traditional subwoofers. -
Page 22: Speaker Mounting
Placement Swivel tweeter - depending on your particular primary listening area, room acoustics, ceiling height, or personal preference, you may find the sound more pleasing by poin- ting the tweeter in a particular direction. If additional treble is desired in the primary listening area, point the tweeter towards that area;... -
Page 23: Operation
Operation Connecting to the Electrical Outlet Plug the Power Cable to the Power Adapter and into the electrical outlet. Your System is ready for operation. Switching the System ON and OFF SWITCH ON the System by pressing the Power ON button - the RED Status LED will turn off. - Page 24 Operation Bluetooth Priority Function BT ON button activates the Bluetooth priority function which will automatically select ® the Bluetooth input after a paired audio device is connected. ® BT OFF button deactivates this function – the input must be selected manually by pressing the button.
- Page 25 Operation Direct Function ( Press this button to reset Bass and Treble to factory settings (flat = 0). Note! After reset, Bluetooth playback may be stopped, restart the playback on the ® audio source. Memory Function The set volume and tone levels are saved in the System memory. They will be restored each time the System is switched on, as well as after a power failure.
-
Page 26: Play Via Bluetooth
Bluetooth devices. ® 4. After a short time “RB-1650BT” will appear on the screen of your audio source. 5. Select “Pair” on your audio source device to connect with the System. After the operation is successful the BLUE (Bluetooth ) status LED will be illumi- ®... -
Page 27: Painting
Painting The grille and the frame, may be painted to match your room decoration. If you want to paint the speaker frame use the part of the template remaining after the hole has been cut out. With the grille removed, protect the speaker with this part and paint the frame. -
Page 28: Kit Content
Instruction Manual Specifications We strongly advise to contact a professional installer or dealer in order to install TAGA Harmony products. We recommend using high quality TAGA Harmony cables and other installation accessories. 2 x 30W RMS 110W Dynamic Peak Amplifier power... - Page 29 EU declaration of conformity Your product is marked with the symbol shown on the left. As its manufacturer, hereby we declare that the product is in compliance with the following EU directives and regulations: 2014/53/EU (RED) & 2011/65/EU (RoHS) The full text of the EU declaration of conformity is available from the manufacturer.
- Page 30 Notes...
- Page 31 Notes...
- Page 32 Notes...
Need help?
Do you have a question about the RB-1650BT and is the answer not in the manual?
Questions and answers