Advertisement
Quick Links
Advertisement

Related Manuals for Taga Harmony TRS Series


Summary of Contents for Taga Harmony TRS Series
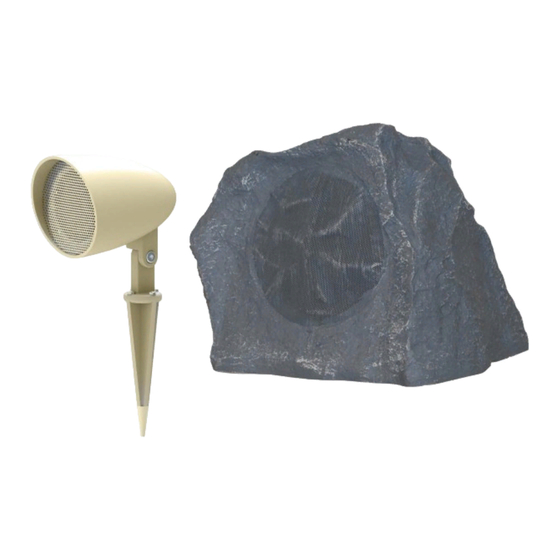
- Page 1 TRS Series GARDEN RAINPROOF SPEAKERS Instruction Manual...
- Page 2 TAGA Harmony speakers to perfectly adapt in the architecture of the environment. This instruction manual provides all of the information that you need to know about your TAGA Harmony TRS speaker. Please read it carefully before you start using the unit. Specifications...
-
Page 3: Select Location
Great care should be taken to ensure that all local building and legal regulations are followed. In case of any doubt contact a professional TAGA Harmony installer or dealer. When placing the speaker, find the position offering the best sound coverage throughout the listening area. - Page 4 Speaker Placement and Set-up 4. Connect the sound source (for TRS L models check point 5) Before connecting the speaker make sure that your audio source (amplifier, receiver etc.) is switched off. Connect the speaker cable to the speaker and amplifier.
- Page 5 Speaker Placement and Set-up + (RED color) speaker cable of your TRS SM speaker, and the amplifier Left output speaker terminal marked with - should be connected with Left - (BLACK color) speaker cable of your TRS SM speaker. The same should be done for the Right channel. If your speaker is wired incorrectly it will be out of phase and it will sound indistinctly and with a weak bass.
- Page 6 Speaker Placement and Set-up Required tools (not supplied with this product) Depending on the mounting surface and option prepare some of the following tools: Connect the sound source Make sure that your sound source (amplifier, receiver etc.) is switched off. 1.
- Page 7 Speaker Placement and Set-up 3. Firmly screw in the connectors. 4. Remove the seal cap which is located on the rear of the Speaker (twist to open and close). 5. Plug in the Quick Speaker Connector – Terminal Block to the terminal socket which is located under the seal cap.
- Page 8 Speaker Placement and Set-up Installation options The TRS L models offer a choice of installation options: In-Ground 1. Using a mallet pound the Ground Stake into the ground. You can use a wooden block to protect the top part of the Ground Stake.
- Page 9 Speaker Placement and Set-up 2. Run the speaker cable through the Surface Mount and the Mount Arm and connect it to the the Quick Speaker Connector – Terminal Block (check “Connect the sound source” for more details). 3. Plug in the Quick Speaker Connector – Terminal Block to the terminal socket (check “Connect the sound source”...
- Page 10 Speaker Placement and Set-up 5. Set the speaker in the down position. Using a screwdriver attach the Surface Mount to the Ground Stake. Note: Make sure not to damage the speaker cable. 6. Set the required Speaker position and tighten the Hex Socket Head Screw (check “Vertical angle regulation”...
- Page 11 Speaker Placement and Set-up 1. Using a knife cut and remove the part of the Surface Mount which is marked in the grey color. 2. Using a screwdriver attach the Ceiling-Wall Mount firmly to the wooden ceiling. 3. Run the speaker cable through the Surface Mount and using a screwdriver attach the Surface Mount firmly to the Ceiling-Wall mount.
- Page 12 Speaker Placement and Set-up 4. Using a screwdriver attach the Mount Arm to the Speaker. Run the speaker cable through the Mount Arm and connect it to the the Quick Speaker Connector – Terminal Block. Plug in the Quick Speaker Connector – Terminal Block to the terminal socket (check “Connect the sound source”...
- Page 13 Speaker Placement and Set-up On-surface / On-wall: floors, decks, walls or garden structures Flat Horizontal surfaces Using a fixing system which is appropriate for the surface you wish to install the Speaker (tent stakes, screws, anchors, dowels or nails - none of them are supplied with this product) attach the Surface Mount directly to the surface.
- Page 14 Speaker Placement and Set-up Vertical angle regulation The vertical position (angle) of your TRS L speaker can be adjusted. It can be regulated forward and backward. Using the Internal Hex Wrench loosen the Hex Socket Head Screw. Set the required Speaker position and tighten the Hex Screw. Note: Make sure to tighten the Hex Screw firmly but be cautious not to break the thread or the mounts.
- Page 15 Notes...
- Page 16 We strongly advise to contact a professional installer or dealer in order to install TAGA Harmony products. We recommend using high quality TAGA Harmony speaker cables and other installation accessories. Your product is marked with the symbol as showed on the left.
Need help?
Do you have a question about the TRS Series and is the answer not in the manual?
Questions and answers