Table of Contents
Advertisement
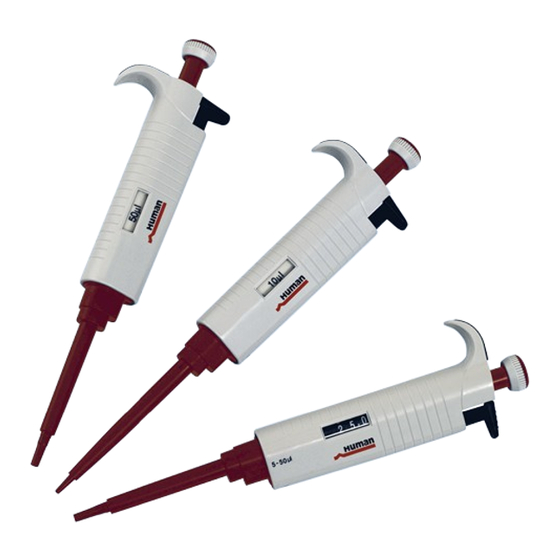
Quick Links
Advertisement
Table of Contents

Subscribe to Our Youtube Channel
Related Manuals for Human HumaPette Smart-Line


Summary of Contents for Human HumaPette Smart-Line
- Page 1 HumaPette Smart-Line | User Manual REF 19500L/1...
-
Page 3: Revision History
No part of this documentation may be reproduced in any form, nor processed, copied or distributed by means of elec- tronic systems, without prior permission of Human GmbH in writing. Since all precautionary measures were taken into ac- count in producing these operating instructions, the manu- facturer accepts no responsibility for any errors or omissions. -
Page 5: Table Of Contents
CONTENTS TABLE OF CONTENTS 1 SAFETY INSTRUCTIONS 1.1 Introduction 1.2 User warranty 1.3 Safety instructions 1.4 Intended use of the instrument 1.5 Disposal 1.6 Instrument disinfection 1.7 Notice 2 SYSTEM DESCRIPTION 2.1 Intended purpose for AutoHumaPette 2.2 General information 2.3 Unpacking 3 INSTALLING THE HUMAPETTE HOLDER 4 HUMAPETTE OPERATION 4.1 Volume setting... - Page 6 7 STORAGE 8 PERFORMANCE TEST AND RECALIBRATION 8.1 Performance test (checking calibration) 8.2 Recalibration procedure 9 MAINTENANCE 9.1 Cleaning your HumaPette 9.2 In-house maintenance 10 TROUBLESHOOTING 11 APPENDIX A: SPECIFICATIONS HUMAPETTE SMART- LINE...
- Page 7 CONTENTS...
- Page 8 HumaPette Smart-Line | User manual...
-
Page 9: Safety Instructions
Technical Service. 1.2 User warranty HUMAN warrants that instruments sold by one of its author- ised representatives shall be free of any defect in material or workmanship, provided that this warranty shall apply only to defects which become apparent within one year from the date of delivery of the new instrument to the purchaser. -
Page 10: Safety Instructions
HUMAN or used for purposes for which it was not designed. Note: GLP-guidelines require regular examinations of your volu- metric instruments. We recommend to check the volume every 3–12 months. The interval depends on the specific require- ments on the instrument. -
Page 11: Disposal
HUMAN GmbH assumes no responsibility for any errors which may appear in this publication. It is the policy of HUMAN GmbH to improve products as new tech- niques and components become available. HUMAN GmbH therefore has to reserve the right to change specifications if... - Page 12 HumaPette Smart-Line | User manual...
-
Page 13: System Description
AutoHumaPette is an adjustable volume pipette with a trig- ger switch with LEMO FFA 0S connector for e.g. HumaClot Duo Plus Model HC2 and HumaClot Quattro Model HC4. It is used in combination with HUMAN’s different hemostasis reagents. For laboratory professional use only. [IVD] FIGURE 1 2.2 General information... -
Page 14: Unpacking
2.3 Unpacking The HumaPette contains the following items:. HumaPette Calibration / Opening tool Instructions for use HumaPette holder Performance certificate according to ISO 8655/DIN 12650. HumaPette Smart-Line | User manual... -
Page 15: Installing The Humapette Holder
InStAllIng the humApette holDer 3 INSTALLING THE HUMAPETTE HOLDER For convenience and safety always keep the HumaPette verti- cally in its own holder when not in use. When installing the holder, please follow the instructions below: 1. Clean the shelf surface with ethanol. 2. - Page 16 FIGURE 4 1 Tip cone 2 Tip ejector collar 3 Display 4 Finger rest 5 Cap 6 Push button (thumb button) 7 Push button rod 8 Tip ejector 9 Grip HumaPette Smart-Line | User manual...
-
Page 17: Humapette Operation
humApette operAtIon 4 HUMAPETTE OPERATION 4.1 Volume setting The volume of the HumaPette is clearly shown through the handle grip window. The delivery volume (variable volume HumaPettes only) is set by turning the thumb button clock- wise or anticlockwise (Figure 5). FIGURE 5 When setting the volume, please make sure that: The desired delivery volume clicks into place. -
Page 18: Sealing And Ejecting Tips
Each HumaPette is fitted with a tip ejector to help elimi- nate the safety hazards associated with contamination. The tip ejector needs to be pressed firmly downwards to ensure proper tip ejection. Make sure that the tip is disposed of into a suitable waste container. HumaPette Smart-Line | User manual... -
Page 19: Pipetting Techniques
pIpettIng technIqueS 5 PIPETTING TECHNIQUES 5.1 Forward pipetting Make sure that the tip is firmly attached to the tip cone. For best results the thumb button should be operated slowly and smoothly at all times, particularly with viscous liquids. Hold the HumaPette vertically during aspiration. Make sure that the liquid and container vessel are clean and that the HumaPette, tips and the liquid are at the same temperature. -
Page 20: Reverse Pipetting
The liquid that remains in the tip(s) should not be included in the delivery. 4. The remaining liquid should now be discarded with the tip(s) or delivered back into the container vessel. HumaPette Smart-Line | User manual... -
Page 21: Pipetting Recommendations
pIpettIng recommenDAtIonS 6 PIPETTING RECOMMENDATIONS Hold the HumaPette vertically when aspirating the liquid and place the tip only a few millimetres into the liquid. Pre-rinse the tip before aspirating the liquid by filling and emptying the tip 5 times. This is important especially when dispensing liquids which have a higher viscosity and density than water. - Page 22 HumaPette Smart-Line | User manual...
-
Page 23: Storage
StorAge 7 STORAGE When not in use it is recommended that your HumaPette be stored in a vertical position. See “Installing the pipette hold- er” (Chapter 3). - Page 24 HumaPette Smart-Line | User manual...
-
Page 25: Performance Test And Recalibration
performAnce teSt AnD recAlIbrAtIon 8 PERFORMANCE TEST AND RECALIBRATION Each HumaPette has been factory-tested and certified at Note: HumaPette 22 °C according to ISO 8655/Din 12650. The following table specifications are shows the maximum permitted errors (Fmax) for manufac- guaranteed only with the turers given in DIN 12650, which further advises each user to manufacturer’s tips. -
Page 26: Recalibration Procedure
(under the thumb button) (Figure 6). 2. Turn the adjustment lock anticlock wise to decrease and clockwise to increase the volume. 3. Repeat performance test (checking calibration) procedure from step 1 until the pipetting results are correct. FIGURE 6 HumaPette Smart-Line | User manual... -
Page 27: Maintenance
mAIntenAnce 9 MAINTENANCE To maintain the best results from your HumaPette each unit should be checked every day for cleanliness. Particular attention should be paid to the tip cone(s). 9.1 Cleaning your HumaPette To clean your HumaPette use ethanol and a soft cloth or lint- free tissue. -
Page 28: In-House Maintenance
7. Before replacing tip cone it is recommended to grease the tip cone. piston slightly. 8. After reassembling use the HumaPette (without liquid) several times to make sure that the grease is spread evenly. 9. Check the HumaPette calibration. FIGURE 7 HumaPette Smart-Line | User manual... -
Page 29: Troubleshooting
troubleShootIng 10 TROUBLESHOOTING Trouble Possible cause Solution Droplets left inside Unsuitable tip Use original tips the tip Non-uniform wetting of Attach new tip the plastic Tip incorrectly attached Attach firmly Unsuitable tip Use original tips Foreign participles Clean the tip cone, attach between tip and tip cone new tip Insufficient amount of... - Page 30 HumaPette Smart-Line | User manual...
-
Page 31: Appendix A: Specifications Humapette Smart-Line
AppenDIx A: SpecIfIcAtIonS humApette SmArt-lIne 11 APPENDIX A: SPECIFICATIONS HUMAPETTE SMART-LINE Adjustable volume HumaPette Cat. no. Volume range Volume Inaccuracy ± Imprecision Increment 19110L 0.5 – 10 µl 10 µl 1.00 % 0.80 % 0.1 µl 5 µl 1.50 % 1.50 %... - Page 32 0.20 % 19545L 1000 µl 0.30 % 0.20 % Distilled water Liquid: (quality 3, DIN ISO 3696) Reference 22 °C, constant to ± 0.5 °C temperature: According to ISO 8655/DIN 12650 Tested: using original manufacturer’s tips HumaPette Smart-Line | User manual...
- Page 33 AppenDIx A: SpecIfIcAtIonS humApette SmArt-lIne...
- Page 34 HumaPette Smart-Line | User manual...
- Page 36 HUMAN Gesellschaft für Biochemica und Diagnostica mbH Max-Planck-Ring 21 • 65205 Wiesbaden • Germany Tel.: +49 6122/9988 0 • Fax: +49 6122/9988 100 eMail: human@human.de • www.human.de...
Need help?
Do you have a question about the HumaPette Smart-Line and is the answer not in the manual?
Questions and answers