Table of Contents
Advertisement
Quick Links
Advertisement
Table of Contents

Related Manuals for Chint Power SCA 75K-T-EU


Summary of Contents for Chint Power SCA 75K-T-EU
- Page 1 PV Grid-tied Inverter User Manual for Applicable to: SCA 75K-T-EU, SCA 75K-T-SA SCA110KTL-DO/EU, SCA110KTL-DO/EU2 SCA 100K-T-EU, SCA 120K-T-EU, SCA 125K-T-EU Shanghai Chint Power Systems Co., Ltd. Rev:1.2 Date: March, 2024 Doc No.: 9.0020.0817A0...
-
Page 2: Preface
This manual contains important information about product installation and safe operation, please read it carefully before use. Thank you for choosing a photovoltaic Grid-tied inverter for Chint Power Systems (hereinafter referred to as "photovoltaic inverter" or "inverter" in this manual). Relying on innovative design and perfect quality control, Chint power system Grid-tied photovoltaic inverters have high reliable quality and are widely used in high-standard photovoltaic Grid-tied systems. -
Page 3: Table Of Contents
Table of Contents Table of Contents PREFACE ................... 2 IMPORTANT SAFETY INSTRUCTIONS ........5 Warnings and Symbols in this Document ......5 Markings on the Product ............. 6 Safety Precautions of Operating the PV Inverter ....7 GENERAL INTRODUCTION ............8 Photovoltaic Grid-tied System .......... - Page 4 Table of Contents Inverter Installation Inspection .......... 38 Inverter Connection Cable Inspection ......38 Electrical Inspection ............38 Commissioning Steps ............38 APP SETUP ................39 APP Download ..............39 APP Setting ..............39 Structure Overview ............41 Main Menu ................ 42 5.4.1 Chart Menu ..............
-
Page 5: Important Safety Instructions
Safety Instructions IMPORTANT SAFETY INSTRUCTIONS (SAVE THESE INSTRUCTIONS) PLEASE READ THIS USER MANUAL CAREFULLY BEFORE THE INSTALLATION AND OPERATION OF THIS PV INVERTER. CPS RESERVES THE RIGHT TO REFUSE WARRANTY CLAIMS FOR EQUIPMENT DAMAGE IF USERS FAIL TO INSTALL THE EQUIPMENT ACCORDING TO THE INSTRUCTIONS IN THIS MANUAL. -
Page 6: Markings On The Product
Safety Instructions 1.2 Markings on the Product Risk of Electric Shock: This mark indicates that there is high voltage inside the product and you must follow the instructions in the user manual when operating High Temperature DANGER This logo indicates that this product complies with international safety standards, but it will generate heat during operation, so please do not touch the heat sink and the metal surface of the inverter... -
Page 7: Safety Precautions Of Operating The Pv Inverter
Safety Instructions Safety Precautions of Operating the PV Inverter DANGER! Before opening the inverter housing for maintenance, you must first disconnect the grid-side AC power supply and PV-side DC power supply, and ensure that the high-voltage energy inside the equipment has been completely released! Generally, you must cut off all connections to the inverter for at least 5 minutes before you can maintain and operate the equipment. -
Page 8: General Introduction
Item Name Description Monocrystalline, polycrystalline silicon components, PV Modules thin film batteries that do not require grounding SCA 75K-T-EU; SCA 75K-T-SA SCA 100K-T-EU; SCA 110KTL-DO/EU PV Inverter SCA 110KTL-DO/EU2; SCA 120K-T-EU SCA 125K-T-EU metering device Standard metering device for inverter power generation Public Grid TT, TN,IT System... -
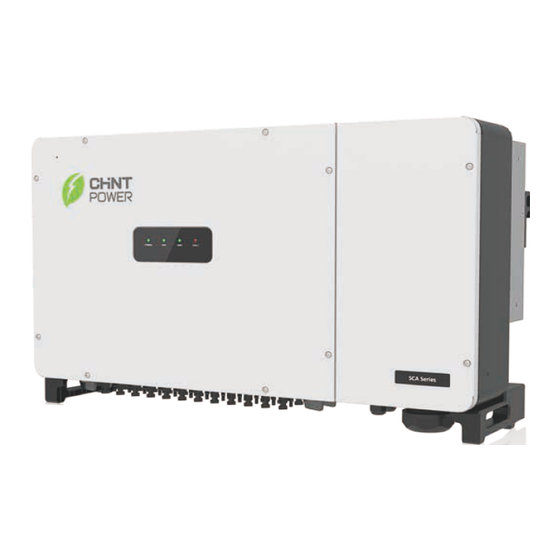
Page 9: Main Components And Product Dimensions
General Introduction 2.2 Main Components and Product Dimensions 9 MPPT inverter with 18 DC inputs: SCA110KTL-DO/EU; SCA 75K-T-EU; SCA 75K-T-SA 12 MPPT inverter with 12 DC inputs: SCA110KTL-DO/EU2 12 MPPT inverter with 24 DC inputs: SCA 100K-T-EU,SCA 120K-T-EU; SCA 125K-T-EU Fig. -
Page 10: General Introduction
General Introduction Name Function DC switch Turn on/off DC power supply PV strings connectors Insert male/female connectors Vent valve Balance pressure difference LINKIT communication Insert LINKIT module interface RS485 communication RS485 communication line outlet port interface AC output connector AC cable outlet port Fans Cooling the inverter Table 2-2 Product Components... -
Page 11: Led Display Panel
General Introduction 2.3 LED Display Panel Fig. 2-4 LED Display Panel The specific meaning of each indicator status is shown in table 2-3. LED Logo Name Status Meaning Power on (control board starts to POWER Power Supply work) (Green) Indicator Light No working power Grid-tied power generation Derating operation status (on for... -
Page 12: Product Circuit Structure Design
AC power through a two-stage relay and an EMI filter. In addition, a string detection function (optional) is added. SCA 75K-T-EU&SCA 75K-T-SA (b) SCA110KTL-DO/EU 12 / 73... - Page 13 General Introduction DC SWITCH MPPT1 PV INPUT PV1+ MPPT1+ PV2+ MPPT1- PV1- LC Filter PV2- AC Relay OUTPUT DC SPD MPPT2 PV3+ MPPT2+ PV4+ MPPT2- PV3- PV4- DC SPD BUS-O MPPT12 PV23+ MPPT12+ PV24+ MPPT12- PV23- PV24- DC SPD String detection (optional)...
-
Page 14: Product Protection Functions
General Introduction 2.5 Product Protection Functions Input polarity reverse protection Short circuit protection Input to ground insulation resistance monitoring Output voltage and frequency monitoring Ground leakage current monitoring DC component monitoring of output current ... -
Page 15: Installation
Installation Installation The following content is the installation instructions of the inverter, please read carefully and follow the steps to install this product. Before installation, please check whether the following items are included in the box. Fig. 3-1 Scope of Supply Image Description Function... -
Page 16: Storage Before Unpacking
Installation Image Description Function 110 Kw(EU2): 12+ & 12- 120 Kw: 24+ & 24- 125 Kw: 24+ & 24- Table 3-1 Packing list 3.1 Storage before Unpacking If the inverter is not immediately installed upon arrival, the following requirements should be met when storing the inverter: ... -
Page 17: Installation Instructions
Installation Installation personnel must be qualified electricians or those who have received professional training. Wear and use proper PPE (personal protective equipment) during installation. Enough space must be provided to allow the inverter cooling system to operate normally. ... - Page 18 Installation Explanation If the installation location allows, install the inverter vertically; If the vertical installation cannot be guaranteed, it may be tilted backward 0 to15 degrees from vertical direction; The inverter does not allow forward installation; The inverter is not allowed to be installed backwards; The inverter is not allowed to be installed horizontally;...
-
Page 19: Inverter Installation
Installation NOTICE! The distance between two parallel inverters must be ≥300 mm, and good ventilation should be ensured. If the surroundings are relatively closed, please increase this distance appropriately. 4) Installation Scenarios A: Keep a distance between the inverter and the shade on its back to ensure good ventilation. - Page 20 Installation (2). Drill holes with a Ф12mm drill at the marked position, and then fix the bracket ④ with the equipped screws M10X50⑤, M10 flat washer③, M10 spring washer ②, and M10 nut ①. Tools: Electric drill (with Ф12mm drill bit), No. 17 wrench, torque value: 230.0 kgf.cm.
- Page 21 Installation CAUTION! The host of the inverter weighs approximately 90 kg (≈198.4 lb.), Please check the mounting bracket again before hanging up, to confirm that the mounting bracket is firmly on the supporting surface. Fig. 3-6 (a) Hanging the inverter Fig.
-
Page 22: Electrical Connection
Installation 3.3 Electrical connection DANGER! The cables shall be connected in accordance with the National Electrical Code and all other applicable local codes or jurisdictions. Before connecting all cables, ensure the equipment is free from any damage. Otherwise, it may cause electric shock or fire. High-temperature environments may result in insulation aging or damage of cables. -
Page 23: Internal And External Interface
High touch current .Earth connection High touch current .Earth connection essential before connecting supply. essential before connecting supply. (a) SCA110KTL-DO/EU&SCA 75K-T-EU&SCA 75K-T-SA Do not disconnect under load. For more details please see the user manual. Do not disconnect under load. - Page 24 Installation (c) SCA110KTL-DO/EU2 Fig. 3-8 External Interface of all inverter modules Fig. 3-9 Internal Wiring Point Description Description DC Input quick plug terminal AC Output terminal block RS485 communication interface Internal ground stud AC Output wiring gland RS485 communication terminal P170 (for external communication) External ground screw hole 24 / 73...
-
Page 25: Cable Specifications
Installation 3.3.2 Cable specifications The inverter external cable must be equipped with the specifications in the table below: Table 3-2 Cable specifications O.D. Conductor cross-sectional Name Type (mm) area (mm2) PV cables that meet 1500V DC Cable standard Grounding Outdoor copper core wire Phase wire diameter/2 cable Copper core cable:... -
Page 26: Ac And Ground Connection
Installation 3.3.4 AC and Ground Connection Connect your PV inverter to the AC grid through the AC output cable and grounding cable. 1)Loosen the 2 captive screws fixing the upper cover of the combiner box with a 5mm hex wrench, and open the upper cover. Fig. - Page 27 Installation Depending on the grounding method, the wiring method is different. After the internal grounding wire is connected, the compression nut of the cable fastening head must be tightened. 3)AC Cable Connection AC cable terminal size requirements Fig. 3-12 AC Output Line Connection Loosen the locking cap from the AC output watertight cable connector at the bottom of the inverter and remove watertight plug from the locking cap as required...
-
Page 28: Dc Connection
Installation AC output (L1/L2/L3/N) cables of every inverter are connected to AC grid through the 4 pole AC breaker to make sure the inverter can be safely disconnected from AC grid. Please choose the AC breaker referring to the Table 3-4: Table 3-4 Specification of AC Breaker Selection Inverter Inverter AC breaker current parameter... -
Page 29: Dc Connection Process
Installation (3) The short-circuit current of each string is less than 30A (less than 26A for 110kw series). 3.3.5.2 DC Connection Process Before connecting the PV module cable to the inverter, please refer to Fig. 3-13 and proceed as follows: i. - Page 30 Installation Fig. 3-15 Crimp power cables NOTICE! The DC input connectors and metal terminals must be supplied randomly, or the same model of the same manufacturer. Otherwise, poor contact may occur, affecting normal use. Insert the crimped positive and negative power cables into the corresponding male and female connectors until a "click"...
-
Page 31: Communication Connection
Installation Insert the positive and negative connectors into their corresponding terminals of the inverter until a "click" sound is heard. Fig. 3-18 Insert the positive and negative connectors NOTICE! Make marks on all positive and negative power cables to identify their correct strings (such as PV1+, PV1-, PV2+, PV2-). - Page 32 Installation Name Picture Configuration Description RS485 port 1 -- 485GND 4 --- GND (6pin connector) 2 -- RS485- 5 --- RS485- P170 3 --- RS485+ 6 --- RS485+ RS485 Communication 120Ω 1 -- Terminal resistance prohibited Terminal resistance 2 --- Use of terminal resistor selection switch s2 RS485 Communication Network Fig.
- Page 33 Installation WARNING! Make sure all DC and AC power has been disconnected before opening the wire box and ensure that hazardous high voltage and power has been discharged to avoid risk of electric shock. Wait at least 5 minutes before opening the wire box. ...
- Page 34 Installation Adjust the cable length and then tighten the compression nut of tightening head. Note: Conduit and tightening head must be sealed and water-tight to maintain its protection rating. After completing all the wiring steps, fix the 2 screws on the upper cover of the combiner box with a 5mm hex wrench, and close the upper cover.
- Page 35 Installation 3.3.6.2 Install LINKIT (1) Remove two screws on the LINKIT cover, and rotate the cover to its opposite side. (2) Fasten LINKIT module onto LINKIT port with its original two screws. Note: indicators face towards front cover of the inverter. Fig.
-
Page 36: Cable Connection Notices For Joints And Seals
Installation 3.3.7 Cable Connection Notices for Joints and Seals IMPORTANT! Pay attention to the following notices when routing cables and sealing the joints. All the electrical cables and communication cables shall be jointed and sealed properly according to the following requirements to ensure their excellent performance and good water tightness. - Page 37 Installation After tightening the fastening head, watertight sealants shall be applied on its inner surface and outer surface to avoid loosening or prevent water from entering. Fig. 3-27 Apply watertight sealants Before and after tightening the fastening head, check carefully to ensure the watertight cushion is in good condition, i.e.
-
Page 38: Commissioning
Commissioning Commissioning 4.1 Inverter Installation Inspection WARNING Before connecting to the grid, please follow the following guidelines to eliminate hidden dangers and ensure safety. When the equipment is powered on for the first time, it is imperative that professionals correctly configure the parameters. Confirm that the supporting structure is firm and reliable, and the mounting screws are fastened. -
Page 39: App Setup
APP Setup APP Setup 5.1 APP Download The inverter conducts human-computer interaction through the mobile APP. Apple users can download the iOS version in the Apple store, and Android users can download the APP called "Chint Connect" in the Google store, or directly scan the QR code below to download. - Page 40 APP Setup Set or change inverter parameters if necessary, such as Grid Code, PV Link Type, RS485 etc. When the RUN indicator lights up, it indicates that the device is running normally. You can browse through the real-time data in the APP by sliding the interface left and right.
-
Page 41: Structure Overview
APP Setup 5.3 Structure Overview Fig. 5-1 Structure of App interface 41 / 73... -
Page 42: Main Menu
APP Setup 5.4 Main Menu The following interfaces will take SCA125K-T-EU as an instance. Different product types have slight differences, the pictures are just for reference. In the main interface, you can access the following submenus: ⚫ Chart ⚫ Setting ⚫... -
Page 43: Chart Menu
APP Setup 5.4.1 Chart Menu In the chart submenu, you can view the power generation in the following ways: current, day, month, year, and total: Fig. 5-3 running information 43 / 73... -
Page 44: Setting Menu
APP Setup 5.4.2 Setting Menu Select settings and enter the password "1111" as shown below: In the "Settings" section, you can access the following submenus: ⚫ Inverter Parameters ⚫ Read/Write Registers ⚫ Firmware Upgrade Fig. 5-4 Setting Menu 44 / 73... -
Page 45: Inverter Parameters
APP Setup 5.4.2.1 Inverter Parameters Touch the Inverter Parameters tab, you can find the following sub-menus. Grid Code PV Link Type Neutral Line RS 485 Inverter Clock Change Password Fig. 5-5 Inverter Parameters 45 / 73... -
Page 46: Read/Write Registers
APP Setup 5.4.2.2 Read/Write Registers In the "Read/Write Register" interface, you can access the following submenus: ⚫ Protect ActivePowerDerating ⚫ ⚫ ReactivePowerDerating ⚫ LVRT/HVRT ⚫ Others ⚫ Command ⚫ LcdLess Basic Parameters ⚫ ARC Parameters (unavailable to 110kw inverters) Fig. 5-6 Read/Write Register 46 / 73... - Page 47 APP Setup 5.4.2.2.1 Protect This interface is used to display and set the protection parameters of AC grid voltage, frequency and recovery, as shown below: Fig. 5-7 protection parameters 47 / 73...
- Page 48 APP Setup 5.4.2.2.2 Active Power Derating The "Active Power Derating" menu is used to set active power derating parameters, including active power derating, over frequency derating and high temperature frequency derating. You can see the Curve of over voltage derating in Fig. 5-8 and Curve of over frequency derating in Fig.
- Page 49 APP Setup In the “ActivePower Derating” interface, you can access and set the following parameters: Fig. 5-10 ActivePower Derating interface 49 / 73...
- Page 50 APP Setup 5.4.2.2.3 Reactive Power Derating The "ReactivePowerDerating" menu is used to set the grid reactive power derating parameters, including PF parameters, Qu parameters, etc. Fig. 5-11 ReactivePowerDerating menu NOTICE: If “Remote” is selected, PF and Q values can be adjusted through remote software.
- Page 51 APP Setup (PFCurveP1,PFCurvePF1) Inductive (P%) Capacitive (PFCurveP2,PFCurvePF2) Fig. 5-12 PF(P) Curve Mode (3).Q(U) curve: Q(U) curve mode NOTICE: The reactive power compensation will change according to the change of the grid voltage, refer to the Fig. 5-13. Q(%) (QuCurveU2i,QuCurveQ2i) Inductive (QuCurveU1, QuCurveQ1) (QuCurveU1i,...
- Page 52 APP Setup 5.4.2.2.4 LVRT/HVRT “LVRT / HVRT” is used to set LVRT(low penetration)and HVRT(high penetration)parameters: Fig. 5-14 LVRT/HVRT 52 / 73...
- Page 53 APP Setup Refer to the figures below, you can see the LVRT Curve. 电 压 Through Trip 0.25 0.73 Time/S Fig. 5-15 LVRT Curve (just for reference) 1.25 Through 1.15 5,6,7,8 Trip 1.05 Time/S 2 4 6 8 10 12 14 16 18 20 22 Fig.
- Page 54 APP Setup 5.4.2.2.5 Others In the others interface, you can find the following common parameters shown as below. 54 / 73...
- Page 55 APP Setup Fig. 5-17 others interface 5.4.2.2.6 Command In the “Command” interface, you can access the following submenus: Fig. 5-18 Command interface 55 / 73...
- Page 56 APP Setup Force Restart: When a permanent failure occurs, you have the option to re-energize the inverter. After re-energizing, the fault will be restored. Alternatively, you can perform a forced restart through the APP or web interface, and the fault will also be restored. There are no limitations on the number of times these procedures can be carried out.
- Page 57 APP Setup ARCClear: This function is used to manually clear the ARC protection of the machine (if 4G network card is connected, this function can be used remotely on web page). The device is preset to automatically reconnect 5 times within 24 hours by default (the automatic reconnection time can be set in parameter area of ARC interface, refer to Fig.
- Page 58 APP Setup 5.4.2.2.8 ARC Parameters In the ARC parameter setting interface, bandwidth, start frequency, proportion, filter, threshold, single period amplitude limit, basic amplitude of each frequency band, and ARC enable default setting, are all set as system default parameters that cannot be changed by the user. The ARC fault recovery time, with a setting range of 5-600 minutes, can be set by users according to their own demands.
-
Page 59: Software Upgrade
– reconnect five times within 24 hours, and manual startup is required. The ARC function is in accordance with the IEC 63027 standard, and the product category is: SCA 75K-T-EU, SCA 75K-T-SA & CPS SCA100KTL-DO:F-I-AFPE-1-6-3 – Full coverage – Integrated – AFPE (Arc fault protection equipment) –... -
Page 60: Event Menu
APP Setup 5.4.3 Event Menu Touch the Event icon, you can see two options (Current and History). If you select the history option, there are 2 submenus in the History menu: “Warning” and “Running Status”, as shown below. SCA125K-T-EU SCA125K-T-EU Fig. -
Page 61: More Menu
APP Setup 5.4.4 More Menu Fig. 5-22 More Menu ⚫ Manual Turn ON/OFF: Manual Power ON/OFF is required after Grid Code setting or manual (fault) shut-down. Touch to submenu “Turn ON/OFF”. Then move the cursor to “Turn ON” to start the inverter, the inverter will start up and operate normally if the start-up condition is met. -
Page 62: Maintenance
Maintenance Maintenance WARNING! Before starting any product maintenance, the inverter should be stopped running, the AC circuit breaker connected to the grid and the PV input on the DC side shall be all disconnected, and then wait at least 5 minutes before starting any operation. - Page 63 Maintenance Use a No.2 Phillips head screwdriver to remove the 4 screws fixing the fan tray as shown in Fig. 6-1. Fig. 6-1 Remove the fan tray and fan Disconnect the watertight cable connector from cooling fan, as shown in Fig. 6-2. Fig.
-
Page 64: Replace The Inverter
Maintenance Place the new cooling fans on the fan tray, and fasten the cable on the fan tray with cable ties. Tools required: No.2 Phillips head screwdriver, torque value: 14~18kgf.cm Reinstall the assembled fans onto the inverter. Tools required: No.2 Phillips head screwdriver, torque value: 16kgf.cm. 6.4 Replace the Inverter IMPORTANT! Make sure the AC breaker and DC switch of inverter are turned off. -
Page 65: Troubleshooting
Troubleshooting Troubleshooting 7.1 LED Lamp Troubleshooting If the LED light indicates any faults, please perform troubleshooting according to the Table 7-1: Table 7-1 LED Light Troubleshooting Troubleshooting Method LED Lamp Failure State 1. Disconnect the external AC circuit breaker 2. Turn the DC switch to the “OFF” position “Power”... - Page 66 Troubleshooting Table 7-2 Fault Information Table 1. Observe for 5 minutes to see if the inverter can automatically eliminate this alarm; Internal Communication 2. Disconnect the DC switch and let the Failure system receive power again; 3. Contact after-sales service personnel 1.
- Page 67 Troubleshooting Sensor Abnormal 2、 Disconnect AC power and let system receive power again 3、 Contact after-sales service personnel 1、 Observe for 5 minutes to see if the inverter can automatically eliminate this Warning 0100 AC MOV alarm Abnormality 2、 Contact after-sales service personnel Restart the inverter, disconnect the AC and Protection 0090 DC connections, wait for 5 minutes to...
- Page 68 Troubleshooting Resistance is too cable are normal Restart the inverter and observe whether the fault is automatically eliminated Contact after-sales service personnel Check whether the PV cable and ground cable are normal Leakage Current is Restart the inverter and observe whether the too high fault is automatically eliminated Contact after-sales service personnel...
-
Page 69: Technical Data
Technical Data Technical Data Model Name SCA120K-T-EU SCA125K-T-EU SCA100K-T-EU SCA75K-T-EU SCA75K-T-SA SCA110KTL-DO/EU SCA110KTL-DO/EU2 DC Input Max. DC Voltage 1100Vdc 1100Vdc 1100Vdc 1100Vdc 1100Vdc 1100Vdc MPPT Voltage Range 200~950Vdc 200~950Vdc 200~950Vdc 200~950Vdc 200~950Vdc 200~1000Vdc MPPT Voltage Range (Full 500-850Vdc 500-850Vdc 500-850Vdc 400-850Vdc 400-850Vdc 500-870Vdc... -
Page 70: Quality Assurance
Failure to operate the covered product in accordance with the product's operating manual or user guide; — Relocate and reinstall systems not in accordance with the requirements of Chint power; — Unsafe electrical or chemical environment or other similar kind of conditions;... -
Page 71: Quality Clause (Warranty Clause)
Quality Assurance facilities, etc., due to lightning strikes). 11. Other circumstances that are not covered by the company's after- sales warranty agreement. 9.2 Quality clause (warranty clause) For products that fail during the warranty period, our company will repair or replace new products free of charge; Customer shall present the invoice of the product and date of purchase. -
Page 72: Recycling
Recycling 10 Recycling Distributors or installers should contact the inverter manufacturer after removing the inverter from the photovoltaic module and follow the instructions below to dispose. The inverter cannot be disposed of as household waste. When the inverter's service life expires, please dispose of it in accordance with the electrical waste disposal laws applicable to the installation location. - Page 73 Contact Information Shanghai Chint Power System Co., Ltd. Headquarters: Building 4, No. 3255, Sixian Road, Songjiang District, Shanghai, China Switchboard: +86-21-37791222-866000 Fax: +86-21-37791222-866001 Website: www.chintpower.com Service Hotline: +86-21-37791222-866300 Email: service.cps@chint.com 73 / 73...
Need help?
Do you have a question about the SCA 75K-T-EU and is the answer not in the manual?
Questions and answers