Table of Contents
Advertisement
Quick Links
Advertisement
Table of Contents

Subscribe to Our Youtube Channel
Related Manuals for Robe ROBIN MMX WashBeam


Summary of Contents for Robe ROBIN MMX WashBeam
- Page 1 Version1.8...
-
Page 2: Table Of Contents
Robin MMX WashBeam Table of contents 1. Safety instructions ......................3 2. Operating determination ....................4 3. Fixture exterior view ...................... 5 4. Installation........................6 4.1 Connection to the mains .................... 6 4.2 Installing the lamp ...................... 7 4.3 Lamp adjustment ....................... 7 4.4 Replacing rotating gobos .................. -
Page 3: Safety Instructions
CAUTION! Keep this device away from rain and moisture! Unplug mains lead before opening the housing! FOR YOUR OWN SAFETY, PLEASE READ THIS USER MANUAL CAREFULLY BEFORE YOU INITIAL START - UP! 1. Safety instructions Every person involved with installation and maintenance of this device have to: - be qualified - follow the instructions of this manual CAUTION! -
Page 4: Operating Determination
2. Operating determination This device is a moving head for creating decorative effects and was designed for indoor use only. If the device has been exposed to drastic temperature fluctuation (e.g. after transportation), do not switch it on immediately. The arising condensation water might damage your device. Leave the device switched off until it has reached room temperature. -
Page 5: Fixture Exterior View
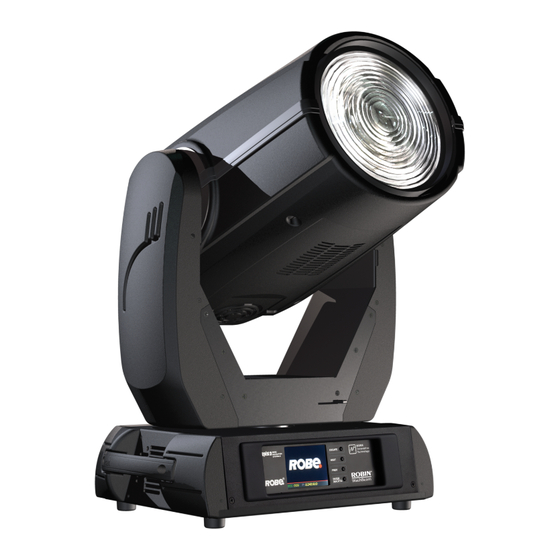
3. Fixture exterior view 1 - Replaceable front lens 2 - Air filter 3 - Tilt lock 4 - Pan lock 5 - Air filter 6 - Handles 7 - Base 8 - Yoke 9 - Moving head The head should be locked for transportation- the tilt lock latch (2) and the pan lock latch (3) have to be in the locked positions. -
Page 6: Installation
4.1 Connection to the mains For protection from electric shock, the fixture must be earthed! The Robin MMX WashBeam is equipped with auto-switching power supply that automatically adjusts to any 50/60Hz AC power source from 100-240 Volts. For use with 100-120 V supplies, main 8 A fuse has to be exchanged for 15 A fuse which is enclosed in the packing. -
Page 7: Installing The Lamp
4.2 Installing the lamp DANGER ! Install the lamp with the device switched off only. Unplug from mains before ! To insert the new lamp. 1. Disconnect the fixture from power and allow it to cool at least 15 minutes. 2. -
Page 8: Replacing Rotating Gobos
4.4 Replacing rotating gobos Install gobos with the device switched off only. Unplug from mains before! To replace rotating gobos. 1. Disconnect the fixture from mains and allow it to cool. 2. Remove the bottom plastic cover of the head by loosening the 4 quarter-turn fasteners on the cover. 3. -
Page 9: Rigging The Fixture
4.6 Rigging the fixture The installation of the fixture has to be built and constructed in a way that it can hold 10 times the weight for 1 hour without any harming deformation. The installation must always be secured with a secondary safety attachment, e.g. an appropriate catch net. This secondary safety attachment must be constructed in a way that no part of the installation can fall down if the main attachment fails. - Page 10 Omega holders positions: Truss installation 1.Bolt each clamp (1) to the omega holder (3) with M12 bolt and lock nut through the hole in the holder. 2.Fasten the omega holders on the bottom of the base by inserting both quick-lock fasteners (4) into the holes of the base and tighten fully clockwise.
-
Page 11: Dmx-512 Connection
4.7 DMX-512 connection The fixture is equipped with both 3-pin and 5-pin XLR sockets for DMX input and output.The sockets are wired in parallel. Only use a shielded twisted-pair cable designed for RS-485 and 3-pin or 5-pin XLR-plugs and connectors in order to connect the controller with the fixture or one fixture with another. -
Page 12: Ethernet Connection
The Universe is a single DMX 512 frame of 512 channels. The Robin MMX WashBeam is equipped with 8-pin RJ- 45 socket for Ethernet input.Use a network cable ca- tegory 5 (with four “twisted” wire pairs) and standard RJ-45 plugs in order to connect the fixture to the network. - Page 13 Ethernet / DMX operation Options “Art2DMX” has to be selected from the “Ethernet Mode” menu on the first fixture (connected to the Ethernet) in the fixture chain,next fixtures have standard DMX setting. Connect the Ethernet-input of the first fixture in the data chain with the network. Connect the DMX output of this fixture with the input of the next fixture until all fixtures are connected to the DMX chain.
-
Page 14: Wireless Dmx Operation
4.9 Wireless DMX operation The wireless version of the Robin MMX WashBeam is equipped with the Lumen Radio CRMX module and antenna for receiving DMX signal. CRMX module operates on the 2.4 GHz band. The item " Wireless " from the menu "DMX Input" allows you to activate receiving of wireless DMX (Person- ality-->... -
Page 15: Remotely Controllable Functions
If you try to switch on the lamp within 5 minutes after having switched it off and the lamp is still too hot, the Robin MMX WashBeam will store this information and automatically ignite the lamp when the 5 minutes period has expired. - Page 16 Barndoors identification...
-
Page 17: Control Menu Map
6. Control menu map Default settings=Bold print Level 1 Level 2 Level 3 Level 4 Level 5 Level 6 Addressing Settings DMX Address 001-255 Ethernet Settings Ethernet Mode Disable ArtNet gMAI gMA2 Art2DMX IP Address/Net Mask Default IP Address Custom IP Address Net Mask ArtNet Universe 0-255... - Page 18 Level 1 Level 2 Level 3 Level 4 Level 5 Level 6 RDM UID RDM Label View Logs Fixture Errors Pan Errors Temp.Sensor Errors Fixture States Power On Power Off Lamp On Lamp Off Fixture Position Fixture Temperatures Head Temperatures Ambient Temperatures Base Temperatures Personality...
- Page 19 Level 1 Level 2 Level 3 Level 4 Level 5 Level 6 On, Off Autofocus Default Settings Manual Control Reset Functions Reset All Systems Pan/Tilt reset Colour System Reset Gobo System Reset Dim./Stro./H.-Spot Res. Zoom/Foc./Barnd. Res. Preset Effect Con- Position 1-Position 5 trol Dimmer Position 1- Position 5...
-
Page 20: Control Menu
7. Control menu The Robin MMX WashBeam is equipped with the QVGA Robe touch screen with battery backup which allows to set the fixture´s behaviour according to your needs, obtain information on its operation, test its various parts and lastly program it, if it has to be used in a stand-alone mode. -
Page 21: Tab " Address
Note: The green icon at the top right corner of the screen indicates the level of the display battery charging. If the whole icon is green, the battery is fully charged while the red icon indicates exhausted battery. The battery charges during fixture operation, its charging lasts cca 6 hours. -
Page 22: Tab "Information
Resetable Hours - The item shows the number of the operation hours with the lamp on that the Robin MMX WashBeam has been powered on since the counter was last reset. In order to reset this counter to 0, touch the text box next to the item "Resetable Hours:"... - Page 23 if the "Head Temperature" exceeds 115°C, the lamp will be switched off. Note: Base Temperature - The menu shows temperature in the fixture base (on the display PCB). Current - A current temperature in the fixture base. Maximum NonRes. - A maximum temperature in the fixture base since the fixture has been fabricated.
-
Page 24: Tab "Personality
7.3 Tab "Personality" User mode - The Robin MMX WashBeam allows you to recall up to 3 user settings. After switching the fixture on for the first time, the User A settings is active. Now all changes made in the “Personality” menu , ”Addressing”... - Page 25 Blackout DMC - Blackout during movement correction. Set this option On if you wish to close light output during the time when the head goes to its correct position, which has been changed by an external force. Active Blackouts - Use this menu if you wish to close the light output during effect changes. Pan/Tilt Moving - The menu item enables to close light output while the pan/tilt coordinates are changing.
-
Page 26: Tab "Manual Control
Play Program 2 - The option starts user program No. 2. Play Program 3 - The option starts user program No. 3. Edit Program - Use the menu to create or to edit desired program. The Robin MMX WashBeam offers 3 free programs, each up to 100 steps. -
Page 27: Tab "Service
can view created scene. 6. Repeat the steps 4 and 5 for next program steps. 7. After editing desired program steps, adjust the length of the program by touching the text boxes "Start Step" and "End Step". Meaning of the icons used in the "Edit Program" menu: - moves down on the next page - saves adjusted values and leaves menu - moves up on the previous page... - Page 28 2. Make a new directory ( e.g. Robe_Uploader) on your hard disk and download the software to it. 3. Unpack the program from the archive. If the Robe fixture is produced in both magnetic and electronic ballast version, name of DMX Software Uploader is the same for both versions.
-
Page 29: Icon "Lamp Menu
DMX512, the RDM protocol allows a console or dedicated RDM controller to send commands to and receive messages from specific moving lights. RDM allows explicit commands to be sent to a device and responses to be received from it. The list of commands for Robin MMX WashBeam is the following. -
Page 30: Error And Information Messages
LAMP_ON_MODE DEVICE_HOURS LAMP_HOURS LAMP_STRIKES ...Another options for this command (only for Robe´s fixtures): value PARAMETER_DATA=0x84 - lamp OFF by DMX value on DMX channel value PARAMETER_DATA=0x88 - lamp OFF if DMX is not present ...Commands relative resetable values 9. Error and information messages Occurred errors during fixture operation are signalled by the yellow warning icon at the bottom line of the screen: Touch the warning icon or press the [ESCAPE] button to display error messages. - Page 31 Overheated This message informs that the fixture head has been overheated and the lamp was switched off by means of the head temperature sensor (Head Temperature). Base Overheated This message informs that the fixture base has been overheated and the lamp was switched off by means of the temperature sensor (Ambient Temperature) in the base.
-
Page 32: Flight Case Parking Position
10. Flight Case Parking Position To make easy inserting the Robin MMX WashBeam into flight case, the fixture is equipped with the function Flight Case Parking Position. The function automatically pulls the zoom tube into the head and both pan and tilt situates to position suitable for manual pan/tilt lock before inserting the fixture into a flight case. -
Page 33: Technical Specifications
functions, DMX range of 0-9. If you set parking position at On with DMX command and after that change it at Off by touching the icon on display, the fixture will stay in this position until you change it by touching icon or changing DMX value on the channel Power/Special functions. - Page 34 Strobe Strobe effect with variable speed (max.15 flashes/sec.) Electronic strobbing (max. 33 flashes/sec.) Dimmer Smooth dimmer from 0 - 100 % Barndoors four motorized barndoors 41 barndoors macros Control Graphic touch screen for fixture setting and addressing Gravitation sensor for auto screen positioning Battery backup of the touch screen Readout fixture and lamp usage, receiving DMX values, temperatures, etc Built-in analyzer for easy fault finding, error messages...
-
Page 35: Dimensions (Mm)
Omega Adaptor CL-regular 2 pcs in box (P/N 10980033)........1 piece Wash lens (P/N. 99013758) ........1 piece (installed in fixture) Beam lens (P/N. 99013738)........1 piece Mains cable .............1 piece Optional accessories Wireless DMX upgrade kit* (P/N. 9903 0100 ) *Installation-see Technical bulletin 27 at www.robe.cz... -
Page 36: Photometric Charts
12. Photometric charts Beam application... - Page 41 Wash application...
-
Page 45: Maintenance And Cleaning
Pam/tilt specification corrected, DMX chart ver. 1.3 21/06/2021 RoboSpot support added June 21, 2021 Copyright © 2012-2021 Robe Lighting - All rights reserved All Specifications subject to change without notice Made in CZECH REPUBLIC by ROBE LIGHTING s.r.o. Palackeho 416/20 CZ 75701 Valasske Mezirici... - Page 46 DMX protocol Robin MMX WashBeam - DMX protocol, version 1.4 Mode/channel Type of Function Value control 0 - 255 Pan movement by 540° proportional Pan Fine 0 - 255 Fine control of pan movement proportional Tilt 0 - 255 Tilt movement by 270°...
- Page 47 DMX protocol Mode/channel Type of Function Value control 200 - 209 Total reset step 210 - 218 Reserved The following RoboSpot related commands are only applicable when the RoboSpot is connected: 219 - 220 RoboSpot enabled step 221 - 222 RoboSpot disabled - except handle faders and pan/tilt step 223 - 224 RoboSpot fully disabled step...
- Page 48 DMX protocol Mode/channel Type of Function Value control 32-39 Macro 4 step 40-47 Macro 5 step 48-55 Macro 6 step 56-63 Macro 7 step 64-71 Macro 8 step 72-79 Macro 9 step 80-87 Macro 10 step 88-95 Macro 11 step 96-103 Macro 12 step...
- Page 49 DMX protocol Mode/channel Type of Function Value control 44-47 Gobo 3 step 48-51 Gobo 4 step 52-55 Gobo 5 step 56-59 Gobo 6 step Shaking gobos from slow to fast Index - set indexing on channel 16/15/13 60 - 69 Beam reducer proportional 70 - 79...
- Page 50 DMX protocol Mode/channel Type of Function Value control * Light beam type is automatically detected according front lens installed Zoom 0 - 255 Zoom from max. to min. beam angle proportional Zoom - fine 0-255 Fine zooming proportional Focus (Beam mode only) 0 - 255 Continuous adjustment from far to near proportional...
- Page 51 DMX protocol Mode/channel Type of Function Value control Macro 5 20-23 step Macro 6 24-27 step Macro 7 28-31 step Macro 8 32-35 step Macro 9 36-39 step Macro 10 40-43 step Macro 11 44-47 step Macro 12 48-51 step Macro 13 52-55 step...
- Page 52 DMX protocol Mode/channel Type of Function Value control 160 - 191 Shutter open, Electronic strobing „ZAP” from slow to fast proportional 192 - 223 Random strobe-effect from slow to fast proportional 224 - 255 Shutter open, Full lamp power step Dimmer intensity 0 - 255 Dimmer intensity from 0% to 100%...
Need help?
Do you have a question about the ROBIN MMX WashBeam and is the answer not in the manual?
Questions and answers