Table of Contents
Advertisement
Advertisement
Table of Contents

Related Manuals for Robe Robin Tarrantula TW


Summary of Contents for Robe Robin Tarrantula TW
- Page 1 Version 1.3...
-
Page 2: Table Of Contents
Robin Tarrantula TW Table of contents 1. Safety instructions ......................3 2. Operating determination ....................4 3. Fixture exterior view ...................... 5 4. Installation........................6 4.1 Connection to the mains .................... 6 4.2 Installing the diffuser ....................6 4.3 Installing the eggcrate ....................7 4.4 Uninstalling/Installing the beam shaper .............. -
Page 3: Safety Instructions
CAUTION! Keep this device away from rain and moisture! Unplug mains lead before opening the housing! FOR YOUR OWN SAFETY, PLEASE READ THIS USER MANUAL CAREFULLY BEFORE YOU INITIAL START - UP! 1. Safety instructions Every person involved with installation and maintenance of this device have to: - be qualified - follow the instructions of this manual CAUTION! -
Page 4: Operating Determination
2. Operating determination This device is a moving head for creating decorative effects and was designed for indoor use only. This device is for professional use only. It is not for household use. If the device has been exposed to drastic temperature fluctuation (e.g. after transportation), do not switch it on immediately. -
Page 5: Fixture Exterior View
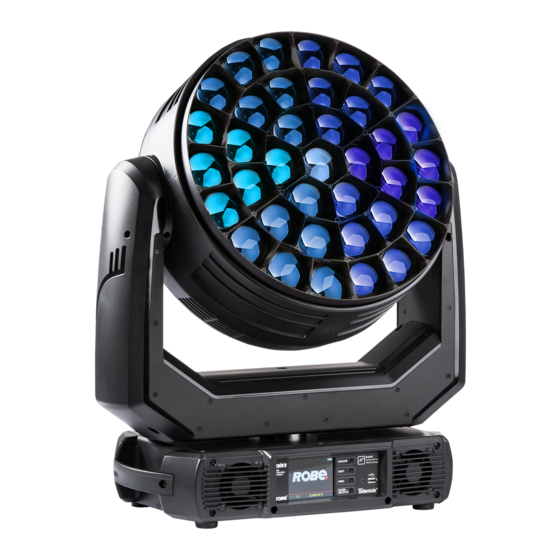
3. Fixture exterior view Robin Tarrantula with Beam shaper 1 - Lens array (Beam shaper) 2 - Yoke 3 - Handle 4 - QVGA touch screen 5 - Control buttons 6 - USB port 7 - Tilt lock 8 - 3-pin DMX OUT 9 - Ethernet IN 10 - Pan lock 11 - Base... -
Page 6: Installation
4.1 Connection to the mains For protection from electric shock, the fixture must be earthed! The Robin Tarrantula TW is equipped with auto-switching power supply that automatically adjusts to any 50- 60Hz AC power source from 100-240 Volts. -
Page 7: Installing The Eggcrate
4.3 Installing the eggcrate 1. Disconnect the fixture from mains. 2. Screw the eggcrate (1) to the zoom module (3) by means of the three screws (2). 4.4 Uninstalling/Installing the beam shaper The following instructions applies to the fixture with installed beam shaper only. 1. -
Page 8: Rigging The Fixture
4.5 Rigging the fixture A structure intended for installation of the fixture (s) must safely hold weight of the fixture(s) placed on it. The structure has to be certificated to the purpose. The fixture (fixtures) must be installed in accordance with national and local electrical and construction codes and regulations. - Page 9 Truss installation 1. Bolt the clamps (3) to the omega holders (5) with M12 bolts and lock nuts through the hole in the holders. 2. Fasten the omega holders to the bottom of the base by inserting both quick-lock fasteners (2) into the holes of the base and tighten fully clockwise.
-
Page 10: Dmx-512 Connection
In order to protect the internal parts of the head from the sun, the function PARKING POSITION must be switched ON before switching the fixture off. The PARKING POSITION function is located on the Power/Special functions channel (120-129 DMX). If the function is on, the fixture will automatically detect via G-sensor whether the fixture is on the floor or hangs on the truss or is mounted sideways on the truss and moves the pan and tilt to the position (including movement of zoom to the front part of the head) in which the head will always face down. -
Page 11: Ethernet Connection
4.7 Ethernet connection The fixtures on a data link are connected to the Ethernet with ArtNet communication protocol.The control soft- ware running on your PC (or light console) has to support Art-Net protocol. Art-Net communication protocol is a 10 Base T Ethernet protocol based on the TCP/IP.Its purpose is to allow transfer of large amounts of DMX 512 data over a wide area using standard network technology. - Page 12 Ethernet / DMX operation Options “Ethernet To DMX” has to be selected from the “Ethernet Setting” menu on the first fixture (connected to the Ethernet) in the fixture chain,next fixtures have standard DMX setting. Connect the Ethernet input of the first fixture in the data chain with the network. Connect the DMX output of this fixture with the input of the next fixture until all fixtures are connected to the DMX chain.
-
Page 13: Wireless Dmx Operation
4.8 Wireless DMX operation The wireless version of the Robin Tarrantula is equipped with the Lumen Radio CRMX module and antenna for receiving DMX signal. CRMX module operates on the 2.4 GHz band. The item " Wireless " from the menu "DMX Input" allows you to activate receiving of wireless DMX (Person- ality-->... -
Page 14: Remotely Controllable Functions
5. Remotely controllable functions Virtual colour wheel This wheel contains 8 preset white colours (3200K, 3800K, 4200K, 4600K, 5000K, 5600K, 6300K, 6500K). Zoom Motorized zoom offers beam range of 4° to 50°. Dimmer/Shutter unit Smooth 0 - 100 % dimming is provided by the electronic control unit. This unit is also used for strobe effects with variable speed. -
Page 15: Control Menu Map
6. Control menu map Default settings=Bold print Level 1 Level 2 Level 3 Level 4 Level 5 Level 6 Addressing Settings DMX Address 001-512 Ethernet Settings Ethernet Mode Disable ArtNet gMAI gMA2 sACN Ethernet To DMX Off, On IP Address/Net Mask Default IP Address Custom IP Address Net Mask... - Page 16 Level 1 Level 2 Level 3 Level 4 Level 5 Level 6 Personality DMX Input Wired Input Wireless Input Wireless In/XLR Out Pan/Tilt Settings Pan Reverse Off, On Tilt Reverse Off, On Pan/Tilt Feedback Off, On Pan/Tilt mode Time Speed Pan/Tilt EMS On, Off Microphone Sen-...
- Page 17 Level 1 Level 2 Level 3 Level 4 Level 5 Level 6 Play Program Play Program 1 Play Program 2 Play Program 3 Edit Program Edit Program 1 Start Step 1-100 End Step 1-100 Edit Program Steps Step 1 0-255 Dimmer Fine 0-255 Step Time...
-
Page 18: Control Menu
7. Control menu The Robin Tarrantula TW is equipped with the QVGA Robe touch screen with battery backup which allows to set the fixture´s behaviour according to your needs, obtain information on its operation, test its various parts and lastly program it, if it has to be used in a stand-alone mode. -
Page 19: Tab " Address
Note: The green icon at the top right corner of the screen indicates the level of the display battery charging. If the whole icon is green, the battery is fully charged while the red icon indicates exhausted battery. The battery charges during fixture operation, its charging lasts cca 6 hours. -
Page 20: Tab "Information
Power On Time Hours - Select this menu to read the number of fixture operation hours. Total Hours - The item shows the total number of the operation hours since the Robin Tarrantula TW has been fabricated. Resetable Hours - The item shows the number of the operation hours that the Robin Tarrantula has been powered on since the counter was last reset. -
Page 21: Tab "Personality
DMX Values - The menu is used to read DMX values of each channel received by the fixture. Wireless State - The menu serves for reading of the wireless operation status. Unlink Wireless Adapter - The item serves for unlinking the fixture from DMX transmitter. Power Channel State - The menu item shows state of the Power/Special functions switches. - Page 22 Speed Mode - Both Pan and tilt will move with the same speed as adjusted at the channel "Pan/Tilt speed, Pan/Tilt time". Pan/Tilt EMS - Built-in electronic motion stabilizer ensures precise position of the fixture´s head during its movement and also reducing its swinging when the truss shakes. Microphone Sensitivity - Enter the menu if you want to adjust the microphone sensitivity from 1 (max.) to 20 (min.).
-
Page 23: Tab "Manual Control
Play Program 2 - The option starts user program No. 2. Play Program 3 - The option starts user program No. 3. Edit Program - Use the menu to create or to edit desired program. The Robin Tarrantula TW offers 3 free programs, each up to 100 steps. -
Page 24: Tab "Service
If you use the Robe Universal Interface, connect a USB port of your computer with the Robe Universal Interface by means of the USB cable and DMX input of the fixture with the DMX output of the Robe Universal Interface... - Page 25 The Software Uploader program will start running. 6. Select correct "COM " number if you use a Flash cable RS232/DMX or select "Robe Universal Interface 1 " if you use the Robe Universal Interface/Robe Universal Interface WTX and then click on the "Connect" button.
-
Page 26: Rdm
Another way, how to update software in the fixtures (especially large installation of fixtures) is to use the ROBE Uploader. It is a software for automatized software update of Robe fixtures. It can take advantage of RDM support and Ethernet ports if present in the units. - Page 27 SENSOR_DEFINITION SENSOR_VALUE DISPLAY_INVERT DISPLAY_LEVEL PAN_INVERT TILT_INVERT DEVICE_RESET DMX_PERSONALITY DMX_PERSONALITY_DESCRIPTION STATUS_MESSAGES STATUS_ID_DESCRIPTION DEVICE_HOURS ROBE_DMX_INPUT ROBE_WIRELESS_UNLINK ...Commands relative resetable values RDM model ID for the Robin Tarrantula TW is 0x0104.
-
Page 28: Error And Information Messages
9. Error and information messages Information icon - Air Filters Cleaning This icon signalizes that cleaning period of the air filters has elapsed and you have to clear air filters and reset the menu item "Elapsed Time". Errors Error in the fixture is signalled by the yellow warning icon at the bottom line of the screen: Touch the warning icon or press the [ESCAPE] button to display error messages. -
Page 29: Technical Specifications
10. Technical Specifications Electrical Power supply:......electronic auto-ranging Input voltage range:....supply 100-240V, 50-60Hz Fuse:........T 12 A Max. power consumption ..1000W (power factor=0.98, I=4.4A at 230V ) Optic Light source: 37 LED multichips LED life expectancy: min. 50.000 hours CRI WW (3200K): 96 CRI CW (7900K): 75 CRI CW+WW (5100K): 85 Virtual colour wheel... - Page 30 Support of RDM (Remote Device Management) 17 control channels Wireless DMX/RDM module (only for Wireles DMX version) Compliance with USITT DMX-512 (1986 & 1990) and 512-A Full DMX fidelity and frame integrity Auto sensing of DMX frame rate and frame size <5ms DMX latency Operational frequency range of 2402-2480 MHz Producer: LumenRadio...
- Page 31 Dimensions (mm) Accessories 1x Robin Tarrantula TW (Robin Tarrantula TW with beam shaper) 1x Omega adaptor CL-regular 2 pcs in box P/N 10980033) 1x user manual Optional accessories Diffuser 2° for Robin Tarrantula (P/N 10980417) Eggcrate for Robin Tarrantula (P/N 10980431)
-
Page 32: Maintenance And Cleaning
11. Maintenance and cleaning It is absolutely essential that the fixture is kept clean and that dust, dirt and smoke-fluid residues must not build up on or within the fixture. Otherwise, the fixture‘s light-output will be significantly reduced. Regular cleaning will not only ensure the maximum light-output, but will also allow the fixture to function reliably throughout its life. -
Page 33: Removing The Optical Module
11.1 Removing the optical module The following instructions are intended for service purposes only To remove the optical module 1. Disconnect the fixture from mains. 2. Loosen the four fastening screws (2) on each side of the head covers (1) to remove the covers. 3. -
Page 34: Disposing Of The Product
11.2 Disposing of the product To preserve the environment please dispose or recycle this product at the end of its life according to the local regulations and codes. -
Page 35: Photometric Diagrams
12. Photometric diagrams (without beam shaper) - Page 36 November 12, 2019 Copyright © 2016-2019 Robe Lighting - All rights reserved All Specifications subject to change without notice Made in CZECH REPUBLIC by ROBE LIGHTING s.r.o. Palackeho 416/20 CZ 75701 Valasske Mezirici...
- Page 37 DMX protocol Robin Tarrantula Tunable White - DMX protocol Version: 1.2 Channel Type of Function Mode 1 Value control Pan (8 bit) 0 - 255 Pan movement by 540° (128=default) proportional Pan Fine (16 bit) 0 - 255 Fine control of pan movement (0=default) proportional Tilt (8 bit) 0 - 255...
- Page 38 DMX protocol Channel Type of Function Mode 1 Value control ** You can adjust selected frequency in 6 steps Up or Down around selected frequency - see table below . Default value of PWM frequency set in the fixture is Standard.
- Page 39 Dimmer intensity (8 bit) 0 - 255 Dimmer intensity from 0% to 100% (0=default) proportional Dimmer intensity - fine (16 bit) 0 - 255 Fine dimming (0=default) proportional Copyright © 2018-2019 Robe Lighting s.r.o. - All rights reserved Page 3...
Need help?
Do you have a question about the Robin Tarrantula TW and is the answer not in the manual?
Questions and answers