Table of Contents
Advertisement
Quick Links
Advertisement
Table of Contents

Related Manuals for Robe ROBIN SilverScan Wireless DMX


Summary of Contents for Robe ROBIN SilverScan Wireless DMX
- Page 1 Version 1.4...
-
Page 2: Table Of Contents
Robin SilverScan Table of contents 1. Safety instructions ......................3 2. Operating determination ....................4 3. Fixture exterior view ...................... 6 4. Installation ........................7 4.1 Connection to the mains .................... 7 4.2 Replacing rotating gobos ................... 8 4.3 Replacing the frost ....................9 4.4 Rigging the fixture .................... -
Page 3: Safety Instructions
CAUTION! Keep this device away from rain and moisture! Unplug mains lead before opening the housing! FOR YOUR OWN SAFETY, PLEASE READ THIS USER MANUAL CAREFULLY BEFORE YOU INITIAL START - UP! 1. Safety instructions Every person involved with installation and maintenance of this device have to: - be qualified - follow the instructions of this manual CAUTION! -
Page 4: Operating Determination
Do not view the light output with optical instruments or any device that may concentrate the beam. 2. Operating determination This device is a scan for creating decorative effects and was designed for indoor use only. This device is for professional use only. It is not for household use. If the device has been exposed to drastic temperature fluctuation (e.g. - Page 5 CAUTION! To avoid damage of the mirror, place the SilverScan to the flight case in the position as shown on the picture below! The mirror has to aim down. Side view Foam Mirror Foam Top view Mirror...
-
Page 6: Fixture Exterior View
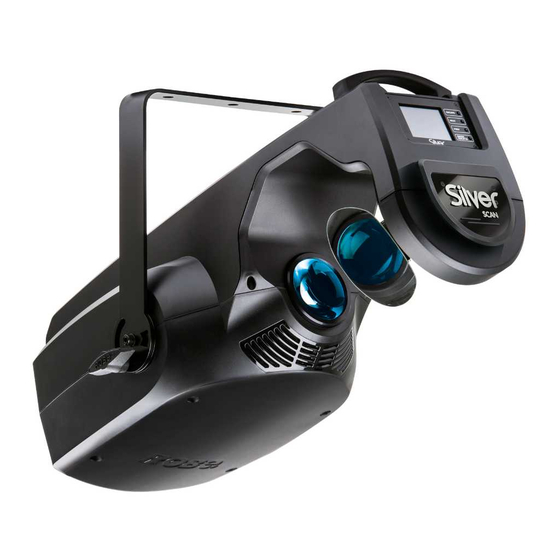
3. Fixture exterior view 1 - Mounting bracket 2 - Handle 3 - Touch screen 4 - Cotrol buttons 5 - Moving mirror 6 - Tilt lock 7 - Power (Neutrik PowerCon True 1) 8 - RJ 45 9 - DMX OUT (5-pin XLR) 10 -DMX IN (5-pin XLR) 11 - Fuse holder... -
Page 7: Installation
4. Installation Fixtures must be installed by a Qualified electrician in accordance with all national and local electrical and construction codes and regulations. 4.1 Connection to the mains For protection from electric shock, the fixture must be earthed! The Robin SilverScan is equipped with auto-switching power supply that automatically adjusts to any 50-60Hz AC power source from 100-240 Volts. -
Page 8: Replacing Rotating Gobos
5. Remove the original gobo (2) and insert the new one (glazy side towards the light source). The Robe gobo has a small position point (8) at its edge which has to aimed at the position point (4) on the gobo holder (4). Insert the spring lock to secure correct gobo position in the gobo holder. -
Page 9: Replacing The Frost
4.3 Replacing the frost Install the frost module with the device switched off only. Unplug from mains before! To replace the frost module. 1. Disconnect the fixture from mains and allow it to cool for 10 minutes. 2. Remove the bottom plastic cover of the fixture by loosening the 4 quarter-turn fasteners on the cover. 3. -
Page 10: Rigging The Fixture
4.4 Rigging the fixture A structure intended for installation of the fixture(s) must safely hold weight of the fixture(s) placed on it. The structure has to be certificated to the purpose. The fixture (fixtures) must be installed in accordance with national and local electrical and construction codes and regulations. - Page 11 Truss installation: 1- Clamp 2- Truss 3- Mounting bracket 4- Safety wire When installing fixtures side-by-side, avoid illuminating one fixture with another! Before taking into operation for the first time,the installation has to be approved by an expert! Floor installation The fixture can be placed on the stage floor only in a position as shown on the picture below (the mounting bracket has to be tighten in the angle of 90°...
-
Page 12: Dmx-512 Connection
4.5 DMX-512 connection The fixture is equipped with 5-pin XLR sockets for DMX input and output. Use only a shielded twisted-pair cable designed for RS-485 and 5-pin XLR-plugs and connectors in order to connect the controller with the fixture or one fixture with another. DMX output DMX input XLR socket:... -
Page 13: Ethernet Connection
4.6 Ethernet connection The fixtures on a data link are connected to the Ethernet with ArtNet communication protocol.The control soft- ware running on your PC (or light console) has to support Art-Net protocol. Art-Net communication protocol is a 10 Base T Ethernet protocol based on the TCP/IP.Its purpose is to allow transfer of large amounts of DMX 512 data over a wide area using standard network technology. - Page 14 Ethernet / DMX operation Option Artnet (gMaI or gMA2 or sACN) has to be selected from “Ethernet Mode” menu at first fixture. Option “Ethernet To DMX” has to be selected from the “Ethernet Mode” menu at the first fixture (connected to the Ethernet) in the fixture chain, next fixtures have standard DMX setting.
-
Page 15: Remotely Controllable Functions
5. Remotely controllable functions Light source The 350W white LED light engine gives an extra punchy beam. Colour wheel This wheel contains 6 dichroic filters + open. The colour wheel can be positioned between two adjacent colours in any position. It is also possible to rotate the colour wheel continuously at different speeds ("Rainbow effect“ in both directions). -
Page 16: Control Menu Map
6. Control menu map Default settings=Bold print Level 1 Level 2 Level 3 Level 4 Level 5 Level 6 Addressing DMX Address 001-512 DMX Presets Mode 1 Mode 2 View Selected Preset Ethernet Settings Ethernet Mode Disable ArtNet gMAI gMA2 sACN Ethernet To DMX Off, On... - Page 17 Level 1 Level 2 Level 3 Level 4 Level 5 Level 6 Fixture States Power On Power Off Fixture Position Fixture Temperatures LED Temperatures Ambient Temperatures Base Temperatures Personality User Mode User A Settings User B Settings Mode 1 DMX Presets Mode 2 View Selected Preset DMX Input...
- Page 18 Level 1 Level 2 Level 3 Level 4 Level 5 Level 6 Stand -Alone Test Sequences Dynamic Mode Static Mode 0-255 Tilt 0-255 Zoom 0-255 Focus 0-255 Off, On MusicTrigger Preset Playback None Test Prg. 1 Prg. 2 Prg. 3 Play Program Play Program 1 Play Program 2...
-
Page 19: Control Menu
7. Control menu The Robin SilverScan is equipped with the QVGA Robe touch screen with battery backup which allows you to set the fixture´s behaviour according to your needs, obtain information on its operation, control all range of effects and program it in stand-alone mode. -
Page 20: Tab " Address
Touch any part of the screen or press the [ENTER/Display On] button to display the initial screen with the cur- rent stored DMX address: Touch the green arrow at the bottom right corner of the screen or press the [ENTER/Display On] button to enter the "... -
Page 21: Tab "Information
Only one fixture has to be connected to the Ethernet. IP Address/Net Mask - Select this menu to set IP address. IP address is the Internet protocol address.The IP uniquely identifies any node (fixture) on a network. There cannot be 2 fixtures with the same IP address on the network! Default IP Address -Preset IP address, you can set up only first byte of IP address (2 or 10) e.g. -
Page 22: Tab "Personality
Current - A current temperature on the pan/tilt PCB. Maximum NonRes. - A maximum temperature on the pan/tilt PCB since the fixture has been fabricated. Maximum Res. - A maximum temperature on the pan/tilt PCB since the counter was last reset. In order to reset this counter to 0, touch the text box next to the item "Maximum Res."... - Page 23 DMX Preset - Use the menu to select desired channel mode. Mode 1 - 32 control channels Mode 2 - 26 control channels View Selected Preset - Use the menu to display channels included in the selected mode. DMX Input- Use the menu to select mode of DMX signal receiving. Wired - DMX signal is received by means of the standard DMX cable.
-
Page 24: Tab "Manual Control
Dimmer Curve - You can select desired dimmer curve: Linear or Square Law. Temperature unit - Use the menu item to change temperature unit from °C to °F. Fan Mode - Use the menu to set the fixture fans to max. fan power mode ("High") or to the auto-control mode ("Auto"). -
Page 25: Tab "Service
Edit Program - Use the menu to create or to edit desired program. The Robin SilverScan offers 3 free programs, each up to 100 steps. Edit Program 1 - The option allows to edit user program No.1. Edit Program 2 - The option allows to edit user program No.2. Edit Program 3 - The option allows to edit user program No.3 To edit program: 1. - Page 26 - Flash cable RS232/DMX, P/N13050624 (if you want to use a serial port of PC) - Robe Universal Interface or Robe Universal interface WTX (if you want to use an USB port of PC) After the software updating the fixture will be set to default values.
-
Page 27: Rdm
If you use the Robe Universal Interface, connect a USB port of your computer with the Robe Universal Interface by means of the USB cable and DMX input of the fixture with the DMX output of the Robe Universal Interface via a DMX cable. -
Page 28: Wireless Dmx Operation
DEVICE_MODEL_DESCRIPTION MANUFACTURER_LABEL DEVICE_LABEL SENSOR_DEFINITION SENSOR_VALUE DISPLAY_INVERT DISPLAY_LEVEL PAN_INVERT TILT_INVERT DEVICE_RESET DMX_PERSONALITY DMX_PERSONALITY_DESCRIPTION STATUS_MESSAGES STATUS_ID_DESCRIPTION DEVICE_HOURS ...Commands relative resetable values RDM model ID for the Robin SilverScan is 0x0106. 9. Wireless DMX operation The wireless DMX version of the Robin SilverScan is equipped with the Lumen Radio CRMX module and antenna for receiving DMX signal. - Page 29 Touch the warning icon or press the [ESCAPE] button to display error messages. List of error and information messages: Tilt Error 1 (Tilt Error 2) This message will appear after the reset of the fixture if the mirror´s magnetic-indexing circuit malfunctions (sensor failed or magnet is missing) or the stepping motor is defective or its driving IC on the PCB.
-
Page 30: Technical Specifications
11. Technical Specifications Electrical Power supply:......electronic auto-ranging Input voltage range:....100-240V, 50/60Hz Max. power consumption:..400 W (power factor=0.94) Fuse:........T 4 A Inrush Current:......20A (115V, cold start, 25 °C ambient) 30A (230V, cold start, 25 °C ambient) Light source 350W white engine Colour temperature: 6500K CRI=75 LED life expectancy: min. - Page 31 Zoom Linear motorized zoom (9°- 27°) Strobe Strobe effect with variable speed (max.15 flashes/sec.) Dimmer Smooth dimmer from 0 - 100 % Control Graphic touch screen for fixture setting and addressing Gravitation sensor for auto screen positioning Battery backup of the touch screen Readout fixture and light source usage, receiving DMX values, temperatures, etc Built-in analyzer for easy fault finding, error messages Built-in demo sequences...
- Page 32 Weight 16.5 kg Dimensions (mm) Connection DMX data in/out: Locking 3-pin and 5-pin XLR ArtNet: RJ 45 (Neutrik Ethercon) AC power IN: Chassis connector Neutrik PowerCon True 1, NAC3MPX Accessories 1 x power cable Optional Accessories Frost 1° (exchange) - assembled (P/N 10980308) Frost 10°...
-
Page 33: Maintenance And Cleaning
12. Maintenance and cleaning It is absolutely essential that the fixture is kept clean and that dust, dirt and smoke-fluid residues must not build up on or within the fixture. Otherwise, the fixture‘s light-output will be significantly reduced. Regular cleaning will not only ensure the maximum light-output, but will also allow the fixture to function reliably throughout its life. -
Page 34: Disposing Of The Product
Checking plastic parts of the fixture The plastic parts of the fixture should be checked for damages and beginning cracks at least every two months. If hint of a crack is found on some plastic part, do not use the fixture until the damaged part will be replaced. Cracks or another damages of the plastic parts can be caused by the fixture transportation or manipulation and also ageing process may influence plastic materials. -
Page 35: Photometric Diagrams
14. Photometric diagrams September 23, 2019 Copyright © 2019 Robe Lighting - All rights reserved All Specifications subject to change without notice Made in CZECH REPUBLIC by ROBE LIGHTING s.r.o. Palackeho 416/20 CZ 75701 Valasske Mezirici... - Page 36 DMX protocol Robin SilverScan - DMX protocol Version 1.1 Mode 1 - Standard 16 bit, Mode 2 - Reduced 8 bit Mode/channel Type of Function Value control 0 - 255 Pan movement by 180° (128=default) proportional Pan Fine 0 - 255 Fine control of pan movement (0=default) proportional Tilt...
- Page 37 DMX protocol Mode/channel Type of Function Value control 190 - 199 Reserved 200 - 209 Total reset step 210 - 218 Reserved The following RoboSpot related commands are only applicable when the RoboSpot is connected: 219 - 220 RoboSpot enabled step 221 - 222 RoboSpot disabled - except handle faders and pan/tilt step...
- Page 38 DMX protocol Mode/channel Type of Function Value control Filter 58 (Lavender) 9-10 step Filter 68 (Sky Blue) 11-12 step Filter 71 (Tokyo Blue) 13-14 step Filter 79 (Just Blue) 15-16 step Filter 88 (Lime Green) 17-18 step Filter 90 (Dark Yellow Green) 19-20 step Filter 100 (Spring Yellow)
- Page 39 DMX protocol Mode/channel Type of Function Value control Filter 202 (Half C.T. Blue) 105-106 step Filter 203 (Quarter C.T. Blue) 107-108 step Filter 204 (Full C.T. Orange) 109-110 step Filter 205 (Half C.T. Orange) 111-112 step Filter 206 (Quarter C.T. Orange) 113-114 step Filter 247 (Filter Minus Green)
- Page 40 DMX protocol Mode/channel Type of Function Value control 200 - 201 Open/hole step 202 - 222 Forwards gobo wheel rotation from fast to slow proportional 223 - 243 Backwards gobo wheel rotation from slow to fast proportional 244 - 249 Random gobo selection by audio control step (Set microphone sensitivity in menu „Personality”) 250 - 255 Auto random gobo selection from fast to slow...
- Page 41 DMX protocol Mode/channel Type of Function Value control (Set microphone sensitivity in menu „Personality”) 250 - 255 Auto random gobo selection from fast to slow proportional Rot. Gobo indexing/rotation Gobo indexing - set position on channel 17/16 0 - 255 Gobo indexing proportional Gobo rotation - set position on channel 17/16...
- Page 42 0 - 255 Dimmer intensity from 0% to 100% (0=default) proportional Dimmer intensity - fine 0 - 255 Fine dimming (0=default) proportional Copyright © 2019 Robe Lighting s.r.o. - All rights reserved All Specifications subject to change without notice Page 7...
- Page 43 Robin SilverScan - colours on Virtual Colour Wheel Colour Cyan Magenta Yellow Colour name Wheel (DMX) (DMX) (DMX) (DMX) Filter 4 (Medium Bastard Amber) Filter 10 (Medium Yellow) Filter 19 (Fire) Filter 24 (Scarlet) Filter 58 (Lavender) Filter 68 (Sky Blue) Filter 71 (Tokyo Blue) Filter 79 (Just Blue) Filter 88 (Lime Green)
- Page 44 Colour Cyan Magenta Yellow Colour name Wheel (DMX) (DMX) (DMX) (DMX) Filter 172 (Lagoon Blue) Filter 179 (Chrome Orange) Filter 180 (Dark Lavender) Filter 181 (Congo Blue) Filter 197 (Alice Blue) Filter 201 (Full C.T. Blue) Filter 202 (Half C.T. Blue) Filter 203 (Quarter C.T.
Need help?
Do you have a question about the ROBIN SilverScan Wireless DMX and is the answer not in the manual?
Questions and answers