Table of Contents
Advertisement
Advertisement
Table of Contents

Related Manuals for Robe Robin CycBar 15


Summary of Contents for Robe Robin CycBar 15
- Page 1 Version 1.7...
-
Page 2: Table Of Contents
Robin CycBar 15 Table of contents 1. Safety instructions ..............................3 2. Fixture exterior view ..............................4 3. Installation .................................. 5 3.1 Rigging the fixture ..............................5 3.2 Connection to the mains ............................6 3.3 DMX 512 connection ............................6 3.4 Inserting diffuser .............................. -
Page 3: Safety Instructions
Robin CycBar 15 FOR YOUR OWN SAFETY, PLEASE READ THIS USER MANUAL CAREFULLY BEFORE POWERING OR INSTALLING YOUR Robin CycBar 15! Save it for future reference. This device has left our premises in absolutely perfect condition. In order to maintain this condition and to ensure a safe operation, it is absolutely necessary for the user to follow the safety instructions and warning notes written in this manual. -
Page 4: Fixture Exterior View
Robin CycBar 15 This device is for professional use only. It is not for household use. When choosing the installation spot, please make sure that the fixture is not exposed to extreme heat or dust. Avoid using the unit in locations subject to possible impacts. -
Page 5: Installation
3.1 Rigging the fixture The Robin CycBar 15 can be rigged in any orientation on a truss without altering its operation characteristics. For overhead use, always install a safety cable that can hold at least 10 times the weight of the fixture. You must only use safety cable with screw-on carbine. -
Page 6: Connection To The Mains
This device falls under class one and must be grounded! Design of the Robin CycBar 15 allows to connect several fixtures to AC mains power in one interconnected daisy chain using power input and throughput connectors. Needed daisy chain cords are stated in the chapter “Technical specifications “... - Page 7 Robin CycBar 15 Caution: Terminate the link by installing a termination plug in the output of the last fixture. The termination plug is a 5-pin XLR male plug with a 120 Ohm resistor soldered between Signal (–) and Signal (+).
-
Page 8: Inserting Diffuser
2. Press and hold a diffuser lock (1) and insert the first part of the diffuser (2). Release the diffuser lock. 3. Press and the hold diffuser lock (1) on the opposite side of the Robin CycBar 15 and insert the second part of the diffuser (2). -
Page 9: Control Menu Map
Robin CycBar 15 5. Control menu map Default settings=Bold print Menu Level 1 Menu Level 2 Menu Level 3 Menu Level 4 Menu Level 5 Menu Level 6 A001 dM.Ad. 001-512 dM.Pr. Mod 1 Mod 5 InFo Poti. totL rSEt VErS. - Page 10 Robin CycBar 15 Menu Level 1 Menu Level 2 Menu Level 3 Menu Level 4 Menu Level 5 Menu Level 6 C.MI.n. rGbV diM.c. VhI.c. On, OFF tnP.u. °C, °F In.Po. rEd1 0-255 F.dim 0-255 Stor. oFrE StAn, HiGh FrEq -18..00..+18...
- Page 11 Robin CycBar 15 Menu Level 1 Menu Level 2 Menu Level 3 Menu Level 4 Menu Level 5 Menu Level 6 rdMH ViFi Status, UnLI AdJ. C.CAL C.r I C.V 15 Stor. uPd.M.
-
Page 12: Control Menu
6. Control menu The Robin CycBar 15 is equipped with 4-segment LED display which allows to set the fixture´s behaviour according to your needs, obtain information on its operation, control various range of effects and lastly program it, if it has to be used in a stand-alone mode. -
Page 13: Personality
Robin CycBar 15 In order to reset this counter to 0, you have to press and hold the UP and DOWN buttons and at the same time press the ENTER button. VErS. ---Software Versions. Select this function to read the software version of the fixture processors. -
Page 14: Manual Mode
Robin CycBar 15 VhI.c. --- White counting. If this function is on, the white LED of each pixel lights when a white colour is mixed. The light intensity of the white LED is in a proportion to the intensity of the rest of pixel´s LEDs (red, Green, blue) and improves the white output of the pixel. -
Page 15: Test Sequences
Robin CycBar 15 6. 5 Test sequences Use this menu to run demo-test sequences without an external controller, which will show you some possibilities of using the CycBar 15. 6.6 Stand-alone setting The fixtures on a data link are not connected to the controller but can execute pre-set programs which can be different for every fixture. -
Page 16: Special Functions
If you use the Robe Universal Interface, connect a USB port of your computer with the Robe Universal Interface by means of the USB cable and DMX input of the fixture with the DMX output of the Robe Universal Interface via a DMX cable. -
Page 17: Error And Information Messages
The Software Uploader program will start running. 6. Select correct "COM " number if you use a Flash cable RS232/DMX or select "Robe Universal Interface " if you use the Robe Universal Interface/Robe Universal Interface WTX and then click on the "Connect" button. -
Page 18: Rdm
Discovery command SET command GET command DISC_UNIQUE_BRANCH DISC_MUTE DISC_UN_MUTE DEVICE_INFO SUPPORTED_PARAMETERS SOFTWARE_VERSION_LABEL DMX_START_ADDRESS IDENTIFY_DEVICE DEVICE_MODEL_DESCRIPTION MANUFACTURER_LABEL DEVICE_LABEL SENSOR_DEFINITION SENSOR_VALUE DISPLAY_LEVEL DEVICE_RESET DMX_PERSONALITY DMX_PERSONALITY_DESCRIPTION STATUS_MESSAGES STATUS_ID_DESCRIPTION DEVICE_HOURS Please, see the Robe Universal Interface user manual for detail description of RDM operation. -
Page 19: Technical Specifications
• Manual control of all effects via control panel • One editable program, up to 35 steps Wireless DMX/RDM module (only for Robin CycBar 15 Wireless DMX) • Compliance with USITT DMX-512 (1986 & 1990) and 512-A • Full DMX fidelity and frame integrity •... - Page 20 Included items • 1 x Robin CycBar 15 • 1 x Omega Adaptor CL-regular 2 pcs in box (P/N10980033) • 1 x Diffuser 35°x70° WallWasher for Robin CycBar 15/12 (P/N 10980247) • 1 x Cap for XLR connector (P/N 19020175) •...
- Page 21 (P/N 10980 252) Diffuser 32° wash for Robin CycBar 15/12 (P/N 10980 251) Diffuser 50° wash for Robin CycBar 15/12 (P/N 10980 248) Diffuser 10°x30° Wall wash for Robin CycBar 15/12 (P/N 10980 250) Diffuser 30°x10° Cyc light for Robin CycBar 15/12 (P/N 10980 249) Diffuser 70°x35°...
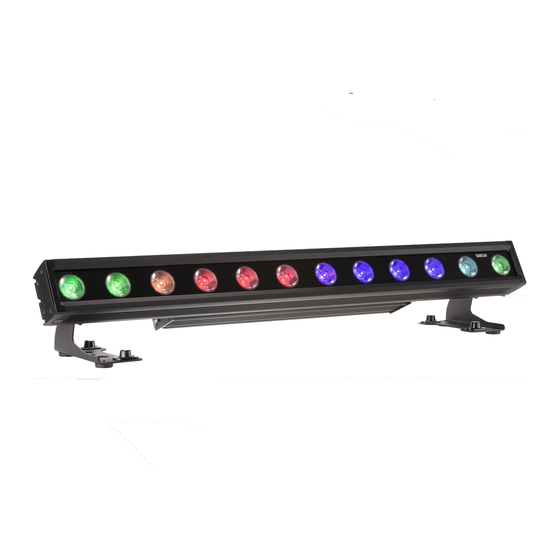
- Page 22 Robin CycBar 15 Robin CycBar 15 with diffuser 35°x70° WallWasher...
-
Page 23: Cleaning And Maintenance
For cleaning use a wet clout or an air-jet. Do not use solvents or any other aggressive cleaning fluid. Maintenance and service operations are only to be carried out by a qualified person or ROBE service worker only. Should you need any spare parts, please use genuine parts. - Page 24 DMX protocol Robin CycBar 15 - DMX protocol Mode 1 - Standard 16-bit, Version: 1.3 Mode 2-Reduced 8-bit, Mode 3 -Extended 16-bit+RGB pixels, Mode 4 - Extended 16-bit+RGBD pixels, Mode 5 -Extended 16-bit+RGBD pixels+LED Frequency Setting Mode/channel Type of Function...
- Page 25 DMX protocol LED Frequency (step +2) step LED Frequency (step +3) step LED Frequency (step +4) step LED Frequency (step +5) step LED Frequency (step +6) step LED Frequency (step +7) step LED Frequency (step +8) step LED Frequency (step +9) step LED Frequency (step +10) step...
- Page 26 DMX protocol White 3200 K step White 3200 K (tungsten emulation)* step White 4200 K step 10-12 White 5600 K step 13-15 White 8000 K step Blue (Blue=full, Red+Green+White=0) step 17-55 Red=0, Green up,Blue =full, White=0 proportional Light Blue (Red=0, Green=full, Blue =full, white=0) step 57 - 95 Red=0, Green=full, Blue...
- Page 27 Dimmer intensity control 0-100% (0=default) proportional * In the Tungsten effect simulation the Dimmer channel imitates behaviour of the halogen lamp during dimming Copyright © 2015-2018 Robe Lighting s.r.o. - All rights reserved All Specifications subject to change without notice Page 4...
- Page 28 Robin CycBar 15 Colour channels priority: 1. Pixel effects channel 2. Virtual colour wheel channel 3. RGBW ALL PIXELS channels 4. If some colour from RGBW ALL PIXELS is set at 0 DMX, this colour can be set individually on each pixel 1-15 using R1G1B1….R15G15B15.
- Page 29 Robin CycBar 15 DMX value Effect Type of Control 59-60 Effect 29 Step 61-62 Effect 30 Step 63-64 Effect 31 Step 65-66 Effect 32 Step 67-68 Effect 33 Step 69-70 Effect 34 Step 71-72 Effect 35 Step 73-74 Effect 36...
- Page 30 Effect 89 Step 181-182 Effect 90 Step 183-255 Reserved Janury 28, 2019 Copyright © 2015-2019 Robe Lighting - All rights reserved All Specifications subject to change without notice Made in ROBE Lighting s.r.o., Palackého 416, 757 01 Valašské Meziříčí, Czech Republic...
Need help?
Do you have a question about the Robin CycBar 15 and is the answer not in the manual?
Questions and answers