
Related Manuals for Anton Paar Abbemat 350


Summary of Contents for Anton Paar Abbemat 350
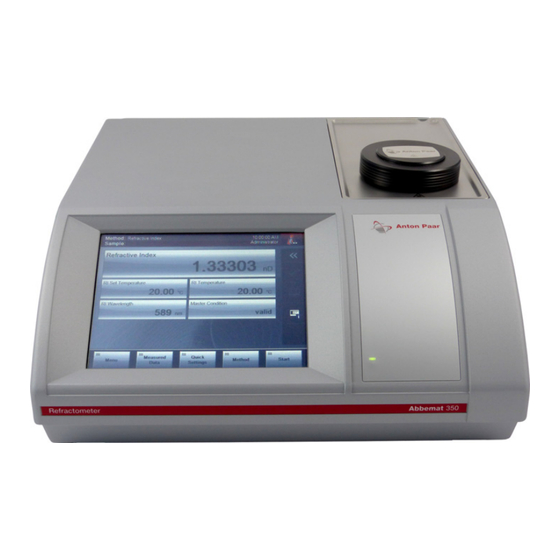
- Page 1 Measure what is measurable and make measurable that which is not. Galileo Galilei (1564-1642) Reference Guide Abbemat 350/550 Automatic Refractometer Instrument Software Version: 5.30...
-
Page 3: Reference Guide
Changes, copyright, trademarks etc. This document and its contents may be changed or amended by Anton Paar at any time without prior notice. All rights reserved (including translation). This document, or any part of it, may not be reproduced, changed, copied, or distributed by means of electronic systems in any form (print, photocopy, microfilm or any other process) without prior written permission by Anton Paar GmbH. -
Page 4: Table Of Contents
Contents Contents 1 Safety Instructions..........................7 1.1 General Safety Instructions....................... 7 1.2 Conventions for Safety Messages ....................8 1.3 Safety Signs on the Instrument......................8 2 Abbemat - An Overview.......................... 9 2.1 Measuring Principle ........................10 2.2 Functional Components ........................11 2.3 Abbemat Desktop ........................... - Page 5 Contents 9 System Security ............................ 29 9.1 Security Level ..........................29 9.2 Increased Security .......................... 29 9.3 Advanced Security .......................... 30 9.4 Auto Logoff ............................. 30 9.5 Password Expiry ..........................30 9.6 Password Length ..........................30 9.7 Strong Passwords........................... 30 9.8 Audit Trail............................
- Page 6 18.6 Drying Cartridge..........................67 19 Maintenance and Repair........................68 19.1 Warranty ............................68 19.2 Repair Performed by an Authorized Anton Paar Representative ..........68 20 Optional Accessories ......................... 69 20.1 Micro Flow Cell ..........................69 20.2 Flow Cell ............................70 20.3 Flow Cell with Filling Funnel ......................
-
Page 7: Safety Instructions
If liquid has been spilled over the instrument, any additions or revisions to the documentation disconnect the instrument from the AC power from Anton Paar GmbH, these must be treated supply. Clean and dry the housing of the instru- as part of the documentation. -
Page 8: Conventions For Safety Messages
1 Safety Instructions 1.2 Conventions for Safety Messages compatible when they come into contact with each other. They shall not react exothermically or produce solid particles which might stick to The following conventions for safety messages are the sample interface. used in this document: •... -
Page 9: Abbemat - An Overview
• Robust measuring principle fractometers cover many standard scales. Custom scales are available on request. • Combination with Anton Paar DMA M density meter / MCP polarimeter • Intuitive operating software • Fulfills all data safety requirements of 21 CFR... -
Page 10: Measuring Principle
At the interface between sample and prism the inci- dent beam is either refracted into the sample or re- Anton Paar refractometers use reflected rather than flected back into the prism. The reflected beam is transmitted light to measure the refractive index. In detected by a sensor array. -
Page 11: Functional Components
2 Abbemat - An Overview Your benefits of this technology are: Interfaces on the rear Economic use of sample • Only a small sample volume is required. • The sample can be recovered as the measure- ment is non-destructive. Fast and easy measurements •... -
Page 12: Abbemat Desktop
Availability of data in machine-readable and Abbemat Desktop is an optional PC software to human-readable form control the refractometer series Abbemat 350, 450, 550 or 650. The software runs on a single worksta- For more information please see section 17 or ask tion computer. -
Page 13: Checking The Supplied Parts
1. prior to opening. Therefore the unopened package 3. If a part is missing, contact your Anton Paar rep- should first be stored in a dry room at normal tem- resentative. -
Page 14: Certified Reference Liquids
Tubing Fluran 2.5 mm x 4.5 mm, 1 m 100302 Tubing Novoprene 2.5 mm x 4.5 mm, 1 m 100297 3.1 Certified Reference Liquids Certified reference liquids are available for checks and calibration of your refractometer. Please con- tact your Anton Paar representative for details. D22IB013EN-D... -
Page 15: Pharma Qualification
3 Checking the Supplied Parts 3.2 Pharma Qualification The Pharma Qualification Package SMART (PQP-S) includes: Anton Paar understands your need for completely • Qualification Instruction (QI) traceable results and supports you with a qualifica- • Design Qualification (DQ) including Qualification... -
Page 16: Installing The Instrument
4 Installing the Instrument 4 Installing the Instrument 4.1 Installation Requirements 4.2 Switching On the Instrument Allow the equipment to reach ambient temperature before installation. This is important if the equipment WARNING has been stored or transported at lower tempera- tures. -
Page 17: Operating The Instrument
5 Operating the Instrument 5 Operating the Instrument To operate the instrument you can use the touch- suring. It turns green when a measurement is screen. You can also connect an external keyboard, finished. bar code reader, or mouse (not supplied by Anton Important functions and messages are easily acces- Paar) to one of the USB interfaces. -
Page 18: Input Control Elements
5 Operating the Instrument Table 5: Buttons in the quick access area Table 6: Keyboard functions Button Function Deletes the character on the left side of the cursor position. The optional peristaltic pump is off. Use this button to switch it on. Moves the cursor position to the left or right. -
Page 19: Using Favorites
5 Operating the Instrument 5.3 Using Favorites 5.5 Regional Settings The favorites function enables you to access your 1. Tap Menu > Setup > Control Panel > Regional favorite menu dialogs directly from the main screen. Settings. The favorites list is the same for all users. 2. -
Page 20: Network
Touchscreen. 5.9 Instrument Name and Location 2. Follow the instructions on the screen. If you have more than one Anton Paar instrument 5.13 Select Methods with Bar Code and want to easily differentiate between them in printouts, data exports or within your local network... -
Page 21: Measuring System Settings
6 Measuring System Settings 6 Measuring System Settings 6.1 Sample List 6.2 Managing the Sample List The sample list is a tool that helps you managing To create a sample list samples that you want to measure. It is especially 1. -
Page 22: Automatic Sample Naming
6 Measuring System Settings 6.5 Sample List Warnings To load a sample list 1. Tap <Sample List> and then tap <More> and Sample list warnings are generated only if you pre- "Load Sample List". pare a sample list prior to the measurement. 2. -
Page 23: Display Of Errors
6 Measuring System Settings 6.8 Display of Errors If air in a warm and humid environment contacts the surface of the eventually colder measuring prism, then water might be condensing on the surface of the prism. By default the instrument will report a bad air reference error. -
Page 24: Printing And Exporting Data
5. For virtual PDF file printers: If you use an RS-232 printer which is not supplied by Select the printer "Type" PDF file printer. Anton Paar, configure the communication settings Activate/deactivate the check box "Use as on the printer (9600,8,N,1). -
Page 25: Printout And Report Settings
7 Printing and Exporting Data 7.3 Printout and Report Settings To import logos for the report 1. Tap Menu > Setup > Printout Settings > You can set up to 10 different report layouts for e.g. Import Logos. different methods, different sample types or for in- 2. -
Page 26: Always Print Report In English
7 Printing and Exporting Data 7.6 Always Print Report in English Reports are printed in the language selected in the regional settings. You can set the instrument to print reports on RS-232 printers in English language al- ways regardless of the language setting: Tap Menu >... -
Page 27: User Groups, Accounts And Passwords
Passwords after three failed logon attempts. are case-sensitive, meaning "Anton Paar" or "anton paar" are treated as different. To log off With high security levels (21 CFR Part 11 and "In- 1. -
Page 28: User Group Administration
8 User Groups, Accounts and Passwords 3. Perform the following settings: To create a new user group Enter or edit a "User Name". 1. Tap Menu > Setup > User Management > Activate/deactivate the user account with the User Group Administration. check box. -
Page 29: System Security
9 System Security 9 System Security You can enable different system security settings to TIPS: Please note that you need to set an additional ensure data security and protect your measuring password for the service account to fulfill the securi- system from unauthorized access. -
Page 30: Advanced Security
9 System Security Table 8: Increased security settings Endless data storage allowed No endless data storage allowed All sample list types allowed Only user-defined sample list mode allowed Infinite logon attempts User account locked after three failed attempts Auto Logon allowed Auto Logon is not allowed User names shorter than 6 characters User name length at least 6 characters... -
Page 31: Audit Trail
9 System Security 9.8 Audit Trail • Activate the audit trail function within your user- defined security mode. The audit trail function generates a log file contain- 1. Tap Menu > Setup > System Security > Audit ing all the operating steps which directly or indirectly Trail. -
Page 32: Securing Actions
Increased security Any MD5 checksum program can be used. For ex- • Methods ample the program "md5summer.exe" can freely be • Quick settings downloaded from the Anton Paar homepage via • Menu your web browser: http://download.anton-paar.com/softwareupdate/ To set securing actions DownloadKey=md5summer.exe 1. -
Page 33: Electronic Signature
9 System Security 9.10 Electronic Signature To set up the electronic signature 1. Tap Menu > Setup > System Security > Elec- Not available in non storage mode. tronic Signature. Electronic signatures can be classified as ordinary 2. Use the check box "Electronic Signature" to acti- manual signatures helping to verify the authenticity vate or deactivate the electronic signature. -
Page 34: Non Storage Mode
9 System Security 5. Enter your password if requested. 6. Assess the sample by tapping <Sign negative> or <Sign positive>. If you want to print or export your results including signing state and respective comments, tap <Print or Export>. 9.11 Non Storage Mode To reduce efforts for instrument validation and qual- ification in lab environments your instrument offers a "Non Storage Mode"... -
Page 35: Checking, Adjusting And Calibrating
10 Checking, Adjusting and Calibrating 10 Checking, Adjusting and Calibrating 10.1 Definitions Reference Standard Check: Select a reference standard. Use the check box to define whether the Checks: Testing the correct state of operation of an check is GxP relevant. instrument by measuring a sample of exactly known Use the check box Check execution measurement properties and comparing the result... -
Page 36: Water Adjustments
10 Checking, Adjusting and Calibrating 10.3 Water Adjustments To perform a one point adjustment 1. Tap Menu > Checks / Adjustments > Refrac- A water adjustment has to be performed if the water tometer Adjustments > One Point Adjust- check failed and using fresh water and cleaning of ment. -
Page 37: Setting The Air Reference
10 Checking, Adjusting and Calibrating To perform a two point adjustment To set the air reference 1. Tap Menu > Checks / Adjustments > Refrac- 1. Clean the measuring prism thoroughly and let it tometer Adjustments > Two Point Adjust- dry (see section 18.2). -
Page 38: Calibrating
10 Checking, Adjusting and Calibrating 10.9 Calibrating 10.10 Reference Standard Manage- ment The goal of a calibration is to validate the accuracy of the refractive index measurement. To calibrate The reference standard substances can be admin- the refractometer measure a certified standard liq- istered in a database to ease operation and to avoid uid and compare the result to the reference value in- input errors. -
Page 39: Measuring Methods
Most measurements are performed at the standard In close cooperation with our customers Anton Paar temperature of 20 °C, if not stated otherwise. The collects and develops continuously new methods standard wavelength of the Abbemat series is and applications. -
Page 40: Measurement Accuracy
Table 10: Accuracy settings for the validation of measurements Measurement Max. temperature Max. refractive index Stable time Accuracy deviation deviation Most Precise 0.005 °C 15 s Abbemat 350 0.00005 nD Abbemat 550 0.00001 nD Precise 0.01 °C 10 s Abbemat 350 0.0001 nD Abbemat 550 0.00002 nD Fast Measuring 0.03 °C... -
Page 41: Quick Settings
If no output quantities are selected, the data brows- your quick settings. er settings are used instead. If you have connected one or more Anton Paar mea- 1. Tap Menu > Method Management. suring modules to your master instrument, the range 2. -
Page 42: Editing Methods
11 Measuring Methods To change or add a quick setting parameter To rename a method 1. Tap Menu > Method Management. 1. Tap Menu > Method Management. 2. Select a method and tap <Quick Settings Man- 2. Select a method with a long tap and tap agement>. -
Page 43: Measuring
12 Measuring 12 Measuring 12.1 General Sample Settings 12.3 Applying a Sample If the "No Sample List" mode is active, you only need to tap <Start> to initiate a measurement. WARNING In "Sample List" mode (see section 6.1) enter the re- Hazardous substances quired data into the sample list before starting a Before applying any sample or cleaning liquid... -
Page 44: Performing A Measurement
12 Measuring Special Cases 3. After applying the sample, it is recommended to place the magnetic sample cover over the • If samples of medium or high viscosity are mea- prism. The cover helps to reduce evaporation. It sured, e.g. sugar syrups, reproducible results can also prevent possible interference from can only be obtained when sample liquid cover- excessive stray light. -
Page 45: Handling The Measurement Data
13 Handling the Measurement Data 13 Handling the Measurement Data TIP: Some of the settings in this chapter are not 2. Tap on the list item that you want to change or available in the non storage mode. on the empty field if you want to add an item. 3. -
Page 46: Viewing Statistics
13 Handling the Measurement Data Filter criteria • If you only want to see the samples that have not been exported yet, choose the following set- • Time tings: • Date • Date Range Filter criterion: "Print/Export Status" • Sample Name Comparator: "Not printed/exported"... -
Page 47: Printing And Exporting
13 Handling the Measurement Data 13.6 Printing and Exporting TIP: To create an empty line in your printed report, add the output quantity "Line break" from the group "System" to your result output list and position it at NOTICE your convenience (see section 11.3). In the non storage mode you can print or export your measured results only immediately after the To export measured data... -
Page 48: User Functions
14 User Functions 14 User Functions With user functions, you can automatically calculate 1. Tap Menu > Setup > Measuring System Set- quantities of your interest from the output values of tings > User Functions / Calculator > User your instrument. For example, calculate the concen- Function Management. -
Page 49: Linear Functions
14 User Functions 3. Perform the following settings: an internal description of your user function. Enter a name for the formula. Activate/deactivate the check box "Protect Use the menu "Function Type" to select the function against changes and copies by "Formula". -
Page 50: User Table
14 User Functions 14.5 User Table 14.6 Calculator A literature table or individual experimental data can Using the calculator you can check the output of be programmed into a user table. Up to 1000 data your user function. With the calculator, you can sim- pairs can be entered. -
Page 51: Group Calculator
14 User Functions 14.7 Group Calculator 14.8 Printing or Exporting User Func- tions With the group calculator, you can simulate all cal- culations belonging to a certain group in one step. 1. Tap Menu > Setup > Measuring System Set- Enter the corresponding input values to get all out- tings >... -
Page 52: System Utilities
15 System Utilities 15 System Utilities 15.2 Restore the Instrument Settings This chapter informs you about doing a backup/re- store of your instrument settings, performing a firm- ware upgrade, getting details about the system and NOTICE viewing the live raw data. The backup and restore •... -
Page 53: Full System Backup And Restore
15 System Utilities 15.4 Full System Backup and Restore TIP: The backup package is a folder with an auto- matically generated name (containing the instru- ment name, serial no., date and time). It is stored in A full system backup file can be used to restore a an automatically created folder named "BackupAr- measuring system to the state of the backup. -
Page 54: Updating The Instrument Software
NOTICE the firmware update. • Contact your local Anton Paar representative for updates of the instrument software. 1. Load the latest firmware into the root directory of Updates can possibly affect settings concern- your USB storage device or FTP server. -
Page 55: Viewing The System Information
The instrument log file is now saved to the root di- rectory of the USB storage device. To change the log file configuration In special cases your Anton Paar representative will ask you to change the configuration of your log file in order to get more specific information about your instrument. -
Page 56: Instrument Connectivity
"Password", and click <OK>. mally an interaction with the instrument is required. Contact your local Anton Paar representative for fur- Now you can operate the instrument via your PC ex- ther information about installation and setup of the actly as you would do via touchscreen. -
Page 57: Automatic Email Notifications
4. Select your FTP connection in the drop-down ry Information Management System (LIMS) using box "USB Printer" and tap <OK>. the Anton Paar software AP Connect (also via Abbemat Desktop) or LIMS Bridge (not available 5. Tap Menu > Setup > Printout Settings > Auto- with Abbemat Desktop). -
Page 58: Connecting Via Rs-232
16 Instrument Connectivity 16.6 Connecting via RS-232 To configure the RS-232 interface 1. Tap Menu > Setup > Control Panel > RS-232 To connect the instrument to a PC you have to use Settings. a terminal software and a suitable RS-232 serial in- 2. - Page 59 16 Instrument Connectivity Table 16: RS-232 commands and their specific responses Command Response Description start measurement started The command was accepted and the measurement was started. start method_number measurement already started The measurement was already started. abort measurement aborted The measurement was aborted. measurement not started No measurement was started.
-
Page 60: Abbemat Desktop
The program gives access to already acquired data • Suitable instruments for Abbemat Desktop: and allows settings. Abbemat 350, 450, 550, and 650 with soft- 17.1 Abbemat and Abbemat Desktop ware version 5.2 or above The operation of a refractometer usually requires a compared close contact of the operator to the instrument, i.e. -
Page 61: Switch Abbemat Into Desktop Mode
If the instrument was acquired as an Abbemat Desktop system, the following steps might have been already done by Anton Paar. Check if your Abbemat displays a start screen similar to Fig. 17-2. If so, skip to section 17.5, Network Set- tings. -
Page 62: Connecting To The Instrument
17 Abbemat Desktop and default gateway 192.168.1.1. Primary and sec- Fig. 17-4: Instrument screen, when Abbemat Desktop and instrument are connected. ondary DNS do not have to be entered. Set the PC to the static IP 192.168.1.1., same sub- net mask and default gateway. Now a direct connec- tion is possible. -
Page 63: Pairing Of Instruments
This ensures a be paired. If you connect to such an instrument logon with the highest privileges of a user. anyways, only Anton Paar service can unpair the Tip. Active Directory groups can only be fully as- instrument. -
Page 64: Secure File Dialog
17 Abbemat Desktop 17.9 Secure File Dialog Tap <Backup> and confirm the following information window with <Yes> to start the backup. By default Abbemat Desktop uses the standard win- dows file select dialog. If required, you can change 3. For an automatic backup, select the cases in to a secure dialog which prevents the manipulation which it shall be executed: of files. -
Page 65: Upkeep And Cleaning
18 Upkeep and Cleaning 18 Upkeep and Cleaning 18.1 Cleaning Instrument Housing and To ensure a constant high accuracy of your mea- surements, employ a regular and effective cleaning Touchscreen routine and store the instrument under the recom- mended conditions. To clean the instrument housing or the touch screen, use a soft tissue that can be wetted with an ethanol water mix or warm water, if necessary with some... -
Page 66: Cleaning A Flow Cell
18 Upkeep and Cleaning 18.3 Cleaning a Flow Cell 18.4 Cleaning a Flow Cell with Filling Funnel Cleaning liquids For cleaning two liquids may be required: Cleaning liquids 1. Cleaning liquid 1 dissolves and removes sample See section 18.3. residues in a measuring cell. It has to be a good solvent for all sample components. -
Page 67: Drying Cartridge
18 Upkeep and Cleaning 18.6 Drying Cartridge The drying cartridge protects the optical system from moisture. It is equipped with a humidity indica- tor behind the window in the center. This allows you to check the status of the cartridge without the need to remove it. -
Page 68: Maintenance And Repair
Contact your local Anton Paar representative for a replacement of the button cell. 1 For detailed information please see the general terms of delivery (GTD) on the Anton Paar website (http://www.anton-paar.com). D22IB013EN-D... -
Page 69: Optional Accessories
20 Optional Accessories 20 Optional Accessories Different flow cells are available for your Abbemat. These can be used for the installation in automated systems or in bypass applications. Furthermore the flow cells can be installed for preventing volatile sol- vents from evaporation or for reducing the amount of sample volume required for a measurement. -
Page 70: Flow Cell
20 Optional Accessories 7. Insert the O-ring (5) into the micro flow cell (3). 1 100803 Screw cap 2 100809 Tube connector OD 7 mm TIP: When mounting the flow cell, take care to keep 3 62403 O-ring 5 x 1 FKM or alternatively the O-ring between cell and prism in its groove. -
Page 71: Flow Cell With Filling Funnel
20 Optional Accessories 20.3 Flow Cell with Filling Funnel 3 100803 Screw cap 4 100809 Tube connector OD 7 mm 5 62403 O-ring 5 x 1 FKM or alternatively For routine analysis of low-viscosity liquids, e.g. 23713 O-ring 5 x 1 FFKM (with improved chemical beverages, this cell type is most convenient. -
Page 72: Sample Presser
The water will be sucked out of the cell due to the siphon effect. 20.4 Sample Presser The sample presser from Anton Paar can be used to measure the refractive index of solid samples, e.g. plastic films. It ensures a coplanar orientation of the sample on the prism, even if the sample is flexible. -
Page 73: Ph Module
20 Optional Accessories To activate/deactivate the peristaltic pump Part No. Description within a method 1. Tap Menu > Method Management > "Method 102989 Peristaltic pump Name" > Activate Modules /Constants. 99306 Roller cassette with fluran tubing 2. Enable/Disable the check box for peristaltic 99284 Roller cassette w/ novoprene tubing pump. -
Page 74: Appendix A: Technical Data
Only connect devices to the interfaces that comply with PELV (protective extra-low voltage) accord- ing to EN 61140 or with SELV (safety extra-low voltage) according to EN 60950. • Only connect Anton Paar equipment or equipment with a maximum current load of 250 mA to the CAN interface. •... -
Page 75: Appendix A.2: Specifications
Appendix A: Technical Data Appendix A.2: Specifications Abbemat 350 Abbemat 550 Measuring range of refractive index 1.26 nD to 1.72 nD Resolution of refractive index 0.00001 0.000001 Accuracy of refractive index +/-0.0001 +/-0.00002 Measuring range of °Brix scale 0 % to 100 % Resolution of °Brix scale... -
Page 76: Appendix B: Output Quantities
Appendix B: Output Quantities Appendix B: Output Quantities Group: Temperature RI Set Temperature Shows set temperature of the measuring prism/sample RI Temperature Sensor Shows temperature of the measuring prism/sample State Group: System Settings Data Field 1 User-definable text Data Field 2 User-definable text Data Field 3 User-definable text... -
Page 77: Appendix C: Quick Settings Parameters
Appendix C: Quick Settings Parameters Appendix C: Quick Settings Parameters Parameter Type Parameter Description Sample name Only in "No Sample List" mode. Measurement Type S (Standard) To perform a standard measurement. C (Check) To perform one of the predefined checks. It is only possi- ble to select a check which has been defined for the selected method before. -
Page 78: Appendix D: Assigning Methods With Bar Codes
Appendix D: Assigning Methods with Bar Codes Appendix D: Assigning Methods with Bar Codes Connect a bar code reader (not supplied by Anton To view the position number, tap <Method> in the Paar) to enter sample names and to select methods main screen. -
Page 79: Appendix E: Menu Tree
Appendix E: Menu Tree Appendix E: Menu Tree The menu tree shows which parts of the menu are Administrator, Manager, Operator accessible for users with administrator, manager or Administrator, Manager operator rights using the following colors: Administrator Table 20: Menu tree Level 1 Level 2 Level 3... - Page 80 Appendix E: Menu Tree Table 21: Menu Tree (continued) Level 1 Level 2 Level 3 Level 4 Setup Measuring System Settings Sample List / Sample Settings Sample List / Sample Naming User-defined Data Fields Sample List Warnings Mandatory Data Fields User Functions / Calculator User Function Management Calculator...
- Page 81 Appendix E: Menu Tree Table 22: Menu Tree (continued) Level 1 Level 2 Level 3 Service Instrument Settings Management Backup Instrument Settings Restore Instrument Settings Export Instrument Settings Full System Backup Full System Restore Backup the Database Restore the Database Update System Update Module Firmware Update...
-
Page 82: Appendix F: Troubleshooting
Appendix F: Troubleshooting Appendix F: Troubleshooting Table 24: Main Power Problem Cause Correction Instrument is without power. Mains power cable is not con- Check connection of the mains nected or defective. power cable; if required, replace it with a new one. Mains power is switched off. - Page 83 The instrument is overheated Insufficient air circulation Ensure unhindered air circula- tion at the ventilation openings Defective cooling fan Contact your local Anton Paar representative Ambient temperature too high Lower the room temperature Frequent and fast changes Extend the times between differ-...
-
Page 84: Appendix G: Ce Certificate
Appendix G: CE Certificate Appendix G: CE Certificate D22IB013EN-D...
Need help?
Do you have a question about the Abbemat 350 and is the answer not in the manual?
Questions and answers