Table of Contents

Related Manuals for Southern Pride MLR-150


Summary of Contents for Southern Pride MLR-150
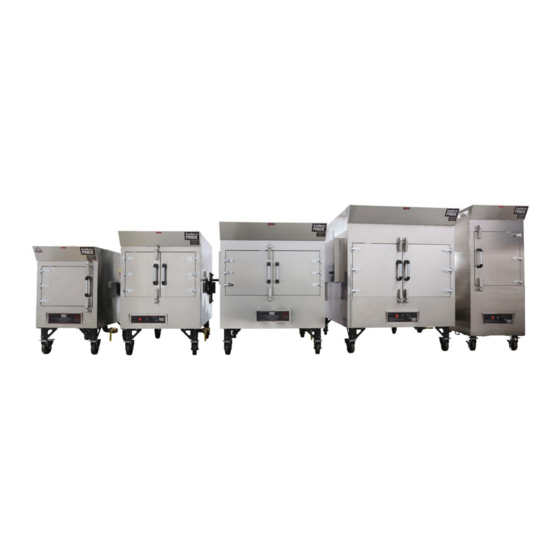
- Page 1 OWNER’S MANUAL Gas-Fired Wood-Burning Rotisserie Barbecue Smoker MLR-150 SPX-300 SPK-500 SP-700 MLR-850 SPK-1400 Southern Pride Distributing, LLC Tel 731-696-3175 401 S Mill St www.southernpride.com Alamo, TN 38001 © 2024 Revision 9...
-
Page 2: Table Of Contents
Wiring Diagram ....................40-43 Warranty ......................44 Please read this Manual carefully prior to installation, operation, and maintenance of your Southern Pride smoker. Proper installation, operation, and maintenance are essential for your satisfaction and safe operation. KEEP THIS MANUAL FOR REFERENCE NOTE: An Electrical Diagram for this appliance can be found on the inside of the service compartment cover. -
Page 3: Safety Information And Precautions
SAFETY INFORMATION AND PRECAUTIONS This manual should be considered a permanent part of this smoker. THE SMOKER MUST BE INSTALLED BY A QUALIFIED SERVICE TECHNICIAN. All troubleshooting guides, component views, and parts lists included in this manual are for general reference only and are intended for use by qualified technical personnel. DANGER: Improper installation, alteration, adjustment, service, or maintenance could result in severe injury, death, or cause property damage. -
Page 4: Diagram Of Smokers
DIAGRAM OF SMOKERS SPK-500 Shown 1. Proximity sensor 4. Smoke extractor / VSP hood power connection 2. Product loading doors 5. Service compartment vent 3. Control panel 6. Power cord 7. Gas supply connection 8. Service compartment cover 12. Bearing cover 9. -
Page 5: Delivery Location
(Common Carrier deliveries) and install the permanent legs on the smoker (all deliveries). Approximate weights of base models: Smoker only Shipping weight (Common Carrier) MLR-150: 656 lbs. (298 kg) 875 lbs. (397 kg) SPX-300: 910 lbs. (413 kg) 1,150 lbs. - Page 6 INSTALLATION UNLOADING THE SMOKER SMOKERS SHIPPED VIA CONTRACT HAULER The driver will unload the smoker from the trailer. Once the smoker is in a level and safe place remove the white protective wrap from the outside of the smoker and open the product loading doors. Plastic zip ties secure a box and permanent legs to one of the product racks of the smoker.
-
Page 7: Site Instructions
Southern Pride recommends the use of a noncombustible material for the floor surface area under the firebox, which should extend at least 6” (152 mm) beyond each side of the firebox, and outward from the smoker beyond the area needed for placement of the ash container. - Page 8 NOTE: On models SPX-300, SPK-500 and SP-700, the front legs can be recessed back 12” for through the wall installations. On models MLR-150, MLR-850 and SPK-1400, the front legs cannot be recessed and the legs should be removed with the front of the smoker resting on the wall ledge.
-
Page 9: Electrical Instructions
INSTALLATION ELECTRICAL INSTRUCTIONS ELECTRICAL REQUIREMENTS: WARNING: • 120 volts AC, 60 Hz This appliance, when installed, must be electrically • grounded in accordance with local codes, or in the 15 amp required absence of local codes, with the National Electrical Code, •... -
Page 10: Gas Piping Instructions
INSTALLATION GAS PIPING INSTRUCTIONS IMPORTANT NOTES TO THE INSTALLER • Read all instructions contained in this owner’s manual before making gas connections. • Observe all governing codes and ordinances. WARNING: IMPROPER GAS HOOKUP WILL VOID WARRANTY AND COULD RESULT IN A HAZARDOUS CONDITION. 1. - Page 11 INSTALLATION GAS PIPING INSTRUCTIONS Pipe Sizing Chart for Natural Gas (0-0.5 psi) with Straight Schedule 40 Metal Pipe The following chart is based on 0-0.5 psi inlet pressure, specific gravity of 0.6, and a pressure loss of 0.5” w.c. Maximum Capacity of Pipe Size in Btu per Hour Pipe Size 1/2”...
- Page 12 INSTALLATION GAS PIPING INSTRUCTIONS Pipe Sizing Chart for Liquid Propane (11” w.c.) with Straight Schedule 40 Metal Pipe The following chart is based on 11” w.c. inlet pressure and a pressure drop of 0.5” w.c. Maximum Capacity of Pipe Size in Btu per Hour Pipe Size 1/2”...
-
Page 13: Gas Connection Instructions
INSTALLATION GAS CONNECTION INSTRUCTIONS For smokers equipped with casters, the installation shall be made with a connector that complies with the Standard for Connectors for Movable Gas Appliances, ANSI Z21.69 CSA 6.16, and a quick-disconnect device that complies with the Standard for Quick-Disconnect Devices for Use With Gas Fuel, ANSI Z21.41 CSA 6.9. Adequate means must be provided to limit the movement of the appliance without depending on the connector and the quick-disconnect device or its associated piping to limit the appliance movement. -
Page 14: Burner Specifications
Firing Rate Btu 65,000 75,000 125,000 150,000 65,000 Btu/hr Natural Gas #26 (.147") 65,000 Btu/hr LP Gas #43 (.089") MLR-150 75,000 Btu/hr Natural Gas #19 (.166") SPX-300 75,000 Btu/hr LP Gas #37 (.104") SPK-500 125,000 Btu/hr Natural Gas #5 (.205") -
Page 15: Venting Instructions
OPTION 1: VSP EYEBROW HOOD SYSTEM • VSP eyebrow hoods are UL Listed to the applicable Southern Pride smoker model and are NSF certified. • VSP eyebrow hoods can be utilized in stand-alone or through the wall applications. •... - Page 16 Placement under a common hood shared with other appliances may be prohibited. • NFPA® 96 specifies a minimum canopy overhang of 6 inches on all sides. Southern Pride recommends a minimum 18 inch overhang on the product loading door side of the smoker.
-
Page 17: Operation
OPERATION The smoker should be operated in the following order (with all operations according to the subsequent instructions): 1. Load the product into the smoker and close the product loading doors. 2. Place the desired wood into the firebox, close the firebox door. 3. -
Page 18: Product Loading Instructions
OPERATION PRODUCT LOADING INSTRUCTIONS 1. Before opening the product door, the main power switch should be off (standard control), or the control should read IDLE (optional cook and hold control). 2. Load product on the product racks. Product should be loaded from bottom to top on the product rack hangers. -
Page 19: Standard Control
OPERATION CONTROL OPERATING INSTRUCTIONS STANDARD CONTROL 1. The product loading doors must be closed. 2. Turn the smoker main power switch on. The control thermostat will come on and display the last temperature used or be off. 3. Use the up/down button on the control thermostat to set the desired temperature setting. 4. - Page 20 OPERATION CONTROL OPERATING INSTRUCTIONS OPTIONAL SMOKE EXTRACTOR DAMPER OPERATION Standard Control: • The smoke extractor damper and exhaust fan automatically activate when the product loading doors are opened. It is recommended to open the left product loading door enough to activate the smoke extractor system 45 seconds prior to fully opening the product loading doors to allow the smoke extractor system time to become fully functional before the product loading doors are opened.
- Page 21 OPERATION PRODUCT UNLOADING INSTRUCTIONS 1. Before opening the product door, the main power switch should be off (standard control), or the control should read IDLE (optional cook and hold control). 2. Evacuate the smoke from the smoker before fully opening the product loading doors. a.
- Page 22 OPERATION GREASE REMOVAL INSTRUCTIONS 1. Immediately drain the grease after each cook cycle. 2. Place a container under the grease drain valve located below the smoker. 3. Open the valve slowly. CAUTION: Grease will be hot. 4. Grease should be poured into an approved grease recycling bin. WARNING Do not connect the grease drain on the smoker directly to the building drain system, or any other drain connection.
- Page 23 OPERATION MOBILE SMOKER OPERATION • LP tanks are shipped empty. Have the tanks filled by a licensed professional before using. Inform your LP supplier that the tanks are new and need to be purged before filling. • Check the fuel level of the LP tanks prior to starting a cook cycle. Proper monitoring of the LP tanks will eliminate the chance of running out of gas.
- Page 24 OPERATION MOBILE SMOKER WARNINGS ELECTRICAL 1. To protect against electrical shock: a) do not immerse any part of the power cord, plug or extension cord in water or any other liquid. b) use only a 3 prong extension cord, and only plug into a 15 amp grounded receptacle. 2.
- Page 25 OPERATION MOBILE SMOKER WARNINGS LP GAS 8. Before each use, inspect the gas hose. If excessive abrasion, wear or if the hose is cut it must be replaced prior to the smoker being put into operation. 9. LEAK TESTING: Do not use a flame to check for a gas leak. To prevent fire or explosion hazard, DO NOT smoke or allow any potential source of ignition (sparks, electrical arcing, etc.) in the area while performing a leak test.
- Page 26 OPERATION PROPANE TANK OPERATION (Models MLR-150, SPX-300, and SPK-500) REMOVING A PROPANE TANK FROM THE ASSEMBLY STAND 1. Turn off both tanks, by turning the valve knobs in a clockwise direction to close. 2. Remove the LP pigtails, by turning the nuts in a counter clockwise direction to loosen.
- Page 27 OPERATION LP DUAL TANK ASSEMBLY The Type I pigtail consists of a green nylon swivel nut attached to a hose by a brass nipple. The nylon nut is designed for easy grip and features a right-handed 1-15/16” ACME thread. The ACME thread allows a smooth, convenient connection that does not require tools.
- Page 28 OPERATION REGULATOR MAINTENANCE The regulator comes with a protective cover in place to protect the regulator vent from freezing rain, snow, etc. collecting over the vent hole of the regulator. It is important to check the vent frequently to be sure it is clean and free of water, corrosion, or obstruction, as clogging is a potential cause of regulator malfunction.
-
Page 29: Maintenance
MAINTENANCE WARNING It is extremely important to follow the below maintenance procedures. Grease or solids buildup inside the smoker could result in a fire hazard. WARNING: Before any service is performed on the smoker, the gas supply should be turned off and the power disconnected. - Page 30 An extra fan blade is shipped with the smoker and is located inside the service compartment. WARNING: Smoker MUST be off and power disconnected before opening the service door. Models: MLR-150, SPX-300, SPK-500, and MLR-850 Loosen the set screw and remove...
- Page 31 Tighten if needed. All models except the SPK-1400. 2. Scrape creosote buildup off of the firebox side of the baffle board. Models: MLR-150, SPX-300, SPK-500, and MLR-850 - From inside of the smoker. View from product Baffle board.
- Page 32 MAINTENANCE QUARTERLY PRODUCT DOOR LATCHES: CAUTION: The latch rollers are spring-loaded and will open quickly with a lot of force. Do not pinch a finger or hand. 3. Remove and clean the product door latches. a. After the smoker has been turned off and given time to cool, open the product door leaving the roller in the open position.
-
Page 33: Semi-Annually
Small Spur Gear Oil Level Plug SEMI - ANNUALLY: Have an experienced service technician inspect and clean the burner electrode. Southern Pride recommends replacing the burner electrode every 12-18 months, depending on usage. ANNUALLY: Lubricate the drive chain (all models except the SPK-1400). Disconnect the power supply and remove the... - Page 34 MAINTENANCE AS NEEDED (Frequency will depend on usage and local health department’s requirements): WARNING It is extremely important to follow the below maintenance procedures. Grease or solids buildup inside the smoker could result in a fire hazard. INTERIOR • Use a commercial product service detergent/degreaser to clean the smoker interior. Follow the product manufacturer’s instructions for proper use, cautions and warnings.
-
Page 35: Stainless Steel Surfaces
Always use the proper cleaning agent at the manufacturer’s recommended strength. EXTERIOR Southern Pride Smokers are known for their attractive appearance. We achieve this by selecting only the finest grade of type 304 stainless steel and applying exacting workmanship. -
Page 38: Before You Call For Service
MAINTENANCE BEFORE YOU CALL FOR SERVICE WARNING: Before any service is performed on the smoker, the gas supply should be turned off and the power disconnected. SYMPTOM WHAT TO DO • Smoker does not start Product loading doors must be closed. •... -
Page 39: Troubleshooting The Gas Burner
MAINTENANCE WARNING: Gas burners require an experienced technician for proper service and adjustment. If the burner does not appear to be operating properly, DO NOT ATTEMPT TO ADJUST THE BURNER YOURSELF, but call in a competent service technician. TROUBLESHOOTING THE GAS BURNER GAS BURNER SEQUENCE OF OPERATION It is very important to know the sequence of operation when troubleshooting the burner. -
Page 44: Limitation Of Liability
IN NO EVENT WILL SOUTHERN PRIDE OR ANY COMPANY/INDIVIDUAL AFFILIATED WITH IT BE LIABLE FOR INCIDENTAL OR CONSEQUENTIAL DAMAGES. In no event shall Southern Pride be liable for loss of use, loss of revenue or profit, or loss of product, or for any indirect, incidental or consequential damages.
Need help?
Do you have a question about the MLR-150 and is the answer not in the manual?
Questions and answers