Table of Contents
Advertisement
INSTRUCTION MANUAL
˚F
˚F
˚C
˚C
HEAT ON
HEAT ON
• Increase Temperature
• Decrease Temperature
• Control Off
472 South Mill Street, Alamo, TN 38001
800-851-8180
sales:
service: 800-437-2679
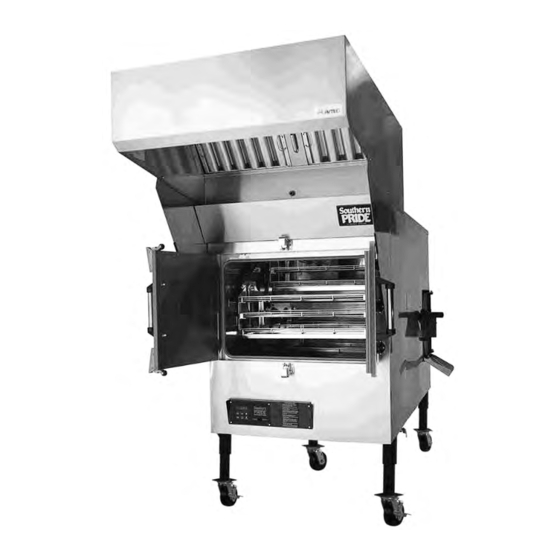
Shown with optional
VSP Vent Hood System
and optional working
height locking casters.
www.southernpride.com
618-993-0378
service fax:
MODEL SPX-300
Nov. 2011 and newer
sales@sopride.com
parts@sopride.com
Advertisement
Table of Contents

Related Manuals for Southern Pride SPX-300


Summary of Contents for Southern Pride SPX-300
- Page 1 MODEL SPX-300 Nov. 2011 and newer INSTRUCTION MANUAL ˚F ˚F ˚C ˚C HEAT ON HEAT ON • Increase Temperature • Decrease Temperature • Control Off Shown with optional VSP Vent Hood System and optional working height locking casters. 472 South Mill Street, Alamo, TN 38001 800-851-8180 www.southernpride.com...
-
Page 2: Table Of Contents
CONGRATULATIONS In selecting Southern Pride, you have chosen the finest, most advanced and most fully automatic wood burning barbecue pit available. With us, “ It’s Simply, a Matter of Pride”. Please read this Instruction Manual carefully prior to installation and operation of your Southern Pride pit. -
Page 3: Safety Information
If the burner does not appear to be operating properly, DO NOT ATTEMPT TO ADJUST THE BURNER YOURSELF, but call in a competent serviceman or contact Southern Pride. 7. DO NOT allow unqualified personnel to perform service work or adjustments on this unit. -
Page 4: Diagram Of Controls & Components
SOUTHERN PRIDE’S SPX-300 BBQ OVEN ˚F ˚F ˚C ˚C HEAT ON HEAT ON • Increase Temperature • Decrease Temperature • Control Off ˚F ˚F ˚C ˚C HEAT ON HEAT ON • Increase Temperature • Decrease Temperature • Control Off Standard Controls... - Page 5 SPX-300 CONTROLS AND COMPONENTS 1. CV CONTROL THERMOSTAT - Adjustable temperature setting (140-325° F) with OFF position. Maintains desired Pit temperature by controlling the Gas Burner. It also displays the actual temperature inside the oven during the cook cycle. 2. MAIN POWER SWITCH - Activates the Rotisserie, Convection Fan, Thermostat, and Red Indicator Lamp.
-
Page 6: Operating Instructions
OPERATING INSTRUCTIONS 1. Load meat on the food racks. DO NOT LET THE MEAT EXTEND BEYOND OR HANG OVER THE EDGE OF THE RACKS. CORRECT INCORRECT Load meat on bottom rack first. May cause food to tip and meat to fall. This could cause the Rotisserie to jam. - Page 7 5. Put a small amount of wood in the Firebox. Use 1-2 logs, 4-6 inches in diameter, 12-15 inches long. Use green or slightly seasoned hardwoods, fruitwoods, or charcoal. Be sure to keep the wood 6” from the burner or ashes can accumulate on the burner and cause it to not work properly.
- Page 8 8. To check or unload meat, on units with optional Smoke Extractor; open the meat doors just enough to activate the Smoke Extractor, for approximately 20 seconds prior to fully opening the Meat Loading Doors. 9. When the meat is cooked; on digital control models press and hold the start / stop button until idle appears in the LED, or on ovens with standard controls turn the Main Power Switch to the OFF position.
- Page 9 Programming a Menu with Standard Controls • After the product has been loaded into the oven and the meat loading doors have been closed, and logs placed in the firebox and the firebox door closed and the drain valve is closed, turn the oven power switch on.
- Page 10 Programming a Menu with Optional Digital Controls Cont. • The control should be in the “IDLE” mode. (The burner, convection fan, and the rotisserie will be off) • When the menu is in progress a PRESS of the down arrow button will activate the smoke extractor (if equipped with the optional Smoke Extractor, prior to opening the meat doors, if the doors are not opened the smoke extractor will go off after one minute and the menu will resume.
-
Page 11: Cold Weather Operations/Mobile Oven Note
SMOKER OVEN COLD WEATHER OPERATIONS When temperatures drop below freezing there are issues that may develop. Listed below are some of those issues and ways to correct or reduce the effects of the problem. 1. Grease in oven drain solidifies in cold weather. Listed below are things that can be done to reduce, or correct the effects of this problem. -
Page 12: Cleaning Instructions
CLEANING INSTRUCTIONS 1. Remove ashes and coals from Firebox after each cook cycle. Ash Disposal: Ashes should be placed in a non-combustible container with a tight fitting lid. The closed container of ashes should be placed on a non-combustible floor well away from all combustible material, pending final disposal. - Page 13 WARNING IT IS EXTREMELY IMPORTANT TO FOLLOW THE ABOVE DAILY CLEANING PROCEDURES. GREASE OR SOLIDS BUILDUP INSIDE THE PIT COULD RESULT IN A FIRE HAZARD. Meat Door Latch Removal Instructions The meat door latches are removable for cleaning. To Remove: 1.
-
Page 14: Maintenance Schedule
MAINTENANCE SCHEDULE When washing the unit, Protect the Door Interlock Switch from getting wet. AFTER EACH USE: Drain Grease and empty ashes from the firebox. DAILY: Remove and clean all of the food racks. Thoroughly clean the complete interior of the oven, using a food service degreaser (follow instructions on degreaser) and rinse with a water hose or pressure washer. - Page 15 ANNUALLY Drive Chain lubrication instructions 1. To lubricate the Drive Chain, disconnect the power supply to the oven and remove the Drive Cover. 2. Use only quality SAE 20 oil for lubricating the Drive Chain. 3. The drive chain for the OT-300 Oven should be lubricated once each year. 4.
-
Page 16: Electrical Instructions
ELECTRICAL INSTRUCTIONS ELECTRICAL REQUIREMENTS: 120 Volts A.C., 60 hz., 2 wire, single phase, 15 amp wiring required. power cord WARNING: CHASSIS MUST BE GROUNDED TO PREVENT POSSIBLE SHOCK HAZARD. DO NOT ASSUME A PLUMBING LINE WILL PROVIDE SUCH A GROUND. WARRANTY IS VOID IF UNIT IS CONNECTED TO ANY VOLTAGE OTHER THAN SPECIFIED ABOVE AND ON NAMEPLATE. - Page 17 SPX-300 gas oven wiring diagram with Standard Controls...
- Page 18 SPX-300 gas oven wiring diagram with Digital Roast and Hold Controls...
- Page 19 ITEMS TO CHECK BEFORE FIRING BURNER IMPORTANT WARNING: IMPROPER GAS HOOKUP WILL VOID WARRANTY AND COULD RESULT IN A HAZARDOUS CONDITION. 1. Gas line MUST be installed by a competent technician and in accordance with this Manual. 2. Gas line MUST include an easily accessible manual shutoff valve, drip leg, and pressure gauge port.
-
Page 20: Burner Specification & Instructions
BURNER SPECIFICATIONS Burner Model: Wayne P250-EP Firing Capacity: Maximum Input 75,000 BTU/HR, on Model SPX-300 Fuels: Natural and L.P. Gases Electrical: 120 V.A.C., 60 hz, 1 ph Orifice Sizes: Model SPX-300 Natural Gas - #19 (.166) L.P. Gas - #37 (.104) NOTE: Orifice and valve setting must correlate with type of gas being supplied. -
Page 21: Gas Piping Instructions
GAS PIPING INSTRUCTIONS READ ALL GAS PIPING INSTRUCTIONS CAREFULLY BEFORE MAKING GAS CONNECTIONS. WARNING: IMPROPER GAS HOOKUP WILL VOID WARRANTY AND COULD RESULT IN HAZARDOUS CONDITION. 2. Connect the gas line to the 1/2 inch piping that extends from the Gas Burner. A 1/2 inch N.P.T. -
Page 22: Venting Instructions
VENTING INSTRUCTIONS 1. It is recommended that the model SPX-300 oven be vented as shown on page 23 or 24. 2. It is recommended that Local Code Officials and a Commercial Kitchen Ventilation Contractor be consulted prior to installation. 3. Provisions must be made for adequate air supply for the oven. If the oven is to be installed in a sealed room or building utilizing exhaust fans, the room must be supplied with a return air system. - Page 23 If the room has negative air pressure smoke could escape into the room during operation. SUPPLIED BY SOUTHERN PRIDE: Smoke Extractor Damper with 10” chimney adapter plate. SUPPLIED BY CUSTOMER: 6” All Fuel Chimney, 6” Rain Cap, and all accessories necessary for installation of the 6”...
-
Page 24: Replacement Parts List
1087 1088 Ignition Electrode LP 1090 Digital Control 0392 Type “K” Thermocouple Rotisserie Axle Bearing 25060 Food Rack 12” x 29” SPX-300 2005 Firebox Door Gasket 2029 -1 Firebox Gasket Clamp 2029-2 Mechanical Door Closer 2110 Meat Door Hinge 2116PC 8”... -
Page 25: Warranty
Southern Pride has no control. The effect of corrosion, fire and normal wear on the equipment or component parts is not covered by this warranty.
Need help?
Do you have a question about the SPX-300 and is the answer not in the manual?
Questions and answers