Table of Contents
Advertisement
Quick Links
Advertisement
Table of Contents

Related Manuals for HIKVISION DS-3 Series


Summary of Contents for HIKVISION DS-3 Series
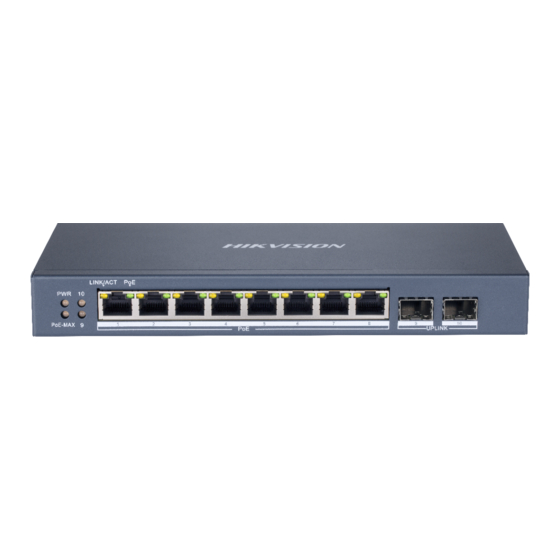
- Page 1 Smart Managed Switch Web User Manual...
-
Page 2: Legal Information
● Products described in this Document, which may include licenses obtained from third parties. Any part of the Document, including text, pictures, graphics, etc., belongs to Hikvision. No part ● of this Document may be excerpted, copied, translated, or modified in whole or in part by any means without written permission. - Page 3 Smart Managed Switch Web User Manual PRODUCT, EVEN IF HIKVISION HAS BEEN ADVISED OF THE POSSIBILITY OF SUCH DAMAGES OR LOSS. YOU ACKNOWLEDGE THAT THE NATURE OF THE INTERNET PROVIDES FOR INHERENT SECURITY ● RISKS, AND HIKVISION SHALL NOT TAKE ANY RESPONSIBILITIES FOR ABNORMAL OPERATION, PRIVACY LEAKAGE OR OTHER DAMAGES RESULTING FROM CYBER-ATTACK, HACKER ATTACK, VIRUS INFECTION, OR OTHER INTERNET SECURITY RISKS;...
-
Page 4: Applicable Models
Smart Managed Switch Web User Manual Preface Applicable Models This manual is applicable to smart managed switches. About Defaults Default administrator account: admin ● Super IP address: 10.180.190.200 ● Note The default user name admin needs to be activated for first-time login. ●... -
Page 5: Table Of Contents
Smart Managed Switch Web User Manual Contents Chapter 1 Introduction ....................... 1 Chapter 2 Activation and Login ....................2 Chapter 3 Device Information ..................... 5 3.1 Device Overview ........................5 3.2 Port Status ..........................9 3.3 Network Status ........................10 Chapter 4 Device Configuration .................... -
Page 6: Chapter 1 Introduction
Smart Managed Switch Web User Manual Chapter 1 Introduction Smart managed switches support management via web, supporting functions such as activation and login, device overview, network configuration, device configuration, and system maintenance. Note The functions supported vary with device models. If there are differences between the figures shown in this manual and the actual interfaces of your device, the latter prevails. -
Page 7: Chapter 2 Activation And Login
Smart Managed Switch Web User Manual Chapter 2 Activation and Login If you use the switch for the first time, you need to activate it and configure the password. Before You Start Ensure that your computer and switch are on the same network segment. Steps Note All figures in this manual are for illustration purpose only. - Page 8 Smart Managed Switch Web User Manual Note You can obtain the default IP address of the switch using the SADP tool. ● You are recommended to use the following web browsers: Microsoft Edge 89 or later, Google ● Chrome 89 or later, and Firefox 78 or later. 2.
- Page 9 Smart Managed Switch Web User Manual 2) Modify the IPv4 address, IPv4 subnet mask, default IPv4 gateway, preferred DNS address, and alternate DNS address as required, or enable DHCP for automatic IP address assignment. Note You are recommended to modify the network configurations to better manage your switch. 3) Log in to the switch web again with the new IP address after modification.
-
Page 10: Chapter 3 Device Information
Smart Managed Switch Web User Manual Chapter 3 Device Information After logging in to the switch web, you can obtain detailed information about the switch, including the device overview information, port status information, and network status information. 3.1 Device Overview You can view or edit the device overview information on the Overview page. -
Page 11: Device Name
Smart Managed Switch Web User Manual Figure 3-1 View Basic Device Information Device Name You can view the current device name or click next to it to customize the device name on the Overview page. Figure 3-2 Edit Device Name System Uptime You can also view the device's system uptime in the upper right corner of the Overview page. - Page 12 Smart Managed Switch Web User Manual Figure 3-3 View System Uptime VLANs Added You can quickly view the number of VLANs that have been added, or click to go to the VLAN Management page for VLAN configuration. Figure 3-4 View Number of VLANs Added Note You can also view the maximum number of VLANs allowed by the device, for example, 4094 in the figure above.
- Page 13 Smart Managed Switch Web User Manual Figure 3-5 View Cloud Platform Connection Status (Connected) If the cloud platform is disconnected, click Refresh to reconnect, or click Diagnose to find out ● the cause of the connection failure and go to the cloud platform configuration page as prompted for cloud platform configuration.
-
Page 14: Port Status
Smart Managed Switch Web User Manual 3.2 Port Status The Overview page provides a visual representation of the physical ports and shows the connection or power supply status of each port, making it easier for users to manage switch ports. Port Panel The Port Panel module displays the connection and power supply status of each port. -
Page 15: Network Status
Smart Managed Switch Web User Manual Configure the rate and duplex mode of a port. The default value is Auto/Auto. You can select different combinations of rates and duplex modes as required. Flow Control Enable or disable flow control of a port. By default, flow control is enabled. Enabling flow control can effectively reduce the impact of large amounts of data on the network and maintain the stability of the network. -
Page 16: View Port Statistics
Smart Managed Switch Web User Manual Query Port MAC Address You can query the MAC address(es) learned by each port. Go to Network Monitoring → MAC Address , select the desired port from the Port drop-down list, and click Search. The MAC address(es) learned by the port and type(s) of the MAC address(es) are displayed in the list below. - Page 17 Smart Managed Switch Web User Manual Figure 3-13 Detect Cable Status Diagnose Network Ping is a function that helps to diagnose network connectivity and quickly locate network faults. 1. Click Network Monitoring → Ping . Figure 3-14 Ping 2. Enter a network server address in the IPv4 address field. 3.
-
Page 18: Chapter 4 Device Configuration
Smart Managed Switch Web User Manual Chapter 4 Device Configuration 4.1 Port Configuration 4.1.1 Configure Port Attributes The basic attributes can influence the working status of a port. Set the parameters as required. Steps 1. Go to L2 Configuration → Port Attributes . Figure 4-1 Configure Port Attributes 2. -
Page 19: Configure Link Aggregation
Smart Managed Switch Web User Manual 4.1.2 Configure Link Aggregation Link aggregation is used to combine multiple physical links together to make a logical high- bandwidth data path, which provides a stronger and faster network connection. Steps 1. Go to L2 Configuration → Link Aggregation . 2. -
Page 20: Configure Port Isolation
Smart Managed Switch Web User Manual 4.1.3 Configure Port Isolation Port isolation is a feature to add multiple ports to an isolation group so that ports in the same isolation group cannot communicate with each other. For example, by using port isolation function, you can achieve the goal of preventing PCs under different ports communicating with each other without configuring VLANs. - Page 21 Smart Managed Switch Web User Manual Figure 4-4 Configure Port Mirroring 2. Select the desired port(s) on the port panel as the mirrored port(s), and set the parameters as required. Note You can also click on the right to batch select or deselect all ports. Enable Enable or disable port mirroring of the selected port(s).
-
Page 22: Configure Long-Range Mode
Smart Managed Switch Web User Manual 4.1.5 Configure Long-Range Mode After the long-range mode is enabled for a port, the transmission distance of the port can reach 300 meters at a rate of 10 Mbps. Steps 1. Go to L2 Configuration → Long-Range Mode . Figure 4-5 Configure Long-Range Mode 2. -
Page 23: Port Poe Configuration
Smart Managed Switch Web User Manual Figure 4-6 Configure High-Priority Port 2. In High-Priority Port Mode, toggle on Enable to batch enable high-priority ports. Note The number of high-priority ports varies with different device models. Please refer to the actual situation. -
Page 24: Vlan Configuration
Smart Managed Switch Web User Manual Note You can click to batch select or deselect all ports. PoE Status View the PoE enabling status and output power of PoE ports in the Port PoE Status list. 4.3 VLAN Configuration Virtual Local Area Networks (VLANs) separate an existing physical network into multiple logical networks. -
Page 25: Configure Port Vlan
Smart Managed Switch Web User Manual Note The VLAN ID should be an integer between 1 and the maximum number of VLANs allowed ● by the device. For example, if the maximum number of VLANs allowed is 4094, the VLAN ID should be integer between 1 and 4094. -
Page 26: Stp Configuration
Smart Managed Switch Web User Manual 3. Click Save. 4. Optional: View the VLAN configuration information of each port in the port VLAN details list. Figure 4-10 Port VLAN Details 4.4 STP Configuration Spanning Tree Protocol (STP) is a layer-2 link management protocol that provides path redundancy and prevents loops in a network topology. -
Page 27: Lldp Configuration
Smart Managed Switch Web User Manual Table 4-1 STP Parameters Parameter Description Bridge Priority The value ranges from 0 to 61440, in an increment of 4096. The default ● value is 32768. Valid values are 0, 4096, 8192, 12288, 16384, …, and 61440. - Page 28 Smart Managed Switch Web User Manual Figure 4-12 Configure LLDP Note After LLDP is enabled, network devices can discover each other, facilitating network topology drawing. 3. Optional: View the local port(s), MAC address(es) of peer device(s), and peer port(s) in the Neighbor Information list.
-
Page 29: Chapter 5 System Management
Smart Managed Switch Web User Manual Chapter 5 System Management 5.1 Network Configuration You can click on the home page to check Hik-Connect connection status, or go to System Management → Network Configuration for network configuration, cloud platform configuration, and SADP configuration. Network Configuration Figure 5-1 Configure Network Set the IPv4 address, IPv4 subnet mask, default IPv4 gateway, preferred DNS address, and alternate... - Page 30 Smart Managed Switch Web User Manual Figure 5-2 Configure Cloud Platform Note It takes several minutes for reconnecting to Hik-Connect service. SADP Configuration Figure 5-3 Configure SADP Enable SADP Server or SADP Agent as required.
-
Page 31: Remote Management
Smart Managed Switch Web User Manual Note After SADP server is enabled, devices supporting SADP can be searched and information about ● the devices is displayed. After SADP agent is enabled, query requests are sent to the LAN periodically (every minute) for ●... -
Page 32: Time Synchronization
Smart Managed Switch Web User Manual Note If Redirect HTTP to HTTPS is enabled, traffic accessed through port 80 will be automatically redirected to port 443. SSH: SSH is used for fault locating by technical support, and is not available to users. ●... -
Page 33: System Maintenance
Smart Managed Switch Web User Manual Figure 5-7 Configure Time with Hik-Connect Server 4. Click Save. 5.3 System Maintenance Go to System Management → System Maintenance to restart, upgrade, back up, or reset the device. Restart Device Figure 5-8 Restart In Restart, click Restart to remotely restart the switch. - Page 34 Smart Managed Switch Web User Manual Note - If upgrading failed or the device cannot function, please contact our technical support engineers. - The device will restart automatically to enter the login page after upgrade is completed. Back Up Device Export the configuration file for local backup.
-
Page 35: Log Management
Smart Managed Switch Web User Manual Note The device parameters cannot be recovered once being restored to factory defaults. ○ The device will restart automatically after being restored to factory defaults. ○ Import Device Parameters: Click to select the configuration file containing device ●... - Page 36 UD33916B...
Need help?
Do you have a question about the DS-3 Series and is the answer not in the manual?
Questions and answers