Table of Contents
Advertisement
Quick Links
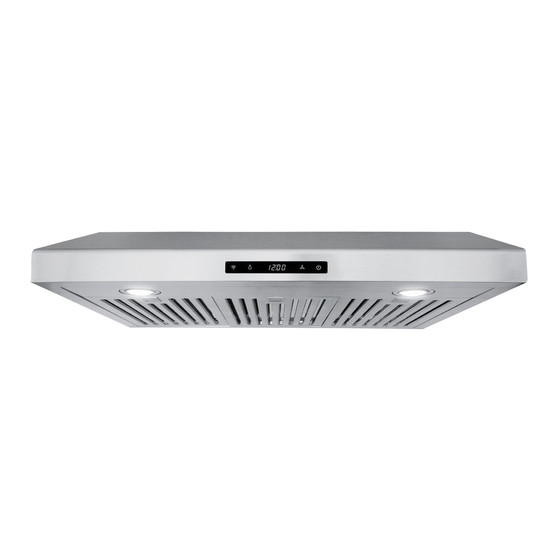
INSERT RANGE HOOD
COS-KS6U30(-BK)
COS-KS6U36(-BK)
KS RANGE HOOD SERIES
INSTALLATION INSTRUCTIONS
AND USE & CARE GUIDE
IMPORTANT:
READ AND SAVE THESE INSTRUCTIONS.
FOR RESIDENTIAL USE ONLY.
INSTALLER:
PLEASE LEAVE THESE INSTRUCTIONS WITH THIS UNIT FOR
THE OWNER.
OWNER:
PLEASE RETAIN THESE INSTRUCTIONS FOR FUTURE
REFERENCE.
Rev.24.04
Advertisement
Table of Contents

Related Manuals for Cosmo KS Series


Summary of Contents for Cosmo KS Series
- Page 1 INSERT RANGE HOOD COS-KS6U30(-BK) COS-KS6U36(-BK) KS RANGE HOOD SERIES INSTALLATION INSTRUCTIONS AND USE & CARE GUIDE IMPORTANT: READ AND SAVE THESE INSTRUCTIONS. FOR RESIDENTIAL USE ONLY. INSTALLER: PLEASE LEAVE THESE INSTRUCTIONS WITH THIS UNIT FOR THE OWNER. OWNER: PLEASE RETAIN THESE INSTRUCTIONS FOR FUTURE REFERENCE.
- Page 2 COSMO Appliances are designed according to the strictest safety and performance standard for the North American market. We follow the most advanced manufacturing philosophy.
-
Page 3: Table Of Contents
TABLE OF CONTENTS RANGE HOOD SAFETY ..................4 Important Safety Instructions ................. 5 INSTALLATION REQUIREMENTS ................ 7 Tools and Parts ......................7 Location Requirements .................... 9 Product Dimensions ....................10 Cabinet Clearances ....................12 Venting Requirements ..................... 13 Electrical Requirements ................... 17 INSTALLATION INSTRUCTIONS ................. -
Page 4: Range Hood Safety
RANGE HOOD SAFETY READ ALL INSTRUCTIONS BEFORE USING THE APPLIANCE Your safety and the safety of others are very important. We have provided many important safety messages in this manual and on your appliance. Always read and obey all safety messages. This is the safety alert symbol. -
Page 5: Important Safety Instructions
IMPORTANT SAFETY INSTRUCTIONS WARNING: TO REDUCE THE RISK OF - CAUTION: To reduce the risk FIRE, ELECTRIC SHOCK, OR INJURY of fire and to properly TO PERSONS, OBSERVE THE exhaust air, be sure to duct FOLLOWING: air outside - do not vent exhaust air into spaces •... - Page 6 IMPORTANT SAFETY INSTRUCTIONS • Always turn the hood ON when - The fire is small and cooking at high heat or when contained in the area where flambéing food (i.e. Crepes it started. Suzette, Cherries Jubilee, - The fire department is being Peppercorn Beef Flambé).
-
Page 7: Installation Requirements
INSTALLATION REQUIREMENTS Tools and Parts Gather the required tools and parts before starting installation. Read and follow the instructions provided with any tools listed here. Tools Needed • Level • Drill • 3/32" (2.5 mm) drill bit for pilot holes •... -
Page 8: Parts Supplied
Parts Supplied • Range hood (main core) with blower and LED lights installed • Metal filters (3) • L-shape wall mounting brackets (2) • Top round vent transition damper • Top rectangular vent transition damper • Top vent cover – for rear venting installations •... -
Page 9: Location Requirements
Location Requirements IMPORTANT: • Observe all governing codes and ordinances. Have a qualified technician install the range hood. It is the installer’s responsibility to comply with installation clearances specified on the model/serial/rating plate. The model/serial/rating plate is located inside the range hood on the housing of the blower motor assembly. -
Page 10: Product Dimensions
Product Dimensions 30" Model: COS-KS6U30(-BK) ¹⁄ in (1.2 cm) 1 ⁄ in (4.1 cm) 2 in (5.1 cm) 6 in (15.3 cm) 22 in (55.8 cm) 29 ¹⁄ in (75.0 cm) 1 ³⁄ in 26 ³⁄ in (3.5 cm) (68.0 cm) 2 ³⁄... - Page 11 36" Model: COS-K -KS S 6 6 U U 3 3 6 6(-BK) ¹⁄ in (1.2 cm) 1 ⁄ in (4.1 cm) 2 in (5.1 cm) 6 in (15.3 cm) 22 in (55.8 cm) 35 ⁄ in (90.0 cm) 2 ⁄ in 30 ⁄...
-
Page 12: Cabinet Clearances
Cabinet Clearances Given dimensions are minimum clearances. Under Cabinet Range Hood 12" (30.5 cm) Overhead Cabinet Depth Max. 36" (91.4 cm) 18" Min. 25 ⁄ " (65.0 cm) (45.7 cm) 36" (91.4 cm) Model 30" Model: COS-KS6U30(-BK) 29 ¹⁄ " (75.0 cm) 36"... -
Page 13: Venting Requirements
Venting Requirements (Ducted installations only) • Duct system must terminate to the outdoors • Do not terminate the duct system in an attic or other enclosed area. • Do not use 4" (10.2 cm) laundry-type wall cap. • Use a 6" (15.2 cm) round metal duct or a 3 ¹⁄ " x 10" (8.3 x 25.4 cm) rectangular metal duct. -
Page 14: Venting Methods
Venting Methods • This range hood can be set for top venting or rear venting. A 6" (15.2 cm) round or a 3 ¼" x 10" (8.3 cm x 25.4 cm) rectangular duct system is recommended. The duct system needed for installation is not included. •... - Page 15 Calculating Duct System Length To calculate the length of the system you need, add the equivalent feet (meters) for each duct piece used in the system. Use no more than three 90° elbows. 6" (15.2 cm) Round Duct System Duct Piece 6"...
- Page 16 3 ¼" x 10" (8.3 cm x 25.4 cm) Rectangular Duct System Duct Piece 3 ¼" x 10" (8.3 cm x 25.4 cm) Rectangular 90° elbow 5.0 ft (1.5 m) Flat elbow 12.0 ft (3.7 m) 6" (15.2 cm) wall cap 0.0 ft (0.0 m) Maximum recommended duct length is 35 ft (10.7 m).
-
Page 17: Electrical Requirements
Electrical Requirements Observe all governing codes and ordinances. Ensure that the electrical installation is adequate and in conformance with National Electrical Code, ANSI/NFPA 70 (latest edition), or CSA Standards C22.1-94, Canadian Electrical Code, Part 1 and C22.2 No. 0-M91 (latest edition) and all local codes and ordinances. -
Page 18: Installation Instructions
INSTALLATION INSTRUCTIONS IMPORTANT: This appliance shall be installed only by authorized persons and in accordance with the manufacturer's installation instructions. This range hood is designed for adaptation to the following types of • Top Venting (Roof Venting) • Top Venting (Wall Venting) •... -
Page 19: Unpack Range
Unpack Range Hood • Remove installations parts carefully. Wear hand gloves to protect against sharp edges. • Confirm that all installations parts have been removed from the shipping carton and the range hood canopy. WARNING EXCESSIVE WEIGHT HAZARD • Use two or more people to move and install range hood. •... -
Page 20: Prepare Location
Prepare Location • It is recommended that the duct system be installed before the range hood is installed. The duct system needed for installation is not included. • Before making cutouts, make sure there is proper clearance within the ceiling or wall for duct fittings. 1. - Page 21 Prepare Wiring Hole 1. Determine and clearly mark a vertical centerline on the wall and cabinet in the area the vent opening will be made. Centerline 2. Mark a line distance "A" from the right of the centerline on the underside of the cabinet.
- Page 22 Prepare Venting Cutout Roof Venting Style 1 – Cut Openings for 6" (15.2 cm) Round Vent System 4 ¹⁄ " (11.5 cm) from wall Centerline To make a 6 ¹⁄ " (15.9 cm) circular vent opening on the underside of the cabinet bottom: 1.
- Page 23 Style 2 – Cut Openings for 3 ¼" x 10" (8.3 cm x 25.4 cm) Rectangular Vent System ¹³⁄ " (2.0 cm) from wall 4 ¹³⁄ " (12.2 cm) from wall Centerline To make a 4" x 10 ½" (10.2 cm x 26.7 cm) rectangular vent opening on the underside of cabinet bottom: 1.
- Page 24 Wall Venting Style 3 – Cut Openings for 3 ¼" x 10" (8.3 cm x 25.4 cm) Rectangular Vent System Cabinet Wood filler front strips (recessed cabinet bottoms only) ¹⁄ " (0.6 cm) 4 ¹⁄ " (10.8 cm) 5 ¼" 5 ¼"...
-
Page 25: Install Range Hood
Install Range Hood WARNING EXCESSIVE WEIGHT HAZARD • Use two or more people to move and install range hood. • Failure to do so can result in back or other injury. 1. Remove the metal filters. See the "Range Hood Care" section. 2. - Page 26 5. Use ³⁄ " (2.5 mm) drill bit to drill pilot holes on cabinet bottom or wood stud as shown. For keyhole mounting slots on wall without stud, use appropriate drill bit to drill pilot holes as shown and install the wall anchors for drywall or the M6 mounting screws for concrete wall.
- Page 27 Top Vent Transition Damper Installation 1. Attach the top vent transition damper using the 4 x 8 mm screws supplied. Round vent transition damper for 6" (15.2 cm) round duct system. Rectangular vent transition damper for 3 ¼" x 10" (8.3 cm x 25.4 cm) rectangular duct system.
- Page 28 Rear Vent Transition Damper Installation 1. Remove the screws around the rear vent knockout, and remove the knockout. 2. Attach the rear rectangular vent transition damper using the 4 x 8 mm screws supplied.
- Page 29 3. Attach the top vent cover using the 4 x 8 mm screws provided. 4. Remove any tape from damper flap if present. Install Range Hood to Cabinet/Wall 1. Using 2 people, lift range hood into final location. Feed power cord through the wiring hole in the cabinet bottom.
-
Page 30: Complete Installation
Complete Installation WARNING ELECTRIC SHOCK HAZARD • Disconnect power before servicing. • Replace all parts and panels before operating. • Plug into a grounded 3-prong outlet. • Failure to do so can result in death, fire, or electrical shock 1. Connect duct system to hood. Seal joints with clamps to make secure and airtight. -
Page 31: Range Hood Use
RANGE HOOD USE The range hood is designed to remove smoke, cooking vapors and odors from the cooktop area. For best results, start the range hood before cooking and allow it to operate several minutes after the cooking is complete to clear all smoke and odors from the kitchen. -
Page 32: Operating The Blower
Operating the Blower The Blower Speed button (D) sets the desired speed and control the sound level for quiet operation. The speed can be changed anytime during fan operation by pressing the blower speed button repeatedly. The Blower Power On/Off button (E) turns the blower power on or off. To turn the blower on •... -
Page 33: Range Hood Care
RANGE HOOD CARE Cleaning IMPORTANT: • Clean the range hood and metal grease filter frequently according to the following instructions. Replace metal grease filter before operating range hood. • Be sure the power is off/disconnected and the lights are cool before cleaning the range hood. -
Page 34: Replacing The Led Light
Replacing the LED Light Turn off the range hood and allow the LED Lights to cool. Replace the LED lights using tissue or wearing cotton/latex gloves to handle them. 1. Disconnect power. 2. Rotate light counterclockwise to unlock and pull out. Wearing latex gloves may offer a better grip. -
Page 35: Limited Warranty
LIMITED WARRANTY WARRANTY AND SERVICE TO RECEIVE WARRANTY SERVICE, YOUR PRODUCT MUST BE REGISTERED. TO REGISTER AND REVIEW FULL WARRANTY DETAILS, VISIT: WWW.COSMOAPPLIANCES.COM/WARRANTY SCAN TO REGISTER CUSTOMER SUPPORT TO CHAT WITH US LIVE FOR ASSISTANCE, VISIT: WWW.COSMOAPPLIANCES.COM/CHAT SCAN TO CHAT... - Page 36 IMPORTANT Do Not Return This Product To The Store If you have a problem with this product, please contact COSMO Customer Support at +1 (888) 784-3108 DATED PROOF OF PURCHASE, MODEL #, AND SERIAL # REQUIRED FOR WARRANTY SERVICE. IMPORTANT Ne pas Réexpédier ce Produit au Magasin...
- Page 37 MEMO...
- Page 38 MEMO...
- Page 39 MEMO...
- Page 40 APPLIANCES Cosmo is constantly making efforts to improve the quality and performance of our products, so we may make changes to our appliances without updating this manual. Electronic version of this manual is available at: www.cosmoappliances.com...
Need help?
Do you have a question about the KS Series and is the answer not in the manual?
Questions and answers