3D Systems NextDent 5100 User Manual
Hide thumbs
Also See for NextDent 5100:
- Setup (4 pages) ,
- Quick start manual (2 pages) ,
- User manual (163 pages)
Table of Contents
Advertisement
Quick Links
8/12/22, 12:32 PM
User Guide
NOTE: Use this page to print the User Guide as a whole. Scroll down to the bottom of the page and click the
button. On the page in the new tab, press ctrl+P (cmd+P on Mac) to print the document.
NOTE: The most-up-to-date User Guide for the NextDent 5100 can be found at http://support.3dsystems.com/nextdent-5100.
infocenter.3dsystems.com/nextdent5100/print/book/export/html/526
User Guide
N e x t D e n t 5 1 0 0
User Guide
Rev. L, P/N 42-D109
Original Instructions
®
1/122
Advertisement
Table of Contents

Related Manuals for 3D Systems NextDent 5100


Summary of Contents for 3D Systems NextDent 5100
- Page 1 NOTE: Use this page to print the User Guide as a whole. Scroll down to the bottom of the page and click the button. On the page in the new tab, press ctrl+P (cmd+P on Mac) to print the document. NOTE: The most-up-to-date User Guide for the NextDent 5100 can be found at http://support.3dsystems.com/nextdent-5100. ...
-
Page 2: Copyright And Corporate Identity
3D Systems may (but shall not be obligated to) make improvements to this document from time to time. However, the Licensed User acknowledges that at any time after the expiration of the date of issuance, 3D Systems may institute a periodic charge or fee payable by the Licensed User in return for ongoing receipt of improvements. - Page 3 The design of the radiation-delivery system is intended to prevent radiation from being aimed outside the area of the build chamber. The NextDent 5100 Printer has been evaluated to IEC 62471 and the internal UV light source classi ed as ‘Risk Group 2’ and does not pose a hazard due to aversion response to bright light or thermal discomfort.
-
Page 4: Alarms And Warnings
NOTE: A note signi es important information but not information of a critical content. Alarms and Warnings If you see an error message on the NextDent 5100 Printer's touch screen, x the issue to clear the error message before resuming operation. Environmental Safety The following are environmental issues concerning the NextDent 5100 Printer: Controlling waste heat is not required for normal operation of the NextDent 5100 Printer. -
Page 5: Print Material Characteristics
Print-Material Spill Containment A major print-material spill is unlikely during normal use of the NextDent 5100 Printer. However, there may be certain situations that require containment of a major resin spill. Your company has the responsibility to de ne what constitutes a major spill. Clean up spilled print material as quickly as possible, as material will cure under both natural and arti cial lighting. -
Page 6: Electrical Safety
In-Service Life In-service life of the print material is de ned as the useful life of the material after having been poured into the NextDent 5100's resin tray. The in-service life of print material greatly varies depending on material type, usage and environmental conditions. If the material is exposed to... -
Page 7: Safety Notice
Inhaling fumes from NextDent resin is irritating to the respiratory system. High atmospheric concentrations may lead to irritation of the respiratory tract, dizziness, headache and anesthetic effects. Do not operate the NextDent 5100 Printer without its carbon lter in place. Normal operation of the printer with lter in place should not emit fumes. - Page 8 8/12/22, 12:32 PM User Guide Item Description Label Product Label - Contains system information and certi cation symbols Optical-Radiation Warning Sticker Risk Group 2 - Possible hazardous optical radiation emitted from the product. Do not stare at operating lamp. May be harmful to the eyes. ...
-
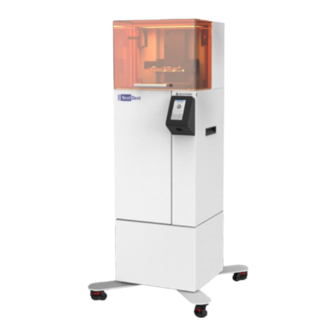
Page 9: Upper Build Chamber
8/12/22, 12:32 PM User Guide Overview NextDent 5100 Printer Components Upper Build Chamber - Contains the elevator, elevator arms, resin tray, and print platform Lower Build Chamber - Contains the projector, controller computer, and other components. The operator does not have access to view inside this area, except to remove/replace the catch tray. -
Page 10: Catch Tray
WARNING: THE OPERATOR DOES NOT HAVE ACCESS TO THE COMPONENTS OF THE LOWER CHAMBER BEYOND WHAT IS OUTLINED ON THIS PAGE. DO NOT REMOVE THE PLATE COVERING THIS CHAMBER. IT IS ONLY TO BE ACCESSED BY 3D SYSTEMS SERVICE PERSONNEL. Touch Screen and QR Code Scanner Touch Screen - used to control the actions of the printer and adjust printer settings... - Page 11 8/12/22, 12:32 PM User Guide Catch-Tray Glass - Allows UV radiation to pass through the catch tray to the bottom layer of print material. Collection Areas - The catch tray is designed such that any resin spilled over it will be channeled into these areas.
- Page 12 Resin Tray You will hand-pour resin into the resin tray before printing. The NextDent 5100 Printer works with all NextDent™ print materials, allowing the printer to work for many different dental applications. The NextDent 5100 Printer comes with one resin tray per machine purchased. Purchasing multiple resin trays gives the user the ability to easily print with two different materials on one machine. The more resin trays you have, the more...
- Page 13 8/12/22, 12:32 PM User Guide Resin Tray Garage The resin-tray garage can be used to store a resin tray with resin outside the machine, keeping UV light and contaminates out. The lid can also be used to cover the resin tray while in the machine. WEAR GLOVES: DUE TO THE POSSIBILITY OF RESIN BEING ON THE THE RESIN-TRAY GARAGE, WEAR 100% NITRILE GLOVES WHENEVER HANDLING IT, EVEN IF IT APPEARS CLEAN.
-
Page 14: Part Cleaning
8/12/22, 12:32 PM User Guide Carbon Filter Bracket - Holds the carbon lter that minimizes fumes coming out of the printer Air Filter Bracket - Filters the air being pulled in by the cooling fan Power Inlet - Plug the female end of the printer's power cable into this inlet Ethernet Port - Plug the supplied Ethernet cable into this port Product Label... - Page 15 LC-3DPrint Box Sold separately from the printer, this is the post-curing oven that is required for use with the NextDent 5100 Printer, as its resins' nished parts must qualify as medical devices. Please see the complete User Guide that comes packaged with the LC-3DPrint Box for full usage instructions. For information on resin stirring times, please refer to...
- Page 16 8/12/22, 12:32 PM User Guide Power Button - Switches machine on/off Front Panel - Graphical User Interface for oven. This shows information about the lamps, the time left for curing, and error messages. Oven Lid - Insert a printed part through this top opening. The lid has a safety interlock that stops the oven when the lid is open. Lamp Status Indicators - These indicators will turn red when the UV lamp pair needs to be changed.
- Page 17 8/12/22, 12:32 PM User Guide Start/Stop Button - Starts and stops bottle mixing Bottle Rollers - Rest the material bottles in between each of the pairs of rollers (please see the image below) Power Button - Turns the mixer on and off Power Inlet - Plug the female end of the power cord into this inlet Device Label...
- Page 18 8/12/22, 12:32 PM User Guide Speci cations and Requirements NextDent 5100 Printer Total Printer Footprint - without pedestal (xyz) 42.7 x 48.9 x 97.2 cm (16.8 x 19.3 x 38.3 in) Total Printer Footprint - with pedestal (xyz) 64.4 x 66.8 x 136.3 cm (25.4 x 26.3 x 53.6 in) Printer Weight 34.5 kg (76 lbs.)
- Page 19 8/12/22, 12:32 PM User Guide NOTE: All materials come in 1kg bottles. Name Description Color Brook eld Elongation Flexural Flexural Viscosity at at Break Strength Modulus 23ºC NextDent SG ® Translucent Orange 1.1-1.6 Pa·s > 80 MPa > 2000 MPa Biocompatible Class I material, developed for the printing of Surgical...
- Page 20 8/12/22, 12:32 PM User Guide Name Description Color Brook eld Elongation Flexural Flexural Viscosity at at Break Strength Modulus 23ºC NextDent Cast ® Purple 1.1 – 1.6 Easy burn out 3D Pa·s printing material, residue-free and suited for all kinds of purposes NextDent Try-In ®...
- Page 21 8/12/22, 12:32 PM User Guide If you have lost the IFU or SDS that came with your material bottle, you can print off a new copy at https://nextdent.com/. Click 3D Printing Materials at the top of the page, and then click the picture of your material. Each material page will offer all available documentation. Contact your reseller if you do not see the document you are looking for.
-
Page 22: Facility Requirements
Space Requirements User preferences, building codes, and equipment con guration help you to de ne the total oor area that your NextDent 5100 Printer will need. The NextDent system should be located in an environmentally controlled room. Locate the secondary post processing equipment and supplies in the same room or adjoining room, if possible. The gure below shows an ideal site con guration that minimizes the required movement of... - Page 23 8/12/22, 12:32 PM User Guide Optimal Site Layout (top view) - dimensions for part cleaner are based on a popular consumer ultrasonic cleaner Printer dimensions with pedestal infocenter.3dsystems.com/nextdent5100/print/book/export/html/526 23/122...
-
Page 24: Internet Connection
Internet Connection There must be a wired internet connection for the printer to connect to. The NextDent 5100 Printer communicates with a 3D Systems server and will not operate on a closed network. There is also no WiFi support. Once connected, the printer will use the internet as illustrated below. - Page 25 If any 3D Connect IP address is not white-listed, a 3D Connect error may appear on the printer (either code 3490120 or 3490121). This error will not affect printer operation and can be disregarded. 3D Connect sends the following data to 3D Systems servers from your printer: infocenter.3dsystems.com/nextdent5100/print/book/export/html/526...
- Page 26 8/12/22, 12:32 PM User Guide Device build.job_data* chamber_door.state lifetime_build_hours lifetime_on_hours printer_name printer_state serial_number Conditions fault.controller.internal_temperature fault.controller.internal_temperature_override fault.sata.drive.failure Build build.abort_code build.current_layer build.progress build.time_remaining Controller controller.internal_temperature controller.ip_address controller.mac_address controller.secure_device_read_failure_count controller.serial_number controller.version controller.version_date Exhaust Filter exhaust_ lter.carbon_ lter_element_hours Projector projector.led_power_commanded projector.led_pwm_value projector.led_total_hours projector.manual.compensation projector.power_cal_table projector.serial_number projector.total_hours...
- Page 27 If your power cord becomes damaged or lost, please ensure you order a replacement from 3D Systems for a power cord that is adequately rated for the machine. Do not replace the power cord with a cord that is not rated for the printer. 3D Systems will identify any parts that are required to be examined or supplied only by 3D Systems or its partners.
- Page 28 Humidity The optimal humidity in the NextDent 5100 Printer build chamber and lab will depend to a certain degree on the NextDent material selection. Regardless, the humidity should always be non-condensing and should not vary outside the range of 20 to 80% RH. Review your NextDent material information (SDS, Instructions for Use, and product labeling) for speci c information on recommended humidity levels.
-
Page 29: Network Access
Space and Location Selection You may choose to locate the part-washing, drying, and curing stations in the same room as the NextDent 5100 Printer or in a room adjoining the printer With either option, please consider the following: 1. -
Page 30: Connection To Ac Power
Uninterruptible Power Supply (UPS) - While a UPS is not required for use with the NextDent 5100 Printer, you may wish to use one for battery backup of your printer in the case of a power surge or outage. -
Page 31: System Delivery
Shipment Arrival The NextDent 5100 Printer will arrive in a variety of crates and/or pallets - the largest crate being for the NextDent 5100 Printer. Your shipment will consist of the following items:... -
Page 32: System Uncrating
Uncrating and installation of your NextDent system components. System Uncrating The uncrating and installation of the NextDent 5100 will be performed by the printer operator. The weight of the printer requires a minimum of two people to lift it safely. -
Page 33: Material Disposal
NextDent 5100 Advance Preparation Checklist NOTE: Unless governed by prior arrangement, 3D Systems is not responsible for loading 3D Sprint software on the user’s workstation(s). Thus, BEFORE THE 3D PRINTER SYSTEM ARRIVES, ensure that your workstation is capable of supporting the requirements of both 3D Sprint software and communication with the printer via your network. -
Page 34: Network Information
5100 Facility Requirements Guide. Once the printer is installed, we agree not to alter any of the required speci cations listed in this manual without consulting with a 3D Systems’ Customer Service Representative or certi ed partner. If alterations are made without consulting 3D Systems, it may void the system’s warranty. -
Page 35: Setting Up Your Printer
8/12/22, 12:32 PM User Guide Setting Up Your Printer The following items and accessories are contained in the printer package. NextDent 5100 Printer Resin Tray - Contains the print material during part building. Print Platform (x2) - The 3D-printed part adheres to the print platform during part building. - Page 36 8/12/22, 12:32 PM User Guide Punch Tool - Used to remove the printed part from the print platform from underneath, and to clear the print-platform holes of partially cured resin. Carbon Filter - Prevents print-material fumes from exiting the process chamber. You will install this in the Carbon-Filter Bracket, as seen below.
-
Page 37: Necessary Accessories
NextDent™ print materials for end-use parts to be certi ed as medical devices. Usage of another UV oven will nullify this certi cation. Material Bottles - The NextDent 5100 Printer uses various NextDent materials, which come in 1kg bottles. Please see the section Printer Materials and Properties for a complete list of currently supported print materials. -
Page 38: Unpacking The Printer
8/12/22, 12:32 PM User Guide Pedestal - to sit your NextDent 5100 Printer on top of and store frequently used tools. Unpacking the Printer Please see Printer unpacking instructions in the Quick-Start Guide on the page Guides Inside the Box. Unpacking the Pedestal... - Page 39 8/12/22, 12:32 PM User Guide 3. To nest from left to right (facing the printers) position the printer on the left such that the front-right foot can roll over and clear the front-left foot of the printer on the right. 4. Slowly move the left printer into place, backing the front-right foot as far back as it can 5.
- Page 40 Ensure the power cable is completely inserted in both the power inlet and wall outlet. Ensure that any power strip or UPS the printer is plugged into is turned on. If you have tried all these options, and the printer will not turn on, contact 3D Systems Service.
- Page 41 CAUTION: It is vital that you register your printer to activate your Service warranty. Connect Printer to WiFi with Router While the printer does not have embedded WiFi, you can connect the printer to WiFi via third-party products. 3D Systems recommends the Link Travel Router.
- Page 42 8/12/22, 12:32 PM User Guide 9. The router will reboot. Once this occurs, reconnect to the router via http://tplinkwi .net/ and go to DHCP. Set the IP Range for the device to provide. Set the Default Gateway to the master DHCP server on the network. c.
- Page 43 8/12/22, 12:32 PM User Guide 14. In Sprint, search for the printer by its new IP address and connect to it. infocenter.3dsystems.com/nextdent5100/print/book/export/html/526 43/122...
-
Page 44: System Requirements And Setup
8/12/22, 12:32 PM User Guide System Requirements and Setup System Requirements Included with the system is the part-preparation Sprint™) software. This application provides part preparation and part building functionality. The 3D Sprint software is installed on a separate, customer-supplied computer. The following page contains the minimum computer con guration requirements for the 3D Sprint computer: https://support.3dsystems.com/s/article/3D-Sprint?language=en_US. - Page 45 3D Sprint Part Orientation Guide For each dental indication that can be printed on the NextDent 5100, part orientation in the part-preparation software is key. This section provides a quick reference for the best ways to orient parts in 3D Sprint for any print material available for the NextDent 5100. This will help ensure build success and maximum usage of the printable area.
- Page 46 8/12/22, 12:32 PM User Guide Indication Build File Orientation Number of Units on 124 x 70 mm Print Platform Denture 3D+ (60-70mm height) 60° SG (Quarter, 24mm height) Horizontal C&B MFH (13mm height) 45° C&B MFH - Full Dental Arch Horizontal Ortho Rigid (14mm height) Horizontal infocenter.3dsystems.com/nextdent5100/print/book/export/html/526...
- Page 47 8/12/22, 12:32 PM User Guide Indication Build File Orientation Number of Units on 124 x 70 mm Print Platform Ortho IBT (11mm height) Horizontal Model 2.0 Prothsodontic (23mm height) Horizontal Model 2.0 Orthodontic Orthodontic "horseshoe" - Vertical Orthodontic full - Horizontal Model 2.0 Premium ...
- Page 48 8/12/22, 12:32 PM User Guide Indication Build File Orientation Number of Units on 124 x 70 mm Print Platform Model 2.0 Ortho Stacked Ortho Stacked Tray (71mm height) Vertical Gingiva Mask Vertical Cast - Coping (crown) (13mm height) 45° infocenter.3dsystems.com/nextdent5100/print/book/export/html/526 48/122...
- Page 49 8/12/22, 12:32 PM User Guide Indication Build File Orientation Number of Units on 124 x 70 mm Print Platform Cast - Replaceable Partial Denture (16mm height) Horizontal Try-In 30° Print-Material Styles Chart The following chart summarizes the different combinations of resins, resin shades, and build styles that are available to choose from in 3D Sprint.
- Page 50 Accuracy Wizard in 3D Sprint to troubleshoot such issues. Each NextDent 5100 printer will vary slightly in accuracy. If you have multiple printers, you will need to set the accuracy for each one separately. To do this, click the Printer icon in the upper left, select each printer one-by-one, and run the steps in this section for each. Additionally, you will need to run the wizard for each Material/Build Style combination you use.
- Page 51 8/12/22, 12:32 PM User Guide 5. If you are connected to the printer, click ADD REFERENCE BUILD TO QUEUE. The le that you created will show on the touch screen in the printer's queue . Run the printing process, as outlined in the section Start Printing.
- Page 52 8/12/22, 12:32 PM User Guide 15. At any time, you can verify that your accuracy values are still valid by running the veri cation .f4x le again. Go to Reference Builds > Load Reference Build File. This will automatically place the reference build parts onto the platform with proper supports and orientation.
-
Page 53: Operation
Changing the Air Filter and Carbon Filter Touch Screen Overview The NextDent 5100 has a touch-screen-based Graphical User Interface (GUI), which is used to control the actions of the printer and adjust printer settings. Please use the following guidelines when using the GUI. -
Page 54: Queue Tab
8/12/22, 12:32 PM User Guide Status Tab - Tap this tab at any time to return to the "Status" screen. Build File Name - The name of the build le sent over from 3D Sprint. Print Preview - Shows the 3D model currently being printed Current Resin - This is the resin that is currently loaded on the printer. -
Page 55: Material Tab
8/12/22, 12:32 PM User Guide Back - Tap this button to go back to the default queue screen. Move Up - Tap this button to move the job one space up in the queue. Move Down - Tap this button to move the job one space down in the queue. Move to Top - Tap this button to move the job to the top of the queue. -
Page 56: Network Settings
- Hardware address of the printer Projector Power Settings - When directed by your reseller or 3D Systems Service to do so, tapping this button opens a screen where projector power can be adjusted. CAUTION: DO NOT open this screen unless directed to do so by your reseller or 3D Systems Service. -
Page 57: Network Diagnostics
8/12/22, 12:32 PM User Guide DHCP - a network protocol that enables a server to automatically assign an IP address to a computer from a de ned range of numbers (i.e., a scope) con gured for a given network. Uncheck this box to enable editing of the IP Address, Subnet Mask, Gateway, and DNS Servers. IP Address - The numerical address given to your printer on your network. For display only. -
Page 58: Firmware Updates
8/12/22, 12:32 PM User Guide If you your printer to connect to the internet via a proxy server, you can go to Settings > Network Settings > Proxy. The screen has elds you will need to ll in with your proxy server information. Proxy Toggle - Turns the proxy connection on/off IP Address... - Page 59 Update Printer Firmware via 3D Sprint Whenever you open 3D Sprint, as long as the NextDent 5100 is set as your default printer, the system will always check to see if your printer has the most up-to-date rmware. If the rmware is not up-to-date, Sprint will show you a popup prompt to update it. Click the button to update. If you choose to update the rmware at a later date, please close the popup and follow the instructions below when you are ready to update.
- Page 60 Prepare and Install the Resin Tray Resin Tray Guidelines The membrane contained within each resin tray is the most fragile component of the NextDent 5100 Printer. It must be handled with care. Follow all resin-tray guidelines and procedures to avoid membrane damage and failure.
- Page 61 9. Uncovered resin trays should not be left outside the NextDent 5100 Printer when containing any amount of print material. Material will cure when exposed to ambient light. Cured material is extremely di cult to remove from the resin-tray membrane without causing damage. If you store a resin tray containing material outside the printer, use the resin-tray garage and store the tray in a cool, dark place.
- Page 62 8/12/22, 12:32 PM User Guide 2. Push in the tension-arm release lever on the front of the tension arm and lift up the tension arm. The arm will stay in place in the up position. 3. Carefully lower the resin tray into place, concave side up, as seen at the right. It should t snugly in the holder on the chassis.
- Page 63 8/12/22, 12:32 PM User Guide 2. The scanner below the touch screen will be activated and you will see a screen like the one at the right. Hold your material bottle's QR code in the path of the scanner such that the center dot is in the middle of the QR code (see image below).
- Page 64 8/12/22, 12:32 PM User Guide 7. Reinstall the print platform. . Install a new resin tray or reinstall the cleaned old one, as per the section Install Resin Tray. 9. If this is a new resin tray, label this tray with the same naming convention used in Step 5. 10.
- Page 65 8/12/22, 12:32 PM User Guide As for part-drying times, these can vary depending on your drying method. Please see the section Part Drying for more information. Name Bottle Shaking Time Bottle Mixing Time Required (LC- Stirring Time Curing Before Mixer Use (*see 3DMixer) Required (in resin Time in...
- Page 66 For biocompatible materials, those that are CE certi ed as a medical device, you can NOT mix materials that come from two different lot numbers, even if they are the same material type. Doing so will compromise the ability of 3D Systems to reconcile any issues that might arise with these materials.
- Page 67 8/12/22, 12:32 PM User Guide 1. Before pouring the material into the resin tray, be sure you do the following: a. Mix the material on the NextDent LC-3DMixer for time speci ed for your material in the Material Stirring and Curing Chart. CAUTION: Failure to su ciently mix materials before each build may result in color deviation and/or print failure.
- Page 68 8/12/22, 12:32 PM User Guide CAUTION: Ensure that the comb is clean before each use. To clean the comb, wipe it with a nonabrasive cloth and the recommended solvent. 1. Run the comb through the resin, with the sharp end (A) facing down. Grip the comb on the indented gripper (B).
-
Page 69: Install Print Platform
8/12/22, 12:32 PM User Guide Prepare and Install the Print Platform Print Platform Guidelines Print platforms should be treated with care in order to preserve their shape and coating. Avoid dropping print platforms. Print platforms should be thoroughly cleaned and inspected after every use to ensure print adhesion, to ensure that two different resins do not mix, and to avoid resin- tray membrane damage. -
Page 70: Start Printing
Ensure the print platform is fully seated and level. Magnets will secure the platform in position. If you feel there is an issue with how the print platform is sitting on the elevator arms, do not build on the printer. Contact 3D Systems customer service. Triangular grooves... - Page 71 8/12/22, 12:32 PM User Guide 2. The QR-code scanner below the touch screen will be activated and the printer will ask you to scan a bottle of the print material sent over in the build le from 3D Sprint. You will see a screen similar to the one at the right. Ensure you are scanning the correct material bottle and hold the bottle's QR code in the path of the scanner such that the center dot is in the middle of the QR code.
- Page 72 8/12/22, 12:32 PM User Guide 5. Tap Start Job button. . You will see a screen like the one at the right, with the progress bar showing the "percent complete" of the print job. You will also see a print preview of what is currently printing. You may abort the print job at any time by tapping the Abort button.
- Page 73 8/12/22, 12:32 PM User Guide 1. At any time, even during printing, you may insert a USB device with .f4x or .pxl les on it. The printer will automatically look for these les and show the screen at the right if it nds them. Tap Dismiss if you do not wish to transfer USB les at this time.
- Page 74 8/12/22, 12:32 PM User Guide 1. In 3D Sprint, click Add to Queue. This will automatically send the build le as a .f4x le. 2. The print job will appear as pending in the queue for up to ve minutes before being able to print. NOTE: The F4X le format will slice the le on the printer itself, as opposed to the PXL le format, which slices the le in 3D Sprint before outputting it.
- Page 75 QR Code Override When you scan a bottle's QR code, there could be an error in reading the code itself. You should contact 3D Systems Customer Service to let them know you have a faulty QR code on your bottle. However, it is possible to continue printing for a limited number of builds by overriding the QR code requirement.
- Page 76 If you do not see your resin listed, contact 3D Systems Customer Service. 4. Once you have selected a bottle, you will see a con rmation screen like the one at the right. Tap...
- Page 77 QR code requirement anymore. Tap Try Again to scan your bottle again or scan a new bottle. Contact 3D Systems Customer Service for more information. Abort a Print Job There are two ways that you may abort the print job: 1.
- Page 78 8/12/22, 12:32 PM User Guide The printer has three safety sensors that, when tripped, will abort the current print job without warning. In any of these cases, you will see the screen at the right and the elevator will move to the o oad position. - Because the resin cures with UV light, exposure of the printed part during printing to any other light besides that of the projector can cause a failed build and can cure the resin in the resin tray.
-
Page 79: Change Air Filter
8/12/22, 12:32 PM User Guide 1. Once the build is aborted in either case, the printer's Status screen will appear like the one at the right. You can take the following actions: a. Tap the Reprint button to restart the build. This will begin the printing process again from Step 1 in the section Start Printing. - Page 80 8/12/22, 12:32 PM User Guide 2. Pull the lter out by the cardboard. Discard the lter with your normal trash. 3. Inspect the new lter to ensure that it is not damaged in anyway or dirty. Install your new air lter with the convex part facing out.
- Page 81 8/12/22, 12:32 PM User Guide 3. Inspect the new carbon lter to ensure that it is not damaged in any way or dirty. Install the lter inside the empty bracket. 4. Secure the carbon- lter bracket in place with the four thumb screws. When Printer is Idle / Sleep Mode When the printer is idle, be mindful of the following: 1.
- Page 82 8/12/22, 12:32 PM User Guide 2. On the printer, tap the button to open the Settings screen. Tap the Resin Tray Cleaning Tool icon. 3. You will see the screen at the right. Tap the Clean Tray button. 4. If you have not done so, remove the print platform. Ensure printer lid and front door are closed and tap Start.
- Page 83 8/12/22, 12:32 PM User Guide 5. The cleaning print will now begin. This build cannot be aborted, even if you open the lid and front door. It must complete once it is started. You will note there is a progress bar on the screen and a Remaining Time indicator.
-
Page 84: Post Processing
8/12/22, 12:32 PM User Guide Post Processing Introduction Once your 3D build has completed, the part on the platform is considered green until it has been through post-processing. A green part must be handled with nitrile gloves at all times. This section describes how to post-process the part, rendering it safe to handle without nitrile gloves. You will need lint-free paper towels (or absorbent cloth) to catch resin that may drip from the part, as well as two stainless-steel or glass containers in which to submerge the part in >90% alcohol solvent. - Page 85 8/12/22, 12:32 PM User Guide 4. If you have another print job in your 3D Sprint queue, or if you want to reprint the same job, you may now insert a clean print platform, as the screen in Step 1 suggests. Closing the printer lid at this time will show the screen at the right, whether you insert a new platform or not.
-
Page 86: Cleaning Parts Using An Ultrasonic Cleaner
If you are running Ortho IBT resin, you MUST use Ethanol as your cleaning solvent. Do not use IPA. Cleaning Procedure While the User Guide for your ultrasonic cleaner will provide speci c-use instructions, the steps outlined below describe how 3D Systems recommends cleaning build parts via an ultrasonic cleaner. ... - Page 87 8/12/22, 12:32 PM User Guide 2. Wearing nitrile gloves, place the printed part inside 1st Bath container. Pour >90% alcohol solvent into the container until you completely submerge the printed part. Used >90% alcohol solvent may be used for this rst bath, unless it is completely saturated.
- Page 88 8/12/22, 12:32 PM User Guide 1. Always dry printed parts over a tub, lab paper towel, or absorbent cloth. Do NOT dry the part over a sink or tub that drains to normal wastewater. 2. Discard any disposable towels used in the drying process according to all local, state and federal regulations. These towels have been in contact with uncured resin and solvents, and must be treated as such.
- Page 89 8/12/22, 12:32 PM User Guide CAUTION: Do not clean the print platform or resin tray in a sink or tub that drains into wastewater. These components must be cleaned in a self-contained tub and the solvent/resin mix must be discarded according to all local, state, and federal regulations. WEAR 100% NITRILE GLOVES THROUGHOUT THIS PROCEDURE.
- Page 90 8/12/22, 12:32 PM User Guide 5. Inspect the platform, particularly the holes on the at surface, to ensure no partially cured resin remains. If you nd resin or partially cured bits on the platform at this point, follow the steps in this section again on the problem areas.
- Page 91 8/12/22, 12:32 PM User Guide 5. Use the Punch Tool if desired to punch bigger chunks of material through the platform. Use the Wire Brush to scrape the remaining partially cured resin from the platform . Wipe down the platform with a lint-free paper towel or nonabrasive cloth. 7.
- Page 92 8/12/22, 12:32 PM User Guide 1. Push in the tension-arm release lever and lift tension arm. 2. Using nitrile gloves and using both hands, slowly lift the resin tray out of the printer. CAUTION: Take care not to hit the resin tray on the elevator arms, printer lid, or other printer components during removal.
- Page 93 8/12/22, 12:32 PM User Guide 5. Pour approximately 250 mL of >90% alcohol solvent into resin tray and use the Part-Cleaning Brush to gently agitate the resin on the membrane and tray edges. . After brushing all surfaces that were in contact with resin, discard dirty solvent according to all government regulations.
- Page 94 8/12/22, 12:32 PM User Guide 11. Inspect the resin tray to ensure no uncured resin and/or foreign debris remain. Discard all paper towels/wipes used throughout this procedure according to all government regulations. The resin tray can now be stored in the Resin-Tray Garage or lled with new print material for printing, according to the section Resin-Tray Material Cross-Usage.
- Page 95 8/12/22, 12:32 PM User Guide Printer Error Message Reference NOTE: Error codes are supported in rmware v1.1.1 or higher. You might experience certain error messages during printer operation, or if the printer detects issues with printer components. Each error message will be accompanied by a numerical code, which you can use to look up troubleshooting steps in this guide. Error code Error text...
- Page 96 8/12/22, 12:32 PM User Guide Error code Error text How to clear the error 3441202 Software Update Not Found 1. Re-send upgrade to the printer. Aborts the build? No 2. Contact your reseller. Printer enters maintenance mode? No 3441203 Upgrade le has bad encryption 1.
- Page 97 Error text How to clear the error 3480102 No barcode detected 1. Reattempt scanning, using valid 3D Systems bottle label. Aborts the build? No 2. Reattempt scanning. Printer enters maintenance mode? No 3. Check bottle label is clear. 4. Check bar code scanner window is clean.
- Page 98 8/12/22, 12:32 PM User Guide Error code Error text How to clear the error Contact your reseller. 3490113 Print Aborted due to Bad Print Setup Aborts the build? Yes Printer enters maintenance mode? No Check printer's ethernet cable connection. 3490115 Printer LAN cable disconnected Aborts the build? No Printer enters maintenance mode? No 3490116...
-
Page 99: Service And Support
International: +1 803-326-3930 General NextDent 5100 Printer service procedures must be performed only by a 3D Systems-certi ed service technician unless this guide explicitly states otherwise. If your 3D printer system needs service, contact 3D Systems Technical Support at the following numbers:... -
Page 100: Preventative Maintenance
Preventative Maintenance To keep the NextDent 5100 Printer in proper working order, it is necessary to perform certain procedures for preventative maintenance. The operator can perform these tasks without the supervision, or services, of a certi ed 3D Systems eld engineer. The following section describes the most up-to-date preventative maintenance procedures. - Page 101 8/12/22, 12:32 PM User Guide 1. Carefully pull the catch tray toward you until it comes off its track. Keep the tray upright at all times while pulling it out of the machine. 2. If the catch tray glass is visually clean of dust and resin drips, skip to the section Replace the Catch Tray below. If the catch-tray glass has normal dust or other debris on...
- Page 102 8/12/22, 12:32 PM User Guide 5. To clean spots of resin on the catch-tray glass: a. Pour >90% alcohol solvent onto a nonabrasive cloth such as a clean-room wipe. b. Wipe the glass inside the catch tray until no more resin exists. c.
- Page 103 8/12/22, 12:32 PM User Guide Frequency: When changing materials, or monthly if using same material Please follow the instructions in the section Clean Resin Tray to clean it. CAUTION: Failure to clean the resin tray regularly risks having partially cured resin bits in the tray, which can cause resin-tray membrane punctures and build failures.
- Page 104 8/12/22, 12:32 PM User Guide Clean Membrane Interface Lip Frequency: Weekly The membrane interface lip is pictured below. It is the part of the chassis that makes contact with the resin-tray membrane. If the lip has dust, debris, or resin on it, clean it with >90% alcohol solvent and a nonabrasive cloth. Inspect the lip for any damage, as chips or cracks could affect the tension of the resin-tray membrane during printing.
- Page 105 8/12/22, 12:32 PM User Guide There are strips of dust-sealing material around the underside of the printer lid. These strips must remain intact to avoid dust and other debris entering the print chamber. There are seven strips in total, as indicated below.
- Page 106 8/12/22, 12:32 PM User Guide 2. Ensure the Ethernet cable is in good shape and that it still connects tightly on the network port of both the printer and your Ethernet outlet. If this cable is damaged and/or wiring is exposed, cease use of printer and replace Ethernet cable. Inspect the area around both wired connections for dust collection and other debris.
-
Page 107: Preventative Maintenance Checklist
8/12/22, 12:32 PM User Guide 1. Place the print platform, print-surface down, on a level surface. 2. Place a spacer of some kind that is between 0.5mm - 0.75mm thick (such as a credit card, shim, or washer) on the same level surface next to the platform. NOTE: This test will be more accurate the closer your spacer is to 0.5mm. -
Page 108: Every 2 Weeks
8/12/22, 12:32 PM User Guide This is NOT an online form and is not submitted to any entity. Company Name: Maintenance Performer: Date: Weekly Items Clean Membrane Interface Lip (link) Every 2 weeks Only check box if performed this week. Otherwise, just ll in the date last performed. Inspect Projector Lens and All Cables (link) - Last performed Without removing the Catch Tray, Inspect Catch-Tray Glass for smudges/print material. -
Page 109: Every 3 Months
8/12/22, 12:32 PM User Guide Every 3 Months Only check box if performed this week. Otherwise, just ll in the date last performed. Change Air Filter (link) - Last performed Check Printer Level (link) - Last performed Every 6 Months Only check box if performed this week. Otherwise, just ll in the date last performed. Change Carbon Filter (link) - Last performed Maintenance Performer Signature: Date:... -
Page 110: Troubleshooting
Turn printer off an unplug it. Wait ten seconds. Plug printer back in and turn it on. 2. If screen freezes again, contact 3D Systems Service. 3D Sprint will not install 1. The downloaded installer le might be corrupted. Delete your installer le and download it again. If the installation is still not successful, contact 3D Systems Service. - Page 111 8/12/22, 12:32 PM User Guide Issue Description Customer Troubleshooting Steps PPQ3 Voids in printed part - holes or This can be caused by: empty spaces where there 1. Not enough material in the resin tray. To prevent this, be sure to ll material back up to the minimum level shouldn't be speci ed in this guide before building.
- Page 112 8/12/22, 12:32 PM User Guide Issue Description Customer Troubleshooting Steps PPQ4 Part color is incorrect Any one of the following could be the cause: 1. Resin was not mixed in the bottle before pouring - Be sure to mix/stir the resin before printing according to the section Mixing, Stirring, and Curing Chart.
-
Page 113: Hardware Issues
8/12/22, 12:32 PM User Guide Issue Description Customer Troubleshooting Steps PPQ9 Part does not adhere to supports. 1. Wrong support style - Please see 3D Sprint Best Practices 2. Not enough supports - Please see 3D Sprint Best Practices PPQ10 Pitting/Chalkiness Ensure part is cleaned and dried correctly before post-curing: See Cleaning Procedure 1. - Page 114 8/12/22, 12:32 PM User Guide Issue Description Customer Troubleshooting Steps regulations. Rinse the catch tray out with >90% alcohol solvent and re-install in machine. 2. Spilled resin hits the catch-tray glass - Follow the guidelines in the section Clean/Replace the Catch Tray to determine if your catch tray needs to be cleaned or replaced. 3.
- Page 115 8/12/22, 12:32 PM User Guide Issue Description Customer Troubleshooting Steps Resin spills outside machine Resin spills outside the machine will require different actions by the printer operator. Please nd the scenario that matches your spill below: Porous surfaces - These are surfaces that will absorb liquids. Examples of porous surfaces are: carpeting, un nished wood, certain stone tiles/counters.
- Page 116 8/12/22, 12:32 PM User Guide Issue Description Customer Troubleshooting Steps HW10 Printer Front Door does not close 1. Ensure that the catch-tray access door (1) is fully closed. If the catch tray is not fully seated, this door cannot close- thus, the front door cannot close, either. Ensure that the catch tray is pushed all the way back.
-
Page 117: Network Issues
8/12/22, 12:32 PM User Guide Issue Description Customer Troubleshooting Steps PCI1 Parts come out of cleaning 1. Parts may not have been properly cleaned. Ensure you have followed all the steps in the sections process dirty, shiny, or sticky. under Cleaning Printed Parts. - Page 118 5. Try to clean 3D Sprint database: a. Close 3D Sprint b. Open Documents folder c. Go to 3D Systems\3D Sprint -> this is the name of the 3D Sprint versions you are using d. Delete Sprint.PrinterRegister le e. Go to PrinterDB folder f.
- Page 119 DHCP mode. 3. MQG Server might be down. This server goes down for less than 15 minutes per quarter, and is monitored by 3D Systems' rmware team. 4. If the issue persists, contact your reseller.
- Page 120 8/12/22, 12:32 PM User Guide Repackaging the NextDent 5100 If you are moving your printer to another facility in a vehicle, it is best to repackage the printer in its original packaging. If you did not keep your original packaging, contact your reseller to order a repacking kit. If you do not repackage the printer in its original packaging or in the packaging provided in the repacking kit, using the instructions in this section, you will assume liability for the printer in its move.
- Page 121 8/12/22, 12:32 PM User Guide . Place cardboard frame with accessories box next to the printer box on the pallet. It should t snugly in the empty slot, with the accessories box facing outward. 7. Slide the outer box around the printer and accessories box. .
-
Page 122: Ec Declaration Of Conformity
8/12/22, 12:32 PM User Guide EC Declaration of Conformity © 2022 by 3D Systems, Inc. All rights reserved. Speci cations subject to change without 3D Systems, Inc. notice. 3D Systems, the 3D Systems logo, NextDent 5100, and NextDent are registered 333 Three D Systems Circle | Rock Hill, SC | trademarks of 3D Systems, Inc.
Need help?
Do you have a question about the NextDent 5100 and is the answer not in the manual?
Questions and answers