Hoymiles MICRO-INVERTER MI-250 Technical Manual
Hide thumbs
Also See for MICRO-INVERTER MI-250:
- Installation training (24 pages) ,
- Quick installation manual (2 pages)
Table of Contents
Advertisement
Quick Links
Advertisement
Table of Contents

Subscribe to Our Youtube Channel
Related Manuals for Hoymiles MICRO-INVERTER MI-250


Summary of Contents for Hoymiles MICRO-INVERTER MI-250
- Page 1 HANGKAI GROUP HOYMILES MICRO-INVERTER MI-250...
-
Page 2: Table Of Contents
TECHNICAL MANUAL CONTENTS INTRODUCTION ..........................3 SAFETY ............................4 SYMBOL ILLUSTRATION ......................4 INSTALLATION WARNINGS ....................6 PREPARE FOR INSTALLING ......................7 TRANSPORT AND INSPECT ....................7 CHECK INSTALLATION ENVIRONMENT ................. 8 INSTALLATION POSITION ...................... 8 MOUNTING AND WIRING ......................9 INSTALLING DIAGRAM ...................... -
Page 3: Introduction
Contact Information Hoymiles Converter Technology Co. , Ltd. No.18 Kangjing Road, Hangzhou, Zhejiang Province, China Phone: +86-571-28056101 Fax: +86-571-28056137 http://www.hzconverter.com/cn/index.php Hoymiles can provide commissioning. Please contact Hoymiles customer service at 086-0571-89775158. More information at website: http://www.hzconverter.com/cn/index.php... -
Page 4: Safety
SAFETY IMPORTANT SAFETY INSTRUCTIONS! PLEASE KEEP THIS INTRODUCTION IN A SAFE PLACE! SYMBOL ILLUSTRATION The safety symbols used in this manual are list below and illustrated in detail. Symbol Usage Indicates a hazardous situation that can result in deadly electric shock hazards, other serious physical injury, or fire hazards. - Page 5 The symbols on the microinverter are list below and illustrated in detail. Symbol Usage Treatment To comply with European Directive 2002/96/EC on waste Electrical and Electronic Equipment and its implementation as national law, electrical equipment that has reached the end of its life must be collected separately and returned to an approved recycling facility.
-
Page 6: Installation Warnings
All repairs should be carried out using only qualified spare parts, which must be installed in accordance with their intended use and by a licensed contractor or authorized Hoymiles service representative. Liabilities arising from commercial components are delegated to their respective manufacturers. -
Page 7: Prepare For Installing
Australia National Wiring Rules PREPARE FOR INSTALLING TRANSPORT AND INSPECT Hoymiles packages and protects individual components using suitable means to make the transport and subsequent handling easier. Transportation of the equipment, especially by road, must be carried out by suitable ways for protecting the components (in particular, the electronic components) from violent, shocks, humidity, vibration, etc. -
Page 8: Check Installation Environment
CHECK INSTALLATION ENVIRONMENT Installation of the equipment is carried out based on the system design and the place in which the equipment is installed. The installation must be carried out with the equipment disconnected from the grid (power disconnect switch open) and with the photovoltaic modules shaded or isolated. ... -
Page 9: Mounting And Wiring
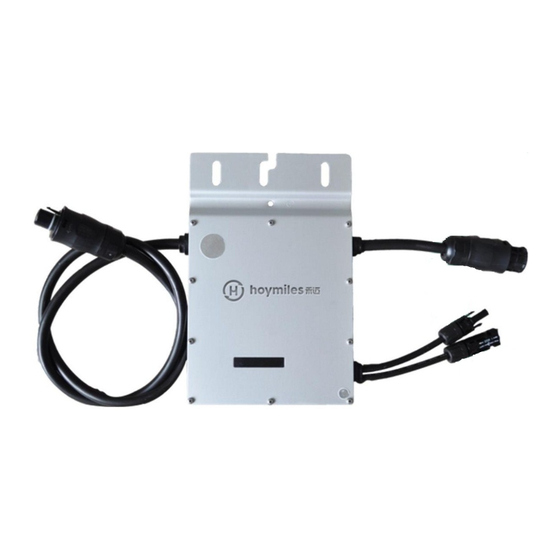
MOUNTING AND WIRING INSTALLING DIAGRAM System Wiring Diagram (a) Single phase wiring diagram (b) Three phase wiring diagram Fig.2. MI-250 Microinverter system wiring diagram... - Page 10 Assembly Diagram AC End Cap PV Module AC Cable Bracket DC Cables From PV Module Micro Inverter Junction Fig.3. Assembly Illustration...
-
Page 11: Assembly Instruction
ASSEMBLY INSTRUCTION Step 1. Install Micro-inverter Mark the approximate center of each photovoltaic module on the frame and install the Micro-inverter with the logo side facing downwards. Observe the certification documents concerning the maximum number of Micro- inverters permitted for installation at each cable section! The Micro-inverter must be under the module, out of long-term exposure to direct sunlight or rain. -
Page 12: Step 4. Connecting Ac-Trunk Cables To Junction Box
Fig.6. Junction Box To prevent electrical hazards, all the connection operations must be carried out with the equipment disconnected from the grid All the external connections to the insulated junction box (caps, adapters, etc.) must be made with securely-sealed Hoymiles components. -
Page 13: Step 5. Drawing System Map
AC cables from the Micro-inverters have three conductors with different colors Hoymiles to identify the function of each conductor: Red: Live Black: Neutral Yellow-Green: Ground Pay special attention and ensure not to reverse the phase with the neutral! The installation technician is responsible for selecting a junction box with the appropriate dimensions and insulation. - Page 14 DC Cable From PV Module DC Cable From Micro Inverter Fig.8. Connect DC Cables The recommended installation need keeping the Micro-inverters underneath the photovoltaic modules, so that the Micro-inverters can operate in the shade. Direct sunlight may cause damage to the Micro-inverters. Each module must be connected to the Micro-inverters with a DC cable having a length of less than 3m.
-
Page 15: Commission The System
COMMISSION THE SYSTEM To commission the Hoymiles Microinverter PV system: 1. Turn ON the AC circuit breaker for each microinverter AC branch circuit. 2. Turn ON the main AC switch. Your system will start producing power after a one-minute wait time. -
Page 16: Troubleshooting
5. Check the DC connections between the microinverter and the PV module. 6. Verify the PV module DC voltage is within the allowable range shown in appendix Technical Data of this manual. 7. If the problem persists, please call Hoymiles customer support. -
Page 17: Maintenance Guide
MAINTENANCE GUIDE ROUTINE MAINTENANCE Only authorized personnel are allowed to carry out the maintenance operations and are responsible to report any anomalies. Always use the personal protective equipment provided by the employer when carry out the maintenance operation. During normal operation, check that the environmental and logistic conditions are ... -
Page 18: Storage And Dismantling
STORAGE AND DISMANTLING If the equipment is not used immediately or is stored for long periods, check that it is correctly packed. The equipment must be stored in well-ventilated indoor areas that do not have characteristics that might damage the components of the equipment. -
Page 19: Appendix
APPENDIX TECHNICAL DATA Model MI-250 Input data(DC) Recommended input power (W) 200~310 MPPT voltage range (V) 27~48 Operating voltage range (V) 16~60 Maximum input voltage (V) Maximum input current (A) Inverter backfeed current (A) Output Data (AC) Rated output power (W) Rated output current (A) 1.09 Nominal output voltage/range (V) - Page 20 Overvoltage Category OVC II for PV input circuit, OVC III for mains circuit Protective class...
-
Page 21: Template For Map Of Micro-Inverter Installation
TEMPLATE FOR MAP OF MICRO-INVERTER INSTALLATION Customer Information: Please affix the extra label that comes from each inverter, on the appropriate position on this HANGKAI GROUP diagram. HOYMILES...
Need help?
Do you have a question about the MICRO-INVERTER MI-250 and is the answer not in the manual?
Questions and answers