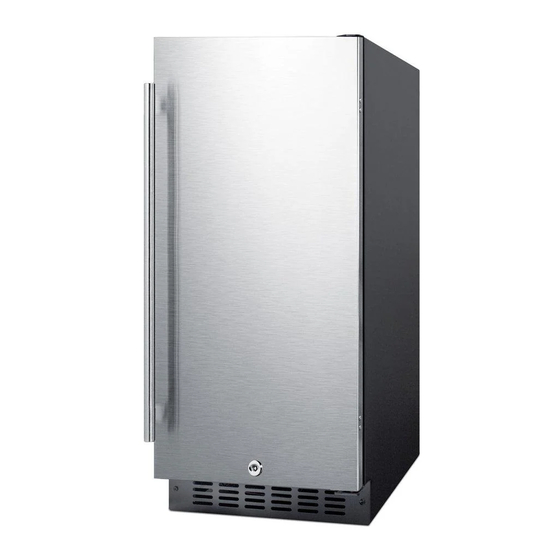
TABLE OF CONTENTS Appliance Safety Important Safeguards Disposal Location of Parts Installation Instructions 9-15 Before Using your Appliance Installation of your Appliance 9-10 Electrical Connection 10-11 Reversing the Door Swing of your Appliance 11-12 Adjusting the Height of the Unit Adjusting the Kick Plate Installing the Stainless Steel Handle Operating your Appliance...
APPLIANCE SAFETY Your safety and the safety of others are very important. We have provided many important safety messages in this manual and on your appliance. Always read and obey all safety messages. This is the Safety Alert Symbol. The symbol alerts you to potential hazards that can kill or injure you and others.
Page 4
• This appliance is CFC- and HFC-free and contains small quantities of Isobutane (R600a) which is environmentally friendly, but flammable. It does not damage the ozone layer, nor does it increase the greenhouse effect. Care must be taken during transportation and setting up of the appliance that no parts of the cooling system are damaged.
• All installations must be in accordance with local plumbing code requirements. • Make certain that the pipes are not pinched, kinked, or damaged during installation. • Check for leaks after connection. • Never allow children to operate, play with or crawl inside the appliance. •...
LOCATION OF PARTS Refrigerators ALR5B / SPR316OS / AL54 / SPR627OS / DBAR1526 / DBAROS1531 Door LED Light Handle Digital Control Panel Shelves (3) Security Lock Door Racks (2) Ventilation Grille Adjustable Legs Freezers SPFF51OS / DBFZOS2458 LED Light Door Handle Shelves (3) Bottom Grille...
Page 7
Beverage Coolers SCR1536BG / AL57G / SCR2464 / SCR611GLOS / DBGROS2467 Digital Control Panel Door Shelves (3) Handle Security Lock Kick-Plate Adjustable Legs Beverage Cooler SCR610BL Freezer SCF475 Door Shelves (3) Handle Security Lock Kick-Plate Adjustable Legs Digital control panel...
Page 8
Refrigerators SPR618OSADA / DBAROS2428ASD Shelves(3) Handle LED Light Door Digital Control Panel Ventilation Grille Adjustable Security Legs Lock...
INSTALLATION INSTRUCTIONS Before Using Your Appliance Remove the exterior and interior packing. • CAUTION: After unpacking you MUST allow this appliance to stand upright for at least 2 hours to allow the lubricant and refrigerant to drain back into the compressor and stabilize.
Built-in Under-counter Instructions Make sure your installation does not block the front ventilation grille. The unit is designed to fit under worktops, using the height-adjustable ventilation grille to ensure that the feet are concealed from the front view. If the unit is to be installed in an area with a kitchen plink, make sure that the ventilation gaps in the plinth are at least 300cm (46.5in...
replaced with a properly grounded 3-prong wall outlet. To prevent accidental injury, the cord should be secured behind the appliance and not left exposed or dangling. The appliance should always be plugged into its own individual electrical outlet which has a voltage rating that matches the rating label on the appliance.
4. Pop out the cover caps on the left side of the cabinet and use them to cover the screw holes on the right-hand side. 5. Screw the alternative left top hinge (6), included in the fittings, on the left hand side of the cabinet. (Fig. 6.
OPERATING YOUR APPLIANCE It is recommended you install the appliance in a place where the ambient temperature is between 44º and 90ºF (7º to 32ºC). If the ambient temperature is above or below the recommended temperatures, the performance of the unit may be affected. For example, placing your unit in extreme cold or hot conditions may cause interior temperatures to fluctuate.
Settings Mode Certain settings can only be selected in settings mode. Touch and hold the UP key for 5 seconds to enter and leave Settings mode. The appliance will leave Settings mode automatically after approximately one minute. ºF/ºC Selection 1. Lightly touch and hold the UP key for 5 seconds to enter Settings mode. 2.
Page 15
Control Panel only for Model SCR610BL ON/OFF Power To turn the appliance off, press and hold the key for 5 seconds until the temperature display goes off. To turn the appliance on, press and hold the key for 1 second until the temperature display lights up. NOTE: Pressing the POWER key once can switch off the audible alarm when the alarm is on.
Page 16
flash in the display window for 5 seconds. After 5 seconds, the temperature inside the unit will reappear in the display window. Control Panel for Freezers ON/OFF Power To turn the appliance off, press and hold the key for 5 seconds until the temperature display goes off. To turn the appliance on, press and hold the key for 1 second until the temperature display lights up.
Interior Light The unit is equipped with interior LED lights which will be turned ON when a door is opened. LED-type lights are designed for extremely long life. They are not user serviceable. To change them please contact the service department. NOTE: Please use only the original LED light fittings provided by the manufacturer.
– Warm fresh food was placed inside – Too much warm ambient air flowed in when rearranging and removing food – Power failure for some time – The appliance is faulty The audible alarm is automatically silenced and the temperature display stops flashing when the temperature is sufficiently cold again.
CARE AND MAINTENANCE CLEANING YOUR APPLIANCE Turn off the power, unplug the appliance, and remove all items, including shelves. Wash the inside surfaces with a solution of warm water and baking soda (about 2 tablespoons of baking soda to a quart of water). Wash the shelves with a mild detergent solution.
TROUBLESHOOTING You can solve many common problems easily, saving you the cost of a possible service call. Try the suggestions below to see if you can solve the problem before calling the servicer. PROBLEM POSSIBLE CAUSE REMEDY Appliance is not connected to a power Connect the appliance.
Page 21
“E0” indicates a communication error for Call for service. 3- zone models. Display “E0”, “E1” or “E2” indicates that the air “E1”. “E2”, temperature sensor has failed. “E3”, “E4”, “E3” or “E4” indicates that the defrost “E5”, “E6” or sensor in the evaporator has failed. “E7”.
LIMITED WARRANTY ONE-YEAR LIMITED WARRANTY Within the 48 contiguous United States, for one year from the date of purchase, when this appliance is operated and maintained according to instructions attached to or furnished with the product, warrantor will pay for factory-specified parts and repair labor to correct defects in materials or workmanship. Service must be provided by a designated service company.
Need help?
Do you have a question about the DREAMBILT ALR15B and is the answer not in the manual?
Questions and answers