Table of Contents
Advertisement
Quick Links
Advertisement
Table of Contents

Related Manuals for DCS ENDEAVOR EDV27-BQ


Summary of Contents for DCS ENDEAVOR EDV27-BQ
- Page 1 This Owner's Manual is provided and hosted by Appliance Factory Parts. DCS EDV36-BQAN Owner's Manual Shop genuine replacement parts for DCS EDV36-BQAN Find Your DCS Grill Parts - Select From 274 Models -------- Manual continues below --------...
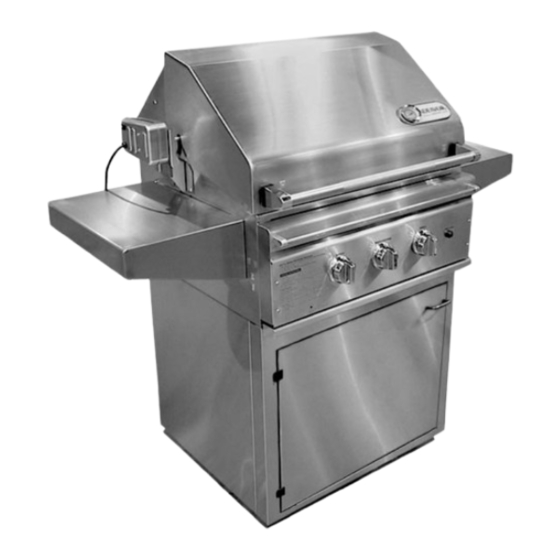
- Page 2 ENDEAVOR GRILL Use and Care Guide Installation Guide Models: ■ EDV27-BQ ■ EDV27-BQR ■ EDV36-BQA ■ EDV36-BQAR...
- Page 3 A Message To Our Customers Thank you for selecting this Professional “ENDEAVOR” Series Grills. Because of these appliances’ unique features we have developed this Use and Care Guide and Installation Guide. It contains valuable information on how to properly operate and maintain your new appliance for years of safe and enjoyable cooking. To help serve you better, please fill out and return the Ownership Registration Card and keep this guide handy, as it will help answer questions that may arise as you use your new appliance.
-
Page 4: Table Of Contents
Table Of Contents SAFETY PRACTICES & PRECAUTIONS ............3-4 GRILL MODELS .......................5 GAS REQUIREMENTS ..................6-7 LOCATING GRILL/BUILT-IN CLEARANCES ..........8-9 BUILT-IN CONSTRUCTION DETAILS ............10-11 LEAK TESTING .......................12 INSTALLER FINAL CHECKLIST ...............13 BURNER ADJUSTMENTS ................13-14 USING THE GRILL ...................15-16 LIGHTING INSTRUCTIONS ................16-17 USING THE ROTISSERIE ................18-19 CARE &... -
Page 5: Safety Practices & Precautions
Safety Practices & Precautions • Never let clothing, pot holders or other IMPORTANT SAFETY NOTICE: flammable materials come in contact with or too Certain Liquid Propane dealers may fill close to any grate, burner or hot surface until it liquid propane cylinders for use in the has cooled. - Page 6 Safety Practices & Precautions For personal safety, wear proper apparel. Loose • Keep the area surrounding the grill free from fitting garments or sleeves should never be worn combustible materials, trash, or combustible while using this appliance. Some synthetic fabrics fluids and vapors such as gasoline or charcoal are highly flammable and should not be worn while lighter fluid.
-
Page 7: Grill Models
Grill Models GRILL ROTISSERIE GRILL GRILL GRILL SAFETY (ROTISSERIE) SAFETY (ROTISSERIE) IGNITION HOLD IN 10 SEC. IGNITION HOLD IN 10 SEC. WHILE LIGHTING WHILE LIGHTING EDV27-BQ EDV27-BQR ROTISSERIE GRILL GRILL GRILL GRILL GRILL GRILL SAFETY (ROTISSERIE) SAFETY IGNITION HOLD IN 10 SEC. WHILE LIGHTING (ROTISSERIE) IGNITION... -
Page 8: Gas Requirements
Gas Requirements Verify the type of gas supply to be used, either natural or LP, and make sure the marking on the appliance rating plate agrees with that of the supply. Never connect an unregulated gas line to the appliance. Bottom of unit An installer supplied gas shut-off valve must be Coupling... - Page 9 Gas Requirements disengaged. Your local LP filling station should be LP GAS HOOK UP (TYPE 1 OR QCC1 equipped with the proper equipment to fill your REGULATOR): tank. Grills orificed for use with LP gas come equipped with a high capacity hose/regulator assembly for LP TANK REQUIREMENTS: connection to a standard 20 lb.
-
Page 10: Locating Grill/Built-In Clearances
Locating Grill / Built-In Clearances CLEARANCES TO COMBUSTIBLE INSULATED JACKET: CONSTRUCTION: Do not build the Grill under overhead unprotected A Minimum of 12" from the sides and a minimum combustible construction. If the Grill is to be of 12" from the back must be maintained from the placed into a combustible enclosure, an approved Grill above and below the cooking surface to insulated jacket is necessary and is available from... - Page 11 Built–In Grill Clearances FOR MODEL 27” grill exhaust 3" (to non- combustible 36" rotisserie handle construction/ (with rotisserie motor mounted) min. lid 3 /4 " 6" 1 /2 clearance) " (lid) 6" (to left and right side of grill to (to left and 12"...
-
Page 12: Built-In Construction Details
Built–In Construction Details – 27” grill exhaust 3" (to non-combustible 1 /2 " construction / min. lid clearance) 12" (to combustible construction) 3 /8 " 1 /4 " 1 /2 " 22" 7 /8 " STANDARD LAYOUT FOR NON-COMBUSTIBLE ENCLOSURE: NOTE: If using a backguard apron or rear wall, locate electrical service on the left hand side for rotisserie motor connection... - Page 13 Built–In Construction Details – 36” grill exhaust 3" (to non-combustible 1 /2 " construction / min. lid clearance) 12" (to combustible construction) 7 /8 " 1 /4 " 1 /2 " 22" 7 /8 " STANDARD LAYOUT FOR NON-COMBUSTIBLE ENCLOSURE: NOTE: If using a backguard apron or rear wall, locate electrical service on the left hand side for rotisserie motor connection...
-
Page 14: Leak Testing
Leak Testing GENERAL: connections from the supply line, or LP cylinder up to and including the manifold pipe assembly. Although all gas connections on the grill are leak Apply the soap solution around the connection, tested at the factory prior to shipment, a complete valve and tubing. -
Page 15: Installer Final Checklist
Installer Checklist/Burner Adjustments INSTALLER FINAL CHECKLIST: ❏ Specified clearances main- ❏ Air shutters adjusted. ❏ User informed of gas supply tained to combustibles. shut-off valve location. ❏ Adjustable low setting satis- ❏ Nylon straps removed from factory. burners. ❏ Drip pan in place properly •... -
Page 16: Burner Adjustments
Burner Adjustments / Using The Grill reflects usable heat upward into the cooking area WARNING: IMPORTANT! Before and reduces temperatures of the drip pan below. lighting, inspect the gas supply Above the burners are stainless steel radiants piping or hose prior to turning the which encase the ceramic tubes and protect the gas "on". -
Page 17: Using The Grill
Using The Grill Note: The hot grill sears the food, sealing in The replacement pressure regulators and hose the juices. The longer the preheat, assembly must be the type specified by the the faster the meat browns and the manufacturer. Do not use the grill if the odor of darker the grill marks. - Page 18 Using The Grill / Lighting Instructions Direct Heat Grilling (Hot Dogs, Hamburgers, USING THE GRILL LP GAS: Typical Thickness Steaks/Chicken) Note: Your preheat time may be shorter than recommended when using LP gas. To prevent overcooking you may want to lower heat settings. Food Grill Rack...
-
Page 19: Lighting Instructions
Lighting Instructions MANUAL LIGHTING: in 4 seconds turn the knob off, wait 5 minutes If the burner will not light after several attempts and try again. Once the left or right burner is lit, then the burner can be manually lit. If you’ve just the adjacent burner(s) can be lit by the cross- attempted to light the burner with the igniter, allow lighting method. -
Page 20: Using The Rotisserie
Using The Rotisserie BQR AND BQAR MODELS ONLY: FIG. 12 Rotisserie System The grill rotisserie system is designed to cook items from the back using infrared heat. The location of the burner allows the placement of the rotis basting pan (included) beneath the food to collect juices and drippings for basting and gravy. - Page 21 Using The Rotisserie TO LIGHT THE ROTISSERIE BURNER WARNING: Keep hands and face away (BQR AND BQAR MODELS ONLY): from front of burner! Stand to the The location of the rotis burner makes it more side when lighting. Once lit move susceptible to strong wind conditions, more so than hand away quickly.
-
Page 22: Care & Cleaning
Care And Cleaning BATTERY REPLACEMENT: 1. Remove grease tray. 2. Open cart door. 3. Pull battery downwards (This may require use of pliers.) Note: Re-install upward and push to snap. Note: Polarity as shown in Fig. 14. GRILL RACKS: FIG. 14 The easiest way to clean the grill is immediately after cooking is completed and after turning off the flame. -
Page 23: Burner Removal And Cleaning
Burner Removal And Cleaning Orifice Cleaning GRILL AND ORIFICE CLEANING: With the burner removed, remove the orifice and Remove the grill racks, then lift out the grill radiant shine a flashlight through the opening to ensure tray. Grasp the burner, pull it up and slightly to the there is no blockage. -
Page 24: Troubleshooting
Troubleshooting BEFORE CALLING FOR SERVICE: Burner flame is yellow or orange, in conjunction with the odor of gas: If the grill does not function properly, use the 1. Check the burner inlet for obstructions such following checklist before contacting your dealer as spider webs. -
Page 25: Grill Burner Assembly 27" Parts List
Grill Burner Assembly-27” ITEM DESCRIPTION PART NO. ITEM DESCRIPTION PART NO. Grill Rack S/S 27 19014-02 Manifold 27 18034-01 Radiant 32889 Control Valve 13017 Pyramid Rock 10436 Control Knob 18445 Knob Bezel 14006-PL 27”C/ Heat Shield w/Assy. 32220 SS Grill Burner 12285 Collector Box 32801... -
Page 26: Grill Body 27" Parts List
Grill Body Parts List-27” ITEM DESCRIPTION PART NO. Folding Lid w/assy. EDV27 32882-01 Handle End Cap Spacer 18446 Handle End Cap 18443-PL Shoulder Bolt 15003-15 Handle Lid 32886-01 Warming Rack Galore 27 18444 Body Assembly 27 EDV Grill 38848-01 Bolt (small) 15002-26 Warming Rack Ret. -
Page 27: Rotisserie Assembly 27" Parts List
Rotisserie Assembly-27” ITEM DESCRIPTION PART NO. ITEM DESCRIPTION PART NO. Electrode Rotisserie 16282-01 Rotisserie Handle 18040 Electrode Housing 32941 Meat Holder Assembly 19010-02 Flavor Tray 32294 Rotisserie Rod 27 19487-01 Manifold Bolt 15001-06 Rotis Receiving Bracket 32846 Tubing Manifold Safety Valve 32914 Rotisserie Burner 27dbqar 12021-2... -
Page 28: Grill Burner Assembly 36" Parts List
Grill Burner Assembly-36” ITEM DESCRIPTION PART NO. ITEM DESCRIPTION PART NO. Grill Rack S/S 36 19014-02 Manifold 36 18447 Control Valve 13017 Grill Rack 9” 19486 Radiant 32889 Control Knob 18445 Pyramid Rock 10436 Knob Bezel 14006-PL Collector Box 32801 36”C/ Heat Shield w/Assy. -
Page 29: Grill Body 36" Parts List
Grill Body Parts List-36” ITEM DESCRIPTION PART NO. Folding Lid w/assy. EDV36 32882-02 Handle End Cap Spacer 18446 Handle End Cap 18443-PL Shoulder Bolt 15003-15 Handle Lid 32886-02 Warming Rack Galore 36 18444-01 Body Assembly 36 EDV Grill 38848-02 Bolt (small) 15002-26 Warming Rack Ret. -
Page 30: Rotisserie Assembly 36" Parts List
Rotisserie Assembly-36” ITEM DESCRIPTION PART NO. ITEM DESCRIPTION PART NO. Electrode Rotisserie 16282-01 Rotisserie Handle 18040 Electrode Housing 32941 Meat Holder Assembly 19010-02 Flavor Tray 32844 Rotisserie Rod 36 19487-02 Manifold Bolt 15001-06 Rotis Receiving Bracket 32846 Tubing Manifold Safety Valve 32909 Rotisserie Burner 36dbqar 12021-2... -
Page 31: Cart Assembly 27" And 36" Parts List
Cart Assembly 27” & 36” ITEM DESCRIPTION PART NO. ITEM DESCRIPTION PART NO. Side Panel L/H 32906 Side Panel R/H 32866 Front Panel-36” 32864-02 Rear Panel-36” 32865-02 Front Panel-27” 32864-01 Rear Panel-27” 32865-01 Bottom Cart L/H Shelf 32921 Rear Brace-36” 32844 Door Assembly-36’... -
Page 32: Head And Cart Assembly
Head and Cart Assembly 1. Put Cart on a flat surface. 2. Install Head on the Cart (2 people required to lift Head). 3. Using bolt and nut (6 required), attach Head to the Cart. 4. Install shelves to the side of the Head with bolt and nut (8 required), putting washers between Head and Shelves. -
Page 33: Wiring Diagram For Edv27-Bq
Wiring Diagram for EDV27-BQ... -
Page 34: Wiring Diagram For Edv27-Bqr
Wiring Diagram for EDV27-BQR... -
Page 35: Wiring Diagram For Edv36-Bqa
Wiring Diagram for EDV36-BQA... -
Page 36: Wiring Diagram For Edv36-Bqar
Wiring Diagram for EDV36-BQAR... -
Page 37: Service
Service HOW TO OBTAIN SERVICE: For warranty service, contact Customer Service at 877-553-0243. Before you call, please have the following information ready: • Model Number • Serial Number • Date of installation • A brief description of the problem Your satisfaction is of the utmost importance to us. If a problem cannot be resolved to your satisfaction, please call at 877-553-0243. -
Page 38: Warranty
Warranty LENGTH OF WARRANTY: One (1) Year Full parts and Labor Covers the entire product Five (5) Year comprehensive warranty covering grill radiant assemblies, and drip pans. Should structural deterioration occur to the degree of non-performance, a replacement will be furnished. Lifetime Warranty on all stainless steel components, including stainless steel grill burners and stainless steel grill racks (excluding discoloration or surface corrosion). - Page 39 As product improvement is an ongoing process, we reserve the right to change specifications or design without notice. BARBEQUE’S GALORE 15041 Bake Parkway Suite-A Irvine, CA 92618 Part No. 17519 Rev. B Tel: 949-597-2400 Litho in USA 10/2002...
Need help?
Do you have a question about the ENDEAVOR EDV27-BQ and is the answer not in the manual?
Questions and answers