Novy Easy 80 Pro Installation Instructions Manual
Hide thumbs
Also See for Easy 80 Pro:
- User manual (148 pages) ,
- Installation instructions manual (47 pages)

Related Manuals for Novy Easy 80 Pro


Summary of Contents for Novy Easy 80 Pro
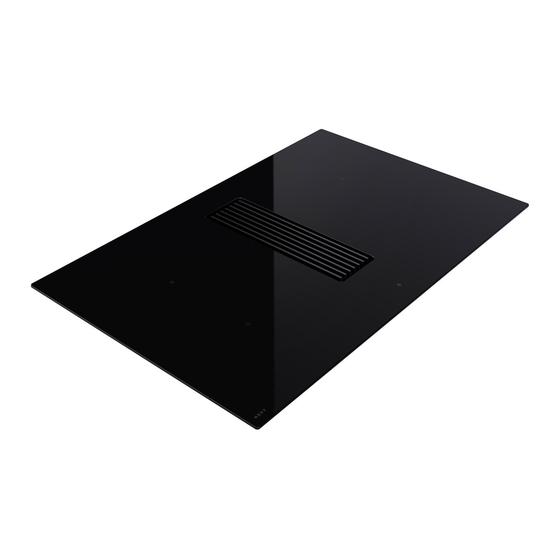
- Page 1 NL Installatievoorschriften FR Instructions d’installation DE Montageanleitung EN Installation Instructions 1851 Novy Easy 80 Pro Duct out 1851_V04_MA1_I...
-
Page 2: Table Of Contents
INHOUD Algemeen Installatie Installatie van het afvoerkanaal Montage instructies CONTENU Généralités Installations Installation du conduit d’évacuation Instructions d'installation INHALT Allgemeine Informationen Installation Installation des abluftkanals Montageanleitung CONTENT General information Installations Install the exhaust duct Installation Instructions – 2 –... - Page 3 De veiligheidsvoorschriften staan vermeld in een apart boekje dat met het toestel is meegeleverd en wordt ook op onze website www.novy.com vermeld. Leef de veiligheidsvoorschriften, de montagehandleiding en de gebruiks aanwijzing na om letsel en materiële schade te voorkomen.
- Page 4 INSTALLATIE Installatie voorschriften De afstand tussen de kookplaat en de muur dient minstens 55 mm te bedragen. − De kookplaat is een apparaat toebehorend aan de beschermingsklasse « Y ». Ingebouwd mag zich een hoge kastwand of een muur aan één zijde en aan de achterzijde bevinden.
- Page 5 INSTALLATIE VAN HET AFVOERKANAAL De uitlaat van de motor heeft een rechthoekige uitlaat van 222 x 89 mm. Het advies is om hier een afvoerkanaal op aan te sluiten met dezelfde afmetingen. Voor een optimale werking van de afzuigkap is het van belang om bij de installatie op de volgende punten te letten.
- Page 6 MONTAGE INSTRUCTIES Volg de onderstaande stappen voor de mon- tage van het toestel en maak gebruik van de montage tekeningen in deze instructie. Neem het toestel uit de verpakking op de plaats van de 2 uitsparingen in de verpakking om schade aan het glas of het toestel te voorkomen.
- Page 7 Min. 55 Min. 55 Vlakbouw Maak een uitsparing en een freesrand in het werkblad volgens tekening 3a. Opbouw Maak een uitsparing in het werkblad volgens tekening 3b. Ventilatie Voorzie een ventilatieopening net onder het werkblad van minimaal 3mm over ten minste de volledige breedte van de inductiekookplaat voor voldoende koeling van de kookplaat.
- Page 8 Verwijder het vetfilter uit de afzuiging om beschadiging aan het toestel te voorkomen. Plak de waterdicht strip op 2mm van de buiten- rand aan de achterkant van de glasplaat. – 8 –...
- Page 9 Bocht plaatsen voor afvoerkanaal. Indien het afvoerkanaal direct met een bocht naar beneden wordt gemonteerd, plaats dan eerst de meege- leverde bocht op de unit. Gebruik aluminiumtape om de aansluiting luchtdicht te maken. Plaats het toestel in de voorziene opening. Neem de kookplaat links en rechts stevig vast.
- Page 10 220-240V 1N~ GN/YE GN/YE 220-240 V 220-240V 2N~ GN/YE GN/YE 220-240 V 380-415V 2N~ GN/YE GN/YE 220-240 V 380-415V 3N~ GN/YE GN/YE 220-240 V De installatie en de aansluiting op het elektrische net mag enkel toevertrouwd worden aan een vakman (elektricien) die op de hoogte is van de voorgeschreven normen.
- Page 11 Plaats het vetfilterframe en het afzuigrooster in de aanzuigopening. – 11 –...
-
Page 12: Généralités
GÉNÉRALITÉS Il s’agit de les instructions d'installation de l’appareil Novy illustré en page de couverture. Lisez attentivement les consignes de sécurité, les instructions de montage et le mode d'emploi avant l’installation et la mise en service de l'appareil. Les consignes de sécurité sont énumérées dans un livret séparé... -
Page 13: Installations
INSTALLATIONS Consignes d’installation La distance entre la table de cuisson et le mur doit être d’au minimum 55 mm. − La table de cuisson est conçue pour la préparation de nouriture classe de protection « Y ». Pour une table de cuisson encastrée, la présence d’une paroi haute garnie de placards ou un mur sur un côté... -
Page 14: Installation Du Conduit D'évacuation
INSTALLATION DU CONDUIT D’ÉVACUATION Le moteur dispose d’une sortie de section rectangulaire de 222 x 89 mm. Il est conseillé d’y raccorder un conduit d’évacuation aux mêmes dimensions. Pour un fonctionnement optimal de la hotte, il est important, lors de l’installation, de respecter les consignes suivantes: Généralités: −... -
Page 15: Instructions D'installation
INSTRUCTIONS D'INSTALLATION Suivez les étapes ci-dessous pour l’installa- tion de l’unité, et se référer à l’installation les plans de montage figurant dans cette notice. Sortez l’appareil de son emballage à l’endroit des 2 encoches dans l’emballage, ceci afin d’éviter des dommages sur le verre. - Page 16 Min. 55 Min. 55 Pose affleurante Faites une découpe ainsi qu’une rainure de fraisage dans le plan de travail, suivant le dessin 3a. Pose standard Faites une découpe dans le plan de travail, suivant le dessin 3b. Ventilation Prévoyez une ouverture de ventilation juste en dessous du plan de travail d’au moins 3mm sur toute la largeur de la plaque à...
- Page 17 Retirez le filtre à graisses de le ventilateur d’extraction pour éviter d’endommager l’appareil. Collez le ruban isolant à 2 mm du bord extérieur à l’arrière du verre. – 17 –...
- Page 18 Installation du coude pour le conduit d’évacu- ation. Dans le cas où le conduit d’évacuation est installé directement avec un coude vers le bas, il faut d’abord installer le coude fourni avec l'appareil. Sur l’arrière de l'appareil se trouve le raccordement du conduit d’évacuation.
- Page 19 220-240V 1N~ GN/YE GN/YE 220-240 V 220-240V 2N~ GN/YE GN/YE 220-240 V 380-415V 2N~ GN/YE GN/YE 220-240 V 380-415V 3N~ GN/YE GN/YE 220-240 V Installation et connexion au réseau électrique ne peuvent être confiées que confiée à un électricien qualifié qui est est familiarisé...
- Page 20 Insérez le cadre du filtre à graisses et la grille d’aspiration dans l’ouverture d’admission. – 20 – – 20 –...
-
Page 21: Allgemeine Informationen
ALLGEMEINE INFORMATIONEN Dies ist die Montageanleitung für das auf der Vorder- seite genannte Novy Gerät. Lesen Sie die Sicherheits- hinweise, die Montageanleitung und die Bedienungs- anleitung vor der Installation und der Inbetriebnahme sorgfältig durch. Die Sicherheitshinweise finden Sie in einer separaten Broschüre, die zum Lieferumfang Ihres Novy Gerätes... -
Page 22: Installation
INSTALLATION Installationsvorschriften Der Abstand zwischen Kochfeld und Wand muss mindestens 55 mm betragen. − Das Kochfeld ist eine Vorrichtung, die in die Schutz- art « Y » eingestuft ist. Im eingebauten Zustand darf sich auf einer Seite und auf der Rückseite eine hohe Schrankwand oder eine Mauer befinden. -
Page 23: Installation Des Abluftkanals
INSTALLATION DES ABLUFTKANALS Der Motor hat einen rechteckigen Auslass von 222 x 89 mm. Es wird empfohlen, einen Abluftkanal mit den gleichen Abmessungen daran anzuschließen. Für eine optimale Funktion der Dunstabzugshaube ist es wichtig, dass bei der Installation die folgenden Punkte beachtet werden. -
Page 24: Montageanleitung
MONTAGEANLEITUNG Führen Sie die folgenden Schritte der Installation nach der Montagezeichnung und Anleitung aus. Nehmen Sie das Gerät an den beiden Ausspar- ungen in der Verpackung aus der Verpackung heraus, um Schäden am Glas zu vermeiden. Überprüfen Sie das Gerät vor der Montage auf Beschädigungen. - Page 25 Min. 55 Min. 55 Flächenbündiger Einbau Erstellen Sie einen Ausschnitt mit Fräsrand in der Arbeitsplatte gemäß der Zeichnung 3a. Aufliegende Montage Erstellen Sie einen Ausschnitt in der Arbeitsplatte gemäß der Zeichnung 3b. Belüftung Stellen Sie eine Belüftungsöffnung direkt unter der Arbeitsplatte von mindestens 3 mm über die gesamte Breite des Induktionskochfelds zur ausreichenden Kühlung des Kochfelds bereit.
- Page 26 Entfernen Sie den Fettfilter aus den Dunstabzug, um eine Beschädigung des Geräts zu vermeiden. Kleben Sie den Isolierstreifen in 2 mm Abstand von der Außenkante auf die Rückseite der Glasplatte. – 26 –...
- Page 27 Umlenkstück für Abluftkanal platzieren. Wenn der Abluftkanal direkt in einer nach unten weisen- den 90 Grad Bogen montiert wird, bringen Sie zuerst das mitgelieferte Umlenkstück am Gerät an. An der Rückseite des Geräts befindet sich der Anschluss für den Abluftkanal. Verwenden Sie Aluklebeband, um die Verbindungsstelle luftdicht abzuschließen.
- Page 28 220-240V 1N~ GN/YE GN/YE 220-240 V 220-240V 2N~ GN/YE GN/YE 220-240 V 380-415V 2N~ GN/YE GN/YE 220-240 V 380-415V 3N~ GN/YE GN/YE 220-240 V Die Installation und der Anschluss an das elektrische Netz sollte nur einer Elektrofachkraft anvertraut werden, die mit den einschlägigen Normen vertraut ist.
- Page 29 Setzen Sie den Fettfilterrahmen und die Gitter in die Öffnung. – 29 –...
-
Page 30: General Information
GENERAL INFORMATION These are the mounting instructions for the Novy unit device on the cover. Carefully read the safety instructions, mounting instructions and user manual before installation and putting it into operation. The safety instructions are listed in a separate booklet supplied with the appliance and listed on our website www.novy.com. -
Page 31: Installations
INSTALLATIONS Installation regulations The distance between the cooking plate and the wall must be min. 55 mm. − The cooking plate belongs to protection class « Y ». When built in, there may be a high cabinet side or a wall on one side and at the rear. -
Page 32: Install The Exhaust Duct
INSTALL THE EXHAUST DUCT The motor outlet has a rectangular exhaust of 220 x 90 mm. It is recommended to connect an exhaust duct to this with the same dimensions. For optimum performance of the hood it is important to pay attention to the items mentioned below. General: −... -
Page 33: Installation Instructions
INSTALLATION INSTRUCTIONS Follow the steps below for the assembly of the appliance and use the the installation drawings in these instruction. Take the unit from the packaging at the place of the 2 cut-aways in the packaging to avoid damaging the glass. - Page 34 Min. 55 Min. 55 Flush mounting Make a cut-away and a milling edge in the table top in accordance with the drawing 3a. Surface mounting Make a cut-away in the table top in accordance with the drawing 3b. Ventilation Provide a ventilation opening just below the worktop of minimum 3mm over at least the entire width of the induction hob for sufficient cooling of the hob.
- Page 35 Remove the grease filter from the extractor in order to prevent damage to the appliance. Stick the insulation strip 2 mm from the outer edge at the rear side of the glass plate. – 35 –...
- Page 36 Install a bend for the exhaust duct. If the exhaust duct is mounted directly with a downward bend, first place the supplied bend on the unit. The connection for the exhaust duct is on the rear of the unit. Make the connection airtight with aluminium tape.
- Page 37 220-240V 1N~ GN/YE GN/YE 220-240 V 220-240V 2N~ GN/YE GN/YE 220-240 V 380-415V 2N~ GN/YE GN/YE 220-240 V 380-415V 3N~ GN/YE GN/YE 220-240 V The installation and connection to the electrical mains may only be entrusted to a professional (electrician) who is familiar with the prescribed standards.
- Page 38 Place the grease filter frame and the exhaust grille into the intake opening. – 38 – – 38 –...
- Page 39 NOVY nv behoudt zich het recht voor te allen tijde en zonder voorbehoud de constructie en de prijzen van haar producten te wijzigen. NOVY SA se réserve le droit de modifier à tout moment et sans réserve la fabrication et les prix de ses produits.
Need help?
Do you have a question about the Easy 80 Pro and is the answer not in the manual?
Questions and answers