Salda AmberAir Compact RIRS 1200 VEL EKO 3.0 RHX Mounting And Installation Instruction
Source: salda.lt/en, vetter-lufttechnik.de
Hide thumbs
Also See for AmberAir Compact RIRS 1200 VEL EKO 3.0 RHX:
- Mounting and installation instruction (60 pages) ,
- Mounting and installation instruction (74 pages) ,
- Mounting and installation instruction (74 pages)

Related Manuals for Salda AmberAir Compact RIRS 1200 VEL EKO 3.0 RHX


Summary of Contents for Salda AmberAir Compact RIRS 1200 VEL EKO 3.0 RHX
- Page 1 AMBERAIR COMPACT RIRS 12005500 V EKO 3.0 MOUNTING AND INSTALLATION INSTRUCTION...
-
Page 2: Table Of Contents
1. CONTENT 2. SYMBOLS AND MARKING 3. SAFETY INSTRUCTIONS AND PRECAUTIONS 4. INFORMATION ABOUT THE PRODUCT 4.1. DESCRIPTION 4.2. DIMENSIONS AND WEIGHT 4.3. TECHNICAL DATA 4.4. OPERATING CONDITIONS 4.5. STANDARD PACKAGE OF COMPONENTS 4.6. DESCRIPTION OF COMPONENTS 5. INSTALLATION 5.1. RECEPTION OF GOODS 5.2. -
Page 3: Symbols And Marking
2. SYMBOLS AND MARKING Warning – pay attention Additional information Apply the auxiliary label on the unit (on an easily accessible location) or on the dashed location of the technical manual in order to keep the im- portant information about the unit. Figure 2.1. - Page 4 Figure 2.7. Technical label place and air duct indication AmberAir Figure 2.8. Technical label place and air duct indication AmberAir Compact RIRS 5500 V EKO 3.0 (right version) Compact RIRS 5500 V EKO 3.0 (left version) NOTE. Ducts are not the part of the unit. | EN AmberAir Compact RIRS 1200-5500 V EKO 3.0 v2023.1...
-
Page 5: Safety Instructions And Precautions
3. SAFETY INSTRUCTIONS AND PRECAUTIONS Read these instructions very carefully before installing and using this equipment. Installation, connection and maintenance should be carried out Main safety rules Danger • of the device have stopped. • Make sure that the fans are not accessible through air ducts or branch openings. •... -
Page 6: Information About The Product
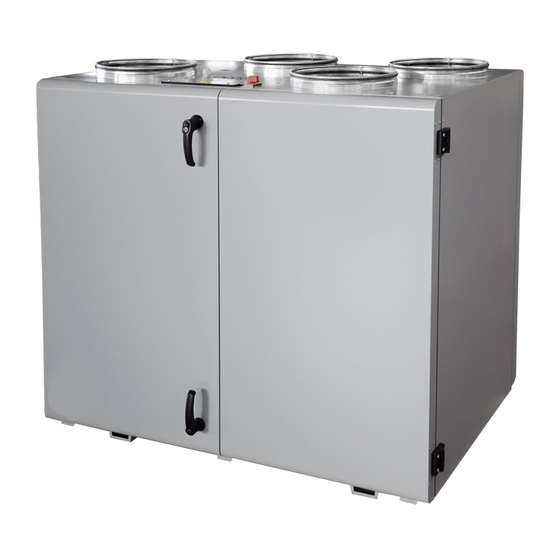
4. INFORMATION ABOUT THE PRODUCT 4.1. DESCRIPTION ventilation in home control panel or though Not suitable for operation in pools, saunas and other similar premises. 4.2. DIMENSIONS AND WEIGHT Figure 4.2.1. AmberAir Compact RIRS 1200 -1900 VE/VW EKO 3.0 Figure 4.2.2. AmberAir Compact RIRS 2500 VE/VW EKO 3.0 | EN AmberAir Compact RIRS 1200-5500 V EKO 3.0 v2023.1... - Page 7 Figure 4.2.3. AmberAir Compact RIRS 3500 VE/VW EKO 3.0 Figure 4.2.4. AmberAir Compact RIRS 5500 VE/VW EKO 3.0 AmberAir Compact RIRS 1200-5500 V EKO 3.0 v2023.1 EN |...
- Page 8 AmberAir Compact 1200 1200 1200 1200 1900 1900 1900 1900 2500 2500 2500 2500 RIRS EKO 3.0 RHX [mm] 1500 1600 [mm] [mm] 1150 1300 ØD / D [mm] [mm] [mm] [mm] [mm] [mm] 1052 1214 [mm] [mm] [mm] [mm] [mm] [mm] [mm]...
-
Page 9: Technical Data
4.3. TECHNICAL DATA AmberAir Compact RIRS EKO 3.0 RHX 1200 VE 1200 VW 1900 VE 1900 VW 2500 VE 2500 VW EXHAUST AIR FAN phase/voltage [50 Hz/VAC] 1/230 1/230 1/230 1/230 1/230 1/230 [kW/A] 0,38/2,5 0,38/2,5 0,47/2,04 0,47/2,04 0,715/3,1 0,715/3,1 speed [min 3370... -
Page 10: Operating Conditions
4.4. OPERATING CONDITIONS AmberAir Compact RIRS EKO 3.0 RHX 1200 VE/VW 1900 VE/VW 2500 VE/VW 3500 VE/VW 5500 VE/VW Minimum outdoor air temperature Maximum outdoor air temperature Minimum extracted air temperature Maximum extracted air temperature Maximum extracted air relative humidity Minimum ambient air temperature Maximum ambient air temperature Installation... -
Page 11: Installation
5. INSTALLATION 5.1. RECEPTION OF GOODS Each device is carefully checked before transportation. When receiving the goods, checking the devices for any damage made during transporta- tion is recommended. If any damage to the unit is observed, immediately contact the representatives of a transport company. Please inform the representative of the manufacturer, if any deviation of the device is noticed. -
Page 12: Unpacking
Figure 5.2.2. Lifting by rope In order to prevent damage to the casing, only a product placed on a pallet should be lifted. 5.3. UNPACKING Accessories may be packed together with the product. Prior to transporting the unit, the accessories should be unpacked •... -
Page 13: Piping And Instrumentation Diagram
5.4. PIPING AND INSTRUMENTATION DIAGRAM * KE1 - only in electrical version; * KV1 - used in water version; ** Possible to control. THE LIST OF COMPONENTS Supply air fan Exhaust fan Exhaust air temperature sensor Supply air temperature sensor Extract air temperature and humidity sensor sensor Computer... -
Page 14: Mounting
5.5. MOUNTING • • When connecting air ducts, consider the labels on the casing of the unit. • Before connecting to the air duct system, the connection openings of ventilation unit should be closed. • • • • • • out maintenance, servicing and/or repairs tion signs may occur. -
Page 15: Connection Of The Unit To Electric Network
• • and noise level, you can increase the diameter. • In order to reduce the level of the noise in the air supply system, install dampers (see the chapter on air supply system installation). • • External air and exhaust system piping should be isolated in order to prevent heat loss and condensation. •... -
Page 16: Maintenance
6. MAINTENANCE 6.1. SAFETY INSTRUCTION Unplug the unit from the mains before opening the door (disconnect the power plug from the outlet or in case an automatic circuit breaker installed, disconnect it as well. Make sure that it cannot be turned on by third parties) and wait until the fans completely stop (for about 2 min.). -
Page 17: Filters Maintenance
6.4. FILTERS MAINTENANCE direction. tion manual or on our website www.salda.lt 6.5. ROTOR MAINTENANCE • Maintenance of rotor heat exchanger must be performed on annual basis, once per year. • exchanger are tight. • clamp of the rotor heat exchanger section, and then remove the heat exchanger. -
Page 18: Heater Maintenance
• • Make sure the impeller is free of any obstacles. • • Prior to commencing any maintenance or repairs, make sure the unit is disconnected from the power source. 6.7. HEATER MAINTENANCE • • • • • If necessary, electric heater can be removed. Disconnect the electrical connector from the heater and remove the heater. 6.8. -
Page 19: Control
Modbus RTU (RS485) MB-GATEWAY + WIFI router SALDA AIR mobile application ST-SA-Control BMS over Modbus TCP/IP FLEX BMS over BACnet TCP/IP 7.2. DEVICE FUNCTIONS WEB application and SALDA AIR mobile application. AmberAir Compact RIRS 1200-5500 V EKO 3.0 v2023.1 EN |... -
Page 20: Connection Of Accessories
8. CONNECTION OF ACCESSORIES 8.1. FIRE PROTECTION SIGNAL INPUT (FIRE PROTECTION INPUT (NC)) 8.2. EXTERNAL CO /PRESSURE SENSORS /PRESSURE (input 0-10 VDC) sensors Sensors connection: detection. The CO transmitter is installed in the extract air duct or room. 8.3. ROOM CO TRANSMITTER INSTALLATION RECOMMENDATION 5 0 c m i n . -
Page 21: Concentration According To Pettenkofer Limit
8.4. CONCENTRATION ACCORDING TO PETTENKOFER LIMIT 8.5. CONNECTION OF SUPPLY AND EXTRACT AIR DAMPERS Spring-return actuators. Wiring diagram for AmberAir Compact RIRS VE EKO 3.0 M2, M3 – Open/Close damper actuators. Upon activation of outputs X16:17, X16:20 the dampers shall open, Upon activation of outputs X16:16, X16:19 the dampers shall close. -
Page 22: Connection Of Remote Control Panel Or Modbus
8.6. CONNECTION OF REMOTE CONTROL PANEL OR MODBUS 8.7. WATER HEATER CIRCULATION PUMP AND VALVE ACTUATOR Compact RIRS VW EKO 3.0 units). Wiring diagram | EN AmberAir Compact RIRS 1200-5500 V EKO 3.0 v2023.1... -
Page 23: Recommended Scheme For Connection Of Internal And External Components
8.8. RECOMMENDED SCHEME FOR CONNECTION OF INTERNAL AND EXTERNAL COMPONENTS Figure 8.8.1. AmberAir Compact RIRS 1200 VE EKO 3.0 AmberAir Compact RIRS 1200-5500 V EKO 3.0 v2023.1 EN |... - Page 24 Figure 8.8.2. AmberAir Compact RIRS 1200 VW EKO 3.0 | EN AmberAir Compact RIRS 1200-5500 V EKO 3.0 v2023.1...
- Page 25 Figure 8.8.3. AmberAir Compact RIRS 1900 VE EKO 3.0 AmberAir Compact RIRS 1200-5500 V EKO 3.0 v2023.1 EN |...
- Page 26 Figure 8.8.4. AmberAir Compact RIRS 1900 VW EKO 3.0 | EN AmberAir Compact RIRS 1200-5500 V EKO 3.0 v2023.1...
- Page 27 Figure 8.8.5. AmberAir Compact RIRS 2500 VE EKO 3.0 AmberAir Compact RIRS 1200-5500 V EKO 3.0 v2023.1 EN |...
- Page 28 Figure 8.8.6. AmberAir Compact RIRS 2500 VW EKO 3.0 | EN AmberAir Compact RIRS 1200-5500 V EKO 3.0 v2023.1...
- Page 29 Figure 8.8.7. AmberAir Compact RIRS 3500 VE EKO 3.0 AmberAir Compact RIRS 1200-5500 V EKO 3.0 v2023.1 EN |...
- Page 30 Figure 8.8.8. AmberAir Compact RIRS 3500 VW EKO 3.0 | EN AmberAir Compact RIRS 1200-5500 V EKO 3.0 v2023.1...
- Page 31 Figure 8.8.9. AmberAir Compact RIRS 5500 VE EKO 3.0 AmberAir Compact RIRS 1200-5500 V EKO 3.0 v2023.1 EN |...
- Page 32 Figure 8.8.10. AmberAir Compact RIRS 5500 VW EKO 3.0 | EN AmberAir Compact RIRS 1200-5500 V EKO 3.0 v2023.1...
-
Page 33: Possible Faults And Troubleshooting
9. POSSIBLE FAULTS AND TROUBLESHOOTING FAILURE CAUSE EXPLANATION / CORRECTIVE ACTIONS No supply voltage Unit is not operating relay is active (if installed by the installer) ic protection fans are rotating Air supply heater or pre-heater is not operat- Possible heater or unit failure. MUST contact ing or malfunctioning (if installed) Manual protection is activated elimination. -
Page 34: Ecodesign Data Table
10. ECODESIGN DATA TABLE 1200 VE 1200 VW 1900 VE 1900 VW AMBERAIR COMPACT RIRS EKO 3.0 Declared typology Bidirectional Bidirectional Bidirectional Bidirectional Type of drive Variable Variable Variable Variable Type of HRS Regenerative Regenerative Regenerative Regenerative 75,3 75,3 /s ] 0,36 0,36 0,41... - Page 35 AMBERAIR COMPACT RIRS EKO 3.0 5500 VE 5500 VW Declared typology Bidirectional Bidirectional Type of drive Variable Variable Type of HRS Regenerative Regenerative 74,2 74,2 /s ] 1,33 1,33 [ kW ] 2,59 2,59 SFPint [ W/(m /s) ] Face velocity [ m/s ] Normal external pressure [ Pa ]...
-
Page 36: Declaration Of Conformity
11. DECLARATION OF CONFORMITY Manufacturer SALDA, UAB LT-78109 Šiauliai, Lithuania Tel.: +370 41 540415 www.salda.lt AmberAir Compact RIRS * EKO 3.0 Machinery Directive 2006/42/EC EMC Directive 2014/30/EU Low Voltage Directive 2014/35/EU Ecodesign Directive 2009/125/EC RoHS 2 Directive 2011/65/EU Ecodesign requirements for ventilation units Nr. 1253/2014 Energy labeling of residential units Nr. -
Page 37: Warranty
12. WARRANTY date. such damage. damaged by installing the control system. 4.1. mechanical damage; 4.2. damage caused by entering outside objects, materials, liquids; lation and mounting regulations, deliberate or careless users or third-party behavior. days and deliver the equipment to manufacturer. Delivery costs should be covered by customer. Manufacturer reserves the right to change this technical passport any time without prior notice, if some typographic errors or inaccurate information is found, as well as after improving the apps and/or the devices. - Page 38 AmberAir Compact RIRS 1200-5500 V EKO 3.0 v2023.1...
- Page 39 AmberAir Compact RIRS 1200-5500 V EKO 3.0 v2023.1...
- Page 40 Heat-exchanger cleaning Every 3-4 Filter replacement months** Look at the product label. ** - At least. NOTE. The customer shall be required to complete the Product Maintenance Table. MANUALS IN OTHER LANGUAGES https://select.salda.lt/file/ https://select.salda.lt/file/ https://select.salda.lt/file/ https://select.salda.lt/file/ https://select.salda.lt/file/ aa-compact-rirs1200- aa-compact-rirs1200- aa-compact-rirs1200- aa-compact-rirs1200-...
Need help?
Do you have a question about the AmberAir Compact RIRS 1200 VEL EKO 3.0 RHX and is the answer not in the manual?
Questions and answers