Table of Contents
Advertisement
Quick Links
Advertisement
Table of Contents

Related Manuals for i-PRO WV-X25580-F2LN2


Summary of Contents for i-PRO WV-X25580-F2LN2
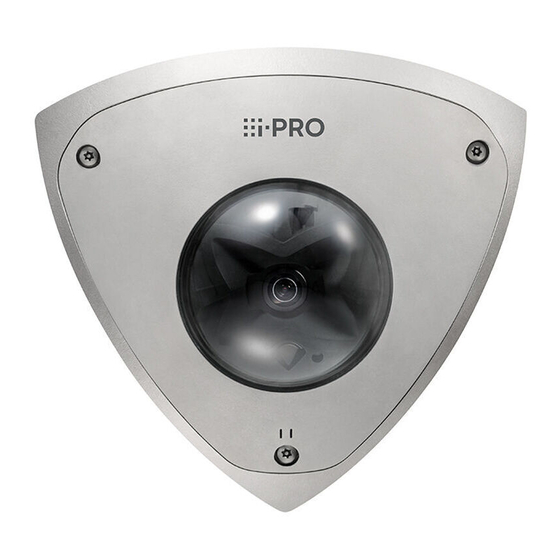
- Page 1 W e b g u i d e c o v e r t e m p l a t e ( f o r c a m e r a s ) Web Guide WV-X25580-F2LN2 Ver 1.0...
-
Page 2: Table Of Contents
Contents 1. Set up ……………………………………………………………………… 1.1 Recommended Procedures for Installing this product ……………………… 2. Connect to the camera …………………………………………………… 2.1 i-PRO Configuration Tool (iCT) …………………………………………… 2.2 IP Setting Software ………………………………………………………… 2.3 Access the camera ……………………………………………………………... - Page 3 Contents 3.11 Set the Image capture size and frame rates ……………………………… 3.12 Set the overlay image function …………………………………………… 3.13 Set the image stream ……………………………………………………… 3.13.1 About the Setting of Stream ……………………………………………… 3.13.2 About delivery volume control (bit rate) …………………………………...
- Page 4 Contents 6.7.1 Set Super Dynamic ………………………………………………………… 6.7.2 Set the backlight compensation …………………………………………… 6.7.3 Set the high light compensation …………………………………………… 6.7.4 Adjust the adaptive black stretch ………………………………………… 6.7.5 Adjust the [Pedestal level] ………………………………………………… 6.8 Adjust the object contrast …………………………………………………… 6.8.1 ...
-
Page 5: Set Up
1. Set up 1.1 Recommended Procedures for Installing this product 1. Set up For detailed instructions on installation, refer to the following. Installation Recommended Procedures for Installing this product The URL of the movie is as follows. https://www.youtube.com/playlist?list=PLTQfvt0fJHvDPOqZw_D0k1KccLwzXt-7S... -
Page 6: Connect To The Camera
Configuration Tool (iCT) This is a tool for managing the image monitoring system at a glance. For more information about i-PRO Configuration Tool (iCT), see the following. →Click here for more information about i-PRO Configuration Tool IP Setting Software Cameras or recorders on the same network can be automatically detected and set up in the network. - Page 7 2. Connect to the camera 2.3 Access the camera ・If you cannot obtain an IP address from the DHCP server, set the IP address to 192.168.0.10. Double-click on the camera's IP address ・ The browser starts and the administrator registration screen is displayed. ・...
-
Page 8: About Live Image
2. Connect to the camera 2.4 About Live image pages About Live image pages ① Camera title ② SD Storage Status Display ③ Stream information display ④ Snapshot button ⑤ Stream selection display button ⑥ Before/after image comparison switching button ⑦... - Page 9 2. Connect to the camera 2.4 About Live image pages ⑯ Camera Control Panel-SD Memory Card-[Log/Play] ⑰ Alarm notification ⑱ Camera Control Panel-SD Memory Card-[Rec. on SD] ⑲ Camera Control Panel-[Mic input volume (Camera to PC)] ⑳ Camera Control Panel-[Brightness] ㉑...
-
Page 10: Set The Camera
3. Set the camera 3.2 Adjust the image quality 3. Set the camera Check whether the object is of the proper size. When using our Extension software, you can check the number of grids to see if it is the right size to recognize object. -
Page 11: Set White Balance Depending On The Lighting Environment You Install
3. Set the camera 3.2 Adjust the image quality Select [Light control mode] To install outdoors: Set [ELC]. For indoor installation: Set [Indoor scene(50Hz)] or [Indoor scene(60Hz)]. 50 Hz/60 Hz can be used differently depending on the region. 3.2.2 Set white balance depending on the lighting environment you install. -
Page 12: Sets Night Time Black-And-White Switching Mode
3. Set the camera 3.2 Adjust the image quality 3.2.3 Sets night time black-and-white switching mode You can switch to color or black-and-white images by using [Day & Night(IR)] when shooting at night. ➣ Live image pages configuration panels>Clicking the [Image quality] tabs enables you to set the image quality. -
Page 13: Recording Setting (Sd Memory Card)
3. Set the camera 3.3 Recording setting (SD Memory Card) Recording setting (SD Memory Card) 3.3.1 Install the SD Memory Card Remove the enclosure Insert a microSD memory card into the slot Use the SD Memory Card formatted on this product. To remove the SD Memory Card, [Basic] the Advanced menu.>On the [SD memory card] tab, select [SD memory card] as [Not use]. -
Page 14: Adjust The Zoom
3. Set the camera 3.5 Hide some of the images ➣ Live image pages cameras control panels>Clicking [Log/Play] displays the log list. View Live image pages and click the camera contol panel display button. Press the [Start] on [Log/Play] button ・... -
Page 15: Identify Sounds With Ai
3. Set the camera 3.7 Record sound Identify sounds with AI Image monitoring can be enhanced by identifying and detecting human cries, broken glass sounds, horns, guns, and other sounds. ➣ Live image pages configuration panels>[Detail setting]>[Camera detailed setting]>[Alarm] of the Advanced menus on the left>Clicking on the [Audio detection] tabs displays the configuration pages. -
Page 16: Set Up Events
3. Set the camera 3.8 Set up events Set up events You can set the alarm to detect the operation of an area or interference to the camera, or the operation when the alarm is detected. ➣ Live image pages configuration panels>[Detailed setting]>[Camera detailed setting]>[Easy Setup] of the Advanced menus on the left>Clicking on the [Event action] tabs displays the configuration pages. -
Page 17: Casing Open Detection
3. Set the camera 3.9 Enhance communication security Drag through the image to set the area. ・ You can set the areas in order. Adjust the [Detection area] and [Detection sensitivity] using the slider bar and then press [Set]. -
Page 18: Detect Data Falsification
3. Set the camera 3.12 Set the overlay image function →Support video 3.10 Detect data falsification If you set Falsification Detection, you can detect the falsified data on the SD Memory Card using the dedicated software. Refer to the following support videos for how to set up tampering detection. →Support video 3.11 Set the Image capture size and frame rates... -
Page 19: Set The Image Stream
3. Set the camera 3.13 Set the image stream 3.13 Set the image stream 3.13.1 About the Setting of Stream You can configure whether to deliver streams, whether to compress streams with H.265 or H.264, Image capture size, image quality, and how to deliver streams. ➣... -
Page 20: Reducing Data Capacity With Smart Coding
3. Set the camera 3.13 Set the image stream 3.13.3 Reducing Data Capacity with Smart Coding Smart coding is a data-compression technique that optimizes the compression ratio by reducing compression and high compression in the background to clearly show the human face, and by object. -
Page 21: Clean Up
4. Clean up 4.2 Cleaning of Dome covers 4. Clean up ・Turn off the power before starting operation. Doing so may result in injury. ・Do not apply or use organic solvents such as benzene and thinner. The enclosure may become discolored. -
Page 22: Specifications
5. Specifications 5.1 PC environment required 5. Specifications PC environment required Ⓡ CPU: Intel Core Processor family <When using an image capture size of 1920 x 1080 or lower> Ⓡ -Intel Core i5-6500 or more Ⓡ -Intel Core i7-6700 or higher recommended <When using an image capture size higher than 1920 x 1080>... -
Page 23: About Image Capture Mode And Image Capture Size
5. Specifications 5.2 About Image capture mode and Image capture size About Image capture mode and Image capture size ・The bit rate of streams is restricted to [Bandwidth control(bit rate)] on the [Network] tabs of network pages. ・If the refresh interval is short, the bit rate may be exceeded depending on the object. -
Page 24: Restrictions
5. Specifications 5.3 DORI *2 “2560 x 1440 (2560 x 1920)” of “stream(2)” can be selected in case of “stream(1)” is set to “2560 x 1440 (2560 x 1920)”. *3 When “3072 x 1728 (3072 x 2304)” or “2560 x 1440 (2560 x 1920)” is selected for “Stream(2)”, the frame rate will be limited to max.“15 fps (12.5fps)”. -
Page 25: Streaming Performance
5. Specifications 5.5 About Available Extension software Streaming performance ・ Up to 14 users are accessible at the same time. ・ The maximum bandwidth is 50 Mbps. About Available Extension software Maximum number of apps ROM capacity RAM capacity 150 MB 250 MB For the latest software (AI application) support status and restrictions, please... -
Page 26: Lamp
5. Specifications 5.6 Lamp Lamp ① [FUNCTION] indicator ② [ACT] indicator ③ [LINK] indicator ④ [SD] (MOUNT) indicator 5.6.1 Lighting of the lamp [FUNCTION] indicator ・ When [REC notification] is set... - Page 27 5. Specifications 5.6 Lamp - Lights red ※Conditions for REC notification: During SD recording or video monitoring ・ When [Impact detection notification] is set - Blinks red ※Condition for Impact detection notification: When the this product casing is impacted ・...
-
Page 28: Button
5. Specifications 5.7 Button Button ① [SD ON/OFF] button ② [INITIAL SET] button... -
Page 29: Cable
5. Specifications 5.8 Cable Cable ① Ethernet cable with RJ45 plug (category 5e or better, straight, all 4 pairs (8 pins), less than 100m {328 feet}) (locally sourced) ② Monitor cable (locally procured) ③ I/O Cable (optional) ④ Audio input cable (white) ⑤... -
Page 30: Others
6. Others 6.2 Check the software version 6. Others Initialize You can initialize the main unit by pressing the [INITIAL SET] button. For the position of the [INITIAL SET] button, refer to the following. →Button Turn off the power of this product. Turn on the power of this product while pressing the [INITIAL SET] button. -
Page 31: Upgrade Software
6. Others 6.4 Order of setting when adjusting image quality Up-to-date versions of software may contain modifications to specific problems. Upgrade software ➣ Live image pages configuration panels>[Detailed setting]>[Camera detailed setting]> [Maintenance] of the Advanced menus on the left>When the [Upgrade] tabs are clicked, the software-upgradeable window is displayed. -
Page 32: Adjusting Object Brightness (Bright Scenes)
6. Others 6.5 Adjusting object brightness (bright scenes) Refer to the User Manual for details of each function. ・The image quality adjustment function may affect each other. ・If necessary, adjust the brightness level of the screen. Adjusting object brightness (bright scenes) 6.5.1 Adjusting brightness Adjust the object brightness. -
Page 33: Adjusting Object Brightness (Dark Scenes)
6. Others 6.6 Adjusting object brightness (dark scenes) Adjusting object brightness (dark scenes) 6.6.1 Adjust the maximum gain In dark scenes, the image becomes brighter by increasing the maximum gain. ➣ Live image pages configuration panels>Clicking the [Image quality] tabs enables you to set the image quality. -
Page 34: Reducing White Flickering And Blacking On The Screen
6. Others 6.7 Reducing white flickering and blacking on the screen Reducing white flickering and blacking on the screen 6.7.1 Set Super Dynamic When Super Dynamic is set to ON, both bright and dark areas are reproduced faithfully, even when shooting in a place with a large brightness difference. -
Page 35: Set The High Light Compensation
6. Others 6.7 Reducing white flickering and blacking on the screen When [Advanced settings] is clicked, the image quality adjustment setting window is displayed. Set to [Back light compensation(BLC)] in the [Super Dynamic] [BLC/ HLC] If [Super Dynamic] is set to [On] or [Intelligent Auto] is set to [On], [Backlight Compensation] cannot be set. -
Page 36: Adjust The Adaptive Black Stretch
6. Others 6.7 Reducing white flickering and blacking on the screen 6.7.4 Adjust the adaptive black stretch Adjust the [Adaptive black stretch] to brighten the dark areas of the images. ➣ Live image pages configuration panels>[Detail setting]>[Camera detailed setting]>[Image] or [Image/Audio] of the Advanced menus on the left>[Image adjust] in the [Image quality] tabs>... -
Page 37: Adjust The Object Contrast
6. Others 6.10 Reducing the blur of object (bright scenes) Adjust the object contrast 6.8.1 Adjust the contrast By adjusting the [Contrast level] to increase the contrast between the light and dark images, visibility of the object with less contrast can be improved. ➣... -
Page 38: Adjust The Maximum Shutter
6. Others 6.10 Reducing the blur of object (bright scenes) scenes, etc.) and facial movements of people. The camera automatically adjusts the amount, gain, shutter speed, and contrast of light entering the camera from the camera's lenses to make it easier to see a moving object. -
Page 39: Reducing Object Blur (Dark Scenes)
6. Others 6.11 Reducing object blur (dark scenes) Maximum Maximum shutter : shutter : 1/30 1/250 6.11 Reducing object blur (dark scenes) 6.11.1 Adjust digital noise reduction Reducing the effects of noise reduction by adjusting the [Digital noise reduction] reduces the blur. ➣... -
Page 40: Sharpen The Outline Of The Subject
6. Others 6.13 Adjust the color 6.12 Sharpen the outline of the subject 6.12.1 Adjust the sharpness level Adjust the [Sharpness level] to sharpen the outline of the images. ➣ Live image pages configuration panels>Clicking the [Image quality] tabs enables you to set the image quality. -
Page 41: Adjust The White Balance
6. Others 6.14 Reducing object noise (bright scenes) 6.13.2 Adjust the white balance If the color is affected by a sodium lamp, use [White balance] to adjust the color. ➣ Live image pages configuration panels>[Detailed setting]>[Camera detailed setting]>[Image] or [Image/Audio] of the Advanced menus on the left>[Image adjust] in the [Image quality] tabs>When [Setup] is clicked, the image quality adjustment setting window is displayed. -
Page 42: Reducing Object Noise (Dark Scenes)
6. Others 6.16 Troubleshooting 6.15 Reducing object noise (dark scenes) 6.15.1 Adjust digital noise reduction By adjusting the [Digital noise reduction] and increasing the effects of noise reduction, noise is reduced. ➣ Live image pages configuration panels>Clicking the [Image quality] tabs enables you to set the image quality. - Page 43 6. Others 6.16 Troubleshooting Phenomenon Probable Causes Measures Reference Be not powered on For a PoE power supply Installation ・Is the Ethernet cable ・Check if it is of this product connected. connected to the power supply device for PoE (IEEE 802.3af compliant)? ・Some power supply ・Refer to the...
-
Page 44: Precautions Pertaining To Usage
6. Others 6.17 Precautions pertaining to usage Phenomenon Probable Causes Measures Reference ・The grounding of the If the peripheral is not camera, switching improved, use a hub, and peripheral microphone with an equipment is not amplifier or connect an grounded. - Page 45 6. Others 6.17 Precautions pertaining to usage Otherwise damage or flooding can result. ・ Do not touch lenses or Dome covers directly. If dirty, image quality may deteriorate. ・ Batteries The battery is built into this product. Do not leave the battery in an environment exposed to excessive heat from sunlight or fire.
-
Page 46: Disclaimer
6.18 Disclaimer IN NO EVENT SHALL i-PRO Co., Ltd. BE LIABLE TO ANY PARTY OR ANY PERSON, EXCEPT FOR REPLACEMENT OR REASONABLE MAINTENANCE OF THE PRODUCT, FOR THE CASES,INCLUDING BUT NOT LIMITED TO BELOW: ANY LOSS OR DAMAGE, INCLUDING WITHOUT LIMITATION, DIRECT OR INDIRECT, SPECIAL, CONSEQUENTIAL OR EXEMPLARY, ARISING OUT OF OR RELATING TO THE PRODUCT;... -
Page 47: Network Relationship
6. Others 6.19 NETWORK RELATIONSHIP EXPRESS OR IMPLIED, INCLUDING BUT NOT LIMITED TO, THE IMPLIED WARRANTIES OF MERCHANTABILITY, FITNESS FOR ANY PARTICULAR PURPOSE, OR NON- INFRINGEMENT OF THE THIRD PARTY'S RIGHT. THIS PUBLICATION COULD INCLUDE TECHNICAL INACCURACIES OR TYPOGRAPHICAL ERRORS.
Need help?
Do you have a question about the WV-X25580-F2LN2 and is the answer not in the manual?
Questions and answers