Advertisement
Quick Links
Advertisement

Related Manuals for Ofs Tangent


Summary of Contents for Ofs Tangent
- Page 1 Tangent assembly instructions...
- Page 2 Tangent assembly instructions Table of contents With buttons Without buttons ofs.com imagine a place® 800.521.5381 Assembly instructions...
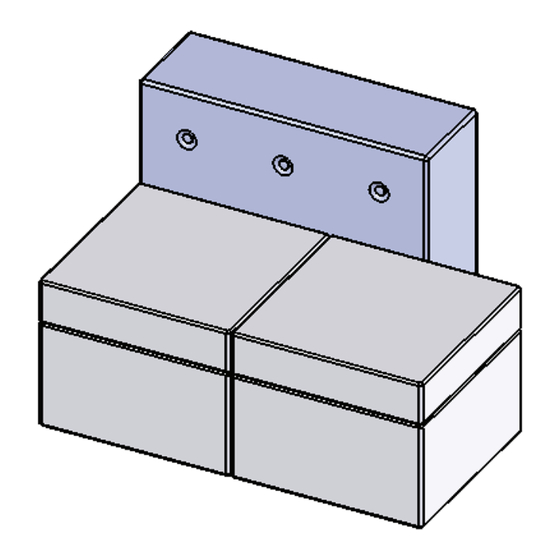
- Page 3 Tangent assembly instructions Attaching walls with buttons Determine the set up, refer to drawings for layout. (Figure A) Install buttons as required. Additional buttons are bagged and stapled to inside of wall unit. (Figure B) Remove seat lids and install ganging brackets. Note: If cushion tie down option was specified with optional back cushion, mount D-ring 1495165 to line up with snap hook on cushion with ganging clip/screw.
- Page 4 Tangent assembly instructions Attaching walls with buttons Lay unit on it’s back and install clamp plate kits CP-1. Required for layouts with benches on one side of walls, not required when layout includes benches on both sides of walls. Clamp plate kit is purchased separately.
- Page 5 Tangent assembly instructions Attaching walls without buttons Determine the set up, refer to drawings for layout. (Figure A) Remove the seat lids and determine the mounting holes required for the setup. Turn wall on it;s side to expose the bottom of the unit. Located mounting holes by pushing ice pick or similar sharp object through the required holes on inside of unit.
- Page 6 Tangent assembly instructions Attaching walls without buttons Lay unit on it’s back and install clamp plate kits CP-1. Required for layouts with benches on one side of walls, not required when layout includes benches on both sides of walls. Clamp plate kit is purchased separately.
Need help?
Do you have a question about the Tangent and is the answer not in the manual?
Questions and answers