
Related Manuals for Copeland RLDS


Summary of Contents for Copeland RLDS
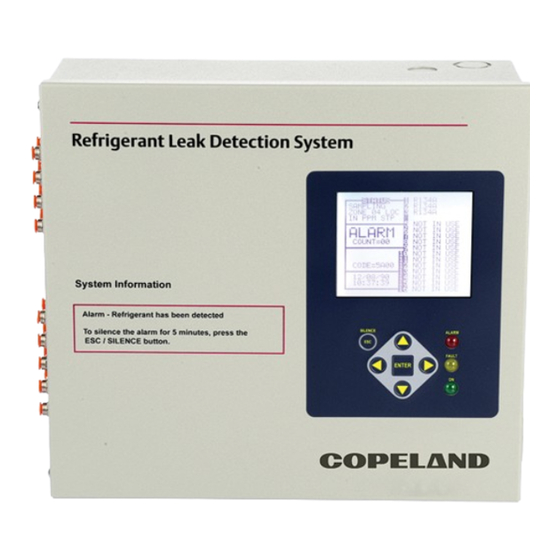
- Page 1 USER MANUAL Refrigerant Leak Detection System (RLDS) Installation and Operation User Manual...
- Page 2 Email: ColdChain.TechnicalServices@copeland.com CE/FCC Compliance Notice Information Class A compliance for RLDS under CE Requirements. Meets Part 15 Subpart B requirements of the FCC Rules. In a domestic environment this product may cause radio interference in which case the user may be required to take adequate measures.
-
Page 3: Table Of Contents
3.1.1 Warnings and Cautions......................................7 3.1.2 Inspection............................................8 3.1.3 Monitor Location .......................................... 8 3.1.4 Mounting Instructions ....................................... 8 3.2 RLDS - Connecting Gas Sample Lines ............................9 3.2.1 Overview ............................................9 3.2.2 Tubing Considerations....................................... 9 3.2.3 Connecting Purge Line ......................................10 3.2.4 Connecting Exhaust Line ...................................... - Page 4 5 RLDS - CONNECTING EXTERNAL ALARMS .................... 28 5.1 Overview........................................28 5.2 Connection ......................................28 6 PROGRAMMING SETUP AND UI NAVIGATION FOR RLDS - DISPLAY SCREENS......30 6.1 Initial Power Up ....................................30 6.2 Data Display Screen ..................................30 6.3 Navigate to the First Setup Screen ...............................30 6.4 Navigate to the Second Setup Screen............................31...
- Page 5 6.24 Acquiring Temperature Coefficient (Factory Use Only) ....................34 6.25 R Digipot ......................................34 6.26 Establishing the CO2 Baseline ..............................35 7 GENERAL OPERATION OF RLDS - UI ......................36 7.1 Functional Overview ..................................36 7.2 The Zone Setup Screen ..................................36 7.2.1 Location ............................................36 7.2.2 Gas/Refrigerant Type .......................................
- Page 6 8.3.1 Zone Status Screen ........................................49 8.3.1 ACKNOWLEDGING ALARMS: ..................................49 8.3.2 General Controller (CTRL STATUS) Screen ..............................49 9 HAND-HELD TERMINAL (HHT) FOR USE WITH THE GATEWAY AND RLDS CONTROLLER... 50 9.1 HHT Key Operations ..................................50 10 MAIN SCREENS.............................. 51 10.1 Home Screen (F1 Screen) ................................51...
- Page 7 TABLE OF CONTENTS 11 RLDS SETUP ON REFLECS, E2, EINSTEIN, AND SUPERVISORY CONTROLLERS ....59 11.1 REFLECS Setup for RLDS ................................59 11.2 E2 Version 3.01 and below Setup for RLDS (without Gateway)..................59 11.3 Supervisory Controller Setup for RLDS ............................ 60 11.3.1 Adding Application .......................................
-
Page 8: Introduction
How to Use This Manual Thank you for investing in Copeland’s Multi-Zone Gas Monitor. To assure operator safety and the proper use of the monitor, please read this manual. It provides important information on the installation, operation, maintenance, and servicing of the monitor and display module.This manual provides important information on how to install, operate, and service the RLDS. -
Page 9: Misuse And Modifications To The Instrument
The protection provided by the monitor may be impaired if the following hazard symbols and/or associated words are the monitor is used in a manner not specified by Copeland. defined as follows. Modifications to this monitor, not expressly approved, will 1.4.1 Warning... -
Page 10: Functional Overview
Recommended monitoring levels based on compliance to cause of the fault. All 800# models of the RLDS come with the ANSI/BSR ASHRAE 15-2007 and ASHRAE Safety Code 34- number of line-end filters (plus one extra) to match the 2007 have been developed and are listed in Appendix A: number of zones for each model. -
Page 11: Response To The Presence Of Multiple Refrigerants
Response to the Presence of Multiple Refrigerants The RLDS is a refrigerant level monitor, not a gas analyzer. You must program the monitor to test for a specific refrigerant in each zone, and it will only return accurate concentration readings for that particular refrigerant. If a leak occurs of another refrigerant gas type, the monitor may return incorrect readings. -
Page 12: Rlds Hardware Specifications
RLDS Hardware Specifications Table 1 - RLDS Specifications Hardware Specifications Multiple refrigerant gases and multiple area monitoring system for low level continuous monitoring of CFC, HCFC, and HFC refrigerant gases used in most commercial refrigeration systems. System Product Type design supports compliance to the refrigerant monitoring requirements of ANS/BSR ASHRE 15-... - Page 13 6,562 ft (2,000 m) Table 2 - RLDS-CO2 Specifications RLDS-CO2 Hardware Specifications The RLDS-CO2 provides multiple area monitoring for low level continuous monitoring of carbon Product Type dioxide gases used in most commercial systems. System design supports compliance to the gas monitoring requirements of ANS/BSR ASHRE 15-1994.
-
Page 14: Rlds Installation
WARNING Shock hazard! Always disconnect the AC power before working inside the equipment. Drilling holes in the RLDS enclosure may damage the unit and will void the warranty. Please use the CAUTION knockouts provided for electrical connections. -
Page 15: Inspection
Dirt, grease, and oils can adversely affect the operation of the RLDS. The monitor should be installed out of direct sunlight in a clean, dry area that is not subject to temperature or humidity extremes. -
Page 16: Rlds - Connecting Gas Sample Lines
3.2.1 Overview Individual sample lines are run from the RLDS to each area of the facility to be monitored. Additionally, a purge line is installed to provide clean air for resetting the infrared zero baseline. An exhaust line is installed to vent residual gas away from the monitor. -
Page 17: Connecting Purge Line
If this is not possible, an optional charcoal filter assembly (P/N) can be used with the RLDS to filter refrigerant from the purge line. It may be mounted adjacent to the monitor. A line-end filter (P/N) should be attached to the end of the purge line when the charcoal filter is not used. -
Page 18: Considerations
RLDS is used in wet locations such as meat preparation rooms. When water is pulled into the system, a System Fault will occur, closing the fault relay located at the bottom of the main control board. To turn power off to the RLDS when this occurs, wire the fault relay into a spare 16AI input. -
Page 19: Rlds Interior Components
RLDS Electrical Wiring The RLDS uses a universal power supply that is capable of accepting inputs of 100 to 240 VAC, 50/60 Hz. The monitor's power consumption is 20 Watts. It is highly recommended that the monitor be connected directly to the AC power source, preferably on its own circuit. -
Page 20: Warnings And Cautions
Drilling holes in the RLDS enclosure may damage the unit and will void the warranty. Only use WARNING the knockouts provided for electrical connections. -
Page 21: Connecting Communication Devices
E2 MODBUS Direct Support for RLDS 4.1.1 Network Connection to E2 Connecting an RLDS to an E2 unit requires the E2 version 3.01 and above. Contact Copeland for upgrade information if the controller is a version prior to 3.01. 4.1.1.1 COM Port Associations - E2 Versions 3.xx 4.1.1.2 COM Port Associations - E2 Versions 4.0 and... -
Page 22: E2 Termination
To enable communications between E2 and the RLDS, the devices must be added and addressed in E2. Before setting up a RLDS, the port on the E2 that has the MODBUS cable connected must be set up as a MODBUS 1. -
Page 23: E2, Einstein, And Reflecs Controllers (The Rlds Gateway Board)
To commission the device, select - Commission to communicate with up to three RLDS units as if each of and choose the MODBUS network address. them were a standard 16AI Analog Input board, and allows for programming with the Hand-Held Terminal (HHT). -
Page 24: Powering The Gateway Board
4.2.1 Powering the Gateway Board 4.2.2 Gateway Board Networking To connect the Gateway to an RLDS, punch out one of the Table 4-1 - Gateway Power Requirements remaining service knockouts to gain access to the interior of the RLDS monitor. Locate the RS485 connector and remove •... -
Page 25: Changing Terminator Switch Settings
Gateway Board. The node address switch on each middle of the network. If the RLDS is connected as a single RLDS must be set in succession from 1 to 3 in order for the device, or it is the last device on the network chain, the Gateway Board to recognize the units on the network. -
Page 26: Connecting The Gateway Board To The E2, Einstein, Or Reflecs Network
RLDS Gateway address; therefore, if the RLDS Gateway Board installed on its RS485 I/O Network. For E2 and Einstein address = 3, then RLDS unit #1 will appear on 16AI #3 and so controllers, this means the Gateway will be installed on the forth. -
Page 27: Setting The Baud Rate Dip Switches
Dip switch 8 must be set to the ON position for REFLECS controller mode and OFF for E2, Einstein controller mode. Baud rate for the RLDS is set by software, either through the RLDS, or on the Gateway Board via Hand-Held Terminal. It is... -
Page 28: Gateway Board Status Leds
RS485 I/O Network or controller failure. • ON with no flashing (steady) - One or more of the RLDS units is offline. If all are offline, check the wiring. If just one is offline, check the RLDS controller. -
Page 29: Connecting To A Building Management System
Connecting to a Building management System The RLDS may be connected to a Building Management System via the RS-485 connector. The node address on each RLDS may be set from 1 to 15 in order to identify itself to the Building Management System. -
Page 30: Terminating Multiple Monitors
Terminating Multiple Monitors Figure 4-19 - Termination Settings for Multiple Monitors Connected to a BMS (Two Trunks) Figure 4-20 - Termination Settings for Multiple Monitors Connected to a BMS (Daisy Chain) 026-1309 R16 RLDS I&O Manual ©2024 Copeland LP. -
Page 31: Pc Software
After both are operational, connect the RS-232 cable and start the software program. Apply power to RLDS monitor and allow it to warm up. Note that on CO2 models, a “Clearing Purge Line” message is displayed for approximately 2.5 minutes before warm up begins. -
Page 32: Saving And Sending Programs
4-20 mA DC scrolling current loop outputs for connection to external monitoring devices (e.g., a local loop-powered • To send a saved program to the RLDS, open the program display or a building management system [BMS]). and connect the PC to the RLDS. From the monitor, select SEND SETUP and press Enter. - Page 33 17 mA DC 17 mA DC 813 PPM 18 mA DC 18 mA DC 875 PPM 19 mA DC 19 mA DC 973 PPM 20 mA DC 20 mA DC 1000 PPM 026-1309 R16 RLDS I&O Manual ©2024 Copeland LP.
-
Page 34: Ma Dc Connections
4.7.2 4-20 mA DC Connections External devices are connected to the RLDS using a shielded dual twisted pair cable. Use any of the remaining service knockouts to gain access to the interior of the monitor. Locate the dual 4–20 mA DC output connector (see below) and remove it from the circuit board. -
Page 35: Rlds - Connecting External Alarms
Overview The RLDS includes four SPDT relays whose contacts are rated 2 A at 250 VAC (inductive) and 5 A at 250 VAC (resistive). These relays are used for the connection of external alarm devices that are activated when the relay is energized. The relays are factory... - Page 36 Figure 5-2 - Typical AC External Alarm Relay 1 Wiring Figure 5-3 - Typical DC External Alarm Relay 1 Wiring 026-1309 R16 RLDS I&O Manual ©2024 Copeland LP.
-
Page 37: Programming Setup And Ui Navigation For Rlds - Display Screens
Programming Setup and UI Navigation for RLDS - Display Screens Initial Power Up When the RLDS is first powered up, all front level panel LEDs will illuminate, and a splash screen will appear and display the monitor’s firmware version level. Note that on CO models, a “Clearing Purge Line”... -
Page 38: Navigate To The Second Setup Screen
Navigate to the Second Setup Screen From RLDS System Setup screen 1 select the SYSTEM option to go to System Setup screen 2. Press the ESC key to return to the System Setup screen 1. Figure 6-4 - Setup Screen 2... -
Page 39: Zone Hold
PPM concentration, respectively. For AUTO - sets the instrument to re-zero every 10 minutes. example, if the RLDS samples zone #9 at 63 PPM, the ZONE and PPM outputs would read 13 mA (corresponds to zone ZONE CHANGE - sets the instrument to re-zero at each #9) and 5 mA (corresponds to 63 PPM), respectively, until the zone change. -
Page 40: Navigating To The Third Setup Screen
The Service Mode option is located on the System Setup Screen in the bottom right corner. When activated, the Service Mode will disable the RLDS unit for a specified length of time. The default is 5 minutes. This time interval can be changed as described in Section 6.16, Node Address... -
Page 41: Service Timeout
Use the UP/DOWN cursor key to modify the Digipot value. 6.21 Node Address Each RLDS on the network must have a distinct node address. The node address may be set from 1 to 64. Press the ENTER key to adjust the setting. -
Page 42: Establishing The Co2 Baseline
Restart the RLDS by either (a) cycling the power, or (b) pressing the CPU reset switch on the main printed circuit board (see Figure 6-7). -
Page 43: General Operation Of Rlds - Ui
Normally each RLDS will perform measurements on its active zones sequentially and without user input. The total time it takes an RLDS to complete a measurement cycle is directly proportional to the number of active zones and the physical length of the air lines. -
Page 44: Log Interval
7.2.6 Log Interval 7.3.2 Spill Level The RLDS retains a data log of 100 measurements for each This is the concentration level in PPM that will activate a spill zone. The log interval is the number of minutes from 1 to 1440 alarm condition. -
Page 45: Fault Conditions
SETUP - using the right arrow key, navigate to the Zone Setup screen 1 (Figure 7-1). This enables review of the zone setup parameters and accesses the Trend screen. Use the ESC button on the RLDS unit to go back to the previous menu. Figure 7-3 - Alarm Summary Screen The Alarm Summary screen displays a list of all alarm conditions pending across the network. -
Page 46: Acknowledging Alarms
Repeat this procedure to acknowledge any remaining alarms Once all the alarms associated with a given RLDS are acknowledged, its red LED will turn off, and any external alarms connected to the RLDS relays will deactivate. -
Page 47: System Faults
NO FLOW message in each individual zone affected. Check for a blockage in the air sample line or at the line-end filter. Once the blockage has been cleared, the RLDS will return to normal operation after the zone has been sampled. -
Page 48: Non-Critical Faults
Once the system malfunction has been corrected, it may take some time for the fault condition to clear completely. If the fault is associated with a specific zone, the RLDS must first cycle back to the affected zone before it returns to normal operation. At that time the yellow LED will turn off and any external alarms connected to the monitor's alarm relays will also turn off. -
Page 49: Viewing Fault Log
The Trend Data Log can be reset by pressing a combination of the ENTER and right arrow buttons while viewing the log. When finished, press the ESC key to revert to the previous screen. Figure 7-9 - Flow Log Screen 026-1309 R16 RLDS I&O Manual ©2024 Copeland LP. -
Page 50: The Calibration Screen
FACTOR to 1.000. Next, set up the RLDS for a logging interval of zero minutes (Section 7.2.6, Log Interval), and place the RLDS in its zone hold mode for the zone you wish to use for calibration purposes (Section 6.13, Re-Zero Mode). -
Page 51: Programming New Gases
7.9.6 Programming New Gases As new gases come into use, the RLDS allows the addition of The ambient CO2 level is set at the these new gases to its on-board gas library. At the end of the factory to 386 ppm and will likely not gas library list is an option labeled CUSTOM for adding new need to be changed. -
Page 52: The Diagnostic Screen
7.11.1 Navigating to the Diagnostic Screen On the System Setup screen (Figure 6-3), select the Diagnostic option (DIAG). 7.11.1.1Diagnostic Screen Figure 7-14 - Diagnostic Screen Layout 7.11.1.2Diagnostic Options and Controls Figure 7-15 - Diagnostic Screen 026-1309 R16 RLDS I&O Manual ©2024 Copeland LP. -
Page 53: Diagnostic Screen Overview
Temperature Compensation – magnitude of voltage applied to sensor output (in volts). Factory use only. 485 RX=x - Receive port number of bytes FUNC - Function MODBUS data 485 TX=x - Transmit port number of bytes REG=xxxxx - Register address 026-1309 R16 RLDS I&O Manual ©2024 Copeland LP. -
Page 54: Quick Setups For Hand-Held Terminal (Hht)
Use the right and left arrow keys to move across the field to select each A change in the Time/Date on any one of the RLDS letter, and remember to use the “.” and “—” keys to toggle controllers changes ALL of the RLDS controllers on the letters. -
Page 55: Zone Config Screen 1
This zone screen is where alarm levels for each zone are set. individual zone: Each zone can be set to a different level for each of the values, and the values activate the relays inside the RLDS. 01: ZONE 01 LOC •... -
Page 56: Status Option Screen
(such as a motor room), stagger In order to acknowledge the alarm, press the CANCEL key so these zones as they enter the RLDS. For the A appears next to the alarm. example, if there are two motor rooms... -
Page 57: Hand-Held Terminal (Hht) For Use With The Gateway And Rlds Controller
The HHT displays several screens for viewing leak system status, making control setpoint adjustments, and adjusting at what PPM an alarm should sound. Setpoint changes made through the HHT are transferred to the RLDS controller and overwrite any existing set points. -
Page 58: Main Screens
If it finds a unit, it marks it as ENABLED. RLDS GW-810-3760 If an RLDS is not present on the network, the user can mark VER: 1.10B04 that RLDS as DISABLED to prevent the Gateway from... -
Page 59: Operation Select (Option) Screen
1 = RLDS STATUS 2 = RLDS FAULTS The RLDS FAULTS screen will display a list of the system 3 = RLDS CONFIG failures associated with the selected RLDS. One failure will be displayed on each line. -
Page 60: Rlds Configuration Option (Config Option) Screen
From the CONFIG OPTION screen, press the right arrow key the AL ACK field. The default for this field is set to MANUAL, and then press the 1 key for RLDS CTRL. Press the down but it is recommended the setting be changed to AUTO so... -
Page 61: Zone Config Screen 1
01 - REFRIG: Each zone can be set to a different level for each of the 01 - LENGTH: values, and the values activate the relays inside the RLDS. • ZONE (name) can be 1-12 characters and is an 01 is the variable indicating which zone number you are alphanumeric representation of the location of the zone. -
Page 62: Time/Date Screen
User enter a curve number for New Gas NOTE Type 1 for x. A change in the Time/Date on any one of the RLDS controllers changes ALL of the RLDS controllers on the Use the “.” and “—” keys to scroll through the supported gas/ network. -
Page 63: Status Option Screen
STATUS OPTION screen where you can make another screen, first press the up arrow key to go back to the OPTION selection. screen and select 1 for RLDS STATUS. You should now be To display CTRL STATUS: (overall controller status), press back at the STATUS OPTION screen. -
Page 64: Diagnostics Screen 1: Sensor Data Register
0.000AU. When sampling refrigerants, its value varies proportionally with the refrigerant concentration. • BNCH P is PPM in bench, based on zone gas selection (uncorrected). Press the down arrow key to display the sixth screen: 026-1309 R16 RLDS I&O Manual ©2024 Copeland LP. -
Page 65: Screen 6: Sensor Data Register
NO is no response after all four tries. Press the down arrow key to display the seventh screen: • 1: <ct> <ct> <ct> is RLDS 1 count for each statistic. • 2: <ct> <ct> <ct> is RLDS 2 count for each statistic. -
Page 66: Rlds Setup On Reflecs, E2, Einstein, And Supervisory Controllers
1,2,3. The second Gateway will be addressed as 4, but twice to go back to the MAIN MENU screen. the RLDS is set to 1 because all units on the Gateway are Press 4 for Sensor Control. numbered sequentially 1 to 3. The RLDS controllers are... -
Page 67: Supervisory Controller Setup For Rlds
Gateways are needed. The first Gateway Select 185. for IR Leak Detection. will be address 1 and the RLDS units are numbered as 1, 2, 3. The second Gateway will be addressed as 4, but the RLDS is set to 1 because all units on the Gateway are numbered sequentially 1 to 3. -
Page 68: Adding Application
1. Click Zone Setup tab. and the address. Click Update or Save Changes to save. 2. Set the Refrigerant Type. Figure 11-5 - Add the RLDS Application to the Supervisory Controller Figure 11-8 - RLDS Zone Setup Tab 11.3.2 Edit Application 11.3.5 Zone Alarms Leak/Spill/Evac... -
Page 69: Rlds Maintenance
Electrical installation should be performed by a certified electrician, and must comply with all applicable WARNING NEC/CEC and local safety codes. The RLDS contains sensitive electronic components that can be easily damaged. Do not touch or disturb IMPORTANT any components. Do not dislodge electrical wiring or pneumatic tubing. - Page 70 Water Trap 275-0234 obvious signs of contamination. The RLDS is protected from electrical damage by two, 1A, 250 V, type “F” fuses. Locate the fuse holders and carefully remove the fuses from their Fuses 275-0250 holders.
-
Page 71: Replacement Parts And Optional Accessories
12.3 Replacement Parts and Optional Accessories Replacement Parts Item Description Part Number RLDS 4 Zone, 5 line-end filters, charcoal filter, t-bolt bracket, 120/240 VAC 50/60 Hz 808-2004 RLDS 4 Zone, 5 line-end filters, charcoal filter, t-bolt bracket, 120/240 VAC 50/60 Hz, 808-2005... -
Page 72: Optional Accessories
275-0280 R-134a Gas Verification Kit 275-0281 R-123 Gas Verification Kit 275-0282 Water Traps Manual Drain Water Trap 275-0234 Manual Drain Water Trap Replacement Filter 275-0235 Manual Drain Water Trap Mounting Bracket 275-0236 026-1309 R16 RLDS I&O Manual ©2024 Copeland LP. -
Page 73: Troubleshooting
(approximately 2 minutes). If the faults cannot be cleared using the above procedure, call the factory for further assistance. 026-1309 R16 RLDS I&O Manual ©2024 Copeland LP. -
Page 74: Appendix A: Recommended Refrigerant Gas Alarm Settings
2000 3000 FA188 FC72 H1301 H1211 H2402 H1234YF N1230 NH3/R-717 R-11 R-12 R-21 R-22 R-23 R-32 R-113 R-114 R-123 R-124 R-125 R-134A R-227 R-236FA R-245FA R-401A R-402A R-402A R-404A R-407A R-408A R-407C 026-1309 R16 RLDS I&O Manual ©2024 Copeland LP. - Page 75 R-438A R-500 R-502 R-503 R-507 R-508B R-717/NH3 R-744/CO2 1500 2000 3000 H1234ZE R407F N7100 N7200 N7300 N7600 H1233zde N4710 R-448A R-449A R-513A R-452A R-452B R-514A CO2/R-744 1500 2000 3000 FA188 FC72 H1301 026-1309 R16 RLDS I&O Manual ©2024 Copeland LP.
- Page 76 H1211 H2402 H1234YF N1230 NH3/R-717 R-11 R-12 R-21 R-22 R-23 R-32 R-113 R-114 R-123 R-124 R-125 R-134A R-227 R-236FA R-245FA R-401A R-402A R-402B R-404A R-407A R-408A R-407C R-409A R-410A R-422A R-422D R-424A 026-1309 R16 RLDS I&O Manual ©2024 Copeland LP.
- Page 77 Alarm Settings (PPM) Leak Spill R-426A H1336E H1336Z N5110 R454A R454B R454C R455A H1224YDZ FC3284 C2H2/R1150 026-1309 R16 RLDS I&O Manual ©2024 Copeland LP.
-
Page 78: Appendix B: Rs-485 Communications Protocol
RLDS responds by sending the contents of the structure MODBUS RTU Operation referenced by the specified register. After the master validates the RLDS response using the CRC bytes, it must then move Overview the data into its matching data structure before individual items may be accessed or modified. - Page 79 Note: All data sent out from the RLDS is in “little endian” byte the RLDS units it is connected to. If it is, the remote display (if order (least significant byte followed by most significant byte).
- Page 80 R-409A N4710 R-410A R-448A R-500 R-449A R-502 R-513A R-503 R-452A R-507 R-452B R-508B R-514A H1301 H1336E R-408A H1336Z FA188 N5110 R-236FA R454A N1230 R454B R-227 R454C R455A FC72 H1224ydZ R-21 FC3284 R-125 026-1309 R16 RLDS I&O Manual ©2024 Copeland LP.
- Page 81 ALARM LEVEL ZONE 13 UNSIGNED INT 2030 ALARM LEVEL ZONE 14 UNSIGNED INT 2031 ALARM LEVEL ZONE 15 UNSIGNED INT 2032 ALARM LEVEL ZONE 16 UNSIGNED INT 2033 (STATUS) MODE UNSIGNED INT 026-1309 R16 RLDS I&O Manual ©2024 Copeland LP.
- Page 82 0-6000 2051 (SENSOR) AVE VOLTAGE x1000 UNSIGNED INT 0-5000 2051 (SENSOR) ZERO VOLTES x1000 UNSIGNED INT 0-5000 2053 (SENSOR) AVE AU x10000 UNSIGNED INT 0-30000 2054 (SENSOR) BENCH PPM UNSIGNED INT 0-65535 026-1309 R16 RLDS I&O Manual ©2024 Copeland LP.
- Page 83 LEAK LEVEL ZONE 16 UNSIGNED INT >0<SPILL PPM 3032 SPILL LEVEL ZONE 1 UNSIGNED INT >LEAK<EVAC PPM 3033 SPILL LEVEL ZONE 2 UNSIGNED INT >LEAK<EVAC PPM 3034 SPILL LEVEL ZONE 3 UNSIGNED INT >LEAK<EVAC PPM 026-1309 R16 RLDS I&O Manual ©2024 Copeland LP.
- Page 84 DISTANCE ZONE 3 UNSIGNED INT 0-1200ft 3067 DISTANCE ZONE 4 UNSIGNED INT 0-1200ft 3068 DISTANCE ZONE 5 UNSIGNED INT 0-1200ft 3069 DISTANCE ZONE 6 UNSIGNED INT 0-1200ft 3070 DISTANCE ZONE 7 UNSIGNED INT 0-1200ft 026-1309 R16 RLDS I&O Manual ©2024 Copeland LP.
- Page 85 Zone Data 0x12xx 4609-4630 R/W Setup data for up to 16 zones (xx defines zone number) CAL Data 0x0014 R/W Cal Factors for all gases Date/Time 0x0015 R/W Set RLDS date & time 026-1309 R16 RLDS I&O Manual ©2024 Copeland LP.
- Page 86 W Release RLDS from service mode 0x001E W PPM values for all zones Zone Log 0x3yxx Tread data for each RLDS zone {y = zone # (starting at 0), xx = 00 - 06} Data Type Abbreviations Character Float Floating Point...
- Page 87 DO NOT MODIFY (use zone hold register or service mode register to change this parameter) State 1 byte Defines RLDS Current State. 0 = Idle; 1 = Sampling; 2 = Zeroing; 3 = Warm Up, 4 = Pressure Check DO NOT MODIFY Measuring 1 byte Value = 1 if unit is acquiring detector signal for running avg.
- Page 88 Zone Data Register 0x12xx (R/W, 78 Bytes) Each zone for an RLDS has a separate zone data structure that is 78 bytes long. The zone number is the low order byte in the register address (i.e., Zone 1 data register = 0x1201h).
- Page 89 RLDS alarm will be created. In order for the alarm to be removed the MODBUS master will write a “0” to the ALARM parameter in the ZONE register. This will cause the alarm to be “silenced” in the RLDS (i.e., the alarm relays will return to their normal state and the ALARM lamp will be extinguished).
- Page 90 See description of STATUS REGISTER RLDS Hold Mode The RLDS can be made to hold or “dwell” on a particular zone if necessary. The length of the hold time is defined by the HOLD TIME parameter in the System Data Register.
- Page 91 Time of each alarm event. TIM value as defined in NOTE 2 of Zone Data 1 byte Pointer to most recent event Unused 1 byte Unused Service Mode Register 0x001B (27 Dec) (W, 10B) Variable Type Length Description Rel_Svc_Mode See description of STATUS REGISTER 026-1309 R16 RLDS I&O Manual ©2024 Copeland LP.
- Page 92 RLDS Service Mode The RLDS can be placed into service mode if necessary. During service mode the unit will take no measurements, any and all alarms are silenced, and all relays are opened. The unit automatically comes out of service mode after a preset interval defined by the service_mode_TO parameter in the System Data Register.
-
Page 93: Appendix C: Fault Codes
Communication error MANIFOLD P FAULT 0x0004 Pressure sensor readings are out of range BENCH T FAULT 0x0002 Sensor temperature is out of range BOX T FAULT 0x0001 Chassis temperature is out of range 026-1309 R16 RLDS I&O Manual ©2024 Copeland LP. -
Page 94: Appendix D: System Menu Map
Appendix D: System Menu Map 026-1309 R16 RLDS I&O Manual ©2024 Copeland LP. - Page 95 026-1309 R16 RLDS I&O Manual ©2024 Copeland LP.
- Page 96 The contents of this publication are presented for informational purposes only and they are not to be construed as warranties or guarantees, express or implied, regarding the products or services described herein or their use or applicability. Copeland reserves the right to modify the designs or specifications of such products at any time without notice.
Need help?
Do you have a question about the RLDS and is the answer not in the manual?
Questions and answers