
Related Manuals for Maxim Lighting VORTEX 88847


Summary of Contents for Maxim Lighting VORTEX 88847
-
Page 2: Safety Precaution
SAFETY PRECAUTION • WARNING -To make sure power is off before attempting installation. • WARNING -Support Directly From Building Structure. When mounted directly to the building structure, appliance installation shall not expose combustible material and do not install the appliance to a ceiling with combustible finish. The installation of the appliance cannot leave the wood of the rafters or any thermal insulation exposed to the interior of the room. - Page 4 Ceiling Fan Kit Ensure the following accessories are included in the carton before installation. Wood Ceiling: Secure the mounting bracket direct to the wood ceiling with 4 pieces of washers and wood screws. (The ceiling must bear more than 60kg.) Concrete Ceiling: Use a ф8mm hammer drill bit to drill a hole according to length of the expansion screw.
-
Page 5: Suspension Installation
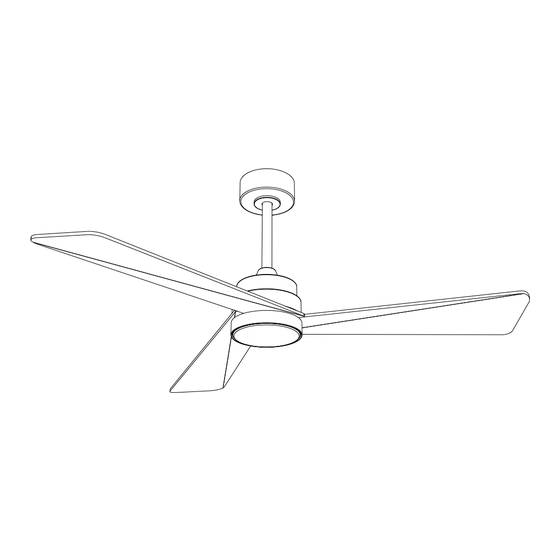
V. Install the fan blades 1. Remove the screws from motor (Figure 1). 2. Lock the blades on the motor by fixed screws. Make sure all screws are fixed tightly for safety (Figure 2). 3. Remove screws from the cover plate (Figure 3). 4. - Page 6 Lead wires 7. Hang the fan on the mounting bracket. Ensure the groove on the suspension ball align with the lug on the mounting bracket (Figure 13). 8. Tighten the safety wire clamp. Secure the safety wire with washer and wood screws for wood ceiling or expansion bolt for concrete ceiling (Figure 14).
- Page 7 Safety Wire Clamp Light-Kit Installation 1. Remove 3 fixing screws from the lamp holder (Figure 15). 2. Plug in the light wire plug to the LED board properly. Secure the LED board to the lamp holder with 3 fixing screws (Figure 16-17). 3.
- Page 8 (Figure 20)
- Page 9 Balance piece 2. Adjust with balance kit. a. Take out the balance bag from the package box, use a balance clamp to select one of the fan blades and clamp the balance clamp on the edge of the tail end of the fan blade (Figure 22) b.
Need help?
Do you have a question about the VORTEX 88847 and is the answer not in the manual?
Questions and answers