Table of Contents
Advertisement
Quick Links
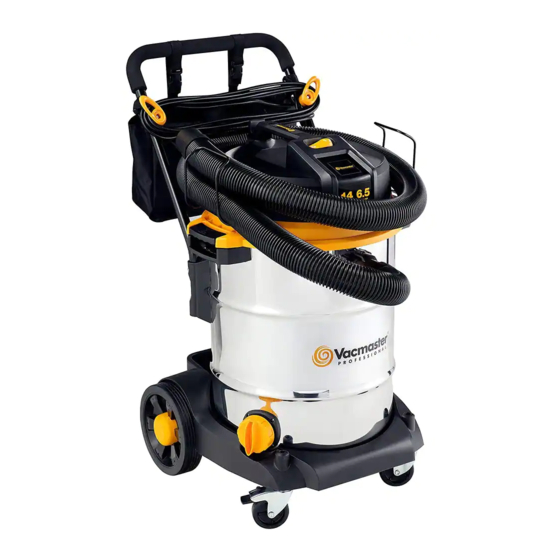
Wet/Dry Vacuum
Operator's Manual
14 Gallon
Model No.
VJE1412SW 0201
FOR YOUR SAFETY
Read and understand this manual before use.
Keep this manual for future reference.
Distributed By
Cleva North America, Inc.
Replacement Filters &
601 Regent Park Court
Accessories available at:
Greenville, SC 29607
Vacmaster.com
Advertisement
Table of Contents

Summary of Contents for Vacmaster PROFESSIONAL VJE1412SW 0201
- Page 1 Model No. VJE1412SW 0201 FOR YOUR SAFETY Read and understand this manual before use. Keep this manual for future reference. Distributed By Cleva North America, Inc. Replacement Filters & 601 Regent Park Court Accessories available at: Greenville, SC 29607 Vacmaster.com...
-
Page 2: Table Of Contents
FOR YOUR SAFETY: CAREFULLY READ AND UNDERSTAND ALL INSTRUCTIONS. WARRANTY ® We take pride in producing a high quality, durable product. This Vacmaster product carries a limited five (5) year warranty against defects in workmanship and materials from date of purchase under normal household use. -
Page 3: Safety Instructions & Warnings
Safety is a combination of common sense, staying alert, and knowing how your vacuum works. Use this Wet/Dry Vac only as described in this manual. To reduce the risk of personal ® injury or damage to your Wet/Dry Vac, use only Vacmaster recommended accessories. Household Type SAVE THIS MANUAL FOR FUTURE REFERENCE. -
Page 4: Double Insulation Instructions
This is a very fine dust which will not be captured by the filter and may cause damage to the motor. When vacuuming fine dust, use a fine dust filter (included). To purchase the additional fine dust filters, call 1-866-384-8432 or get them at your local or online Vacmaster ®... -
Page 5: Unpacking & Checking Carton Contents
UNPACKING & CHECKING CARTON CONTENTS Remove all contents from the box. Remove the power head and take out any contents inside the collection tank. Check each item against the carton contents list. Carton Contents List: Description......... Qty. Vac Assembly ........1 Hose ............. -
Page 6: General Assembly Instructions
GENERAL ASSEMBLY INSTRUCTIONS A Philips head screwdriver driver is required. WARNING: DO NOT PLUG POWER CORD INTO POWER OUTLET. MAKE SURE PLUG IS DISCONNECTED BEFORE ASSEMBLING THE WET/DRY VACUUM. 1. Verify that the power cord is disconnected from the outlet. (Fig. 1) 2. -
Page 7: Dry Vacuum Operation
10. For wet vacuum cleaning, install the supplied foam wet filter. For filter installation instructions see page 12. (Fig. 10) 11. Place the power head back on the collection tank aligning the top section with the latches, and snap into place. (Fig. 11 & 12) 12. -
Page 8: Liquid Vacuum Operation
When vacuuming fine dust, use a fine dust filter (included). To purchase the additional fine dust filters, call 1-866-384-8432 or get them at your local or online Vacmaster ®... -
Page 9: Blower Operation
1. Verify that the power cord is disconnected from the power outlet. Ensure that the tank is clean and free of dust and dirt. (Fig. 1) 2. Remove the cartridge filter and install the foam wet filter over the filter cage and place the power head back on the collection tank. -
Page 10: Maintenance
6. Verify that the power switch is in the ‘O’ OFF position before plugging the power cord into the outlet. (Fig. 4 & 5) 7. Before turning ON the vac, firmly hold the loose end of the hose. Turn the motor on by pressing the switch to the ‘I’... -
Page 11: Installing & Cleaning Cartridge Filter
INSTALLING & CLEANING CARTRIDGE FILTER Installing Cartridge Filter 1. Verify that the power cord is disconnected from the outlet. (Fig. 1) 2. Remove power head and place in upside down position. 3. Install the cartridge filter over the filter cage with the flat end of the filter towards the power head. -
Page 12: Installing & Cleaning Foam Wet Filter
INSTALLING & CLEANING FOAM WET FILTER Installing Foam Wet Filter 1. Verify that the power cord is disconnected from the outlet. (Fig. 1) 2. Remove power head and place in upside down position. Follow instructions to remove cartridge filter. 3. Carefully slide foam wet filter down over the filter cage making sure the cage is completely covered. -
Page 13: Exploded View
EXPLODED VIEW 15.1 15.1... -
Page 14: Parts List
PARTS LIST Part Part Number Description Quantity Power Head Assembly 551006102 Hose Storage Rack 551120118 Filter Cage 551259109 Push/Pull Handle Receiver 551178105 Latch Assembly Collection Tank 551016105 Vacuum Port Assembly 551303103 Drain Assembly 551152114 Static Discharge Chain 551113107 Vacuum Base 551061108 Rear Wheel Assembly 551034112...


Need help?
Do you have a question about the PROFESSIONAL VJE1412SW 0201 and is the answer not in the manual?
Questions and answers