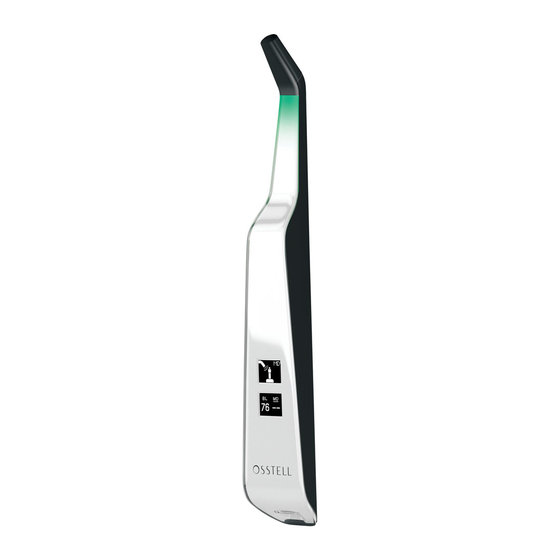
W&H Osstell Beacon Instructions For Use Manual
Hide thumbs
Also See for Osstell Beacon:
- User manual (234 pages) ,
- User manual (313 pages) ,
- Instructions for use manual (109 pages)
Table of Contents
Advertisement
Quick Links
Advertisement
Table of Contents

Summary of Contents for W&H Osstell Beacon
- Page 1 US only Osstell Beacon INSTRUCTIONS FOR USE osstell.com...
-
Page 3: Table Of Contents
Welcome Congratulations on the purchase of your new Osstell® Beacon. Before you start using your Osstell Beacon, please read through the entire instructions for use. Table of content 1) Introduction 2) Warnings and Precautions 3) Intended Use 4) Indications for Use... -
Page 4: Warnings And Precautions
Do not use the instrument in the presence of explosive or flammable materials. See section 4, 5 and 10 for information about approved and com- patible accessories. 3) Intended Use Osstell Beacon is intended for use as a Dental Implant Stability Analyzer. 25087-06 US... -
Page 5: Indications For Use
4) Indication for use Osstell Beacon is indicated for use in measuring the stability of implants in the oral cavity and maxillofacial region. Conditions Surgically placed implants or abutments for which there is space to attach a compatible SmartPeg. Reasons for use... -
Page 6: Safety Symbols
6) Safety Symbols Caution Follow instructions for use Consult instructions for use See section 2) Warnings and Precautions Type BF applied part Manufacturer Country and date of manufacture YYYY-MM-DD Serial number Do not dispose of with domestic waste. Li-ion battery. CE mark with identification number of the notified body. -
Page 7: Before You Start
ISQ values are, where red is the lower range, yellow is the middle range and green is the higher range of the ISQ scale. After 60 seconds of no motion, the Osstell Beacon will turn off automatically. -
Page 8: Smartpeg
SmartPeg threads. 11) How to Measure Prior to use on a patient, place a barrier sleeve over the Osstell Beacon. The barrier sleeve helps prevent cross-contamination and helps keep dental composite material from adhering to the surface of the instru- ment tip and body, and discoloration and degradations from cleaning solutions. - Page 9 5. Repeat step 4 to measure in the Mesial-Distal direction, see fig. 6, and then the sequence starts over and the Osstell Beacon is ready for measurement in the BL (Buccal- Lingual) direction again. See fig 7.
-
Page 10: How To Measure On An Abutment
Beacon connected to OsstellConnect by the Osstell Key. Before you can start using data connection to OsstellConnect you have to register your Osstell Beacon. The serial number can be found on the back of the instrument. For registration assistance and features of data connection to OsstellConnect, please visit: osstell.com/support-osstell-beacon-us &... - Page 11 (1) minute. Visually inspect Osstell Beacon for contamination and visible debris. If contamination or visible debris is present, remove it with a soft bristle brush, cotton swab, or soaked cloth depending on location of the soil.
-
Page 12: Technical Information
Store sterile goods dust-free and dry. 16) Technical information Technical description Osstell Beacon is CE-marked according to MDR 2017/745 in Europe (Class Im, internally powered, type BF applied parts. Not AP or APG equipment, not protected against ingress of water). - Page 13 The Osstell Beacon contains a built in Bluetooth 4.0 low energy module for communication with a PC/Laptop via the Osstell Key. The Osstell Key should be within a radius of 6m in an open area from the Osstell Beacon to be able to connect. The data is transmitted encrypted using AES-128.
-
Page 14: Troubleshooting
Power, weight & size: Lithium-ion battery: 3.7 VDC Charging: Use only Osstell USB cable (USB type C / USB type A) connected to standard USB 2.0 or 3.0 (type A) port (Max 5,2 VDC). Instrument size: 210 x 35 x 25 mm Package size: 272 x 140,2 x 74,60 mm Instrument weight:... -
Page 15: Service And Support
19) Waste and Disposal The Osstell Beacon instrument should be recycled as electrical equip- ment. SmartPegs should be recycled as metal. Whenever possible, the battery should be disposed in a discharged state to avoid heat genera- tion through inadvertent short-circuiting. - Page 16 Osstell AB Stampgatan 14, 411 01 Göteborg, Sweden Phone: +46 31 340 82 50 info@osstell.com | www.osstell.com...


Need help?
Do you have a question about the Osstell Beacon and is the answer not in the manual?
Questions and answers