
Related Manuals for Goodwe ES Uniq 8.0-12kW


Summary of Contents for Goodwe ES Uniq 8.0-12kW
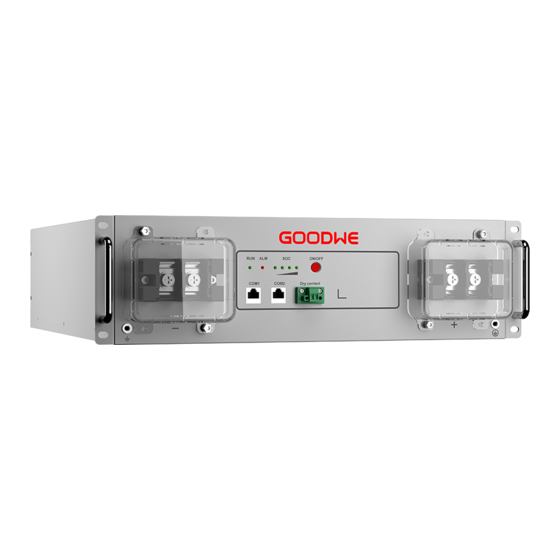
- Page 1 Residential Smart Inverter Solutions ES Uniq 8.0-12kW LX A5.0-10 LX A5.0-30 User Manual...
- Page 2 No part of this manual can be reproduced or transmitted to the public platform in any form or by any means without the prior written authorization of GoodWe Technologies Co.,Ltd. Trademarks and other GOODWE trademarks are trademarks of GoodWe Technologies Co., Ltd. All other trademarks or registered trademarks mentioned in this manual are owned by the company. NOTICE The information in this user manual is subject to change due to product updates or other reasons.
-
Page 3: Table Of Contents
1 About This Manual ............................... 8 1.1 Overview ................................8 1.2 Applicable Model ............................. 8 1.3 Symbol Definition ............................. 9 2 Safety Precautions ..............................10 2.1 General Safety ..............................10 2.2 Personnel Requirements ..........................10 2.3 System Installation ............................11 2.3.1 PV String Safety .......................... - Page 4 4.1 Check before Acceptance .......................... 28 4.2 Package Content ............................. 28 4.2.1 Inverter deliverables (ES Uniq) ....................28 4.2.2 Battery deliverables (LX A5.0-10) ....................29 4.2.3 Battery deliverables (LX A5.0-30) ....................31 4.2.4 Smart Meter Deliverables (GMK110) ..................32 4.2.5 Smart Meter (GM3000) ........................32 4.2.6 Smart Dongle (WiFi/LAN Kit-20) ....................
- Page 5 6.3.1 Preparing Breakers ..........................50 6.3.2 Preparing Cables ..........................51 6.4 Connecting the PE cable ..........................53 6.5 Connecting the PV Cable ........................... 54 6.6 Connecting the Battery Cable ......................... 55 6.6.1 Connecting the Power Cable between the Inverter and Battery ......63 6.6.2 Connecting the Communication Cable between the Inverter and Battery ..
- Page 6 8.5 Creating Power Plants ..........................89 9 System Commissioning ............................90 9.1 SolarGo Overview ............................90 9.1.1 App Interface Structure ........................91 9.1.2 Introduction to the SolarGo App Login Interface ............92 9.1.3 Introduction to the Main Interface of SolarGo App ............93 9.2 Connecting the Inverter ..........................
- Page 7 10.3.1 Viewing power plant information ..................119 10.3.2 Viewing Alarm Information ....................120 11 Maintenance ................................122 11.1 Power OFF the System ........................... 122 11.2 Removing the Equipment ........................124 11.3 Disposing of the Equipment ....................... 124 11.4 Routine Maintenance ..........................124 11.5 Troubleshooting ............................
-
Page 8: About This Manual
Read through this manual before installing and operating the products. This manual is subject to update without notice. For more product details and latest documents, visit https://en.goodwe.com/. 1.2 Applicable Model The energy storage system consists the following products:... -
Page 9: Symbol Definition
1.3 Symbol Definition DANGER Indicates a high-level hazard that, if not avoided, will result in death or serious injury. WARNING Indicates a medium-level hazard that, if not avoided, could result in death or serious injury. CAUTION Indicates a low-level hazard that, if not avoided, could result in minor or moderate injury. NOTICE Highlights key information and supplements the texts. -
Page 10: Safety Precautions
Strictly follow the installation, operation, and configuration instructions in this manual. The manufacturer shall not be liable for equipment damage or personal injury if you do not follow the instructions. For more warranty details, please visit https://en.goodwe.com/warranty. 2.2 Personnel Requirements NOTICE Personnel who install or maintain the equipment must be strictly trained, learn about ... -
Page 11: System Installation
Only qualified professionals or trained personnel are allowed to install, operate, maintain, and replace the equipment or parts. 2.3 System Installation DANGER Disconnect the upstream and downstream switches to power off the equipment before any electrical connections. Do not work with power on. Otherwise, an electric shock may occur. - Page 12 30mm apart. Do not place the cables entangled or crossed. Place the cables at least 30mm away from the heating components or heat sources, otherwise the insulation layer of the cables may be aging or broken due to high temperature.
-
Page 13: Pv String Safety
2.3.1 PV String Safety WARNING Ensure the component frames and the bracket system are securely grounded. Ensure the DC cables are connected tightly, securely and correctly. Inappropriate wiring may cause poor contacts or high impedances, and damage the inverter. ... -
Page 14: Battery Safety
2.3.3 Battery Safety DANGER Keep Power Off before any operations to avoid danger. Strictly follow all safety precautions outlined in this manual and safety labels on the equipment during the operation. Do not disassemble, modify, or replace any part of the battery or the power control unit without official authorization from the manufacturer. -
Page 15: Smart Meter Safety
medical assistance. Skin contact: Thoroughly wash the touch area with soap and clean water, and seek immediate medical assistance. Ingestion: Induce vomiting, and seek immediate medical assistance. Fire The battery may explode when the ambient temperature exceeds 150℃. Poisonous and hazardous gas may be released if the battery is on fire. - Page 16 High-temperature hazard. Do not touch the product under operation to avoid being burnt. Operate the equipment properly to avoid explosion. Batteries contain flammable materials, beware of fire. The equipment contains corrosive electrolytes. In case of a leak in the equipment, avoid contact the leaked liquid or gas.
-
Page 17: Eu Declaration Of Conformity
2.5 EU Declaration of Conformity 2.5.1 Equipment with Wireless Communication Modules GoodWe Technologies Co., Ltd. hereby declares that the equipment with wireless communication modules sold in the European market meets the requirements of the following directives: Radio Equipment Directive 2014/53/EU (RED) ... -
Page 18: Battery
2.5.3 Battery GoodWe Technologies Co., Ltd. hereby declares that batteries sold in the European market meets the requirements of the following directives: Electromagnetic compatibility Directive 2014/30/EU (EMC) Electrical Apparatus Low Voltage Directive 2014/35/EU (LVD) Battery Directive 2006/66/EC and Amending Directive 2013/56/EU ... -
Page 19: System Introduction
3 System Introduction 3.1 System Overview The residential smart inverter solution consists of inverter, battery system, smart meter, smart dongle, etc.. In the PV system, solar energy can be convert to electric energy for household needs. The IoT devices in the system controls the electrical equipment by recognizing the overall power consumption situation. - Page 20 (Current ≥ M x (Purchase from IBat rated. (M: The quantity of batteries connected in GoodWe) parallel in the system, IBat rated: The rated current of the battery). BCB-11-WW-0: Used with LX A5.0-10, the battery...
-
Page 21: Product Overview
GMK110 smart meter. CT is not supported for changing GMK110 Smart meter to other type, CT ratio: 120A/40mA (Optional) CM330: order the CT for GM330 from GoodWe or other GM330 suppliers. CT ratio: nA/5A. (purchase from GoodWe) ... -
Page 22: Smart Meter
Nominal output Number Model Nominal output voltage power GW8000-ES-C10 220/230/240 GW10K-ES-C10 10kW 220/230/240 GW12K-ES-C10 12kW 220/230/240 3.2.3 Smart Meter The smart meter can measure and monitor the data in the photovoltaic energy storage system, such as voltage, current, frequency, power factor, and power. -
Page 23: Smart Dongle
Applicable scenarios CT is not supported for changing to other type, CT ratio: GMK110 120A/40mA Order the CT for GM330 from GoodWe or other suppliers. CT ratio: nA/5A. GM330 nA: CT primary input current, n ranges from 200 to 5000. -
Page 24: Supported Grid Types
Master inverter of a parallel Ezlink3000 Bluetooth, WiFi, LAN system 3.3 Supported Grid Types 3.4 System Working Mode Self-Use Mode Self-use mode is the basic working mode of the system. When the power generated in the PV system is sufficient, it will supply the loads in priority. The excess power will charge the batteries first, then the remaining power will be sold to the utility grid. - Page 25 BACK-UP Mode The BACK-UP mode is mainly applied to the scenario where the grid is unstable. When the grid is disconnected, the inverter turns to off-grid mode and the battery will supply power to the BACK-UP loads; when the grid is restored, the inverter switches to grid-tied mode. ...
- Page 26 Economic mode It is recommended to use economic mode in scenarios when the peak-valley electricity price varies a...
- Page 27 lot. Select economic mode only when it meets the local laws and regulations. For example, set the battery to charge mode during Valley period to charge battery with grid power. And set the battery to discharge mode during Peak period to power the load with the battery.
-
Page 28: Check And Storage
4 Check and Storage 4.1 Check before Acceptance Check the following items before accept the product. 1. Check the outer packing box for damage, such as holes, cracks, deformation, and other signs of equipment damage. Do not unpack the package and contact the supplier as soon as possible if any damage is found. -
Page 29: Battery Deliverables (Lx A5.0-10)
PV DC terminal GW8000-ES-C10 x 3 Smart dongle x 1 GW10K-ES-C10、 GW12K-ES-C10 x 4 2PIN terminal x 2 2PIN terminal x 2 AC protection cover 2PIN terminal x 2 Waterproof rubber seal x 1 communication cable x 1 CT connection cable x 1 Documents x 1 PIN terminal x 14... - Page 30 M5 grounding Warning label x screw x 2 Terminal resistor x Electrical Label x Battery bracket x Documents x 1 2 (optional) Support column x M4*8 screw x 8 2 (optional) (optional) When selecting stacking way to install the battery, the battery bracket, support column, and M4*8 screw are included in the package.
-
Page 31: Battery Deliverables (Lx A5.0-30)
M8 OT terminal x M10 OT terminal 4.2.3 Battery deliverables (LX A5.0-30) Battery Component Description Component Description Terminal resistor x 1 When connecting to a third-party busbar, the Battery module x 1 battery needs to be equipped with this terminal resistor. -
Page 32: Smart Meter Deliverables (Gmk110)
installation installation Battery bracket x 2 M4*8 screw x 8 (optional) For floor-mounted For floor-mounted installation installation Busbar box (BCB-32-WW-0) (optional) Component Description Component Description 720A busbar box x 1 M6 expansion bolt x 4 M8 OT terminal x ... -
Page 33: Smart Dongle (Wifi/Lan Kit-20)
2PIN terminal x 1 terminal x 6 Screw driver Documents x 1 4.2.6 Smart Dongle (WiFi/LAN Kit-20) Component Description Component Description Smart dongle x 1 Documents x 1 4.2.7 Smart Dongle (Ezlink3000) Component Description Component Description Smart dongle x 1 LAN cable connector x Unlock tool x 1 Remove the module using... - Page 34 Installation environment requirements: 1. Place the equipment in a cool place where away from direct sunlight. 2. Store the equipment in a clean place. Make sure the temperature and humidity are appropriate and no condensation. Do not install the equipment if the ports or terminals are condensed. Battery storage temperature range (T): LX A5.0-10/LX A5.0-30:...
-
Page 35: Installation
5 Installation DANGER Install and connect the equipment using the deliverables included in the package. Otherwise, the manufacturer shall not be liable for the damage. 5.1 System Installation and Commissioning Procedure 5.2 Installation Requirements 5.2.1 Installation Environment Requirements 1. Do not install the equipment in a place near flammable, explosive, or corrosive materials. 2. - Page 36 6. The place to install the equipment shall be well-ventilated for heat radiation and large
 enough for operations. 7. Check the protection rating of the equipment and ensure that the installation environment meets the requirements. The inverter, battery system, and smart dongle can be installed both indoors and outdoors.
-
Page 37: Installation Space Requirements
5.2.2 Installation Space Requirements Reserve enough space for operations and heat dissipation when installing the system. When using CAT7 communication cables among inverters, the maximum distance can reach 10 meters, while using CAT5 communication cables, the maximum distance can reach 5 meters. - Page 38 Wire stripper YQK-70 hydraulic pliers PV connector tool Adjustable wrench PV-CZM-61100 Impact drill (drill bits Torque wrench Φ8mm, 10mm) M4、M5、M6、M8、M10 Rubber hammer Socket wrench set Multimeter Marker Range≤600V Heat shrink tube Heat gun Cable tie Vacuum cleaner Level Personal Protective Equipment Tool Description Tool...
-
Page 39: Equipment Handling
Goggles Safety shoes 5.3 Equipment Handling CAUTION Operations such as transportation, turnover, installing and so on must meet the requirements of local laws and regulations. Move the equipment to the site before installation. Follow the instructions below to avoid ... -
Page 40: Installing The Battery System
5.5 Installing the Battery System WARNING Ensure that the battery system is installed vertically and securely. When using the locking bracket, the bracket should be vertically attached to the wall and the surface of the battery system. Cover the equipment with a cardboard to prevent foreign matters when drilling holes. Otherwise, the system may be damaged. - Page 41 Step 3: Place the battery flat and stack multiple batteries. Ensure that the locating pin is inserted into the locating hole. LX A5.0-30: Rack-mounted Installation NOTICE It is recommended to install it in a 19-inch standard rack with a length * width of 600*800mm and above, and the height should be determined based on the thickness of the battery (133mm) and above.
- Page 42 LX A5.0-30: Wall-mounted Installation Step 1: Determine the drilling position with installation positioning cardboard and marker pen. Step 2: Use an impact drill to drill holes. Step 3: Install the battery brackets. Step 4: Install the battery on the brackets and use screws to secure the battery. LX A5.0-10: Floor-mounted Installation NOTICE Up to 6 batteries can be stacked for floor-mounted installation.
- Page 43 Step 1: Tighten the support column to make it fit against the surface of the bracket. Step 2: Place the battery vertically. Step 3: Install the brackets on the battery, and tighten them with screws. Step 4: Place the battery flatly, and stack batteries. ...
-
Page 44: Installing The Smart Meter
5.6 Installing the Smart Meter WARNING In areas at risk of lightning, if the meter cable exceeds 10m and the cables are not wired with grounded metal conduits, you are recommended to use an external lightning protection device. GMK110... - Page 45 GM330...
-
Page 46: System Wirings
6 System Wirings DANGER Perform electrical connections in compliance with local laws and regulations. Including operations, cables, and component specifications. Disconnect the DC switches and the AC output switches to power off the equipment before any electrical connections. Do not work with power on. Otherwise, an electric shock may occur. -
Page 47: Detailed System Wiring Diagram
inverter first if maintenance is required on the BACK-UP loads. Otherwise, it may cause electric shock. N and PE cables are separately wired in the Main Panel. NOTICE Ensure that the grounding of BACK-UP is correctly and tightened. Otherwise, the BACK- UP function may be abnormal in case of grid failure. - Page 48 With GMK110 smart meter...
-
Page 49: Detailed System Wiring Diagram For Parallel System
6.2.2 Detailed System Wiring Diagram For Parallel System In parallel scenarios, the inverter connecting to Ezlink and smart meter is considered as the master inverter, while all the others are slave inverters. Do not connect any smart dongle to the slave inverters. ... -
Page 50: Preparing Breakers
An AC circuit breaker shall be installed on the AC side to make sure that the inverter can safely disconnect the grid when an exception happens. Select the appropriate AC circuit breaker in compliance with local laws and regulations. When the inverter is powered on, the BACK-UP AC port is energized. -
Page 51: Preparing Cables
cross sectional area of conductor Battery PE cable LX A5.0-30: LX A5.0-10:4mm²-6mm² Supports purchase LX A5.0-30:10mm² from GoodWe Commonly used outdoor photovoltaic cable Prepared by Conductor cross-sectional area: PV DC cable customers. 10mm²- 16mm²... - Page 52 6mm² Communication between batteries and Prepared by customers. inverters as well as between batteries battery LX A5.0-30: requires the use of CAT 5E or above communication line Supports purchase standard shielded network cables and from GoodWe RJ45 shielded connector.
-
Page 53: Connecting The Pe Cable
Shielded twisted pair cable Smart meter RS485 Prepared by communication Conductor cross-sectional area: customers. cable 0.2mm²- 0.3mm² CAT 5E and above standard shielded Communication Prepared by network cable and RJ45 shielded cable for parallel customers. connected inverters connector ... -
Page 54: Connecting The Pv Cable
6.5 Connecting the PV Cable DANGER Do not connect one PV string to more than one inverter at the same time. Otherwise, it may cause damage to the inverter. Confirm the following information before connecting the PV string to the inverter. Otherwise, ... -
Page 55: Connecting The Battery Cable
6.6 Connecting the Battery Cable DANGER In a single inverter system, do not connect the same battery pack to multiple inverters, which may cause inverter damage. It is forbidden to connect loads between the inverter and batteries. When connecting battery cables, use insulated tools to prevent accidental electric shock or short circuit to the batteries. - Page 56 LXA5.0-30: Hand-to-hand connection The battery system supports a maximum working current of 160A, working power of 8kW, and can connect to a maximum of 1 inverter, and 30 batteries...
- Page 57 LXA5.0-30: Use with busbar BCB-32-WW-0 The battery system supports a maximum working current of 720A, working power of 36kW, and can connect to a maximum of 6 inverters, and 15 batteries.
- Page 58 LXA5.0-30: Use with third-party busbar The complexity of the parallel system increases with the increase in the number of inverters. When the number of inverters in parallel system is ≥ 6, please contact the after-sales service to confirm the installation and application environment of the inverter to ensure stable operation of the system.
- Page 59 LX A5.0-10: Use with busbar BCB-11-WW-0 The nominal charging and discharging current of a single battery is 60A. The battery system supports a maximum working current of 360A, working power of 18kW, a maximum of 3 inverters, and 6 batteries.
- Page 60 LX A5.0-10: Use with busbar BCB-22-WW-0 The nominal charging and discharging current of a single battery is 60A. The battery system can support a maximum working current of 720A, working power of 36kW, a maximum of 6 inverters, and 12 batteries.
- Page 61 LX A5.0-10: Use with third-party busbar The nominal charging and discharging current of a single battery is 60A. The complexity of the parallel system increases with the increase in the number of inverters. When the number of inverters in parallel system is ≥ 6, please contact the after-sales service to confirm the installation and application environment of the inverter to ensure stable operation of the system.
- Page 62 LX A5.0-30 communication port definition: COM1 COM2 Description Reserved Parallel OUT+ Parallel OUT+ Parallel communication port CAN_1H CAN_1H Connect the inverter communication port or battery parallel communication port CAN_1L CAN_1L Parallel OUT2+ Parallel OUT2+ Parallel interlock communication port Reserved Parallel OUT- Parallel OUT- Communication port for parallel system LX A5.0-10 Communication Port Definition...
-
Page 63: Connecting The Power Cable Between The Inverter And Battery
COM1 COM2 Description Reserved Parallel OUT+ Parallel OUT+ Parallel communication port CAN_1H CAN_1H Connect the inverter communication port or battery parallel communication port CAN_1L CAN_1L Reserved Parallel OUT- Parallel OUT- Communication port for parallel system 6.6.1 Connecting the Power Cable between the Inverter and Battery WARNING ... - Page 64 Make the inverter power cable...
- Page 65 Battery power cable manufacturing (LX A5.0-10 and LX A5.0-30)
-
Page 66: Connecting The Communication Cable Between The Inverter And Battery
6.6.2 Connecting the Communication Cable between the Inverter and Battery NOTICE The BMS cable is included in the package of the inverter, the included BMS communication cable is recommended. If more communication cables are needed, prepare shielded network cables and RJ connectors by yourself to make the cable. Only crimp PIN4 and PIN5 of the connector when making the cable, otherwise the communication may fail. - Page 67 NOTICE When connecting the lead-acid battery temperature sensor cable, it is recommended to connect the temperature sensor cable at a location with poor heat dissipation. For example, when lead-acid batteries are placed side by side, the sensor should be fixed on the lead-acid battery located in the middle. To better protect the battery cell, a temperature sampling cable must be installed, ...
-
Page 68: Connecting The Ac Cable
6.7 Connecting the AC Cable WARNING The residual current monitoring unit (RCMU) is integrated into the inverter to avoid the residual current exceeds the limit. The inverter will disconnect the utility grid quickly once it found the residual current exceeds the limit. When wiring, ensure that the AC cable is completely matched with the "BACKUP", "ON-GRID", ... -
Page 69: Connecting The Meter Cable
6.8 Connecting the Meter Cable NOTICE Contact the manufacturer for additional smart meters if multiple inverters are connected. Ensure that the CT is connected in the correct direction and phase sequences, otherwise the monitoring data will be incorrect. Ensure the cables are connected tightly, securely and correctly. - Page 70 Outer diameter of the AC cable should be smaller than the hole diameter of the CT, so that the AC cable can be routed through the CT. To ensure accurate current detection, the CT cable is recommended to be shorter than 30m.
-
Page 71: Connecting The Inverter Communication Cable
Installing the CT (Type I) Installing the CT (Type II) 6.9 Connecting the Inverter Communication Cable NOTICE The communication functions are optional. Connect the cables based on actual needs. If you need to use the remote shutdown function, please turn it on in the SolarGo App... - Page 72 after wiring is completed. Do not turn on the function in the SolarGo App if the inverter is not connected to a remote shutdown device, otherwise the inverter will be unable to operate on-grid. In a parallel system, please connect the communication cable to the master inverter to achieve the remote shutdown function, otherwise, the function will not work.
-
Page 73: Connect The Smart Dongle
6.10 Connect the smart dongle NOTICE The inverter supports connecting to mobile phones or WEB interfaces via Bluetooth, WiFi, LAN, and 4G smart dongle (China version) to set device-related parameters, view equipment operation information and error messages, and promptly understand the system status. -
Page 74: System Commissioning
7 System Commissioning 7.1 Check before Power ON Number Check Item The inverter is firmly installed in a clean place where is well-ventilated and easy to operate. The PE, DC input, AC output, communication cables, and terminal resistors are connected correctly and securely. Cable ties are intact, routed properly and evenly. -
Page 75: Power On A Single Inverter System
the batteries. 7.2.1 Power on a single inverter system... -
Page 76: Power On A Parallel System
7.2.2 Power on a parallel system 7.3 Indicators 7.3.1 Inverter Indicators Indicator Status Description The inverter is power on and in the standby mode. The inverter is starting up and in the self-check mode. The inverter is in normal operation under grid-tied or off-grid mode. -
Page 77: Battery Indicators
BACK-UP port of the inverter is normal. The grid is normal, and the power supply to the BACK-UP port of the inverter is normal. The BACK-UP port has no power supply. The monitoring module of the inverter is resetting. The inverter fails to connect with the communication Termination. - Page 78 Indicator System Status No green displayed on SOC=0% the SOC indicator The first SOC indicator 0%<SOC≤25% shows green The first two SOC indicators 25%<SOC≤50% are green The first three SOC 50%<SOC≤75% indicators are green The four SOC indicators are 75%<SOC≤100% green The battery system is working Green light steady on...
-
Page 79: Smart Meter Indicator
The SOC indicator represents the battery Green flashes 1 The battery system is in system's useable energy. time/s standby mode. Green light The battery system is in blinks 1 time/s an idle state. Green light The battery system is in steady on the charging state. -
Page 80: Smart Dongle Indicator
Communication Blinks Meter communication is normal indicator Meter communication is abnormal or has no communication GM330 Type Status Description Steady on Power on, no RS485 communication. Power indicator light Power on, RS485 communication works Blinks properly. The smart meter has been powered off. Reserved Communication Press the Reset button for more than 5... - Page 81 Blinks 4 times: The smart dongle is communicating normally with the router, but has not connected to the server. Off: The software of the smart dongle is reseting or is not powered on. Indicator Color Status Description The connection of the wired network Steady on at 100Mbps is normal.
- Page 82 ON = The Ezlink is connected to the server. Communica Blink 2 = The Ezlink is not connected to the tion router. indicator Green Blink 4 = The Ezlink is connected to the router, but not connected to the server. Short press for 3s to restart the Ezlink.
-
Page 83: Quick System Commissioning
8 Quick System Commissioning 8.1 Downloading the App Make sure that the mobile phone meets the following requirements: Mobile phone operating system: Android 4.3 or later, iOS 9.0 or later. The mobile phone can access the Internet. The mobile phone supports WLAN or Bluetooth. Method 1: Search SolarGo in Google Play (Android) or App Store (iOS) to download and install the app. - Page 84 Connect to the inverter via Bluetooth Connecting the inverter via WiFi...
-
Page 85: Communication Settings
8.3 Communication Settings NOTICE The communication configuration interface may vary depending on the type of smart dongle connected to the inverter. Please refer to the actual interface for accurate information. Step 1: Enter the setting page through "Home" > "Settings" > "Communication Configuration"... -
Page 86: Quick Settings
IP address When DHCP is enabled, there is no need to configure this Subnet mask parameter. When DHCP is turned off, please configure this parameter Gateway address according to the information of the router or switch. DNS Server 8.4 Quick Settings NOTICE ... - Page 87 Parameter Name Description Select the corresponding safety code based on the country or region Safety regulations where the equipment is located. Select the actual mode for connecting the battery to the inverter. If there is no battery connected in the system, it is unnecessary to configure the BAT Access Mode battery model and working mode, and the equipment will operate in the self-use mode by default.
- Page 88 Description Parameter Name Self-use mode: based on the self-use mode, Back-up mode, Economic mode, and Smart charging can be enabled at the same time, and the inverter will automatically select the working mode. Operation priority: BACK-UP mode > Economic mode > Smart Charging mode > Self-use mode. Depth of discharge(on- The maximum depth of discharge of the battery when the system is grid)
-
Page 89: Creating Power Plants
mode The percentage of power during charging or discharging compared to Rated power the rated power of the inverter. Charge/Discharge Cut-off The battery stop charging/discharging once the battery SOC reaches Charge Cut-off SOC. After setting the parameters, click Complete to restart. 8.5 Creating Power Plants NOTICE Login to the SEMS Portal app using the account and password before creating... -
Page 90: System Commissioning
9 System Commissioning 9.1 SolarGo Overview SolarGo App is a mobile application that communicates with the inverter through bluetooth or WiFi modules. Commonly used functions are as follows: Check the operating data, software version, alarms, etc. Set grid parameters, communication parameters, safety countries, power limitation, etc. -
Page 91: App Interface Structure
9.1.1 App Interface Structure... -
Page 92: Introduction To The Solargo App Login Interface
9.1.2 Introduction to the SolarGo App Login Interface Name/Ico Description Tap the icon to open the page downloading the SEMS Portal app. Tap to read the connection guide. Not found Check information such as app version, local contacts, etc. ... -
Page 93: Introduction To The Main Interface Of Solargo App
Select the device by checking the serial number of the master inverter when multi inverters are parallel connected. The device name varies depending on the inverter model or communication module. Search Tap Search Device if the device is not found. Device 9.1.3 Introduction to the Main Interface of SolarGo App Single inverter and multiple inverters... -
Page 94: Connecting The Inverter
Unbalanced Output, etc. Home. Tap Home to check Serial Number, Device Status, Energy Flow Chart, System Status, etc. Home Parameters. Tap Parameters to check the running parameters of the system. Settings. Log in before entering Quick Settings and Advanced Settings. Initial password: goodwe2010 or 1111. Tap Total Number to check serial number of all inverters. - Page 95 Connecting the inverter via WiFi...
-
Page 96: Quick Settings
9.3 Quick Settings NOTICE When selecting the safety regulation country/region, the system will automatically configure the overvoltage and undervoltage protection, overfrequency and underfrequency protection, inverter on-grid voltage/frequency, connection slope, Cosφ curve, Q(U) curve, P(U) curve, FP curve, high and low voltage ride-through, etc. according to the safety regulation requirements of different regions. - Page 97 Parameter Name Description Select the corresponding safety code based on the country or region Safety regulations where the equipment is located. Select the actual mode for connecting the battery to the inverter. If there is no battery connected in the system, it is unnecessary to BAT Access Mode configure the battery model and working mode, and the equipment will operate in the self-use mode by default.
-
Page 98: Communication Settings
Self-use mode: based on the self-use mode, Back-up mode, Economic mode, and Smart charging can be enabled at the same time, and the inverter will automatically select the working mode. Operation priority: BACK-UP mode > Economic mode > Smart Charging mode > Self-use mode. -
Page 99: Setting The Basic Information
Step 1: Enter the setting page through "Home" > "Settings" > "Communication Configuration" > "Network Settings". Step 2: Configure the WLAN or LAN network based on the actual situation. Number Name/Icon Description Applicable to WLAN. Please select the corresponding network Network Name based on your actual situation and communicate the device with the router or switch. -
Page 100: Setting Advanced Parameters
After enabling SPD, when the SPD module is abnormal, there will be SPD module abnormal alarm prompt. Setting the Backup Function After enabling Backup, the battery will power the load connected to the backup port of the inverter to ensure Uninterrupted Power Supply when the power grid fails. Number Parameter Name Description... -
Page 101: Setting Power Limit Parameters
Number Parameter Name Description AFCI Test Enable or disable AFCI accordingly. The test status, like Not Self-checking, self- AFCI Test Status check succeeded, etc. AFCI Test Clear AFCI Alarm Clear ARC Faulty alarm records. Tap to check whether the AFCI function Self-check works normally. -
Page 102: Setting The Battery Parameters
secondary current of the external CT. 9.5.4 Setting the Battery Parameters Lithium ion battery Step 1: Enter the parameter setting interface through Home > Settings > Advanced Settings > Battery Function Settings. Step 2: Enter the parameters and tap √. The parameters are set successfully. Number Parameter Name Description... - Page 103 Charging. For example, setting the Immediate Charging Power of a 10kW inverter to 60 means the charging power of the inverter is 10kW*60%=6kW. Lead Acid Battery NOTICE 1. Before setting the parameters of lead-acid batteries, it is necessary to read the user manual, technical parameters and other related materials of lead-acid batteries.
- Page 104 Voltage voltage charging by default; this value is the upper limit of charging voltage in this mode. Please set it according to the battery technical parameters. Please set it according to the battery technical Minimum discharge parameters. To protect the battery performance voltage and life, this parameter should not be set too low.
-
Page 105: Setting Generator Parameters
9.5.5 Setting Generator Parameters Step 1: After connecting to the SolarGo APP, go to Home > Settings > Port Connection > Generator Connection. After selecting the generator type, enter the parameter setting interface. Step 2: Enter the parameters and tap √. The parameters are set successfully. Manual control generator (Does not support dry contact connection): This type of generator only supports manual start and stop. -
Page 106: Setting Load Control
The time mode will be on between the Start Time and Lower Voltage End Time. Set the upper limit of operating frequency for the generator. Upper frequency Set the upper limit of operating frequency for the limit generator. Lower Frequency Set the lower limit of the generator's operating frequency. -
Page 107: Setting Safety Parameters
powered automatically within the setting time period. the inverter has an integrated relay controlling port, which can control the loads off or on. In off-grid mode, the load SOC mode connected to the port will not be powered if the BACKUP overload is detected or the battery SOC value is lower than the Off-grid battery protection value. -
Page 108: Setting Customized Safety Parameters
9.6.2 Setting Customized Safety Parameters NOTICE Set the custom safety parameters in compliance with local requirements. Do not change the parameters without the prior consent of the grid company. 9.6.2.1 Setting the Active Power Mode Setting the P(F) Curve Step 1: Tap Home > Settings > Advanced Settings > Safety Parameters > Active Power Mode Settings to set the parameters. - Page 109 9.6.2.2 Setting the Reactive Power Mode Setting the Fix PF Step 1: Tap Home > Settings > Advanced Settings > Safety Parameter Settings > Reactive Power Mode to set the parameters. Step 2: Set the parameter based on actual needs. The power factor remains fixed during the inverter working process.
- Page 110 Number Parameter Name Description Enable Fix Q when it is required by local grid standards Fix Q and requirements. Under-excited Set the reactive power as inductive or capacitive reactive power based on actual needs and local grid Over excitation standards and requirements. The percentage of reactive output power to apparent Power Factor power.
- Page 111 Setting Protection Parameters Step 1: Tap Home > Settings > Advanced Settings > Safety Parameters > Protection Parameters to set the parameters. Step 2: Set the parameters based on actual needs. Number Parameter Name Description Voltage Protection Parameters Set the grid overvoltage protection threshold value, OV Stage n Trip Value n = 1, 2, 3.
- Page 112 Set the grid overfrequency protection threshold OF Stage n Trip Value value, n = 1, 2. Set the grid overfrequency protection tripping time, OF Stage n Trip Time n = 1, 2. Set the grid underfrequency protection threshold UF Stage n Trip Value value, n = 1, 2.
- Page 113 Number Parameter Name Description LVRT Ride Through Voltage The inverter will not be disconnected from the Start Point utility grid immediately when the grid voltage is between Ride Through Voltage Start Point and Ride Ride Through Voltage Through Voltage End Point. End Point Indicates the longest duration the inverter can Ride Through Time Start...
-
Page 114: Monitoring Power Plant
10 Monitoring Power Plant 10.1 SEMS Portal Overview SEMS Portal App is a monitoring platform. Commonly used functions are as follows: Manage the organization or User information; Add and monitor the power plant information; Equipment maintenance. Login Page of SEMS Portal App Number Name Description... - Page 115 APPs Tap to download SolarGo app. Configure WiFi parameters to establish communication Configuration between the inverter and the server and realize remote monitoring and managing. Click to enter the power plant for demonstration Power plant for interface, where the content displayed is based on the demonstration account permissions of the viewer.
-
Page 116: Manage Power Plant Or Equipment
operation status Search for Search for power stations by selecting their name, equipment power plant SN number, email, or on the map. Power Click to switch between today, this month, total generated generation power and cumulative earnings. statistics Home of power plant monitoring. Plants Alarms Check all alarms, happening alarms, and recovered alarms. -
Page 117: Power Plant Management
Step 3: Add devices according to the interface prompts to complete the creation of the power plant. 10.2.2 Power plant management Step 1: Enter the power plant monitoring page and delete or modify the power plant information based on actual needs. -
Page 118: Managing The Equipment In The Power Plant
10.2.3 Managing the equipment in the power plant Step 1: Click on the power plant in the power plant monitoring interface to enter the power plant details page. Step 2: Click the serial number of the device to enter the device details page, and add, delete, or replace the device based on actual needs. -
Page 119: Power Plant Monitoring
10.3 Power plant monitoring 10.3.1 Viewing power plant information After logging into SEMS Portal App with the account and password, you will enter the home page of the power plant, where the overall operation status of all power plants under the account will be displayed. -
Page 120: Viewing Alarm Information
10.3.2 Viewing Alarm Information Step 1: Click the Fault tab on the power plant details page to enter the alarm query page. Step 2: Click on the alarm name to view detailed alarm information. -
Page 122: Maintenance
11 Maintenance 11.1 Power OFF the System DANGER Power off the equipment before operations and maintenance. Otherwise, the equipment may be damaged or electric shocks may occur. Delayed discharge. Wait until the components are discharged after power off. ... - Page 123 Parallel system power off...
-
Page 124: Removing The Equipment
11.2 Removing the Equipment DANGER Make sure that the equipment is powered off. Wear proper personal protective equipment during operations. Please use standard disassembly tools when removing wiring terminals to avoid damaging the terminals or equipment. Unless otherwise specified, the dismantling process of the equipment is in reverse order to the installation process, and it will not be further elaborated in this document. -
Page 125: Troubleshooting
Maintaining Maintaining Maintaining Item Maintaining method Period purpose Check the heat sink, air intake, and air outlet for foreign matter or dust. Prevent heat Once half a System clean dissipation Check whether the installation year failures. space meets requirements and whether there is any debris around the device. -
Page 126: System Troubleshooting
service if these methods do not work. Collect the information below before contacting the after-sales service, so that the problems can be solved quickly. 1. Product information like serial number, software version, installation date, fault time, fault 
 frequency, etc. 2. -
Page 127: Inverter Troubleshooting
3. When communicating via WiFi, make sure that the wireless network connection is OK and the wireless signal strength meets the requirements. Enable or disable DHCP based on actual needs. Make sure that the smart dongle is connected to the router via WiFi or LAN properly, and the router can access the Internet. - Page 128 Utility grid power The alarm is automatically cleared fails. after the grid power supply is 2. The AC cable is restored. Utility Loss disconnected, or 2. Check whether the AC cable is the AC breaker is connected and the AC breaker is on. off.
- Page 129 the grid voltage is within the allowable range. Contact the local power company if the grid voltage exceeds the permissible range. Modify the grid overvoltage rapid protection threshold after obtaining the consent of the local power company if the grid voltage is within the permissible range.
- Page 130 normal. Check if the grid voltage is running at a high voltage for a long time. If it occurs frequently, please check if the grid voltage is within the allowable range. Contact the local power company if the grid voltage exceeds the permissible range.
- Page 131 If the problem occurs frequently, check whether the grid frequency is within the permissible range. Contact the local power company if the grid frequency exceeds the permissible range. Modify the underfrequency protection threshold or disable the underfrequency protection function after obtaining the consent of the local power company if the grid frequency is...
- Page 132 Utility grid exception. If the problem occurs occasionally, The duration of the the utility grid may be abnormal LVRT utility grid exception temporarily. The inverter will Undervoltage exceeds the set time recover automatically after of LVRT. detecting that the utility grid is normal.
- Page 133 please reset the "Insulation Resistance Protection Point". Inverters for the Australian and New Zealand markets can also be alerted in the following ways in the event of insulation impedance failure: The inverter is equipped with the buzzer: the buzzer sounds continuously for 1 minute in case of failure;...
- Page 134 Hardware CRC error Send (receive) control bit is receive (send). 6. Transmit to the unit that is not allowed. Disconnect the AC output switch and DC input switch, then connect them 5 AC HCT Check The sampling of the minutes later. Contact the dealer or the abnormal AC HCT is abnormal.
- Page 135 abnormal. minutes later. Contact the dealer or the after-sales service if the problem persists. Check whether the ventilation of the inverter installation location is The installation good and whether the ambient location of the temperature exceeds the maximum inverter is not allowable ambient temperature ventilated.
- Page 136 damaged. String1 PV String Reversed The PV strings are Check whether the PV1 and PV2 strings connected reversely. are connected reversely. String1 PV String Reversed In case of no generator connection, ignore this fault. If a generator is Generator is not connected, immediately stop the connected.
- Page 137 requirements of good condition and the voltage setting the specification. does not exceed the requirements, but the fault still exists after restarting the generator, please contact your dealer or after-sales service center. In case the generator is not connected, ignore this fault. If a generator is Generator is not connected, immediately stop the connected.
- Page 138 APP. indicator in Check whether the server error connection is correct. 5. Log in to the website mqtt.goodwe- power.com via a computer to view the resolved IP address and obtain the server connection information. Incorrect communication cable connection or unreliable cable connection cause communication failure.
- Page 139 the problem, please try to restart the inverter and get networking again. Check whether the parallel communication cable is connected correctly and firmly. Communication of Parallel IO 2. If the communication cable parallel inverters in check fail connection is normal, it may be an error internal communication failure.
-
Page 140: Battery Fault (Lx A5.0-30)
11.5.3 Battery fault (LX A5.0-30) Alarm state When the battery ALM indicator turns red, troubleshoot the issue by referring to the SOC indicator's display status. Number SOC indicator Fault Name Solutions Power off and wait for 2 hours. If Battery the problem persists, please abnormality contact the after-sales service. -
Page 141: Battery Fault (Lx A5.0-10)
Restart the battery. If the problem Communicati persists, please contact the after- on failure sales service. Open contact Contact the after-sales service. sticking fault Restart the battery. If the problem Precharge persists, please contact the after- Failure sales service. Component Power off and wait for 2 hours. - Page 142 Overvoltage problem persists, please contact the after-sales service. Battery Contact the after-sales service. Undervoltage Power off and wait for 2 hours. If the High Cell problem persists, please contact the Temperature after-sales service. Turn off the device to wait for the temperature to return to normal.
- Page 143 of battery cells Restart the battery. If the problem Wire harness persists, please contact the after-sales exception service. Restart the battery. If the problem MOS Open- persists, please contact the after-sales Circuit Fault service. Restart the battery. If the problem MOS Open- persists, please contact the after-sales Circuit Fault...
- Page 144 Overtemperat after-sales service. Reverse Connection Contact the after-sales service. Fault Microelectron Contact the after-sales service. ic Fault...
-
Page 145: Parameters
12 Parameters 12.1 Inverter Parameters Technical Parameters GW8000-ES-C10 GW10K-ES-C10 GW12K-ES-C10 Battery Input Data Li-Ion/Lead- Type Li-Ion/Lead-acid Li-Ion/Lead-acid acid Rated Voltage (V) Voltage Range (V) 40~60 40~60 40~60 Max. Continuous Charging Current (A) Max. Continuous 160(176 at 200(220 at 240(264 at 10min) Discharging Current (A) 10min)... - Page 146 Max. Short Circuit Current 48/24 48/48 48/48 per MPPT (A) Max. Backfeed Current to The Array (A) Number of MPPT Number of Strings per MPPT AC Output Data (On-grid) Nominal Apparent Power Output to Utility 8,000 10,000 12,000 Grid (VA) Max.
- Page 147 Distortion Voltage Type (a.c. or d.c.) AC Output Data (Back-up) Back-up Nominal 8,000 10,000 12,000 Apparent Power (VA) Max. Output Apparent 11,000 (20,000 8,800 (16,000 @10s) 13,200 (24,000 @10s) Power (VA) @10s) Nominal Output Current 36.4/34.8/33.3 45.5/43.5/41.7 54.5/52.2/50.0 Maximum output current 40.0 50.0 60.0...
- Page 148 Max. Efficiency 97.6% European Efficiency 96.2% CEC Efficiency 96.2% Max. Battery to AC 95.5% Efficiency MPPT Efficiency 99.9% Protection PV String Current Integrated Integrated Integrated Monitoring Insulation Resistance Integrated Integrated Integrated Detection Residual Current Integrated Integrated Integrated Monitoring PV Reverse Polarity Integrated Integrated Integrated...
- Page 149 General Data Operating Temperature -35~+60 -35~+60 -35~+60 Range (℃) Relative Humidity 0~95% 0~95% 0~95% Maximum Operating 3000 3000 3000 Altitude (m) Smart Fan Cooling Method Smart Fan Cooling Smart Fan Cooling Cooling LED, User Interface LED, WLAN+APP LED, WLAN+APP WLAN+APP BMS Communication Communication with RS485...
-
Page 150: Battery Technical Data
Storage Temperature (℃) -40~+85 -40~+85 -40~+85 Battery: A Battery: A Battery: A PV:C PV:C PV:C The Decisive Voltage AC: C AC: C AC: C Class (DVC) COM:A COM:A COM:A Mounting Method Wall Mounted Wall Mounted Wall Mounted Certification Safety Regulation IEC62109-1&2 EN61000-6-1,EN61000-6-2,EN61000-6-3,EN61000-6-4, 12.2 Battery Technical Data... - Page 151 Ingress Protection Rating IP21 0 ~ +35 (≤ 1 year); -20 ~ 0 (≤ 1 month); -40 ~ 45 (≤ Storage Temperature (℃) 1 month) Mounting Method Rack mounted/Ground mounted Round-trip Efficiency Safety IEC62619,IEC 63056,IEC62040-1,INmetro Standard and EN IEC61000-6-1,EN IEC61000-6-2,EN IEC61000- Certification 6-3,EN IEC61000-6-4 Transportation...
-
Page 152: Smart Meter Technical Data
Communication Ambient Temperature 0<T≤40℃ (Recommended 10<T≤30℃) Operating Temperature Range (℃) Charge: 0<T≤55℃; Discharge: -20<T≤55℃ Max. Storage Time 12 Months (maintenance-free) Maximum Operating Altitude (m) 4000 Weight (Kg) 442*133*520 (core part), 483*133*559 (max. Dimensions (W x H x D mm) dimensions) Ingress Protection Rating IP20 Application Method... - Page 153 Voltage Range (V) 85~288 Nominal Voltage 50/60 Frequency (Hz) CT Ratio 120A/40mA Current CT Quantity Communication RS485 Communication distance (m) 1000 User Interface 2LED Voltage/Current Class I Accuracy Active Energy Class I Reactive Energy Class II Power Consumption (w) <5 Dimensions (W x H x D mm) 19*85*67 Mechanical...
-
Page 154: Smart Dongle Technical Data
Current CT Ratio nA:5A Communication RS485 Communication distance (m) 1000 User Interface 4 LEDs, Reset Button Voltage/Current Class 0.5 Accuracy Active Energy Class 0.5 Reactive Energy Class 1 Power Consumption (w) <5 Dimensions (W * H * D) 72*85*72 Mechanical Weight (g) Parameters Mounting Method... - Page 155 Weight (g) Ingress Protection IP65 Rating Mounting Method USB port insertion and removal Operating Temperature Range (℃) -30~+60 Storage Temperature Range (℃) -40~+70 Relative Humidity 0-95% Max. Operating Altitude (m) 4000 Technical Parameters Ezlink3000 General Data Connection Interface 10/100Mbps self-adaption, communication distance Ethernet interface (optional) ≤100m Mounting Method...
- Page 156 Max. Working Altitude (m) 4000...
-
Page 157: Appendix
13 Appendix 13.1 FAQ 13.1.1 How to conduct auxiliary detection for smart meters/CT? Meter detection function, which can detect whether the CT of the meter is connected correctly and the current operation status of the meter and CT. Step 1: Access the detection page through Home > Settings > Electricity Meter/CT Auxiliary Detection. -
Page 158: Abbreviations
prompts; otherwise, they will not be able to use the APP. You can complete the upgrade by following the prompts on the interface. 13.2 Abbreviations Abbreviation English Description Battery Voltage Range batt Nominal Battery Voltage batt,r Max. Continuous Charging Current batt,max (C/D) Max. - Page 159 Operating Temperature Range operating Max. Input Current DC,max Input Voltage DC Power Supply DC,r Power Supply/AC Power Supply Power Supply/Input Voltage Range AC,r Operating Temperature Range operating Max Output Power TX Power Power Consumption Power Consumption AC,r Frequency (Hz) Max. Input Short Circuit Current SC PV Range of input Operating Voltage dcmin...
- Page 160 ECO mode Economical Mode Time of Use Energy Storage System Power Conversion System Remote shutdown Emergency Power Off Surge Protection Device zero injection/zero export Power Limit / Export Power Limit DRED Demand Response Enabling Device Ripple Control Receiver AFCI AFCI GFCI Ground Fault Circuit Interrupter RCMU...
Need help?
Do you have a question about the ES Uniq 8.0-12kW and is the answer not in the manual?
Questions and answers