Table of Contents
Advertisement
Quick Links
Advertisement
Table of Contents

Related Manuals for Electrolux LKI6444SOW


Summary of Contents for Electrolux LKI6444SOW
- Page 1 EN User Manual | Cooker LKI6444SOW...
-
Page 2: Table Of Contents
WE’RE THINKING OF YOU Thank you for purchasing an Electrolux appliance. You’ve chosen a product that brings with it decades of professional experience and innovation. Ingenious and stylish, it has been designed with you in mind. So whenever you use it, you can be safe in the knowledge that you’ll get great results every time. -
Page 3: Safety Information
SAFETY INFORMATION Before the installation and use of the appliance, carefully read the supplied instructions. The manufacturer is not responsible for any injuries or damage that are the result of incorrect installation or usage. Always keep the instructions in a safe and accessible location for future reference. - Page 4 similar accommodation where such use does not exceed (average) domestic usage levels. • Only a qualified person must install this appliance and replace the cable. • This appliance is intended for use up to an altitude of 2000 m above sea level. •...
-
Page 5: Safety Instructions
• After use, switch off the hob element by its control and do not rely on the pan detector. • WARNING: The appliance and its accessible parts become hot during use. Care should be taken to avoid touching heating elements. •... - Page 6 • The sides of the appliance must stay next • Fully close the appliance door before you to appliances or units with the same connect the mains plug to the mains height. socket. • Do not install the appliance adjacent to a 2.3 Use door or under a window.
- Page 7 • Be careful when you remove the door from WARNING! the appliance. The door is heavy! • Fat and food remaining in the appliance Risk of damage to the appliance. can cause fire. • To prevent damage or discoloration to the •...
-
Page 8: Installation
2.7 Disposal • Disconnect the appliance from the mains supply. • Cut off the mains electrical cable close to WARNING! the appliance and dispose of it. Risk of injury or suffocation. • Remove the door catch to prevent children or pets from becoming trapped in the •... -
Page 9: Product Description
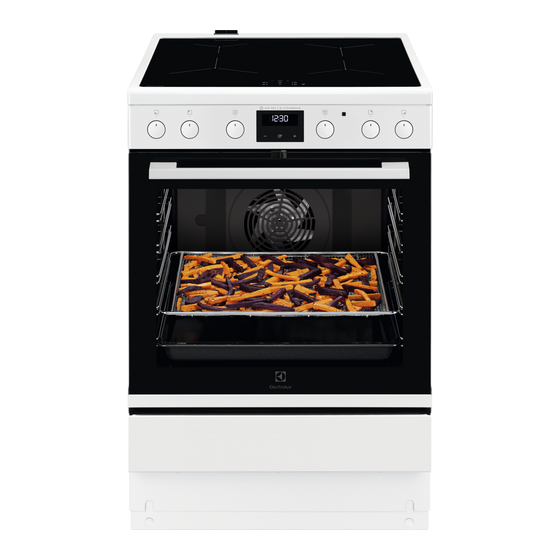
Make sure you install the anti-tilt protection at the correct height. For more information about the installation of the appliance refer to a separate installation booklet 4. PRODUCT DESCRIPTION 4.1 General overview Knob for the oven functions Display Knob for the temperature Temperature indicator / symbol Knobs for the hob Socket for the core temperature sensor... -
Page 10: Before First Use
4.3 Accessories To fry food with less oil or without baking paper. • Wire shelf • Core temperature sensor For cookware, cake tins, roasts. To measure how far the food is cooked. • Baking tray • Storage drawer For cakes and biscuits. The storage drawer is below the oven •... -
Page 11: Hob - Daily Use
4. Hold the door trim B at each side and position it on the inner edge of the door. Put the door trim into the top edge of the door. Close the door without pressing the lever. 5.8 Deactivating the mechanical door lock - in the main oven 1. - Page 12 6.1 Hob control panel Use the sensor fields to operate the appliance. The displays, indicators and sounds tell which functions operate. Sensor Function Comment field Heat setting display To show the heat setting. Timer indicators of cooking zones To show for which zone you set the time. Timer display To show the time in minutes.
- Page 13 Display Description PowerBoost operates. There is a malfunction. + digit OptiHeat Control (3 step Residual heat indicator): continue cooking / keep warm / resid‐ ual heat. Lock / Child Safety Device operates. Incorrect or too small cookware or no cookware on the cooking zone. Automatic Switch Off operates.
- Page 14 To set the cooking zone: touch again Heat setting The hob deactivates and again until the indicator of a necessary after cooking zone comes on. 3 - 4 5 hours To activate the function: touch of the timer to set the time (00 - 99 minutes). When 4 hours the indicator of the cooking zone starts to 6 - 9...
- Page 15 Minute Minder You can use this function as a Minute Minder when the hob is activated and the When you deactivate the hob, you also cooking zones do not operate. The heat deactivate this function. setting display shows 6.11 Child Safety Device To activate the function: touch .
- Page 16 automatically on basis of mode setting and 4. Press until H and a digit (0 - 6) comes temperature of the hottest cookware on the on. H5 is the default setting. hob. You can also operate the fan from the 5.
-
Page 17: Hob - Hints And Tips
• The phase has a maximum electricity load. • The function divides the power between cooking zones. • The function activates when the total electricity load of the cooking zones is exceeded. • The function reduces the power of the other cooking zones. -
Page 18: Hob - Care And Cleaning
7.4 Öko Timer (Eco Timer) linear. When you increase the heat setting, it is not proportional to the increase of the To save energy, the heater of the cooking consumption of power. It means that a zone deactivates before the count down timer cooking zone with the medium heat setting sounds. -
Page 19: Oven - Daily Use
• Use a special cleaner suitable for the • Remove when the hob is sufficiently surface of the hob. cool: limescale rings, water rings, fat • Use a special scraper for the glass. stains, shiny metallic discoloration. Clean the hob with a moist cloth and a non- 8.2 Cleaning the hob abrasive detergent. - Page 20 Symbol Oven function Application Moist Fan Baking This function was used to comply with the Energy Efficiency Class and Ecodesign Regulations (according to EU 65/2014 and EU 66/2014). Tests according to: IEC/EN 60350-1. The oven door should be closed during cooking so that the func‐ tion is not interrupted and to ensure that the oven operates with the highest energy efficiency possible.
- Page 21 You can set the temperature from 30 °C WARNING! to 99 °C. Refer to values in the table. Make sure that the appliance is cold 4. Set the oven function and the oven before you remove the remaining temperature. water from the cavity embossment. 5.
-
Page 22: Oven - Clock Functions
• All accessories have small indentations at the top of the right and left side to increase safety. The indentations are also anti-tip devices. • The high rim around the shelf is a device which prevents cookware from slipping. AirFry tray: Place the AirFry tray on the third shelf position. -
Page 23: Oven - Hints And Tips
Button Function Description PLUS To set the time. 10.3 Clock functions Clock function Application TIME OF DAY To set, change or check the time of day. DURATION To set how long the oven works. MINUTE MINDER To set a countdown. This function has no effect on the operation of the oven. - Page 24 11.1 Baking change the temperature setting if an unequal browning occurs. The differences equalize For the first baking, use the lower during baking. temperature. Trays in the oven can distort during baking. You can extend the baking time by 10 – 15 When the trays are cold again, the distortions minutes if you bake cakes on more than one disappear.
- Page 25 Food Temperature Time (min) Shelf posi‐ (°C) tion Baguettes 180 - 200 20 - 30 2 + 4 Pancakes 150 - 160 50 - 60 Fruit cakes 140 - 150 70 - 80 Muffins 160 - 170 15 - 25 2 + 4 Jam roll 190 - 210...
- Page 26 Food Temperature (°C) Time (min) Shelf posi‐ tion - baking 55 - 65 Baguettes 220 - 230 15 - 30 3 - 4 Pancake 170 - 180 50 - 60 2 - 3 Dish cake 170 - 180 35 - 45 3 - 4 Sponge cakes / Madeira cakes 170 - 180...
- Page 27 Food Temperature (°C) Time (min) Shelf posi‐ tion Tarts, frozen 2 + 4 25 - 35 When frying or boiling fish, the cooking time depends on the thickness of the fish. The fish is finished when the flesh is white. Test by sticking a fork into the fish. If the flesh comes easily away from the bone, the fish is cooked. With cooking on two levels (double portion) the time is around 1/3 longer than that stated on the packaging.
- Page 28 Food Temperature (°C) Time (min) Shelf position Fruit tarts, short crust pastry 170 - 180 35 - 45 Fruit tarts, crumble pastry 175 - 200 25 - 35 Pizza, home made (thick - with a lot of topping) 180 - 200 25 - 35 Pizza, home made (thin crust) 15 - 20...
- Page 29 Food Temperature (°C) Time (min) Shelf position Meat skewers 500 g 30 - 40 Small baked items Food Temperature (°C) Time (min) Shelf position Cookies 25 - 35 Macaroons 25 - 35 Muffins 25 - 35 Savoury cracker 20 - 30 Short crust pastry biscuits 25 - 35 Tartelettes...
- Page 30 Food Temperature Water in the Preheating Time (min) Shelf (°C) cavity em‐ time (min) posi‐ bossment tion (ml) Croissant Lasagne 35 - 45 Food regeneration Food Temperature Water in the Preheating Time (min) Shelf (°C) cavity em‐ time (min) posi‐ bossment tion (ml)
- Page 31 11.11 Hot Air Roasting Veal Food Temperature (°C) Time (min / kg) Shelf posi‐ tion 60 - 70 2 - 3 Fillet of beef Other. Can be browned off after roasting under the grill or with top / bottom heat at 250°C. If you are using a meat probe, remove it before grilling.
- Page 32 11.12 Conventional Roasting Veal Food Temperature (°C) Time (min / kg) Shelf posi‐ tion 60 - 70 2 - 3 Fillet of beef Other. Can be browned off after roasting under the grill or with top / bottom heat at 250°C. If you are using a meat probe, remove it before grilling.
- Page 33 Food Food core temperature (°C) Shelf position Rump steak - roasting 55 - 65 2 - 3 Roast beef 75 - 80 1 - 2 Veal Food Food core temperature Shelf position (°C) Fillet of beef 2 - 3 Lamb Food Food core temperature Shelf position...
- Page 34 11.15 AirFry Bakery products Food Quantity Temperature Time (min) Shelf po‐ (°C) sition Croissant, frozen approx. 350 g 180 - 220 15 - 30 Puff pastry, frozen approx. 400 g 180 - 220 15 - 35 Puff pastry, fresh approx. 300 g 180 - 220 15 - 35 Pizza, frozen...
-
Page 35: Oven - Care And Cleaning
Food Function Tempera‐ Time (min) Accesso‐ Shelf po‐ ture (°C) ries sition Small cakes (20 small Hot Air 25 - 35 Tray / Drip‐ 1 + 4 ping Pan cakes per tray) Apple pie, 2 tins (ø 20 cm) Conventional 70 - 90 Grid on the grid, diagonally shif‐... - Page 36 Clean the cavity after each use. Fat accumulation or other residue may cause fire. Do not store the food in the appliance for longer than 20 minutes. Dry the cavity only with a microfibre cloth after each use. Everyday Use Clean all accessories after each use and let them dry.
- Page 37 Use maximum 6% vinegar without any additives. 2. Let the vinegar dissolve the residual limestone at the ambient temperature for 30 minutes. 3. Clean the cavity with warm water and a soft cloth. 12.6 Removing the shelf supports To clean the oven, remove the shelf supports. 1.
- Page 38 4. Clean the door glass panels. To install panels, do the same steps in reverse. 12.9 Replacing the lamp 3. Clean the glass cover. WARNING! 4. Replace the lamp with a suitable 300 °C heat-resistant lamp. Risk of electric shock. 5.
-
Page 39: Troubleshooting
13. TROUBLESHOOTING WARNING! Refer to Safety chapters. 13.1 What to do if... Problem Possible cause Remedy You cannot activate the appliance. The appliance is not connected to Check if the appliance is correctly an electrical supply or it is connec‐ connected to the electrical supply. - Page 40 Problem Possible cause Remedy The diameter of the bottom of the Use cookware with correct dimen‐ comes on the hob display. cookware is too small for the zone. sions. Refer to "Hob - Hints and tips" chapter. The oven does not heat up. The oven is deactivated.
-
Page 41: Energy Efficiency
14.3 Product Information and Product Information Sheet according to EU Ecodesign and Energy Labelling Regulations for ovens Supplier's name Electrolux Model identification LKI6444SOW 947941455 Energy Efficiency Index 95.3 Energy efficiency class Energy consumption with a standard load, conventional mode 0.95 kWh/cycle Energy consumption with a standard load, fan-forced mode 0.82 kWh/cycle... -
Page 42: Environmental Concerns
Help protect the environment and human health by recycling waste of electrical and Electrolux Appliances AB - Contact Address: electronic appliances. Do not dispose of Al. Powstancow Slaskich 26, 30-570 Krakow, appliances marked with the symbol... - Page 44 867363470-C-152023...
Need help?
Do you have a question about the LKI6444SOW and is the answer not in the manual?
Questions and answers