Table of Contents
Advertisement
Quick Links
Advertisement
Table of Contents

Related Manuals for Kirkland Signature 720-0011-LP


Summary of Contents for Kirkland Signature 720-0011-LP
- Page 1 This Owner's Manual is provided and hosted by Appliance Factory Parts. Kirkland 720-0011-LP Owner's Manual Shop genuine replacement parts for Kirkland 720-0011-LP Find Your Kirkland Grill Parts - Select From 27 Models -------- Manual continues below --------...
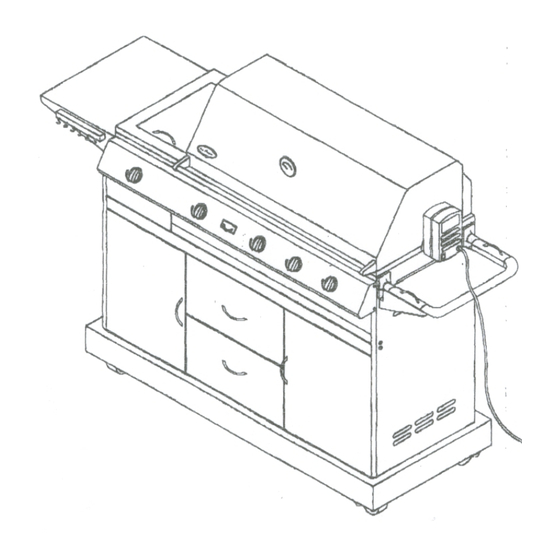
- Page 2 Stainless Steel Gas Grill With Rear and Side Burner USE AND CARE GUIDE FOR OUTDOOR USE ONLY...
- Page 3 FOR YOUR SAFETY It you smell gas: 1. Shut off gas to the appliance. 2. Extinguish any open flame. 3. Open lid 4. If odor continues, immediately call you gas supplier or your fire department. FOR YOUR SAFETY 1. Do not store or use gasoline or other flammable vapors and liquids in the vicinity of this or any other appliance.
-
Page 4: Table Of Contents
Feel free to contact us if we can help you. When you write please include the model number of the grill. We thank you for buying The Kirkland Signature Grill and wish you many years of enjoyment. Note: This appliance is NOT intended to be installed in or on recreational vehicles or boats. -
Page 5: Precaution
PRECAUTIONS Do not repair or replace any part of the grill unless specifically recommended in this manual. All other TESTED IN ACCORDANCE WITH ANSI service should be referred to a qualified technician. Z21.58a-1995 STANDARD FOR OUTDOOR COOKING GAS APPLIANCES. THIS CHILDREN SHOULD NOT BE LEFT ALONE OR GRILL IS FOR OUTDOOR USE ONLY. -
Page 6: Placement Of The Grill
GRILL. operation. The Kirkland Signature Grill is designed for optimum Clean the grill with caution. Avoid steam burns; do not performance without the use of briquettes. Do not place use a wet sponge or cloth to clean the grill while it is hot. -
Page 7: Side Shelf
ASSEMBLY INSTRUCTIONS INSTALLATION OF SIDE SHELF The screws used to attach the side shelf are already screwed into the left panel (see the figure below). Remove the screws from the left panel, align with the holes in the side shelf, and then re-screw into the holes on the left panel of the grill. -
Page 8: Installation Of Utensil Rack
INSTALLATION OF UTENSIL RACK The screws used to attach the utensil rack are already screwed into the back of the utensil rack. Unscrew the 2 screws, align the holes on the front side of the side shelf, and then tighten up the screws to assemble the utensil rack. -
Page 9: Installation Of Push Bar
INSTALLING THE PUSH BAR The screws used to attach the push bar are already screwed into the right panel (see the figure below). Remove the screws from the right panel, align with the holes in the push bar, and then re-screw into the holes on the right panel of the grill. Press the cap against the ends of the push bar, and gently tap them into place. -
Page 10: Installing The Strengthening Bar And Serving Tray
INSTALLING THE STRENGTHENING BAR & SERVING TRAY Find the 4 screws used to attach the strengthening bar. Align the holes on the strengthening bar and the holes on the right panel, and then tighten up the screws to assemble the strengthening bar. Tighten up the 2 screws from underneath also (see the figure below) to further secure the strengthening bar. -
Page 11: Rotisserie Kit Assembly
ROTISSERIE KIT ASSEMBLY The screws for rotisserie mount are already screwed into the right side of the grill housing. Remove the screws and install the rotisserie motor mount as shown in the figure below. Assemble the rotisserie skewer as shown in the figure below. -
Page 12: Gas Hook-Up
GAS HOOK-UP The pressure regulator and hose assembly supplied with the grill must be used. Replacement pressure regulator Manifold pressure: (operating): 10” water column. and hose assembly must be specified by the grill manufacturer. L.P. GAS HOOK-UP: Ensure that the black plastic grommets are in place and This is a liquid propane configured grill. -
Page 13: Installer Final Checklist
DO NOT SMOKE WHILE LEAK TESTING. warranty. Do not use the grill until all connections have been checked and do not leak. NEVER LEAK TEST WITH AN OPEN FLAME. ALWAYS CHECK FOR LEAKS AFTER Make a soap solution of one part liquid detergent and EVERY L.P. -
Page 14: Operating Instruction
“HI” and “LO”. After your first use of the rotis burner it is likely that the NOTE: The Kirkland Signature grill is designed to grill stainless steel adjacent to the burner will darken to a dark efficiently without the use of lava rocks or briquettes of blue color. - Page 15 LIGHTING INSTRUCTIONS GRILL/ROTIS WARNING: IMPORTANT! If the burner will not light after several attempts then the burner can be match lit. BEFORE LIGHTING… Inspect the gas supply piping or hose prior to turning the If you’ve just attempted to light the burner with the gas “ON”.
-
Page 16: Lighting Illustration
LIGHTING ILLUSTRATIONS 1. Make sure the lid is open 2. Push and turn 1 knob to HI position 3. After the burner is lit, adjust the knob as desired... -
Page 17: Using The Side Burner
USING THE SIDE BURNER WARNING: IMPORTANT! cleaners available. Always use the mildest cleaning USING THE SIDE BURNER: procedure first, scrubbing in the direction of the grain. Inspect the gas supply piping or hose prior to turning the To touch up noticeable scratches in the stainless steel, gas “ON”. -
Page 18: Troubleshooting
noticeable scratches in the stainless steel, sand very The top burner grate is stainless steel. To avoid burns do lightly with dry 100 grit emery paper in the direction of not clean a hot grate. They may be wiped while in place the grain. -
Page 19: Grill Parts List
GRILL PARTS LIST... -
Page 20: Grilling Hints
GRILLING HINTS The doneness of meat, whether rare, medium, or well done, is affected to a large degree by the thickness of the To get the juiciest meats, add seasoning or salt after the cut. Expert chefs say it is impossible to have a rare cooking is finished on each side and turn the meat only doneness with a thin cut of meat. -
Page 21: Grill Cooking Chart
GRILL COOKING CHART WEIGHT OR APPROXIMATE SPECIAL INSTRUCTIONS FOOD THICKNESS FLAME SIZE TIME AND TIPS VEGETABLES Slice. Dot with butter or margarine. Wrap in heavy-duty foil. Fresh Grill, turning occasionally. Beets Medium 12 to 20 minutes Carrots Grill, turning once. Brush occasionally Turnips with melted butter or margarine. - Page 22 Tenderloin, Porterhouse, T-Bone, Sirloin Remove excess fat from edge. Slash remaining fat at 2-inch intervals. Rare 1 inch High 8 to 14 minutes Grill, turning once. 1-1/2 inch High 11 to 18 minutes Medium 1 inch Medium to 12 to 22 minutes 1-1/2 inch High 16 to 27 minutes...
- Page 23 FISH AND SEAFOOD Grill, turning once. Brush withmelted butter, margarine or oil Steaks to keep moist. Halibut 3/4 to 1 inch Medium to 8 to 15 minutes Salmon High Swordfish Whole Grill, turning once. Brush with melted Catfish 4 to 8 ounces Medium to 12 to 20 minutes butter, margarine or oil.
-
Page 24: Grill Recipe Suggestions
GRILL RECIPE SUGGESTIONS BBQ SALMON butter and sprinkled with chopped parsley and a crisp lettuce salad. BARBECUED LONDON 2 large salmon steaks BROIL 2 tbs. Oil Note: Substitute catfish, halibut or Salt & pepper cod for salmon. 4 to 6 servings 2 oz. - Page 25 minutes longer or until potatoes Serve 4 chop eggplant finely. Add all the are tender. Let stand 5 minutes ½ lb. boneless sirloin or beef cut seasonings. Chill thoroughly and before serving. into 1” cubes serve on toast. ½ lb. boneless loin of lamb cut into VEGETABLE KABOBS 1”...
- Page 26 accordion pleated. Fasten the second meat hook into the rack. Turn your rotis burner on high. Rotis for 50 minutes or until done. PORK ROAST Apple cider vinegar basting sauce: 1 c. apple cider vinegar 6 oz. water ½ stick butter Salt, pepper, parsley and garlic seasoning 2 oz.
-
Page 27: Limited Warranty
LIMITED WARRANTY MODEL 720-0011 STAINLESS STEEL OUTDOOR GAS GRILL Virco Associates Inc. warrants to the original consumer purchaser of each Outdoor Gas Grill that when subject to normal residential use, it is free from defects in workmanship and materials for the periods specified below. This warranty excludes grills used in rental or commercial applications.
Need help?
Do you have a question about the 720-0011-LP and is the answer not in the manual?
Questions and answers