Table of Contents
Advertisement
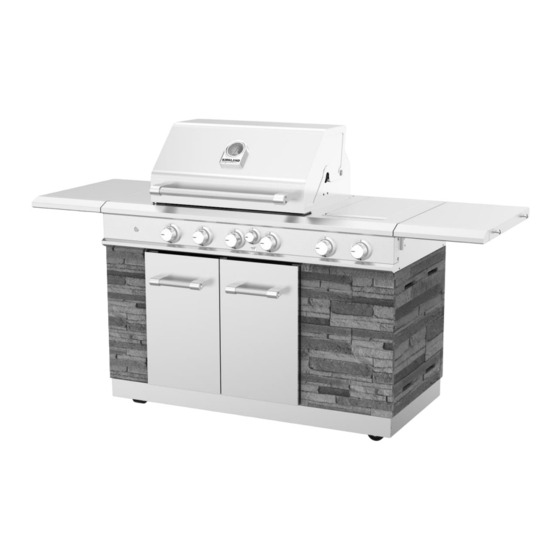
ITM. / ART. 2127649
FREESTANDING OUTDOOR ISLAND GRILL
Installation Instructions and Use & Care Guide
Missing Parts / Questions / Issues
For assistance with parts, assembly, installation, etc. Please call: 1-866-984-7455
Languages spoken: English, French, Spanish 8 a.m.-5 p.m., PST. Monday-Friday.
Costco Member Service Number: 1-800-774-2678
Operating hours 8 a.m.-5 p.m., PST. Monday-Friday.
www.Costco.com
19001001A0
IMPORTANT, RETAIN FOR FUTURE REFERENCE: READ CAREFULLY.
FOR OUTDOOR USE ONLY. NOT FOR COMMERCIAL USE.
860-0030 (LP) 870-0030 (NG)
Advertisement
Table of Contents

Related Manuals for Kirkland Signature 2127649


Summary of Contents for Kirkland Signature 2127649
- Page 1 ITM. / ART. 2127649 FREESTANDING OUTDOOR ISLAND GRILL Installation Instructions and Use & Care Guide Missing Parts / Questions / Issues For assistance with parts, assembly, installation, etc. Please call: 1-866-984-7455 Languages spoken: English, French, Spanish 8 a.m.-5 p.m., PST. Monday-Friday.
-
Page 2: Table Of Contents
TABLE OF CONTENTS Using Your Outdoor Grill ……………………….…………….…29 OUTDOOR GRILL SAFETY…………………………..…………3 Using Your Top Sear Burner……………………………………31 PACKAGE PARTS LIST…............5 Using Your Side Burner………………………….………………32 ASSEMBLY INSTRUCTIONS .…………………..……….……7 TIPS FOR OUTDOOR GRILLING ……………..……………...33 INSTALLATION REQUIREMENTS…………………………..18 Cooking Methods ………………….…………………………….33 Product Dimensions…………………………………..……….…18 OUTDOOR GRILL CARE ………………………………...……34 Gas Supply Requirements………………………………………19 Replacing the Igniter Battery …….……………………..……..34 Gas Connection Requirements………………………..……..…19... -
Page 3: Outdoor Grill Safety
OUTDOOR GRILL SAFETY CALIFORNIA RESIDENTS ONLY - WARNING: Fuels used in liquefied propane gas appliances, and the products of combustion of such fuels, can expose you to chemicals including benzene, which is known to the State of California to cause cancer and reproductive harm. - Page 4 IMPORTANT SAFETY INSTRUCTIONS ◼ WARNING: To reduce the risk of fire, electrical shock, The LP gas supply cylinder to be used must be: injury to persons, or damage when using the outdoor cooking - Constructed and marked in accordance with the gas appliance, follow basic precautions, including the following: Specification for LP Gas cylinders of the U.S.
-
Page 5: Package Parts List
Package Parts List... - Page 6 Package Parts List Hardware package list Truss Head Screw Truss Head Screw 5/32-32 x 15/16” 1/4-20 x 1/2” ASSEMBLY INSTRUCTIONS Tools Needed Some parts come with screws pre- installed. Loosen and tighten for final assembly.
-
Page 7: Assembly Instructions
Assembly Instructions... - Page 12 For Griddle Plate Storage...
- Page 14 For placing rotisserie kit when not in use Propane tank is not included...
- Page 17 INSTALLATION REQUIREMENTS Location Requirements Select a location that provides minimum exposure to wind and traffic paths. The location should be away from strong draft areas. Do not obstruct flow of combustion and ventilation air. Clearance to combustible construction for grill: ◼...
-
Page 18: Installation Requirements
INSTALLATION REQUIREMENTS Production Dimensions The model/serial number rating plate is located on the inside of the left cabinet door. See the following illustration. Model/serial number plate... -
Page 19: Gas Supply Requirements
Gas Supply Requirements Gas Supply Line Pressure Testing Testing above 3.5 kPa / 1/2 psi. or 14" WCP (gauge): The grill and its individual shutoff valve must be disconnected from the gas supply piping system during any pressure testing of that system at test pressures greater than 3.5 kPa / 1/2 psi. Testing below 3.5 kPa / 1/2 psi. - Page 20 Place the 9.07 kg (20lb) propane tank bottom collar into Natural Gas Conversion the mounting hole in the tank tray. Tighten the locking screw against the bottom collar of the Conversion must be made by a qualified gas technician. The 9.07 kg (20lb) propane tank to secure.
-
Page 21: Gas Connection
Using your hand, turn the gas pressure regulator/hose Gas Connection assembly clockwise to connect to the 9.07 kg (20lb) propane tank as shown. NOTE: If grill is to be converted to Natural Gas, follow Hand tighten only. Use of a wrench could damage the instructions in the “Gas Conversions”... -
Page 22: Gas Conversion
GAS CONVERSIONS 860-0030 (LP), 870-0030 (NG) orifice sizes Liquid Propane (LP) Natural Gas (NG) Components Orifice Size BTU/HR Orifice Size BTU/HR Main Burner 0.99 mm 11,000 1.57 mm 11,000 Top Sear Burner 1.07 mm 13,000 1.84 mm 13,000 Side Burner (SB) 1.02 mm 12,000 1.70 mm... -
Page 23: Conversion From Lp Gas To Natural Gas
Conversion from LP Gas to Change Grill Main Burner Valve Orifices Natural Gas Remove the grates and flame tamers. Remove the screws and cotter clip that hold the burner in Installation of the regulator place. Set the screw and clip aside. Turn off the main gas supply valve. - Page 24 Reinsert the burner and reattach using the cotter clip and Change The Top Sear Burner Orifice screws previously removed. Repeat the procedure for each main burner. Use a screwdriver to remove the two screws from the top sear burner heat shield. Remove the heat shield. Use an adjustable wrench to remove the brass elbow.
- Page 25 Change the Side Burner Orifice Reinstall the top sear burner brass elbow by using a Remove the side panel. wrench. Reinstall the top sear burner cover. Unscrew the bracket and side cover. Remove the valve of the side burner. Use a 6 mm socket wrench or 6 mm nut driver to remove the orifice and replace with the Natural Gas orifice.
-
Page 26: Gas Connection
Gas Connection Reinstall the valve of side burner. Before making any connections, check to ensure the Natural Gas inlet pressure falls between the allowable range of 7" W.C. / 0.25 psi and 14" W.C. / 0.5 psi. If the NG inlet pressure does not fall within this range, contact your local gas supplier. - Page 27 Adjust High Flame Setting Screw Place the burner control knobs back to their original When converting from LP to Natural Gas, you will need to positions. adjust the high flame setting screw for ideal burner flame height. Remove each control knob for the main burners and sear burner Use a flat-blade screwdriver to turn the high flame Record Conversion...
-
Page 28: Checking And Adjusting Burners
Low Flame Adjustment Check and Adjust the Burners If flame goes out on the “L” setting, the low flame setting must The burners are tested and factory-set for most efficient be adjusted. operation. However, variations in gas supply and other Turn off the valve and wait until grill and burners are cool. -
Page 29: Outdoor Grill Use
OUTDOOR GRILL USE This manual covers several different models. The grill you have purchased may have some or all of the features listed. The locations and appearances of the features shown here may not match those of your model. Control Panel Knob Light Switch Bottom Left main burner control knob Left center main burner control knob... - Page 30 You will hear the “snapping” sound of the spark. When Prepare the Grill for Lighting burner is lit, release the knob. Turn knob to desired setting. Open the hood completely. Do not light burners with the Repeat for each of the other burners as needed. hood closed.
-
Page 31: Using Your Top Sear Burner
Using Your Top Sear Burner Lighting the Top Sear Burner Strike the match to light it. Hold the lit match close to the top sear burner. Open the main burner cover. Do not light burners with the cover on. Do not lean over the grill. Push in and turn the grill control knob to “●”, while continuing to hold it in. -
Page 32: Using Your Side Burner
Using Your Side Burner Lighting the Side Burner Push in and turn the control knob to “ ”. For the burner closest to the lit match. The burner will light immediately. Open the side burner cover. Do not light burners with the When burner is lit. -
Page 33: Tips For Outdoor Grilling
TIPS FOR OUTDOOR GRILLING Cooking Methods Direct Heat Cooking by direct heat means the food is placed on grill grates directly above or below lighted burners. Hood position can be up or down. If hood is in the up position, total cooking times may be longer. -
Page 34: Outdoor Grill Care
OUTDOOR GRILL CARE GRILL GRATES Replacing the Igniter Battery IMPORTANT: Immediately after you are finished cooking, turn If igniters stop sparking, the battery should be replaced. all burners to HIGH for 10-15 minutes with the hood closed to burn off food residue. Turn off all burners, raise the hood and The igniter button cap is located inside the left door. - Page 35 BURNERS TOP SEAR BURNER Cleaning Method: Cleaning Method: ◼ Light the top seal burner. See the “Using Your Top Sear Clean the exterior of the burner with a wire brush. ◼ Burner” section. Clear any clogged burner ports with a straightened paper clip.
-
Page 36: Adjustment Of Grill Doors
ADJUSTMENT OF GRILL DOORS Your grill is equipped with adjustable door hinges which may Adjustment of Grill Doors need adjustment if doors become misaligned. The hinges are made of two pieces which can easily be detached if door removal is ever necessary for maintenance. In the case that your grill doors need minor adjustments, the two screws on the main hinge piece can be adjusted as shown Removal of Grill Doors... -
Page 37: Troubleshooting
Excessive flare-ups TROUBLESHOOTING ▪ Is there excessive fat in the food being grilled? Keep flame on low or turn one burner off. Grill will not light Keep the hood up when grilling to avoid excessive flare- ups. ▪ Is the 9.07 kg (20lb) propane tank valve turned off? Move food to the warming rack until flames subside. -
Page 38: Warranty
LIMITED WARRANTY (Model # 860/870-0030) 860/870-0030 Warranty is to the original consumer-purchaser only that this product (Model# ) shall be free from defects in workmanship and materials after correct assembly and under normal and reasonable home use for the periods indicated below beginning on the date of purchase. - Page 39 THIS LIMITED WARRANTY IS THE SOLE EXPRESS WARRANTY GIVEN BY THE MANUFACTURER. NO PRODUCT PERFORMANCE SPECIFICATION OR DESCRIPTION WHEREVER APPEARING IS WARRANTED BY MANUFACTURER EXCEPT TO THE EXTENT SET FORTH IN THlS LIMITED WARRANTY. ANY IMPLIED WARRANTY PROTECTION ARISING UNDER THE LAWS OF ANY STATE, INCLUDING IMPLIED WARRANTY OF MERCHANTABILITY OR FITNESS FOR A PARTICULAR PURPOSE OR USE, IS HEREBY LIMITED IN DURATION TO THE DURATION OF THIS LIMITED WARRANTY.
-
Page 40: Replacement Parts
Replacement Parts... - Page 41 Parts List Warranty Warranty Part (Description) coverage Part (Description) coverage (year) (year) Main lid Control panel trim piece(upper) Main lid screw Main control panel Temperature gauge Control panel trim piece (lower) Logo and Temperature gauge Main control panel fix panel housing Temperature gauge seal Bezel A...
- Page 42 Parts List Warranty Warranty Part (Description) coverage Part (Description) coverage (year) (year) Electric igniter module Gas tank block piece Cart trim piece, rear Tank tray bolt Door magnet Faux stone back panel, left Bracket Faux stone back panel,middle Foldable side shelf Bracket Faux stone back panel,right LED lights wire Faux stone side panel, left...
- Page 43 Distributed by: Costco Wholesale Canada Ltd.* Costco Wholesale Corporation 415 W. Hunt Club Road P.O. Box 34535 Ottawa, Ontario Seattle, WA 98124-1535 K2E 1C5, Canada 1-800-463-3783 1-800-774-2678 www.costco.ca www.costco.com * faisant affaire au Québec sous le nom les Entrepôts Costco Limited warranty provided by manufacturer.
Need help?
Do you have a question about the 2127649 and is the answer not in the manual?
Questions and answers