Advertisement
Quick Links
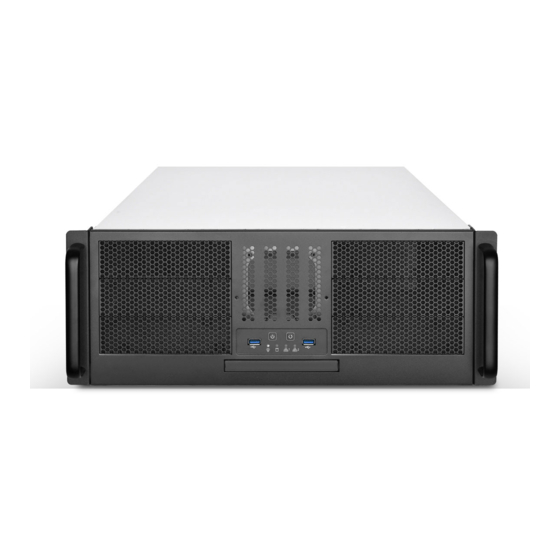
RM41-506
4U 6-bay 5.25" rackmount server chassis
1
4
5
1
6
2
3
2
4
5
6
7
8
9
9
Slim ODD cage assembly
Remove the slim ODD
blank cover
Loose 2-screws and remove the blank cover
Slim ODD assembly
1. Fix the slim ODD bracket with slim ODD with 2 pcs
screws
2. Insert and secure the slim ODD assembly into the
drive bay with 1-screw
Front panel IO and indicators
1
POWER ON SWITCH
SYSTEM RESET SWITCH
2
USB 3.1 Gen1 x 2 ports
3
POWER ON LED (BLUE)
4
3
8
7
WWW.SILVERSTONETEK.COM
4bays-3.5" HDD cage and
cooling fan assembly
How to remove the drive cage
1. Loose 2 screw and lift off the drive cage
2. Once hard drive assembled, secure the drive
cage back with the same 2-screws
Optional cooling fan assembly
Fix 80 x 25mm fan with 4-screws
Removing the top cover
HDD ACTIVITY (GREEN)
1. Release 2-screws of the top cover on each side
5
2. Push the top cover backward about 1" and lift it off the chassis
LAN1 LED (GREEN)
6
LAN2 LED (GREEN)
7
Cooling fan
Optional 8cm fans
Place the 80 x 25mm fan to the rear
plate of chassis
3.5" HDD assembly
1. Place the HDD in the drive bay
2. Secure HDD with screws (4 pcs - 6#32 x 6mm)
Advertisement

Related Manuals for SilverStone RM41-506


Summary of Contents for SilverStone RM41-506
- Page 1 Removing the top cover HDD ACTIVITY (GREEN) 1. Release 2-screws of the top cover on each side POWER ON SWITCH RM41-506 2. Push the top cover backward about 1” and lift it off the chassis LAN1 LED (GREEN) SYSTEM RESET SWITCH LAN2 LED (GREEN) USB 3.1 Gen1 x 2 ports...
- Page 2 2U Redundant PSU to the PSU mount es will SilverStone Technology be liable for damages in connection with the sale, purchase, or use including but not limited 3. Secure the device with 4 pcs screws on two sides...
Need help?
Do you have a question about the RM41-506 and is the answer not in the manual?
Questions and answers