
Related Manuals for Sime MURELLE HR 35 R (M)


Summary of Contents for Sime MURELLE HR 35 R (M)
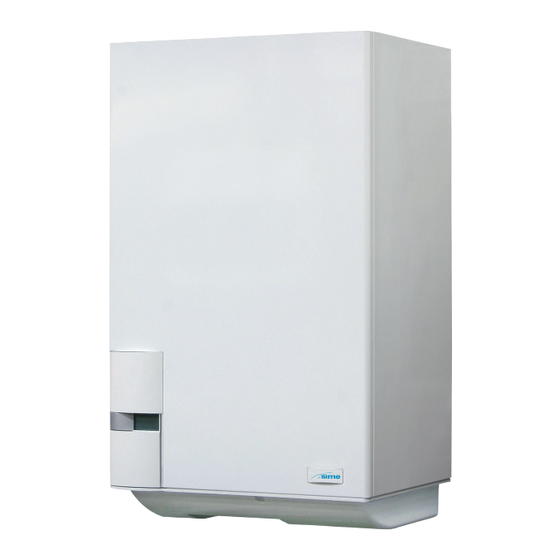
- Page 1 Cod. 6316160A - 07/2013 murEllE hr 35 r (m) EnsurE that thEsE instructions arE lEft for thE usEr aftEr complEtion of thE BEnchmarK sEction plEasE rEad thE important noticE within this guidE rEgarding your BoilEr warranty 199838...
- Page 2 For the first year all of our appliances are protected by our manufacturer’s guarantee which covers both parts and labour. As you would expect from Sime Ltd, it is our aim to provide our valued customers with the best in after sales and service.
- Page 4 The Benchmark Scheme Sime Ltd is a licensed member of the Benchmark Scheme which aims to improve the standards of installation and commissioning of domestic heating and hot water systems in the UK and to encourage regular servicing to optimi- se safety, efficiency and performance.
-
Page 5: Table Of Contents
IpX4D murelle HE 35 R Gas Council number 41-283-29 murelle HE 35 R m: Gas Council number 41-283-30 CONTENTS DESCRIpTION OF THE bOILER ........................pag. INSTALLATION ............................... pag. 10 CHARACTERISTICS ............................pag. 28 uSE AND mAINTENANCE, bENCHmARK AND COmmISSIONING ..............pag. 35 FAuLT FINDING ............................. -
Page 6: Description Of The Boiler
dEscription of thE BoilEr introduction gle installation and in modular systems with European Directives 2009/142/CE, with multiple generators connected in 2004/108/CE, 2006/95/CE and 92/42/CE. murEllE hm 35 r (m) are premixed gas sequence/cascade and independent from condensing boilers for heating only with each other. - Page 7 tEchnical fEaturEs murEllE hE 35 r (m) heat output Nominal (80-60°C) 33.8 Nominal (50-30°C) 37.2 Reduced G20 (80-60°C) Reduced G20 (50-30°C) Reduced G31 (80-60°C) Reduced G31 (50-30°C) heat input nominal 34.8 heat input reduced g20/g31 3.48/6.0 max/min useful yield (80-60°c) 92.0/97.2 max/min useful yield (50-30°c) 106.3/106.8...
- Page 8 functional diagram (fig. 2) Exhaust temperature sensor (SE) Heating flow sensor (SM) Gas valve Safety thermostat 100°C Aqua Guard Filter System By-pass Pump with auto air vent Heating return sensor (SR) Condensate drain trap Safety valve 3 bar Water pressure transducer Boiler discharge Primary heat exchanger CONNECTIONS...
- Page 9 main componEnts (fig. 3) Control panel Aqua Guard Filter System Condensate drain trap (SM) Heating flow sensor Safety thermostat Ignition electrode Primary heat exchanger Limit thermostat Exaust probe (SF) Detection electrode (SR) Return heating probe Automatic air vent 14a Pump fixed 14b Modulating pump Fig.
-
Page 10: Installation
installation The boiler must be installed in a fixed ce only, and assumes the ventilation air ceiling) when installed as a class B appliance location and only by qualified engineers is taken directly from outside. The sizes in compliance with all instructions con- of the vents may need to be increased in (open flued, not roomed sealed). - Page 11 cm²/KW of net heat input. 8 boilers in cascade and communication Then press again, simultaneously, the A single Murelle HE 35 R (34,8 KW net in MODBUS. and the buttons for 2 seconds until input) boiler would require 174 cm² at The board is placed on the back of the high level and 348 cm²...
- Page 12 Fig. 4/b...
- Page 13 modBus mode (fig. 4/c) In this case, proceed as follows: - Choose the communication configu- ration suited to the MODBUS network The RS-485 board can be used for - Set the DIP SWITCH of the RS-485 (PAR 17 INST) according to table par MODBUS communication every...
- Page 14 MODBUS BOILER VARIABLES LIST Function Variable description Digital variables Request CH zone 1 Boiler CH Enable/Request D R/W Enable DHW preparation Boiler DHW Enable D R/W Not used Boiler Water Filling Function D R/W State CH zone 1 Boiler CH Mode State preparation DHW Boiler DHW Mode State presence flame...
- Page 15 cascadE+modBus mode (fig. 4/d) CONNETTORE CABLATO This mode allows for MODBUS commu- (cod. 6319173) nication of at least two boilers in cascade WIRED CONNECTOR and is performed by requesting another (cod 6319173) RS-485 board provided in the kit code 8092244. attEntion: communication will occur only with the mastEr boiler, (boiler with par 15 = 0), interpreting the casca-...
- Page 16 1- Dealing with condensate). than: NOTE: All pipework must have a con- important to clean the system using suitable products. Sime recommend the tinuous fall from the boiler and must be resistant to corrosion by condensate, use of FERNOX products for the flushing –...
- Page 17 isolate the flow and return, and use the See fig 8a for examples of suitable flue polypropylene accessories and without boiler drain vent (5 fig. 5). termination positions. the use of gasket or sealant in type C installation. 2.4.2 Dealing with condensate 2.5.1 type B (fig.
- Page 18 type B 80 mm accessories Code Description Load loss mm H 2 0 8077450A single) 90° bend 8077450 (6 pieces) 8077351A (single) 1000mm Extension 0,25 8077351 (6 pieces) 8077350A (single) 500mm Extension 0,25 8077350 (6 pieces) 8091300 Articulated Tile 8091212B Roof terminal (1381mm) STAFFA TELAIO CALDAIA...
- Page 19 type c (separate ø 80 flues) type c (separate ø 80 flues and coaxial exhaust terminal) 80 mm accessories warning: Code Description Load loss mm - installations with roof exit terminal (4a) and coaxial exhaust (13) require Inlet Exaust the use of a condensation recovery (12) 8077450A (single) 90°...
- Page 20 positioning thE appliances may be located in the exter- distances to be observed, with reference outlEt tErminals (fig. 7) nal perimeter walls of the building. to the type of building shown in fig. 7. To provide some indications of possible The outlet terminals for forced-draught solutions, table 3 gives the minimum TAbLE 2...
- Page 21 Set PAR 14 according to the maximum(10v) flow temperature required. ce errore notE: simE declines all responsibility for injury or damage to persons, ani- mals or property, resulting from the 2.7.7 use with different failure to provide for proper earthing of electronic systems the appliance.
- Page 22 BASIC SYSTEM MULTI-ZONE SYSTEM wITH PUMP, ROOM THERMOSTAT ANd EXTERNAL SENSOR (Code 8094101) BASIC SYSTEM MULTI-ZONE SYSTEM wITH PUMP, ROOM THERMOSTAT ANd EXTERNAL SENSOR (Code 8094101) BASIC SYSTEM MULTI-ZONE SYSTEM wITH VALVE, ROOM THERMOSTAT, REMOTE CONTROL CR 73 (Code 8092226) ANd EXTERNAL SENSOR (Code 8094101) PARAMETERS SETTINGS To use the remote control...
- Page 23 BASIC SYSTEM MULTI-ZONE SYSTEM wITH VALVE, ROOM THERMOSTAT, REMOTE CONTROL CR 73 (Code 8092226) ANd EXTERNAL SENSOR (Code 8094101) PARAMETER SETTING To use the remote control (CR) as room reference for a zone, set: PAR 7 = 1 Set the opening time of the zone valve VZ: PAR 33 = “OPENING TIME”...
- Page 24 ZONA ZONA GIORNO NOTTE ZONA ZONA (70ϒ C) (50ϒ C) GIORNO NOTTE (70ϒ C) (50ϒ C) SYSTEM wITH dOUBLE TEMPERATURE OUTPUT MULTI-ZONE SYSTEM wITH PUMP, CHRONOTHERMOSTAT ANd EXTERNAL SENSOR (Code 8094101) ZONA ZONA NOTTE GIORNO ZONA ZONA NIGHT (70ϒ C) (50ϒ...
- Page 25 BOLLITORE SYSTEM wITH MIXER VALVE SYSTEM wITH ONE dIRECT ZONE, ONE MIXEd ZONE, ONE kIT MIXEd ZONE (Code 8092234), REMOTE CONTROL BOLLITORE CR 73 (Code 8092226) ANd EXTERNAL SENSOR (Code 8094101) PARAMETERS SETTINGS To use the remote control (CR) as remote control panel for the boiler rather than as room reference, set: PAR 7 = 0...
- Page 26 SYSTEM wITH MIXER VALVE SYSTEM wITH TwO MIXEd ZONE INdEPENdENT, TwO kITS MIXEd ZONE (Code 8092234) ANd EXTERNAL SENSOR (Code 8094101) SYSTEM SOLAR SYSTEM wITH TwO MIXEd ZONE INdEPENdENT, ONE dIRECT ZONE, TwO kITS MIXEd ZONE (Code 8092234), ONE kIT SOLAR INSOL (Code 8092235), REMOTE CONTROL CR 73 (Code. 8092226) ANd EXTERNAL SENSOR (Code 8094101) Murelle HM T / HE R (CR)
- Page 27 BOILER ELECTRICAL (fig. 11) SR (5 VDC) TPA (5 VDC) SF (5 VDC) SM (5 VDC) (24 VDC) EV1-2 TS (24 VDC) (5 VDC) F1-2 (5 VDC) (24 VRAC) (24 VRAC) 0 ... 10 VDC (24 VAC) RS-485 (24 VAC) connEctor sparE F1-2 Fuse (4 AT)
-
Page 28: Characteristics
ON = Electricity supply to boiler is on pc connEction OFF = Electricity supply to boiler is on but not ready To be used only with the SIME programming kit and only for functioning. However, the protection fun- by authorised personnel. Do not connect other electronic ctions are active. - Page 29 accEss to installEr’s information For access to information for the installer, press the key (3 fig. 14). Each time the key is pressed, the display moves to the next item of information. If expansion boards (MIXED zONE o INSOL) are connected, the related info will be displayed. If the key is not pressed, the system automatically quits the function.
- Page 30 18. Display of heating return temperature sensor (SR) 29. Display of valve operation with board MIXED ZONE 2 (respectively ON and OFF) 18. Visualizzazione valore sonda ritorno riscaldamento (SR) 29. Visualizzazione comando chiusura valvola con schedino ZONA MIX 2 (rispettivamente ON e OFF) 19.
- Page 31 accEss to PARAMETERS INSTALLER installEr’s paramEtErs FAST CONFIGURATION PAR DESCRIPTION RANGE UNIT OF INC/DEC DEFAULT MEASUREMENT UNIT SETTING For access to the installer’s parameters, Combustion configuration -- = ND “- -” press simultaneously the keys 1 ... 31 or 2 seconds (3 fig. 12). Hydraulic configuration -- = ND “- -”...
- Page 32 BOILER PAR 2 PARAMETERS INSTALLER Instantanious with diverter valve and flowmeter EXPANSION CARd Instantanious with diverter valve, PAR DESCRIPTION RANGE UNIT OF INC/DEC DEFAULT flowmeter and solar system MEASUREMENT UNIT SETTING Number of expansion boards 0 ... 3 Remote control cylinder with Mix valve stroke time 0 ...
- Page 33 ExtErnal sEnsor (fig. 13) If there is an external sensor, the hea- ting settings SET can be taken from the climatic curves according to the external temperature and, in any case, limited to with the range values described in point 3.3 (parameters PAR 22 for zone 1, PAR 25 for zone 2 and PAR 28 for zone 3).
- Page 34 to light, if after the third attempt the automatically start up again. the graph in fig. 14. The speed of the flame has not been recognised, the modulating pump system WILO-YONOS boiler will lockout (ALL06). This may PARA PWM is set as default (installation be due to a worn or distorted ionisa- parameter par 13 = - - ).
-
Page 35: Use And Maintenance, Benchmark And Commissioning
(fig. 15/a). stion circuit and working gas supply Procedure for checking the combu- pressure. If required contact Sime Set up the boiler(s) to operate at maximum rate as described in 4.5.1 stion. Ltd for further assistance. - Page 36 10 seconds. this operation must be performed by The table below shows the SET settings authorised personnel using original MAX power to enter when the type of gas fuel is sime components. (Methane) (Propane) changed. totale 9,3 ±0,2 10,2 ±0,3...
- Page 37 Codice/Code 8111200 attEntion Modello/Model MURELLE HE 35 R (M) Before removing or refit- Matricola/Serial n. 9999999999 ting the front panel of the PAR 1 = 3 (G20) / 11 (G31) boiler, open the small PAR 2 = 5 upper plastic door. Fig.
- Page 38 cut off at 80°C and re-ignition at 70°C (attEntion! Ensure adequate circula- tion to the heating system is available before activating chimney sweep. the chimney sweep function will auto- matically switch off after 15 minutes or is pressed again. when the key 4.5.2 cleaning the filter “aqua guard filter system”...
- Page 39 4.5.4 wILO-YONOS PARA PwM pump diagnose and remedy (fig. 22/b) LEd diagnose and remedy Led color Meaning diagnostic Cause Remedy Continuous green Normal running Pump run as expec- Normal operation ted or is faced to a phenomenon that shortly affects its running Red/green blinking Abnormal situation...
- Page 40 APRE – safEty/limit thErmostat Error alarm 07 (fig. 23/f) If the connection with the safety ther- Circuito mostat/limit thermostat is interrupted, riscaldamento 2 the boiler will stop; the flame control will remain waiting to be switched off for one minute, keeping the system pump on for that period.
- Page 41 zone) Circuito Circuito – fan Error “all 15” (fig. 23/m) – safEty thErmostat intErVEn- – auxiliary sEnsor Error (s3) “all riscaldamento 2 riscaldamento 2 The fan speed does not fall within the tion sEcond mixEd zonE “all 22” 26” (fig. 23/20) rated speed range.
- Page 42 – hEating rEturn sEnsor Error – rs-485 Board communication Error “all 30” (fig. 23/u) in cascadE modE “all 34” (fig. 23/j) When the heating return sensor (SR) is When PAR 15 is different from “- -” open or shorted, ALL 30 will be displa- and there is no communication betwe- yed.
- Page 43 GAS BOILER SYSTEM COMMISSIONING CHECKLIST This Commissioning Checklist is to be completed in full by the competent person who commissioned the boiler as a means of demonstrating compliance with the appropriate Building Regulations and then handed to the customer to keep for future reference. Failure to install and commission according to the manufacturer’s instructions and complete this Benchmark Commissioning Checklist will invalidate the warranty.
- Page 44 SERVICE RECORD It is recommended that your heating system is serviced regularly and that the appropriate Service Interval Record is completed. Service Provider Before completing the appropriate Service Record below, please ensure you have carried out the service as described in the manufacturer’s instructions. SERVICE 01 SERVICE 02 Date:...
-
Page 47: Fault Finding
FAuLT FINDING If an electrical fault occurs on the appli- SHORT CIRCuIT CHECK approx.: 240 V ac. ance the preliminary electrical system – Test leads from L to E “ ” meter checks must be carried out first. Switches turned FULL ON - meter set on reads approx. -
Page 48: Replacement Of Parts
Protect any electrical equipment from possible Apply heat conducting paste to the replace- that are not supplied by Sime Ltd, and only suit- spills of system water. ment stat. ably qualified personnel are permitted to work on gas appliances. -
Page 49: Exploded Views
EXpLODED VIEWS MURELLE HE 35 R - MURELLE HE 35 R M Posiz. Codice Descrizione 6138533 Right hand side frame part 6138632 Left hand side frame part 6255431 Expansion vessel lower support 6138894 Frame assembly lower side 6266081 Rear panel... - Page 50 6256751 Upper protection fixing bracket 6277207 Water trap 6010831 Main exchanger supporting brack 6010829 Main exchanger fixing bracket 6278910 Main exchanger body 6269008 Main exchanger door insulation 6248861 Combustion chamber O-ring 6248860 Glass fibre sealing cord 6278853 Main exchanger door 6278357 Burner 6174823...
- Page 51 6248828 Air inlet gasket Ø80 6304700 Control panel 6305160 Guidelight with led 6305120 Kit Rubber button 6247327 Cap for time programmer 6304890 Flap door assembly 6301480 Main PCB 2211610 Earth faston 6305000 Cover 6305010 connection cover 6305020 Time programmer cover 6301465 PCB expansion 6272320...
- Page 52 AppENDIX 1 INDUSTRY GUIDANCE FOR INSTALLERS ON CONDENSATE DRAINAGE PIPE INSTALLATION This guidance is endorsed by HHIC members. 1. BACKGROUND During recent winters the UK has experienced prolonged spells of extremely cold weather - down to minus 20 C and below in many areas. This resulted in a significant increase in the number of calls to boiler manufacturers and heating engineers from householders with condensing (high efficiency) boilers where the condensate drainage pipe had frozen and become blocked with ice, causing the boiler to shut down.
- Page 53 2.1 INTERNAL TERMINATION: Wherever possible, the condensate drainage pipe should be terminated at a suitable internal foul water discharge point such as (a) an internal soil and vent stack or (b) an internal kitchen or bathroom waste pipe, washing machine waste pipe etc. A suitable permanent connection to the foul waste pipe should be used.
- Page 54 The use of fittings, elbows etc should be kept to a minimum and any internal “burrs” on cut pipework should be removed so that the internal pipe section is as smooth as possible. The customer/householder should be advised that even with the above measures this type of installation could freeze, and that if this were to occur then boiler shutdown could result, requiring remedial action - possibly involving a chargeable engineer call-out.
- Page 55 NOTES The Benchmark Commissioning Checklist (located at the back of the boiler installation manual) should be completed as required to record details of the condensate drainage pipe installation. Where an external condensate drainage pipe is installed, the customer should be made aware of the risks and consequences of its freezing and offered the option to fit trace heating (or other measures approved by the boiler manufacturer or service organisation).
- Page 56 Figure 1 – Connection of condensate drainage pipe to internal soil and vent stack Boiler Visible air break 75 mm trap Visible air break and trap not required if there is a trap with a minimum condensate seal of 75 mm incorporated into the boiler Soil and vent stack Invert 450 mm minimum up to three storeys...
- Page 57 Figure 2(a) – Connection of a condensate drainage pipe downstream of a sink, basin, bath or shower waste trap Boiler Visible air break 75 mm trap Visible air break and trap not required if there is a trap with a minimum condensate seal of 75 mm incorporated into the boiler.
- Page 58 Figure 2(b) – Connection of a condensate drainage pipe upstream of a sink, basin, bath or shower waste trap Boiler Visible air break at plug-hole 75 mm sink, basin, bath or shower waste trap Sink, basin, bath or shower with integral overflow Open end of condensate drainage pipe direct into gully 25 mm min below grating but above water level;...
- Page 59 Figure 3 – Connection of a condensate pump - typical method (NB manufacturer’s detailed instructions should be followed). IND GUIDE INST 10-11 HHIC REF T11/0027BRev8...
- Page 60 Figure 4 – Connection of condensate drainage pipe to external soil and vent stack Boiler 450 mm minimum up to three storeys Visible air break Minimum internal diameter 19 mm 75 mm trap Pipe size transition point Visible air break and trap not required if Minimum internal diameter 30 mm there is a trap with a minimum condensate seal of 75 mm incorporated into the boiler.
- Page 61 Figure 5 – External termination to rainwater downpipe (NB only combined foul/rainwater drain) Condensate discharge pipe from boiler Air gap Pipe size transition point 68 mm PVCu strap-on fitting Water/weather proof insulation Minimum internal diameter 19 mm 43 mm 90° male/female bend Minimum internal diameter 30 mm External rain water pipe into foul water End cut at 45 °...
- Page 62 Figure 6 – External drain, gully or rainwater hopper Boiler Visible air break 38 mm minimum trap Visible air break and trap not required if there is a trap with a minimum condensate seal of 38 mm incorporated into the boiler External length of pipe 3 m maximum Open end of condensate drainage pipe direct into gully 25 mm min below grating but above water level;...
- Page 63 Figure 7 – Example of a purpose-made soakaway Condensate discharge pipe from boiler Ground (this section of the condensate drainage pipe may be run either above or below ground level); End cut at 45 ° Diameter 100 mm minimum plastic tube Bottom of tube sealed Limestone chippings Two rows of three 12 mm holes at 25 mm centres, 50 mm from bottom of tube and...
- Page 64 1a Blue Ridge Park Thunderhead Ridge Glasshoughton, Castleford, WF10 4UA Phone: 0845 9011114 Fax: 0845 9011115 www.sime.co.uk Email: enquiries@sime.co.uk...
Need help?
Do you have a question about the MURELLE HR 35 R (M) and is the answer not in the manual?
Questions and answers