Table of Contents
Advertisement
Quick Links
Installation
Harrier
Control Box
For metering and injecting chemicals into multiple wells. Intended to be used only with a
KRAKN™ MPI solenoid valve manifold. For professional use only.
See page 3 for approvals and page 4 for model information. Class
I, Div 2, Groups A, B, C, D, T4 approved models available.
Important Safety Instructions
Read all warnings and instructions in this manual,
and in related manuals on page 2, before using the
equipment. Save all instructions.
®
+ MPI
3A7378F
EN
Advertisement
Table of Contents

Subscribe to Our Youtube Channel
Related Manuals for Graco Harrier+ MPI


Summary of Contents for Graco Harrier+ MPI
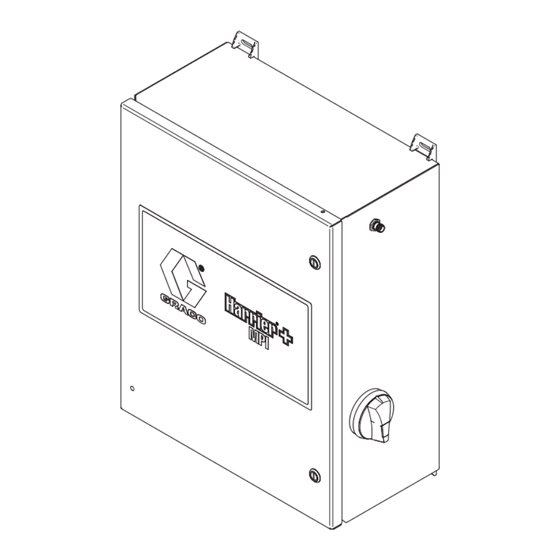
- Page 1 Installation ® Harrier + MPI 3A7378F Control Box For metering and injecting chemicals into multiple wells. Intended to be used only with a KRAKN™ MPI solenoid valve manifold. For professional use only. See page 3 for approvals and page 4 for model information. Class I, Div 2, Groups A, B, C, D, T4 approved models available.
-
Page 2: Table Of Contents
California Proposition 65 ....47 Graco Standard Warranty ....48 Related Manuals Manual No. -
Page 3: Approvals
Approvals Models Approvals B52M00 - 03 CI-D24-0x00-2M B52M04 - 07 CI-A1A-0x00-0M 3132066 B52M08 - 11 Conforms to UL STD 508A CI-A1A-0x00-2M Certified to CAN/CSA C22.2 No. 286 B52H00 - 03 CI-D24-0x00-2M 3132066 Certified to CAN/CSA C22.2 No. 286 B52H04 - 07 Conforms to UL 508A CI-A1A-0x00-0M B52H08 - 11... -
Page 4: Models - Ordinary Location
Models - Ordinary Location Models - Ordinary Location Part Number Configuration Code Input Voltage Controller Output Voltage B52M00 CI-D24-0300-2M Harrier+ SCADA B52M01 CI-D24-0400-2M Harrier+ GSM USA 24 VDC 24 VDC B52M02 CI-D24-0500-2M Harrier+ International B52M03 CI-D24-0600-2M Harrier+ CDMA B52M04 CI-A1A-0300-0M Harrier+ SCADA B52M05 CI-A1A-0400-0M... - Page 5 Models - Hazardous Location Control Box Configuration Number Matrix Check the identification plate (ID) for the 12-digit Configuration Number of your box. Use the following matrix to define the components of your box. NOTE: Not all possible configurations are available. Sample Configuration Number: CI-D24-0300-2M Chemical Box Style...
-
Page 6: Warnings
Warnings Warnings The following warnings are for the setup, use, grounding, maintenance, and repair of this equipment. The exclama- tion point symbol alerts you to a general warning and the hazard symbols refer to procedure-specific risks. When these symbols appear in the body of this manual or on warning labels, refer back to these Warnings. Product-specific hazard symbols and warnings not covered in this section may appear throughout the body of this manual where applicable. - Page 7 Warnings PERSONAL PROTECTIVE EQUIPMENT Wear appropriate protective equipment when in the work area to help prevent serious injury, including eye injury, hearing loss, inhalation of toxic fumes, and burns. Protective equipment includes but is not limited to: • Protective eyewear, and hearing protection. •...
-
Page 8: Installation
Installation Installation Connect the Antenna All electrical wiring must be done by a qualified elec- trician and comply with all local codes and regula- Removing or replacing the antenna while the circuit is tions. live may spark ignitable fumes in the area. To reduce the risk of ignition, do not remove or replace the Attach Control Box to Stand antenna while the circuit is live unless the area is free... -
Page 9: Grounding
Installation Grounding The equipment must be grounded to reduce the risk of static sparking and electric shock. Electric or static Ground Wire sparking can cause fumes to ignite or explode. Improper grounding can cause electric shock. Grounding Bar Grounding provides an escape wire for the electric current. -
Page 10: Connect Power
Installation Connect Power Ordinary Location Boxes 2. Connect the main power to the control box as fol- lows: a. Feed the cable through the strain relief (23) on right side of the control box. The strain relief All electrical wiring must be done by a qualified elec- trician and comply with all local codes and regula- accepts 0.59-1.0 in. - Page 11 Installation Hazardous Location, DC In and DC Out Boxes (B52H00-03) 2. Connect the main power to the control box as fol- lows: a. Feed the cable through the strain relief (23) on bottom of the control box. The strain relief All electrical wiring must be done by a qualified elec- trician and comply with all local codes and regula- accepts 0.59-1.0 in.
- Page 12 Installation Hazardous Location, AC In and AC Out Boxes (B52H04-07) 2. Connect the main power to the control box as fol- lows: a. Feed the cable through the strain relief (23) on right side of the control box. The strain relief All electrical wiring must be done by a qualified elec- trician and comply with all local codes and regula- accepts 0.59-1.0 in.
- Page 13 Installation Hazardous Location, AC In and DC Out Boxes (B52H08-11) a. Feed the cable through the strain relief (23) on right side of the control box. The strain relief accepts 0.59-1.0 in. (15-25 mm) diameter cables. All electrical wiring must be done by a qualified elec- trician and comply with all local codes and regula- b.
-
Page 14: Pump Connection
Installation Pump Connection 24 VDC Pumps (CI-D24-0x00-2M and CI-A1A-0x00-2M) for Ordinary Location Boxes All electrical wiring must be done by a qualified elec- The pump control circuit includes an in-line mini-ATM in trician and comply with all local codes and regula- fuse holder F2. -
Page 15: Multiple-Point Valve Manifold Connection
Installation Multiple-Point Valve Manifold Connection Verify that power is disconnected before connecting the multiple-point valve manifold assembly. Refer to the multiple-point valve manifold instruction manual for operation. (See Related Manuals on page 2.) Connect the ground wire to the grounding bar. (See Grounding on page 9.) Connect the valve manifold wires to terminals 32-41 according to Multiple-Point Valve Manifold Connec-... -
Page 16: Power Terminals And Circuit Breakers
6 A* MTR (LINE), Motor Power, Breaker, UL 489 CNTL (LINE), Controller Power, Breaker, UL 489 * For Graco motors, or 120% motor cur- rent rating, not to exceed 6 A. ti37510a . 7: 115 VAC Out Models (CI-A1A-0x00-0M), B52M04-B52M07 (Ordinary Location) - Page 17 MTR (+) MINI, UL 248 FCM3 (BLACK CUBE) * For Graco motors, or 120% motor cur- rent rating, not to exceed 25 A. . 8: 24 VDC Out Models (CI-D24-0x00-2M), B52M00-B52M03 (Ordinary Location) To install a wire, loosen the screw above the wire location, insert the wire, tighten the screw. Torque to 5-7 in-lbs (0.6-0.8 N•m).
- Page 18 15 A* MTR+, Motor Power, ATM MINI, UL 248 Incoming AC Power, Breaker * For Graco motors, or 120% motor cur- rent rating, not to exceed 25 A. ti41117a . 9: 115 VAC In, 24 VDC Out Models (CI-A1A-0x00-2M), B52M08-B52M11 (Ordinary Location) To install a wire, loosen the screw above the wire location, insert the wire, tighten the screw.
- Page 19 Fuse 24 V+, FCM3, 5x20 MM Fuse 7.5 A Incoming AC Power, Breaker, UL 1077 * For Graco motors, or 120% motor current rat- ing, not to exceed 6 A. . 10: 115 VAC Out Models (CI-A1A-0x00-0M), B52H04-B52H07 (Hazardous Location)
- Page 20 24 V+, FCM3, 5x20 MM Fuse 7.5 A Incoming AC Power, Breaker, UL 1077 * For Graco motors, or 120% motor current rat- ing, not to exceed 25A. . 11: 115 VAC In, 24 VDC Out Models (CI-A1A-0x00-2M), B52H08-B52H11 (Hazardous Location) To install a wire, loosen the screw above the wire location, insert the wire, tighten the screw.
- Page 21 15 A* MTR+, Motor Power, Class CC Fuse 24 V+, FCM3, 5x20 MM Fuse * For Graco motors, or 120% motor current rat- ing, not to exceed 25 A. . 12: 24 V In, 24 V Out Models (CI-D24-0x00-2M), B52H00-B52H03 (Hazardous Location)
-
Page 22: Terminals
Installation Multiple-Point Valve Manifold and Accessory Terminals A terminal block assembly is included to ease wiring the solenoids and accessories. All terminal blocks are labeled similar to the tables shown below. Depending on your system, not all of the terminals will be present. Ordinary Location Terminal Block Key Cycle Counter, positive... - Page 23 Installation Hazardous Location Terminal Block Key Cycle Counter, positive 26 Analog Out, Ground 10 Cycle Counter, negative 27 Temperature Sensor 11 Auxiliary Switch, positive 28 Temperature Sensor 12 Auxiliary Switch, negative 29 Receive, black (SCADA models only) 13 Alarm #1 30 Transmit, red (SCADA models only) 14 N/A 31 Ground, green (SCADA models only)
-
Page 24: Typical Installation
Installation Typical Installation . 13 Multiple-Point Injection System Layout 3A7378F... -
Page 25: Typical Installation Components
The mul- tiple-point valve manifold assembly (N), pump (A), and control box (B) in F . 13 are supplied by Graco. All other components are supplied by the customer. Key: Pump (includes Inlet (J) and Outlet (K) ports) -
Page 26: Operation
Operation Operation Software Updates Follow the “Install Software with Token” procedure in the Harrier+ Chemical Injection Controller Programming To reduce the risk of electric shock when accessing manual to update software on the Harrier+ and FCM3. the control box while power is present: See Related Manuals on page 2. -
Page 27: Wiring Schematics
Operation Wiring Schematics 24 VDC IN and 24 VDC OUT B52M00-03 configuration CI-D24-0x00-2M is shown (Ordinary Location) FCM3 (BLACK CUBE) MTR (+) MTR (-) ti37511a 3A7378F... -
Page 28: 115 Vac In And 115 Vac Out
Operation 115 VAC IN and 115 VAC OUT B52M04-07 configuration CI-A1A-0x00-0M is shown (Ordinary Location) MTR N (-) FCM3 (BLACK CUBE) MTR L (+) L(+) N(-) ti37512a 3A7378F... -
Page 29: 115 Vac In And 24 Vdc Out
Operation 115 VAC IN and 24 VDC OUT B52M08-11 configuration CI-A1A-0x00-2M is shown (Ordinary Location) FCM3 (BLACK CUBE) MTR (-) MTR (+) ti37513a 3A7378F... -
Page 30: 24 Vdc In And 24 Vdc Out
Operation 24 VDC IN and 24 VDC OUT B52H00-03 configuration CI-D24-0x00-2M is shown (Hazardous Location) 9 10 11 12 13 14 15 16 17 18 19 20 21 22 23 24 25 26 27 28 32 33 34 35 36 37 38 39 40 41 9 10 11 12 13 14 15 16 17 18 19 20 21 22 23 24 25 26 27 28 32 33 34 35 36 37 38 39 40 41 MTR (-) MTR (+) -
Page 31: 115 Vac In And 115 Vac Out
Operation 115 VAC IN and 115 VAC OUT B52H04-07 configuration CI-A1A-0x00-0M is shown (Hazardous Location) 9 10 11 12 13 14 15 16 17 18 19 20 21 22 23 24 25 26 27 28 32 33 34 35 36 37 38 39 40 41 9 10 11 12 13 14 15 16 17 18 19 20 21 22 23 24 25 26 27 28 32 33 34 35 36 37 38 39 40 41 MTR N (-) MTR L (+) -
Page 32: 115 Vac In And 24 Vdc Out
Operation 115 VAC IN and 24 VDC OUT B52H08-11 configuration CI-A1A-0x00-2M is shown (Hazardous Location) 9 10 11 12 13 14 15 16 17 18 19 20 21 22 23 24 25 26 27 28 32 33 34 35 36 37 38 39 40 41 9 10 11 12 13 14 15 16 17 18 19 20 21 22 23 24 25 26 27 28 32 33 34 35 36 37 38 39 40 41 MTR (-) MTR (+) -
Page 33: Troubleshooting
Troubleshooting Troubleshooting To reduce the risk of electric shock when accessing the control box while power is present: • Do not make contact with components or wires unless instructed to do so. • Wear appropriate personal protective equipment. EXPLOSION HAZARD •... -
Page 34: Parts
Parts Parts 24 VDC IN and 24 VDC OUT B52M00 configuration CI-D24-0300-2M is shown (Ordinary Location) From 13 51, 56 51, 56 30 38,39 30 3A7378F... - Page 35 Parts 24 VDC IN and 24 VDC OUT Parts List, B52M00 (Ordinary Location) Ref. Part Description Ref. Part Description PLUG, PG-7 (SCADA assemblies ENCLOSURE only) PANEL, back, enclosure NUT, PG-7 (SCADA assemblies CONTROLLER, Harrier+ only) B32833 GSM USA; DC SCREW, pan B32835 GSM International;...
-
Page 36: 115 Vac In And 115 Vac Out
Parts 115 VAC IN and 115 VAC OUT B52M04 configuration CI-A1A-0300-0M is shown (Ordinary Location) 54,57 54,57 30 38,39 29 3A7378F... - Page 37 Parts 115 VAC IN and 115 VAC OUT Parts List, B52M04 (Ordinary Location) Ref. Part Description Ref. Part Description BRACKET, mounting, external ENCLOSURE handle Panel, back, enclosure PLUG, PG-7 (SCADA assemblies CONTROLLER, Harrier+ only) B32834 GSM USA; AC NUT, PG-7 (SCADA assemblies B32836 GSM International;...
-
Page 38: 115 Vac In And 24 Vdc Out
Parts 115 VAC IN and 24 VDC OUT B52M08 configuration CI-A1A-0300-2M is shown (Ordinary Location) 61,57 51,56 52,56 51,56 30 52,56 38,39 29 3A7378F... - Page 39 Parts 115 VAC IN and 24 VDC OUT Parts List, B52M08 (Ordinary Location) Ref. Part Description Ref. Part Description NUT, PG-7 (SCADA assemblies ENCLOSURE (includes ref 4) only) PANEL, back, enclosure SCREW, pan CONTROLLER, Harrier+ SCREW, machine, pan B32833 GSM USA; DC FUSE, 15 A (not shown) B32835 GSM International;...
-
Page 40: 24 Vdc In And 24 Vdc Out
Parts 24 VDC IN and 24 VDC OUT B52H00 configuration CI-D24-0300-2M is shown (Hazardous Location) 51,56 56,63 47,48 30 38,39 30 3A7378F... - Page 41 Parts 24 VDC IN and 24 VDC OUT Parts List, B52H00 (Hazardous Location) Ref. Part Description Ref. Part Description HOLDER, fuse terminal block, 5 x ENCLOSURE 20 mm PANEL, back, enclosure FUSE, 3A, 5x20mm (not shown) controller, harrier+ WIRE, battery, POS B32833 GSM USA;...
-
Page 42: 115 Vac In And 115 Vac Out
Parts 115 VAC IN and 115 VAC OUT B52H04 configuration CI-A1A-0300-0M is shown (Hazardous Location) 30 54,57 54,57 60,58 38,39 29 40 41 3A7378F... - Page 43 Parts 115 VAC IN and 115 VAC OUT Parts List, B52H04 (Hazardous Location) Ref. Part Description Ref. Part Description NUT, PG-7 (SCADA assemblies ENCLOSURE (includes ref 4) only) PANEL, back, enclosure SCREW, pan CONTROLLER, Harrier+ SCREW, machine, pan B32834 GSM USA; AC FUSE, class-cc, 6 A (not shown) B32836 GSM International;...
-
Page 44: 115 Vac In And 24 Vdc Out
Parts 115 VAC IN and 24 VDC OUT B52H08 configuration CI-A1A-0300-2M is shown (Hazardous Location) 52,56 51,56 57,59 30 57,59 38,39 29 3A7378F... -
Page 45: Kits And Accessories
Parts 115 VAC IN and 24 VDC OUT Parts List, B52H08 (Hazardous Location) Ref. Part Description Ref. Part Description PLUG, PG-7 (SCADA assemblies ENCLOSURE only) PANEL, back, enclosure NUT, PG-7 (SCADA assemblies CONTROLLER, Harrier+ only) B32833 GSM USA; DC SCREW, pan B32835 GSM International;... -
Page 46: Dimensions
Dimensions Dimensions Multiple-Point Injection Control Box . 15 Multiple-Point Injection Control Box Dimensions and Mounting Hole Locations 3A7378F... -
Page 47: Technical Specifications
Technical Specifications Technical Specifications Multiple-Point Injection Control Box Metric Nominal Input Voltage (by model, see page 4) CI-D24-0x00-2M 24 VDC CI-A1A-0x00-0M 115 VAC CI-A1A-0x00-2M 115 VAC Maximum Input Current (by model, see page 4) CI-D24-0x00-2M 25 A CI-A1A-0x00-0M CI-A1A-0x00-2M Nominal Pump Output Voltage (by model, see page 4) CI-D24-0x00-2M 24 VDC... -
Page 48: Graco Standard Warranty
With the exception of any special, extended, or limited warranty published by Graco, Graco will, for a period of twelve months from the date of sale, repair or replace any part of the equipment determined by Graco to be defective.
Need help?
Do you have a question about the Harrier+ MPI and is the answer not in the manual?
Questions and answers