
Related Manuals for domi outdoor living LGCD1626


Summary of Contents for domi outdoor living LGCD1626
-
Page 2: Assembly Manual
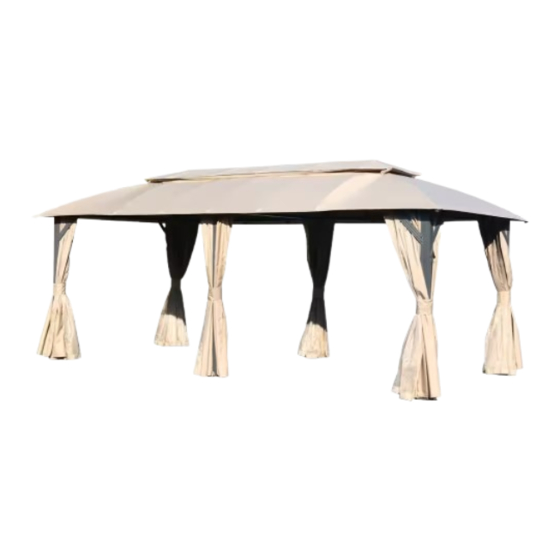
10'×20' Gazebo ASSEMBLY MANUAL MODEL#: LGCD1626 Missing part? Damaged? Contact us via email at service@domioutdoorliving.com www.domioutdoorliving.com © Copyright 2023-2025 domi outdoor living LLC. All Rights Reserved. - Page 4 ×16 ×16 12 × 12 × 12 inches 12 in.
- Page 5 Corner Post Middle Post Short Beam Short Beam Long Beam Long Beam Corner Corner Long Beam Solidifying Bar Solidifying Bar 1185mm 1185mm Track Track 1810mm 1810mm Track Track 815mm 815mm Track Track Middle Roof Tube Middle Roof Tube Corner Roof Tube...
- Page 6 732mm 721mm Corner Roof Tube Roof Support Tube 682mm 702mm Roof Support Tube Middle Support Tube Corner Middle Joint Bar Bracket Post Base Post Base Bracket Bracket Roof Hub Joint Bar Roof Roof Roof Corner Cover Connector Connector Connector Canopy Plastic Cap Plastic Hook Top Hook...
- Page 7 Self-tapping Bolts Bolts and Nuts Bolts Bolts...
- Page 8 (1) Attach Bracket #N to the top of Post A with bolt #2. (2) Attach post base #B to the bottom of corner post #A with 3 bolts #2. (3) Repeat the above procedures for the other three posts.
- Page 9 (1) Attach 2 brackets #L to the middle post #A1 with 4 bolts #5. (2) Attach middle post base #B1 to the bottom of middle post with 2 bolts #2. (3) Repeat the above procedures for another middle post #A1.
- Page 10 (1) Slide the plastic hooks to the double-rail track #F & F1(each slot should slide 6 plastic hooks). (2) Repeat the above procedures for another track #F & F1.
- Page 11 (1) Insert Part #M into part #C, and secure with 3 bolts #2. (2) Insert the other side of part #M into part #C1 and secure with 3 bolts #2. (3) Repeat the above procedures for another beam #C & C1.
- Page 12 (1) Use 6 bots #2 to secure track #F &F1 to the beam #C & C1. (2) Attach Bracket #N1 to the joint of #C & C1 with bolt #2. (3) Repeat the above procedures for another beam #C & C1.
- Page 13 (1) Slide the plastic hooks to the double-rail track #F2 & F3 (each slot should slide 16 plastic hooks). (2) Slide the plastic hooks to the double-rail track #F4 & F5 (each slot should slide 8 plastic hooks). (3) Repeat the above procedures for the other tracks.
- Page 14 (1) Insert part #M into part #D2, and secure with 3 bolts #2. (2) Insert another part #M into the other side of part #D2 and secure with 3 bolts #2. (3) Connect part #D and # D1 to part #M with 6 bolts #2. (4) Repeat the above procedures for another long beam.
- Page 15 (1) Use 10 bolts #2 to secure track #F2 &F4 & F5& F3 to the beam #D & D2 & D1. (2) Attach 5 brackets #N1 to the beam #D & D2 & D1 with 5 bolts #2. (3) Repeat the above procedures for another long beam.
- Page 16 (1) Connect part #C and #D1 to post #A with 8 Bolts #2. (From Outside) (2) Repeat the above procedures for the other three corner posts.
- Page 17 Inside View (1) Attach part #L to the long beam #D2 with 4 bolts #2 (From Inside). (2) Repeat the above procedure for another middle post # D2.
- Page 18 (1) Use part #V1 to connect two middle support tubes #V, and secure with 4 bolts #5. Outside View (2) Use 4 bolts #2 to attach middle support tubes #V to beam #D2. (3) Repeat the above procedures for another side. (4) Cover with plastic cap #Q(from outside).
- Page 19 (1) Affix part #E & #E1 to the frame with 8 bolts #2. Outside View Inside View (2) Attach the corner with corner cover #P. (3) Secure with 4 Self-tapping bolts #4. (4) Repeat the above procedures for the other three corners.
- Page 20 (1) Connect part #J and part J1 with part #K3 & K2. (2) Connect part #J1 and part J with part #K3 & K2. (3) Use part #K3 & K2 to combine the 2 assembled roof support tubes ( J & J1, J1 & J) as shown. Pay attention to the mounting position of K2 &...
- Page 21 (1) Secure top hooks #S to Part #K. (2) Connect part #J with part #K1 & K. (3) Repeat the above procedures for another side. Note: Each of the load-bearing capacity of the top hook shall not exceed 8 lbs.
- Page 22 Tight Loose Insert the marble into the point(indicated by the arrow)...
- Page 23 Middle Roof Tube #G1 Assembly Use 6 bolts #3 to fix the assembled roof tubes #G1 with 6 brackets #N1.
- Page 24 Middle Roof Tube #G Assembly Use 2 bolts #3 to fix the assembled roof tubes #G with 2 brackets #N1.
- Page 25 Middle Roof Tube #G1 Assembly Use 4 bolts #3 to fix the assembled roof tubes #G1 with 4 brackets #N1.
- Page 26 Main Canopy #U1 Assembly Attention:We highly recommend installing the corner roof tube AFTER the main canopy is installed.
- Page 27 Corner Roof Tube #H Assembly: Insert 4 corner roof tubes #H to the roof connector #K.
- Page 28 Use 4 bolts #3 to fix the assembled roof tubes #H1 with 4 brackets #N1.
- Page 29 (1) Hang hooks to the tubes #G1. (2) Insert 4 canopy adjustment kits #R into the corresponding pockets. When inserting the adjustment kit #R into the 4 corners of the main canopy, we suggest you press the marble again, insert the marble more deeply into the adjustment kit #R as shown in the picture, put on the 4 corners of the main canopy, then pull outward #R to...
- Page 30 Vent Cover #U Assembly...
- Page 31 (3) Insert 12 canopy adjustment kits #R into the corresponding pockets. (4) Part #R has 3 levels to adjust the status of canopy, from loose to tight. Tighter Marble NOTE: If you find the canopy get looser in the later use, we recommend you to adjust #R to make canopy tighter.
- Page 32 Mosquito Netting Assembly Inside Track 7 Hooks 10 Hooks 7 Hooks 6 Hooks 6 Hooks 6 Hooks 6 Hooks 10 Hooks 7 Hooks 7 Hooks...
- Page 33 Curtains Assembly: Outside Track 7 Hooks 10 Hooks 7 Hooks 6 Hooks 6 Hooks 6 Hooks 6 Hooks 10 Hooks 7 Hooks 7 Hooks...
- Page 34 Note: Stakes are NOT RECOMMENDED for PERMANENT USE. Be aware of strong wind when anchor the gazebo on the soft ground. We do not provide warranty services if the gazebo is destroyed by strong wind when you anchor the gazebo using the stakes.
Need help?
Do you have a question about the LGCD1626 and is the answer not in the manual?
Questions and answers