
Related Manuals for domi outdoor living LGMF1638


Summary of Contents for domi outdoor living LGMF1638
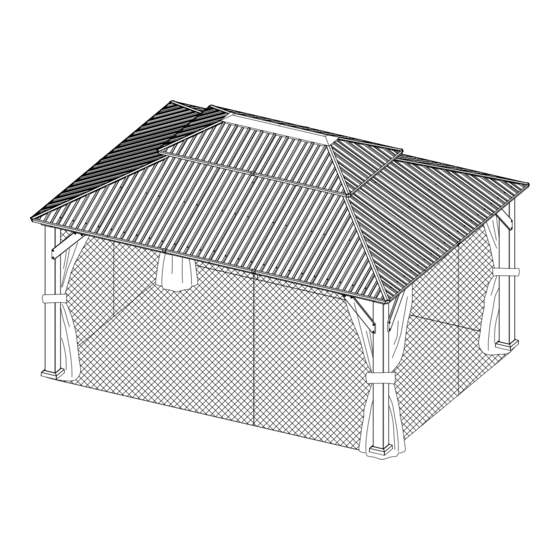
- Page 1 12'×16' Metal Patio Wood Gazebo MODEL#:LGMF1638 Missing part? Damaged? Contact us via email at service@domioutdoorliving.com www.domioutdoorliving.com © Copyright 2023-2025 domioutdoorliving LLC. All Rights Reserved.
- Page 3 ×16...
- Page 4 ×16...
- Page 5 Wood Post Beam Beam Beam Beam Beam Corner Roof Bar Connector Corner Roof Bar Middle Roof Bar Solidifying Bar Solidifying Bar Solidifying Bar Finishing Bar Finishing Bar Finishing Bar Finishing Bar...
- Page 6 Finishing Bar Finishing Bar Finishing Bar Finishing Bar Finishing Bar Finishing Bar Finishing Bar Roof Panel Roof Panel Roof Panel Roof Panel Roof Panel Roof Panel Roof Panel Roof Panel Roof Panel...
- Page 7 Roof Panel Roof Panel Roof Panel Roof Panel Roof Panel Roof Panel Roof Panel Roof Panel Roof Panel Roof Panel Roof Panel Roof Panel Roof Panel Roof Panel Roof Panel Roof Panel...
- Page 8 Roof Panel Roof Panel Net Frame Net Frame Net Frame Post Base Base Cover Corner Bracket Bracket Joint Bar Solidifying Bar Corner Inside Roof Outside Roof J-Hook Solidifying Bar Cover Cover Joint Cover Bracket Bracket Bracket Spacer Bracket Joint Cover Plastic Hook Curtain Corner Cover...
- Page 9 Mosquito Plastic Plastic Plastic Netting Bracket Bracket Bracket Wrench Drill Plastic Cap...
- Page 12 (2) Insert the other side of (1) Insert Part #C2 into Part #D Part #C2 into Part #D2 and and secure with 3 Bolts #8. secure with 3 Bolts #8. (4) Insert Part #X into the beam and secure with 1 Bolt #8. (3) Connect Part #D and Part #D2 through Part #C2.
- Page 13 Outside View Outside View Inside View (1) Connect Part #D to Part #A with 2 Bolts #17, and fix from the other side with 2 gaskets and nuts #18.(The first row of screw holes) (2) Connect Part #C to Part #A with 2 Bolts #17, and fix from the other side with 2 gaskets and nuts #18.(The second row of screw holes) (3) Secure Part #D &...
- Page 15 Outside View...
- Page 19 Inside Roof Cover...
- Page 20 (2) Repeat the above procedures to assemble the other 7 roof bars.
- Page 23 (2) Connect Part #E2 and the Assembled Beam (D1&D2&D) with part #U1. Secure with 2 Bolts #8. (3) Repeat the above procedures to assemble the opposite side.
- Page 24 Outside Roof Cover...
- Page 25 (1) Insert Part #U3 into Part #G1 (2) Insert 2 Part #U3 into Part #G1 and secure with Blot #8. and secure with 2 Blots #8. Inside View (3) Attach Part #G1 and Part #U3 to Part #E2 with (5) Attach Part #G1 and Blot #7.
- Page 26 Inside View (1) Attach Part #G and Part #U3 to Part #E2 with Bolt #8 Outside View (2) Repeat the above procedures to assemble the opposite side.
- Page 27 (2) Attach 2 Part #F and Part #U3 to Part #E2 with Blot #7 and Blot #8. Outside View...
- Page 28 (1) Insert Part #U2 into Part #F and Part #G. (2) Secure with 2 Bolts #8. (3) Secure them to Part #E with Bolt #8. (4) Repeat the above procedures to assemble the other 3 sides.
- Page 29 (1) Connect Part #J1 and Part #Q1 with 2 Bolts #7 and 2 Nuts #5. (2) Connect Part #J2 and Part #Q2 with 2 Bolts #7 and 2 Nuts #5.
- Page 30 (1) Place the Assembled J1 & Q1 and J2 & Q2 on Part #E2, secure with 3 Bolts #8. Inside View (2) Repeat the above procedures to assemble the opposite side.
- Page 31 (1) Connect Part #J and Part #Q with 2 Bolts #7 and 2 Nuts #5. (2) Place the Assembled Part #J & #Q on Part #E2, securing with 1 Bolt #8. Inside View (3) Repeat the above procedures to assemble the opposite side.
- Page 33 Cover Part #Z, #Z1 & #Z2 to Roof Panels. Section View...
- Page 34 Cover Part #Z to Roof Panels. Section View...
- Page 35 If you can’t install N2, N3 or N4, push the outside roof cover up and try to insert them again. (1) Insert Part #N1, N2,N3*2,N4,N5 into the frame. (2) Repeat the above procedures to assemble the opposite side.
- Page 36 (1) Place Part #H1 and Part #H2 on Part #E2,and secure with 2 Bolt #8. (2) put on Part #X2 and secure with Bolt #8. (3) Repeat the above procedures to assemble the opposite side.
- Page 37 (1) Insert Part #L1 and (2) Insert Part #L4 and Part #L2 into the frame. Part #L3 into the frame.
- Page 39 Cover Part #Z to Roof Panels...
- Page 40 Cover Part #Z to Roof Panels...
- Page 41 Cover Part #Z to Roof Panels...
- Page 42 Part #W should be inserted between roof panels and solidifying bar or beams, then secure with bolts and nuts. Solidifying Bar Beam...
- Page 43 ATTENTION: The bigger roof panel need to cover the smaller one. (1) Insert Part #P1, Part #P2 into the frame. (2) Place 3 Part #W between roof panels and beams. Then secure with 3 Bolts #10 and 3 Nuts #5. Beam (3) Insert Part #P10, Part #P9 into the frame.
- Page 44 ATTENTION: The bigger roof panel need to cover the smaller one. (1) Insert Part #P3 into the frame. (2) Place 2 Part #W between roof panels #P3 and solidifying bars. Then secure with 2 Bolt #12 and 2 Nuts #5. Solidifying Bar (3) Place 3 Part #W between roof panels #P3 and beams.
- Page 45 ATTENTION: The bigger roof panel need to cover the smaller one. (1) Insert Part #P4 into the frame. (2) Place 2 Part #W between roof panels #P4 and solidifying bars. Then secure with 2 Bolt #12 and 2 Nuts #5. Solidifying Bar (3) Place 3 Part #W between roof panels #P4 and beams.
- Page 46 ATTENTION: The bigger roof panel need to cover the smaller one. (1) Insert Part #P5 and #P6 into the frame. (2) Place 5 Part #W between roof panels and solidifying bars. Then secure with 4 Bolt #12, 1 Bolt #9 and 4 Nuts #5. Solidifying Bar (3) Place 7 Part #W between roof panels and beams.
- Page 47 ATTENTION: The bigger roof panel need to cover the smaller one. (1) Insert Part #M1, Part #M2 into the frame. (2) Place 3 Part #W between roof panels and beams. Then secure with 3 Bolts #10 and 3 Nuts #5. Beam (3) Insert Part #M8, Part #M7 into the frame.
- Page 48 ATTENTION: The bigger roof panel need to cover the smaller one. Solidifying Bar (1) Insert Part #M3 into the frame. (2) Place 2 Part #W between roof panels #M3 and solidifying bars. Then secure with 2 Bolt #12 and 2 Nuts #5. (3) Place 3 Part #W between roof panels #M3 and beams.
- Page 49 ATTENTION: The bigger roof panel need to cover the smaller one. Solidifying Bar (1) Insert Part #M4 and #M5 into the frame. (2) Place 5 Part #W between roof panels and solidifying bars. Then secure with 4 Bolt #12, 1 Bolt #9 and 4 Nuts #5.
- Page 50 (1) Place Part #W between roof panels and Part #E2. Then secure with Bolt #11 and Nut #5. (2) Repeat the above procedures to assemble the other 3 sides.
- Page 51 (1) Place Part #K2 or #K4 and Part #K3 or #K4 on Part #E2; Put on Part #X2 and secure with Bolt #8. (2) Secure K4 on E2 with Bolt #8. (3) Repeat the above procedures to assemble the opposite side.
- Page 52 (1) Place Part #K and Part #K1 on Part #E2; Put on Part #X2 and secure with Bolt #8. (2) Repeat the above procedures to assemble the opposite side.
- Page 53 (1) Place Part #K3 and Part #K on Part #E; Put on Part #X3 and secure with Self-tapping Screw #2. (2) Repeat the above procedures to assemble the other 3 corners.
- Page 54 (1) Attach roof panels to finishing bars with 2 Self-tapping Screws #3. (2) Repeat the above procedures to assemble the other 3 sides.
- Page 55 How to the 128 Hooks into the Double-track Double-track 9 Hooks × 2 Rows 7 Hooks × 2 Rows 7 Hooks × 2 Rows 9 Hooks × 2 Rows 9 Hooks × 2 Rows 7 Hooks × 2 Rows 9 Hooks × 2 Rows 7 Hooks ×...
- Page 56 (1) Place 7 hooks on each slot of the Sidewall Track(C1&C). (2) Install Part #T1 at the joint of Part C&C1 with Bolt #8. Double-track (3) Repeat the above procedures to assemble the opposite side.
- Page 57 (1) Place 9 hooks on each slot of the Sidewall Track(D&D1). (2) Install Part #T1 at the joint of Part D&D1 with Bolt #8. Double-track (3) Repeat the above procedures to assemble the opposite side.
- Page 58 Hang up Mosquito Sidewalls to Inside Track...
- Page 59 Hang up Solid Sidewalls to Outside Track...
- Page 60 © Copyright 2023-2025 domioutdoorliving LLC. All Rights Reserved.
Need help?
Do you have a question about the LGMF1638 and is the answer not in the manual?
Questions and answers
I recently purchase a 12 x 16 Gazebo I need to know from base to base what is the exact measurement Width and Length I have a concrete slab exactly 12x16. Thank you