Table of Contents
Advertisement
Quick Links
Advertisement
Table of Contents

Related Manuals for Elation PLATINUM BEAM 5R XM485-V1.0-NR


Summary of Contents for Elation PLATINUM BEAM 5R XM485-V1.0-NR
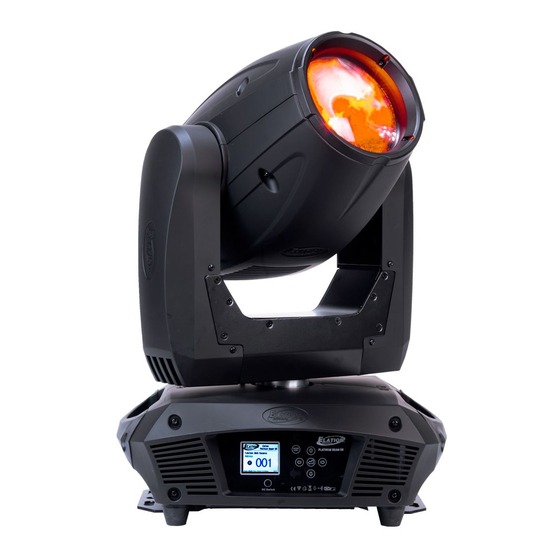
- Page 1 PLATINUM BEAM 5R KEEP THIS MANUAL FOR FUTURE NEEDS...
- Page 2 XM485-V1.0-NR...
- Page 4 Thank you for your patronage. We are confident that our excellent products and service can satisfy you. For your own safety, please read this user manual carefully before installing the device. In order to install , operate, and maintain the lighting safety and correctly. We suggest that the installation and operation should be done by the verified technician and follow the instruction strictly.
-
Page 5: Safety Instructions
·Stepless frost, 0%~100% linear change frost ·Strobe/shutter: High speed shutter, 0-13 Hz or random strobe ·Control board with full color LCD graphic display and touch-keyboard ·Auto-program: 7 pre-built programs can be selected. ·Software-upload by optional accessory via DMX line Overview SAFETY INSTRUCTIONS 1) Lens 2) Display... - Page 6 This device has left the factory in perfect condition. In order to maintain this condition and to ensure a safe operation, it is absolutely necessary for the user to follow the safety instructions and warning notes written in this user manual. Important: Damages caused by the disregard of this user manual are not subject to warranty.
-
Page 7: General Guidelines
GENERAL GUIDELINES This device is a lighting effect for professional use on stages, in discotheques, theatres, etc., the device was designed for indoor use only. This fixture is only allowed to be operated with the max alternating current which stated in the technical specifications in the last page of this manual. -
Page 8: Mounting The Device
Before replacing the lamp let the lamp cool down, because during operation, the lamp can reach very high temperature. During the installation of halogen lamps do not touch the glass bulbs bare handed. Always use a cloth to handle the lamps during insertion and removal. Do not install lamps with a higher wattage. - Page 9 weight for 1 hour without any harming deformation. The installation must always be secured with a secondary safety attachment, e.g. an appropriate safety rope. Never stand directly below the device when mounting, removing or servicing the fixture. The operator has to make sure the safety relating and machine technical installations are approved by an expert before taking the device into operation for the first time.
-
Page 10: Installation Via The Omega Holders
Installation via the Omega holders a) Fixed the clamp on the bracket by tighten up the M12 screw on the bracket to the Ф13 hole in the middle of the bracket. b) Insert the quick-lock fasteners of the first Omega holder into the respective holes on the bottom of the device. - Page 11 Address 1 Address 14 Address27 DMX-512 connection with DMX terminator For installations where the DMX cable has to run a long distance or is in an electrically noisy environment, such as in a discotheque, it is recommended to use a DMX terminator. This helps in preventing corruption of the digital control signal by electrical noise.
-
Page 12: Control Board
to 1, the second unit to 14(13 + 1), the third to 27 (13 + 14), and so on. Control Board The Control Board offers several features: you can simply set the starting address , run the pre-programmed program or make a reset. The main menu is accessed by pressing the menu by pressing the -button ,... - Page 13 Temperature Info Head Temperature Head Temperature Head Temperature Head Temperature Head Temperature Software Version Ver1.0…… Ver1.0…… Ver1.0…… Ver1.0…… Ver1.0…… Ver1.0…… Ver1.0…… Lamp On or Off Lamp On or Off Lamp On or Off ON/OFF ON/OFF ON/OFF ON/OFF ON/OFF Automatic La-On Automatic La-On Automatic La-On ON/OFF...
-
Page 14: Main Functions
Set Edit User Mode Edit User Mode Max Channel = XX Max Channel = XX Max Channel = XX Max Channel = XX Max Channel = XX Max Channel = XX PAN = CH01 PAN = CH01 PAN = CH01 PAN = CH01 PAN = CH01 PAN = CH01... - Page 15 mode. Each slave setting will have a different function for a dynamic lightshow without a controller. Auto Program This function allows the internal programs to run in either stand-alone or master/ salve mode. In “Master” mode the fixture will send DMX data to other fixtures connect via the DMX chain.
-
Page 16: Software Version
counter should be reset after every lamp change. Lamp Off Time This function displays the running time of the lamp from the last power on. The display shows “XXXX”, where “XXXX” represents the number of hours the lamp has been running since it was last struck. This counter is automatically reset after every power-on. -
Page 17: Lamp Control
Lamp Control: Lamp On or Off This function allows manual control of the lamp power via the on-board system menu. • Select “ON” if you wish to strike the lamp or “OFF” to switch it off. • Press “ENTER” to confirm. •... -
Page 18: Status Setting
Personality: Status setting Address via DMX - This function allows the DMX address to remotely be adjusted from a DMX console. This setting requires special settings for both the controller and the fixture. RDMX is on by default. For operational instructions please see Section 10/Page 35 of this manual “Remote DMX addressing.”... -
Page 19: Display Settings
includes original Design Spot 250s. There are 3 different mode variations; Speed 1 (Default): Slower than the original Design Spot 250 for smoother, more precise movements. Speed 2: Pan and Tilt speeds are identical to the first generation Design Spot 250. - Page 20 function is disabled as default. Key Lock – This function allows you to lock the keys on the display to prevent menu tampering. With this function you can activate the automatic keylock function. If this function is activated, the keys will be automatically locked in 15 seconds from the last command.
-
Page 21: Effect Adjust
Effect Adjust: Test Channel – This menu function allows the user to select each individual fixture channel and test it’s function independently from the control board. Lamp adjustment (manual control) – This function readies the fixture for lamp optimization in a simple single step procedure. This function will center the pan and tilt motors and at the same time open the shutter and bring the dimmer to 100%. - Page 22 external DMX controller. For detailed instructions on how to complete this task please see Section 12/ Page 39. Select program – This function allows the user to select one of ten of the user defined built-in programs. This program is then accessed in “Function Mode” under “Program Run.”...
-
Page 23: Instructions On Use
INSTRUCTIONS ON USE: DMX channel´s functions and their values (16 DMX channels): DMX channel´s functions and their values (16 DMX channels): DMX channel´s functions and their values (16 DMX channels): DMX channel´s functions and their values (16 DMX channels): DMX channel´s functions and their values (16 DMX channels): Mode/Channel Mode/Channel Mode/Channel... - Page 24 120-134 Rot. gobo 3 shake 135-149 Rot. gobo 4 shake 150-164 Rot. gobo 5 shake 165-179 Rot. gobo 6 shake 180-194 Rot. gobo 7 shake 195-209 Rot. gobo 8 shake 210-255 Rot. gobo wheel cont. rotation slow to fast Rotating gobo index, rotating gobo rotation : ...
-
Page 25: Error Message
Dimmer intensity: 0-255 Intensity 0 to 100% Fine Dimmer intensity: 0-255 Dimmer intensity fine Frost: 0-127 Disable frost 128-255 Enable frost Speed Pan/Tilt movement: 0-225 max to min speed 226-235 blackout by movement 236-245 blackout by all wheel changing 246-255 no function Lamp on/off, reset, internal programs:... -
Page 26: Cleaning And Maintenance
some error in channel 1. If there are some errors on channel 1, channel 5, channel 6 at the same time, you may see the error message “Err channel is Color wheel”, “Err channel is Pan movement”, “Err channel is Tilt movement”... -
Page 27: Technical Specifications
We recommend a frequent cleaning of the device. Please use a moist, lint- free cloth. Never use alcohol or solvents. There are no serviceable parts inside the device except for the lamp. Please refer to the instructions under “Installation instructions”. Should you need any spare parts, please order genuine parts from your local dealer.
Need help?
Do you have a question about the PLATINUM BEAM 5R XM485-V1.0-NR and is the answer not in the manual?
Questions and answers