BullFrog A Series Owner's Manual
Hide thumbs
Also See for A Series:
- Owner's manual (61 pages) ,
- Owner's manual (61 pages) ,
- Owner's manual (55 pages)
Table of Contents
Advertisement
Advertisement
Table of Contents

Related Manuals for BullFrog A Series


Summary of Contents for BullFrog A Series
- Page 1 A SERIES OWNERS MANUAL...
-
Page 2: Quick Reference
QUICK REFERENCE To assist you with the installation and maintenance service Electrician of your new spa, please ll out the following information 1. Name: and keep it on hand for future reference. Telephone: My Spa Information 2. Name: Model: Telephone: Serial Number: Concrete, Decking, and Masonry Dealership:... -
Page 3: Table Of Contents
TABLE OF CONTENTS Quick Reference Overview Important Safety Instructions Getting to Know Your Spa Filling Your Spa External Air Bleeder Instructions Premium Touch Screen Control (A1000) Auxiliary Controls JetPaks & Jets Water Care & Chemistry Spa Maintenance Installation & Delivery Electrical Requirements &... -
Page 4: Overview
Carefully read this Owner’s Manual before you install Patents: www.bullfrogspas.com/patents your spa. Your Bullfrog Spas Limited Warranty may be U.S. Patents: 7,908,684, 8,661,576, 8,881,321, 8,689,370, voided if damage is caused by failure to install, maintain, 8,869,469, 5,754,989, 5,987,663, 6,000,073, 6,092,246, and operate your spa by the recommendations contained 6,256,805, 6,543,067. -
Page 5: Important Safety Instructions
IMPORTANT SAFETY INSTRUCTIONS MUST be completed by a quali ed Electrician and must Safety Instructions meet all applicable electrical codes. When installing and using this electrical equipment, basic safety precautions should always be taken, including For Cord-Connected units: the following: Replace the damaged cord immediately. - Page 6 (3m) of the spa or hot tub must be bonded to the CAUTION: Non-Approved Accessories. Using equipment grounding bus with copper conductors no accessories not approved by Bullfrog International, LC smaller than No. 6 AWG.
- Page 7 It should be placed in a noticeable place adjacent to the spa. For free additional copies, contact your authorized Bullfrog Spas Dealer. *Final warning sticker is included with spa for installation by owner.
-
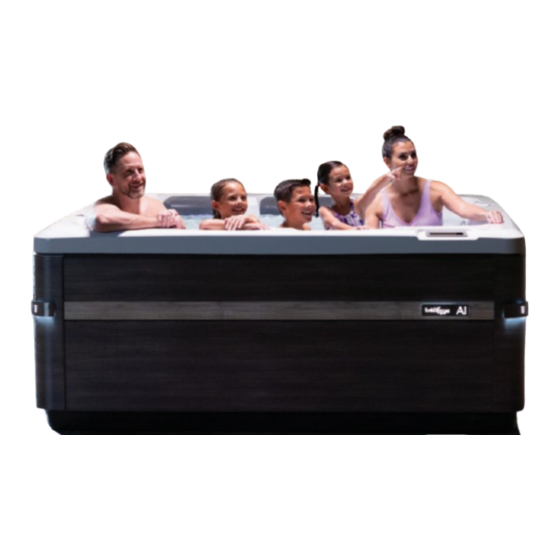
Page 8: Getting To Know Your Spa
GETTING TO KNOW YOUR SPA Spa Overview (A7 Select Spa Model Pictured) 1. Main control 2. Auxiliary control 3. JetPaks 4. Filter access (behind JetPak to the right of control panel). 5. Removable headrests and JetPak access 6. Water feature 7. - Page 9 Equipment Compartment Overview Spa Equipment Compartment “A7L” Series 1. Jet pump 1 2. Jet pump 2 3. Control box 4. EOS ozone generator box 5. EOS carbon lter 6. EOS mixing module 7. Safety certi cate and serial number 8. Serial number sticker (visible with door installed) 9.
-
Page 10: Filling Your Spa
IMPORTANT: Never ll the spa with so water unless your authorized Bullfrog Spas Dealer. an appropriate mineral supplement is immediately added (see your authorized Bullfrog Spas Dealer). If your water is Step 5: Install Cover: e spa cover comes with tie down extremely hard, it is preferable to either dilute the water’s... -
Page 11: External Air Bleeder Instructions
EXTERNAL AIR BLEEDER INSTRUCTIONS ese instructions should be followed at initial and Step 3: Using caution, carefully remove the air bleeder subsequent draining and re lling to prevent pump screw from the external air bleeder tting with a cavitation caused by trapped air within the pump and standard screwdriver or ½”... -
Page 12: Premium Touch Screen Control (A1000)
Center A Series Touch Control Home/Status Screen Power e Home/Status screen on your A Series (A1000) control Tap screen to wake up the control. Touch and drag the shows basic statuses, including time, jet status, light status, logo icon to the reverse logo icon... - Page 13 (Saturday & Sunday). the spa’s set temperature. e ltration schedule shown on the A Series (A1000) screen will apply to the main Suggested use: Use when the spa is used only on weekends ltration pump.
- Page 14 Status Light On Plus and Select A Series trim packages, the door light Modifying Water Care Schedules will act as a status alert for maintenance reminders or if To modify a Water Care category, touch the pen icon there is a problem with your spa.
- Page 15 Set Date and Time of Day pressing the pause/standby icon. e home/status screen and normal spa function will resume a er the Setting the correct date and time is important for settings 30-minute standby period. to function as expected. Upon restarting your spa adjust the time format (24 hr.
- Page 16 Note that only the sources available on to match the actual service available at the installation the A Series Audio will be displayed in the source menu. location using the instructions above. e rst time you use your Bluetooth...
-
Page 17: Auxiliary Controls
AUXILIARY CONTROL To turn on/off the water feature: A Series Auxiliary Control Instructions Step 1: Press the button with the water icon once to turn it Each auxiliary control only manages the speci c pump to on, then again to turn it o . -
Page 18: Jetpaks & Jets
Jetpak manifold. If you PLATE MAY CAUSE DAMAGE TO THE JETPAK, have an A Series Select spa, there is a light that is held in by VOIDING THE WARRANTY. snaps; take care not to let it slip o . Remove the light by gently pulling forward o snap to clean the internal JetPak Step 3: Place the JetPak in the desired location in the spa. - Page 19 JetPak manifold. If you have an A Series Select spa, there is a light that is held in by snaps; take care not to let it slip o . Remove the light by gently pulling forward o snap to clean the internal JetPak cap assembly.
-
Page 20: Water Care & Chemistry
Bullfrog Spas that takes the guess work out of water care so you always feel at ease while enjoying your hot tub. For all water care-related questions, please refer all... - Page 21 Balance water by following STEPS a - d in order. Set the FROG @ease Mineral Cartridge to the highest setting using the dial on the bottom of the cartridge. No IMPORTANT: Always follow printed instructions on the balancing further adjustments are necessary for the life of the cartridge. chemical packages.
- Page 22 Follow the same procedure for the FROG @ease SmartChlor Cartridge into the other opening. With the silver FROG FROG @ease SmartChlor Cartridge @ease facing the inside of the hot Mineral Cartridge tub, insert cartridge holder between the lter cartridges FROG under the weir door/ lter @ease plate pushing down until it...
- Page 23 Step 4: Routine Hot Tub Care Drain and refill hot tub as direct- FROG @ease SmartChlor Cartridge will maintain 0.5-1.0 ed by your hot tub manufacturer. ppm free chlorine level as long as the water is balanced. Whenever you drain and refill, NOTE: Free Chlorine levels are reduced up to 75%* make sure to replace your FROG when using FROG @ease Minerals.
- Page 24 WARNING: Trichlor chlorine tablets should never be Step 2: If possible, have your authorized Bullfrog Spas used in a portable spa. Dissolve rate, potency, and the dealer test the calcium hardness (CH) of your spa. Adjust extremely low pH of this chemical can cause severe as per your dealer’s recommendations.
- Page 25 Proper total alkalinity levels are important to ensure optimal chemical balance in Your Bullfrog Spas spa may be equipped with the spas. Low TA can cause pH to be unstable. To correct low EOS enhanced ozone puri cation system. Long-term TA, add a Total Alkalinity Increaser.
- Page 26 Plus is system may also reduce your sanitizer usage. or Select A Series trim package spa acts as an indicator Contact your authorized Bullfrog Spas dealer for of spa function. If your spa is functioning normally, the information on periodic maintenance or replacement lighted badge will remain lighted in a solid or steady state.
-
Page 27: Spa Maintenance
See Spa Filling instructions Page 9. It is recommended that the pleated at Simplicity lter used in A Series spas be cleaned or replaced every 4 weeks, or sooner if needed. You may prefer to simply replace monthly, or Simplicity lters can be cleaned by spraying Step 4: Remove and replace the lter. - Page 28 CCW25 control unit (gray box) and one on the Clear Comfort for Bullfrog Spas When slots in the cartridge align with the guides in the CCW25 cartridge (blue).
- Page 29 Bullfrog Spas Warranty an outdoor fabric protectant (never petroleum-based) to beyond manufacturer defects.
- Page 30 IMPORTANT: During all low and no-use periods, be sure to drain from each JetPak as you drain the spa. Once the to maintain the spa water as per the instructions in the water is completely out of the spa, close each valve before Water Chemistry section.
- Page 31 Step 3: Once it has popped out of the bottom C-clips, li EQUIPMENT DOORS the door up about an inch to release it from the French A Series Door removal: cleat groove. Once the door panel has cleared both the C-clip channel and the French cleat slowly lower to the ground.
-
Page 32: Installation & Delivery
A licensed electrician must perform the electrical plenty of ventilation, such as a ceiling fan and moisture- installation and GFCI test procedure. Each Bullfrog Spa resistant paint. An architect can help determine if special is manufactured and tested to a standard that provides ventilation equipment is required, such as a humidistat maximum protection against electrical shock. - Page 33 1.5” (4cm) or less, or a reinforced deck. must install your spa at the required minimum distance Your authorized Bullfrog Spas Dealer may also sell or from all electrical outlets, switches, and devices. recommend pre-formed spa pads.
- Page 34 2’ 8” (.81m) ) colors and textures with those of your spa should only be made a er carefully researching your options. e cost of Corner Radius for A Series Models is 4” (0.1016m) a Landscape Architect may be money well spent.
-
Page 35: Electrical Requirements & Installation
Always have a licensed Electrician perform the electrical Bonding: Based upon the national and local wiring rules installation. Each Bullfrog Spa is manufactured and tested that apply to your area, the Control System Box located to a standard that provides maximum protection against inside the equipment compartment of your spa must electrical shock. - Page 36 Conversion Options: If there is not 32A of electrical by the national and local wiring rules in your area. service available, an authorized Bullfrog Spa dealer or an Installation must be in accordance with all federal and Electrician can easily convert the spa to operate on either a local wiring rules.
- Page 37 Note: To conform with electrical codes, and to accordance with all national and local wiring rules. create a barrier against pests, any holes created in the base of your Bullfrog Spa should be tted with an Connecting the electrical service to the spa appropriate connector.
-
Page 38: Electrical Chaseway Diagrams
ELECTRICAL CHASEWAY DIAGRAMS 89.93in 228.4cm 89.9in 14.31in 228cm 36.3cm 14.8in 38cm TRUE R3.5in MODEL A9L, A9L PLUS, MODEL A9L, A9L PLUS, A9L SELECT A9L SELECT MODEL A8/A8L, A8/A8L PLUS, A8/A8L SELECT 105.93in 269.1cm FROM BOTTOM 89.9in OF BASE 228cm 14.8in 13.0in 14.31in 14.31in... -
Page 39: Hardware Setup/Wiring Diagrams
Note: Each Control System Box is labeled with a QR code that links to the supplier’s Technical Documents associated with your speci c Control System Box and its so ware. Scan that QR code for the Quick Start Card, Techbook, and more. A Series Standard (YE-6) Connection for model without AMP connectors:... - Page 40 A Series Standard, 50Hz Equipment (YE-6) Connection for model without AMP connectors: Pump 2 (A3) Direct output 1 (A5) Voltage 230 V Voltage 230 V Green / ground Green / ground Black / line Black / low speed K2-P White / common...
- Page 41 A Series Plus and Select Trim Package (yt 9) YT-9 UL Wiring Diagram Connecting high voltage accessories: (North America 60 Hz) Pump 1 (A2) Pump 2 (A3) Pump 3 (C1) Circulation pump / O3 (A1) Voltage 240 V Voltage 240 V Voltage 240 V Voltage 240 V Green / ground Green / ground Green / ground Green / ground Black / low speed Black / low speed Black / low speed K22 Black / low speed Red / high speed...
- Page 42 A Series Plus and Select Trim Package (yt 9) Connecting high voltage accessories: (European 50 Hz YT-9 CE Wiring Diagram Pump 1 (A1) Pump 2 (A3) Pump 3 (C1) Circulation pump / O3 (A2) Voltage 240 V Voltage 240 V Voltage 240 V Voltage 240 V Green / ground Green / ground Green / ground Green / ground Black / low speed Black / low speed Black / low speed K22 Black / low speed Red / high speed Red / high speed...
-
Page 43: Gfci Wiring Diagrams
GFCI WIRING DIAGRAMS Electrical wiring: North American model in.yt and in.ye Refer to wiring diagram in the enclosure box lid for more information. 240 V (4 wires) 120 V (*3 wires) 240 V (4 wires) 120 V (*3 wires) in.yt (left) / in.ye (right) *If connected to a 3 wires system, the heat.wave and accessories will not operate at 240 V Refer to the section «... -
Page 44: Rcd Wiring Diagrams
RCD WIRING DIAGRAMS Electrical wiring: European model in.yt Refer to wiring diagram in the enclosure box lid for more information. Warning in.yt.ce models must always be connected to a circuit protected by a Residual-Current Device (RCD) having a rated operating residual-current not exceeding 30 mA. Correct wiring of the electrical service box, RCD, and pack terminal block is essential! Check your electrical code for local regulations. - Page 45 Electrical wiring: European model in.ye Refer to wiring diagram in the enclosure box lid for more information. Warning in.ye.ce models must always be connected to a circuit protected by a Residual-Current Device (RCD) having a rated operating residual-current not exceeding 30 mA. Correct wiring of the electrical service box, RCD, and pack terminal block is essential! Check your electrical code for local regulations.
-
Page 46: Display Messages & Error Messages
DISPLAY MESSAGES AND ERROR MESSAGES Code Message High Limit circuit has tripped! FLO - L01 FLO - L02 FLO FLO condition - Check filter, pump, blockage, air lock and water level NO FLO Persistent NO FLO, all off - Check filter, pump, blockage, air lock and water level A hardware error was detected (Relay stuck) Spa temperature is too high Temp probes or detection circuit are defective... -
Page 47: Troubleshooting Guide
Spa pump turns off during operation: all, but the pump is running: Cause #1: Automatic timer has completed its 30- or Cause #1: Jet handle(s) A Series are partially or fully 60-minute cycle. closed. Valves are closed A Series JetPak II, Solution: Turn on the pump. -
Page 48: Warranty Information
Warranty solely to the original end-user purchaser (“Owner” or “you”) of any 2023 model year and later M Series, A Series or STIL Bullfrog Spas hot tub manufactured on or after February 1, 2023 and installed for residential use in the United States or Canada. - Page 49 Limited Warranty and was purchased from an authorized Bullfrog Spas dealer or retail store. Bullfrog reserves the right, at its option, to either repair or replace a defective spa or component. Owner is required to maintain clear access for spa repairs and is responsible for any non-standard costs of accessing spa equipment or spa plumbing.
- Page 50 In the event of a structure or frame failure after seven years from the original spa purchase date, the defective spa must be sent to Bullfrog for repair at Owner’s expense. In some situations, the servicing dealer or Bullfrog may charge Owner a reasonable service fee.
- Page 51 Delivery Guide. Any person or company may perform necessary maintenance or repairs on a Bullfrog spa. However, any damages caused by you or anyone other than Bullfrog or its authorized agents are not covered and may void this Limited Warranty.
- Page 52 Registration requirements do not apply to residents of California or other jurisdictions where prohibited by law. Updated 1/2024 Pat. www.bullfrogspas.com/patents Bullfrog International, LC 7017 West 11800 South • Herriman, Utah 84096 Tel (801) 565-8111 • Fax (801) 565-8333 www.bullfrogspas.com • info@bullfrogspas.com...
- Page 53 Bullfrog International, LC 7017 W 11800 S Herriman, UT 84096 801.565.8111 801.565.8333 : info@bullfrogspas.com v 1.6 Register your spa online by visiting: bullfrogspas.com/warranty-registration North America 2024 Bullfrog International LC...
Need help?
Do you have a question about the A Series and is the answer not in the manual?
Questions and answers
How many jet packs can I control separately.
The Bullfrog A Series allows for different numbers of JetPaks depending on the model. The A7 model has four JetPaks in the standard version and five JetPaks in the A+ version. The A Select version also includes upgraded pillows and a titanium finish around the jets.
This answer is automatically generated