Table of Contents
Advertisement
Quick Links
Advertisement
Table of Contents

Related Manuals for Cosmo COS-ERC304KBD


Summary of Contents for Cosmo COS-ERC304KBD
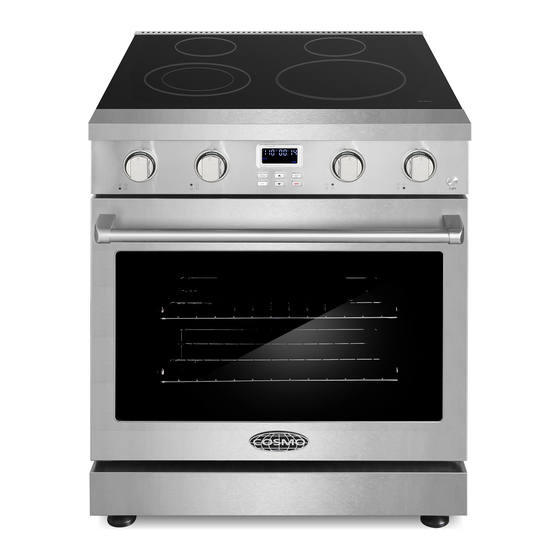
- Page 1 ELECTRIC RANGE COS-ERC304KBD COS-ERC365KBD SLIDE-IN RANGE USER MANUAL IMPORTANT: READ AND SAVE THESE INSTRUCTIONS. FOR RESIDENTIAL USE ONLY. INSTALLER: PLEASE LEAVE THESE INSTRUCTIONS WITH THIS UNIT FOR THE OWNER. OWNER: PLEASE RETAIN THESE INSTRUCTIONS FOR FUTURE REFERENCE. Rev.24.03a...
- Page 2 COSMO Appliances are designed according to the strictest safety and performance standard for the North American market. We follow the most advanced manufacturing philosophy.
-
Page 3: Table Of Contents
TABLE OF CONTENTS RANGE SAFETY....................5 Anti-tip Device ......................6 Important Safety Instructions ................. 8 OVERVIEW ......................13 Range Layout ......................13 Control Panel ......................15 FEATURES ......................17 Timer ........................... 17 Settings ........................19 Setting Temperature Scale ................20 Turning On/Off Control Button Sound ............ - Page 4 Cooking Modes ....................35 Bake ........................36 Conv Bake ......................37 Conv Roast ......................39 Pizza ........................40 Warm ........................42 Broil ........................43 Tips and Techniques ..................44 RANGE CARE AND MAINTENANCE ..............51 Cleaning ........................51 TROUBLESHOOTING ..................57 Cooktop Problems ....................
-
Page 5: Range Safety
RANGE SAFETY READ ALL INSTRUCTIONS BEFORE USING THE APPLIANCE Your safety and the safety of others are very important. We have provided many important safety messages in this manual and on your appliance. Always read and obey all safety messages. This is the safety alert symbol. -
Page 6: Anti-Tip Device
ANTI-TIP DEVICE WARNING TIP OVER HAZARD • A child or adult can tip the range and be killed. • Install anti-tip bracket to floor or wall per installation instructions. • Slide range back so rear range foot is engaged in the slot of the floor- mounting anti-tip bracket or rear range pin is engaged under the wall- mounting anti-tip bracket. - Page 7 WARNING • This appliance is intended for normal residential use. It is not approved for commercial use, outdoor installation, or any other application not specifically allowed by this manual. • This appliance requires connection to a 3-prong or 4-prong, 240VAC single-phase (split-phase), 60Hz grounded electrical source dedicated to the appliance.
-
Page 8: Important Safety Instructions
IMPORTANT SAFETY INSTRUCTIONS WARNING: To reduce the risk of fire, electrical shock, injury to persons, or damage when using the range, follow basic precautions, including the following: • WARNING: TO REDUCE THE • Proper Installation – The RISK OF TIPPING OF THE RANGE, appliance, when installed, must THE RANGE MUST BE SECURED be electrically grounded in... - Page 9 IMPORTANT SAFETY INSTRUCTIONS • If there is a fire in the oven • DO NOT TOUCH HEATING during baking, smother the fire ELEMENTS OR INTERIOR by closing the oven door and SURFACES OF OVEN – Heating turning the oven off or by using elements may be hot even a multi-purpose dry chemical or though they are dark in color.
- Page 10 IMPORTANT SAFETY INSTRUCTIONS • Never Leave Surface Units • Utensil Handles Should Be Unattended at High Heat Turned Inward and Not Extend Settings – Boilover causes Over Adjacent Surface Units – To smoking and greasy spillovers reduce the risk of burns, ignition that may ignite.
- Page 11 IMPORTANT SAFETY INSTRUCTIONS • Never broil with door open. • Keep Oven Vent Ducts Open-door broiling is not Unobstructed. permitted due to overheating of • Clean Cooktop With Caution – If control knobs. a wet sponge or cloth is used to •...
- Page 12 IMPORTANT SAFETY INSTRUCTIONS • Proper Disposal of Your • Wait for the oven to cool before Appliance – Dispose of or recycle removing contents and cleaning your appliance in accordance the oven. with Federal and Local • In the event of ignition inside the Regulations.
-
Page 13: Overview
OVERVIEW OVERVIEW RANGE LAYOUT The range you have purchased may have some or all of the items listed. The locations and appearances of the features shown here may not match those of your model. 1. Glass-ceramic cooktop 8. Control panel 2. - Page 14 WHAT'S INCLUDED Oven racks (2) 2-Piece broiler pan NOTE: • To purchase replacement parts or any other accessories, please visit www.cosmoappliances.com or reference the contact information at the end of this manual.
-
Page 15: Control Panel
CONTROL PANEL The appearance of the knobs may vary from what is shown below. COS-ERC304KBD (30") COS-ERC365KBD (36") - Page 16 # Name Description Cooktop element To turn the front left element on and off. 2 Cooktop element To turn the rear left element on and off. 3 Light To turn the oven light on and off. 4 Display To show the time and provide oven status. 5 Cooktop element To turn the rear middle element on and off.
-
Page 17: Features
FEATURES TIMER The timer serves as an extra timer in the kitchen that beeps when the set time has run out, and can be used during any of the other oven control functions. It does not start or stop cooking. Setting the Timer (Up to 10 Hours) 1. - Page 18 Canceling the Timer 1. Press TIMER ON/OFF once. NOTE: • Pressing CANCEL/OFF will not cancel the current timer, but will cancel any oven cooking modes in progress. • Pressing CANCEL/OFF will recall the remaining time in the display when no oven cooking mode is in progress. •...
-
Page 19: Settings
SETTINGS The oven has a variety of settings which can be accessed and adjusted using the SETTINGS button. These settings can only be adjusted or activated while no oven operation is in progress. All adjustments remain in the control's memory after a power failure or until changed. Settings Description Default... -
Page 20: Setting Temperature Scale
SETTING TEMPERATURE SCALE 1. Press SETTINGS. 2. Press repeatedly to select "F-C" in the display. 3. Press START/OK. 4. Press to toggle and select °F (Fahrenheit) or °C (Celsius). 5. Press START/OK to confirm. TURNING ON/OFF CONTROL BUTTON SOUND 1. Press SETTINGS. 2. -
Page 21: Setting Oven Temperature Calibration
SETTING OVEN TEMPERATURE CALIBRATION 1. Press SETTINGS. 2. Press repeatedly to select "CAL" in the display. 3. Press START/OK. Press/Hold to adjust the offset temperature between -30°F and +30°F (-17°C and +17°C). • +30°F (+17°C) will raise the oven temperature and cook food more. •... -
Page 22: Turning On/Off Demo Mode
The oven light automatically turns on when the oven door is opened and turns off when the oven door is closed. 30" MODEL: COS-ERC304KBD • Press LIGHT button to control the oven light when the oven door is closed. 36" MODEL: COS-ERC365KBD... -
Page 23: Operation
OPERATION COOKTOP BEFORE USING THE COOKTOP Read all instructions before using. WARNING • Do not cook on a broken cooktop. If the cooktop is broken, cleaning solutions and spillovers may penetrate the broken cooktop and create a risk of electric shock. Contact a qualified technician immediately. •... - Page 24 CAUTION • Never cook directly on the glass. Always use cookware. • Do not use the glass cooktop surface as a cutting board. • Do not slide metal or glass across the cooktop surface. Cookware with rough or uneven bottoms can mark or scratch the cooktop surface. •...
-
Page 25: Cooking Areas
When a control is turned on, a glow can be seen through the glass cooktop surface. For the most efficient cooking, fit the pan size to the element size. Pans should not extend more than 1/2" to 1" (1.3 cm to 2.5 cm) beyond the cooking area. COS-ERC304KBD (30") Hot surface indicator light COS-ERC365KBD (36") -
Page 26: Hot Surface Indicator
HOT SURFACE INDICATOR The hot surface indicator light glows and indicates that one or more cooktop elements are still hot. When the hot surface indicator turns off, the glass surface may still feel slightly hot to touch. NOTE: • The hot surface indicator light glows 30 seconds after an element is turned on or when the surface temperature reaches 150°F (65°C). - Page 27 Turning on a Dual Element OFF position Single element Dual element HI position HI position 1. Select a dual element, and find its control knob. 2. Push the control knob in and turn it in either direction to use it as a single element or a dual element.
-
Page 28: Using The Proper Cookware
USING THE PROPER COOKWARE The size and type of cookware will influence the settings needed for the best cooking results. Cookware should have flat bottoms that make good contact with the entire surface heating element. Using the correct cookware can prevent many problems, such as uneven cooking or extended cooking times. - Page 29 Choosing Cookware The cookware material determines how evenly and quickly heat is transferred from the surface element to the pan bottom. Recommended • Aluminum - Excellent heat conductor. Some types of food will cause it to darken (anodized aluminum cookware resists staining and pitting).
-
Page 30: Oven
OVEN BEFORE USING THE OVEN Read the instructions for each feature and cooking mode in this manual carefully before using the oven. CAUTION • Do not use any type of foil or oven liner to cover the oven bottom. These items can trap heat or melt, resulting in damage to the product and risk of shock, smoke or fire. -
Page 31: Before Using The Oven For The First Time
WARNING FOOD POISONING HAZARD • Do not let food sit in oven more than one hour before or after cooking. Doing so can result in food poisoning or sickness. • Foods that can easily spoil such as milk, eggs, fish, meat or poultry, should be chilled in the refrigerator first. -
Page 32: Oven Door
OVEN DOOR Oven heating elements and, if in operation, convection fan will temporarily shut off any time door is opened, and will resume when door is closed within 3 minutes. NOTE: • Do not leave the door open any longer than necessary. If the door is left open too long for over 3 minutes, the cooking mode will be automatically cancelled. - Page 33 Removing Racks 1. Pull the rack straight out until it stops. 2. Lift up the front of the rack and pull i t out. Replacing Racks 1. Place the end of the rack on the support. 2. Tilt the front end up and push the rack in. Rack Positions For best cooking results, adjust rack so food is placed at the center of the...
-
Page 34: Preheating
PREHEATING Preheating is generally desirable, although not absolutely necessary in all circumstances. • For oven modes that utilizes preheat, the control will automatically enter preheat mode and show "100°F" after START/OK is pressed to turn on the oven. When the oven temperature reaches 100°F, the display will show the current oven temperature, and will continue to show the oven temperature increasing until the set temperature is reached. -
Page 35: Cooking Modes
COOKING MODES The various baking modes (Bake, Conv Bake, Conv Roast, and Pizza) have a 10-hour time limit, after which the control will automatically end the baking mode. Broil and Warm modes have a 3-hour time limit. If desired, these modes can be restarted after the time limit expires. -
Page 36: Bake
BAKE The Bake mode uses heat from the lower heating element to cook food. This mode works best with food placed on a single rack. Always preheat the oven first and place food centrally near the middle racks. Setting the Bake Mode 1. -
Page 37: Conv Bake
8. Press CANCEL/OFF when cooking is finished, and remove the food from the oven. If a Cook Time is set and the countdown reaches 00:00, the oven turns o ff automatically. The display shows "End" and a cook end tone sounds for 1 minute or stops when the oven door is opened. - Page 38 4. Press START/OK. "Cooktime" appears and "00:00" (hour:minute) flashes in the display. 5. [Optional] Press/Hold to set the desired length of cooking time. 6. Press START/OK. The oven turns on and starts preheating. As the oven preheats and reaches 100°F, the display will show the current oven temperature, and will continue to show the oven temperature increasing until the set temperature is reached.
-
Page 39: Conv Roast
CONV ROAST The Convection Roast mode uses heat from both upper and lower elements and air movement from the convection fan to enhance cooking efficiency and evenness across multiple racks. Ideal for roasting meats and poultry. Heated air circulates around the food from all sides, sealing in juices and flavors. -
Page 40: Pizza
NOTE: • Do not leave the door open any longer than necessary when placing food. If the door is left open too long for over 3 minutes, the cooking mode will be automatically cancelled. 8. Press CANCEL/OFF when cooking is finished, and remove the food from the oven. - Page 41 3. [Optional] Press/Hold to set the desired pizza mode temperature. 4. Press START/OK. "Cooktime" appears and "00:00" (hour:minute) flashes in the display. 5. [Optional] Press/Hold to set the desired length of cooking time. 6. Press START/OK. The oven turns on and starts preheating. As the oven preheats and reaches 100°F, the display will show the current oven temperature, and will continue to show the oven temperature increasing until the set temperature is reached.
-
Page 42: Warm
WARM The Warm mode uses heat from the lower heating element to maintain oven temperature at around 175°F (79°C). It will keep cooked food warm for serving up to 3 hours after cooking has finished. Cover foods that need to remain moist and do not cover foods that should be crisp. -
Page 43: Broil
BROIL The Broil mode uses intense heat from the upper heating element to sear foods. This mode works best for tender cuts of meat, fish, and thinly cut vegetables, and is ideal for toasting, melting cheese, browning and searing surface. Food should be placed near the upper racks, and should not be cooked for too long on each side of the food. -
Page 44: Tips And Techniques
TIPS AND TECHNIQUES BAKE Baking is cooking with heated air. The lower element in the oven is used to heat the air but no fan is used to circulate the heat. Follow the recipe or convenience food directions for baking temperature, time and rack position. - Page 45 Bake Chart FOOD ITEM RACK TEMPERATURE TIME POSITION SETTING °F (°C) (MIN) (PREHEATED OVEN) Cake Cupcakes 350 (175) 19-22 Bundt Cake 350 (175) 40-45 Angel Food 350 (175) 35-39 2 crust, fresh, 9" 375-400 (190-205) 45-50 2 crust, frozen fruit, 9" 375 (190) 68-78 Cookies...
- Page 46 CONVECTION BAKE Convection Bake uses heat from the lower heating element and air movement from the convection fan to enhance cooking efficiency and evenness across multiple racks. Reduce recipe baking temperatures by 25°F (15°C). • For best results, foods should be cooked uncovered, in low-sided pans t o take advantage of the forced air circulation.
- Page 47 Foods recommended for convection bake mode: Appetizers, Biscuits, Cakes, Casseroles, Coffee Beans, Cookies (2 to 4 racks), Cream Puffs, Popovers, Yeast Breads, One-Dish Entrées, Oven Meals (rack positions 3 and 4), and Air Leavened Foods (Soufflés, Meringue, Meringue- Topped Desserts, Angel Food Cakes, Chiffon Cakes). Convection Bake Chart Reduce standard recipe temperature by 25 ºF (15 °C) for Convection Bake.
- Page 48 BROIL The Broil mode uses intense heat from the upper heating element to sear foods. The size, weight, thickness, starting temperature, and your preference of doneness will affect broiling times. • For best results when broiling, use a pan designed for broiling. •...
- Page 49 INTERNAL TIME TIME RACK BROIL FOOD FOOD ITEM SIDE 1 SIDE 2 POSITION SETTING TEMP. (MIN) (MIN) °F (°C) Lamb Chops (1") Medium Rare 145 (63) Medium 160 (71) Well Done 170 (77) Bread Garlic Bread, (1" slices) Garlic Bread, (1" slices) CONVECTION ROAST The Convection Roast mode uses heat from both upper and lower elements and hot air movement from the convection fan to enhance cooking efficiency...
- Page 50 Convection Roasting Chart TEMP. INTERNAL TIME RACK FOOD ITEM SETTING FOOD (MIN/ (LB) POS. °F (°C) TEMP. °F (°C) Beef Rib Roast 325 (160) Medium Rare 145 (63) 16-20 Medium 160 (71) 18-22 Rib Eye Roast 325 (160) Medium Rare 145 (63) 16-20 Medium...
-
Page 51: Range Care And Maintenance
RANGE CARE AND MAINTENANCE CLEANING IMPORTANT: Before cleaning, make sure all controls are off and the oven and cooktop are cool. Always follow label instructions on cleaning products. Soap, water and a soft cloth or sponge are suggested first unless otherwise noted. Do not use abrasive cleaning products. - Page 52 Cleaning Method: • Use ceramic cooktop cleaner on the glass cooktop. Other creams may not be as effective or may scratch, damage or stain the cooktop surface. • Use a paper towel or non-scratch cleaning pad to clean the entire cooktop surface.
- Page 53 HEAVY BURNED-ON RESIDUE • Allow the cooktop to cool. • For additional protection, after all residue has been removed, polish the entire surface with ceramic cooktop cleaner and a paper towel. Cleaning Methods: • While the cooktop is still warm, use a single-edge razor blade scraper at approximately a 30°...
- Page 54 Cleaning Methods: • Be careful not to slide pots and pans across your cooktop. It will leave metal markings on the cooktop surface. These marks are removable using the ceramic cooktop cleaner with a non-scratch cleaning pad for ceramic cooktops. •...
- Page 55 COOKTOP CONTROL KNOBS • Pull knobs straight away from control panel to remove. • When replacing knobs, make sure knobs are in the OFF position. Cleaning Method: • Wash with soap and water. NOTE: • Do not use steel wool, abrasive cleansers or oven cleaner. Do not soak knobs.
- Page 56 OVEN CAVITY • Food spills should be cleaned when oven cools. At high temperatures, foods react with porcelain, so staining, etching, pitting or faint white spots can result. Cleaning Method: • Mild detergent and warm water. NOTE: • Do not use oven cleaners. •...
-
Page 57: Troubleshooting
TROUBLESHOOTING First try the solutions suggested here to possibly avoid the cost of a service call. COOKTOP PROBLEMS PROBLEM POSSIBLE CAUSE SOLUTION Surface units There is no power Make sure electrical plug is plugged do not turn on to the range. into a live, properly grounded outlet. - Page 58 PROBLEM POSSIBLE CAUSE SOLUTION Unable to Using improper Use pans with flat bottoms and that maintain a cookware. match the diameter of the cooktop rolling boil or element selected. See "Using the will not cook Cooktop Elements" in the fast enough "Operation"...
-
Page 59: Oven Problems
PROBLEM POSSIBLE CAUSE SOLUTION Brown streaks Boilovers are Use a blade scraper to remove soil. or specks cooked onto See "Cleaning" in the "Range Care surface. and Maintenance" section. OVEN PROBLEMS PROBLEM POSSIBLE CAUSE SOLUTION Strong odor Manufacturing This is normal with a new range and when using new protective coating will disappear after a few uses. - Page 60 PROBLEM POSSIBLE CAUSE SOLUTION Food is All ovens operate Adjust oven calibration downwards overcooked slightly differently to reduce overcooking. See "Setting from each other. Oven Temperature Calibration" in the "Settings" section. Cooling fan The electronic The fan will turn off automatically continues to run components have when the electronic components...
-
Page 61: Error Codes
PROBLEM POSSIBLE CAUSE SOLUTION "E" and a System error This is an error code. Press number CANCEL/OFF to clear the display detected. appears in and stop the beeping. If necessary, display reset oven power at the circuit breaker. If error code remains or repeats, write down error code and contact a qualified service provider for repairs. -
Page 62: Limited Warranty
LIMITED WARRANTY WARRANTY AND SERVICE TO RECEIVE WARRANTY SERVICE, YOUR PRODUCT MUST BE REGISTERED. TO REGISTER AND REVIEW FULL WARRANTY DETAILS, VISIT: WWW.COSMOAPPLIANCES.COM/WARRANTY SCAN TO REGISTER CUSTOMER SUPPORT TO CHAT WITH US LIVE FOR ASSISTANCE, VISIT: WWW.COSMOAPPLIANCES.COM/CHAT SCAN TO CHAT... - Page 63 IMPORTANT Do Not Return This Product To The Store If you have a problem with this product, please contact COSMO Customer Support at +1 (888) 784-3108 DATED PROOF OF PURCHASE, MODEL #, AND SERIAL # REQUIRED FOR WARRANTY SERVICE. IMPORTANT Ne pas Réexpédier ce Produit au Magasin...
- Page 64 APPLIANCES Cosmo is constantly making efforts to improve the quality and performance of our products, so we may make changes to our appliances without updating this manual. Electronic version of this manual is available at: www.cosmoappliances.com...
Need help?
Do you have a question about the COS-ERC304KBD and is the answer not in the manual?
Questions and answers