Advertisement
Important before assembly:
Read these instructions carefully before assembling or using the product.
Please check the contents of the boxes before attempting to assemble this product. The instructions will
have a checklist of parts and fittings.
Assemble the product as close to its intended final location/room as possible.
Health & Safety:
This product or some parts of this product will be heavy. Please use an assistant when lifting.
Please keep small parts out of reach of children.
Always use on a level, even surface.
DO NOT jump on the product or any of its parts.
DO NOT use this product if any parts are missing, damaged or worn.
DO NOT use this product unless all fixings are secured.
Further instructions are on the following pages.
Please keep these instructions for future reference.
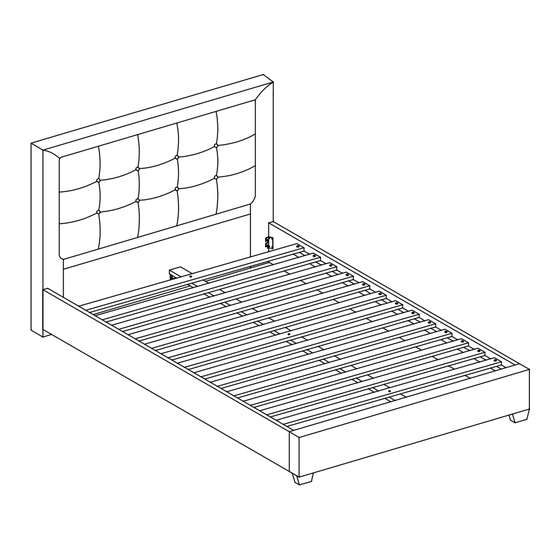
Gainford Fabric Bed - 4FT
Small Double
Assembly Instructions
.
www.happybeds.co.uk
Advertisement
Table of Contents

Subscribe to Our Youtube Channel
Related Manuals for Happy Beds Gainford Fabric Bed - 4FT Small Double


Summary of Contents for Happy Beds Gainford Fabric Bed - 4FT Small Double
- Page 1 Gainford Fabric Bed - 4FT Small Double Assembly Instructions Important before assembly: Read these instructions carefully before assembling or using the product. Please check the contents of the boxes before attempting to assemble this product. The instructions will have a checklist of parts and fittings. Assemble the product as close to its intended final location/room as possible.
- Page 2 These tools are not necessary, but may help to assemble the product. Do NOT use any power tools as this may damage the frame. (Not metal) This product or some parts of this product will be heavy. Please use an assistant when lifting. Never drag or push the pieces across a hard or stone floor as this will cause damage to the joints.
-
Page 3: Parts List
PARTS LIST CARTON 1 : Parts 1,4 CARTON 2 : Parts 2,3,5,6,7 NO. PART HEADBOARD FOOTBOARD SIDE RAIL SLAT (13PCS) CENTRE RAIL SUPPORT LEG FOOTBOARD LEG... -
Page 4: Hardware List
HARDWARE LIST 110 mm 100 mm 90 mm 80 mm 70 mm 60 mm 50 mm 40 mm 30 mm 20 mm 10 mm 0 mm M8x20 M6x40 M6x50 M4x32 35mm Bolt Bolt Allen Allen Bolt Screw Adjuster... -
Page 5: Product Information
Top Tips before you start! 1. Please check that all parts are present before you start the assembly of your furniture, as once assembled, the furniture is exempt from our home approval policy. 2. For ease and speed of assembly, we recommend that before you commence each step of the assembly, you identify all the parts required for that step. -
Page 6: Back View
Step 1 M6x50 M4x100 JCBC Allen BACK VIEW Step 2 M5x70 M8x20 Bolt Allen... - Page 7 Step 3 M6x40 M4x100 35mm Bolt Allen Adjuster ATTENTION: Please keep the adjuster around 5 to 8 mm distance away from the floor. Step 4...
- Page 8 Step 5 M6x40 M4x32 M4x100 M5x70 Bolt Screw Allen Allen...
-
Page 9: General Care And Maintenance
Please dispose of all packaging safely. General Care & Maintenance Wipe clean with a slightly damp cloth. Avoid the use of all household cleaners and abrasives. Periodically check all screw & fixings to ensure they are secure. When moving your product, carefully lift into place. Never drag or push the product across the floor as this will cause damage to the joints.
Need help?
Do you have a question about the Gainford Fabric Bed - 4FT Small Double and is the answer not in the manual?
Questions and answers