Advertisement
Quick Links
Precautions
This manual describes the important precautions you should take for safe operation of this
product.
Observe these precautions carefully to avoid personal injury, damage, fire, and other problems.
Meaning of symbols
WARNING
Failure to observe precautions carries the possibility of serious personal injury or death due to
fire, electric shock, or other causes.
CAUTION
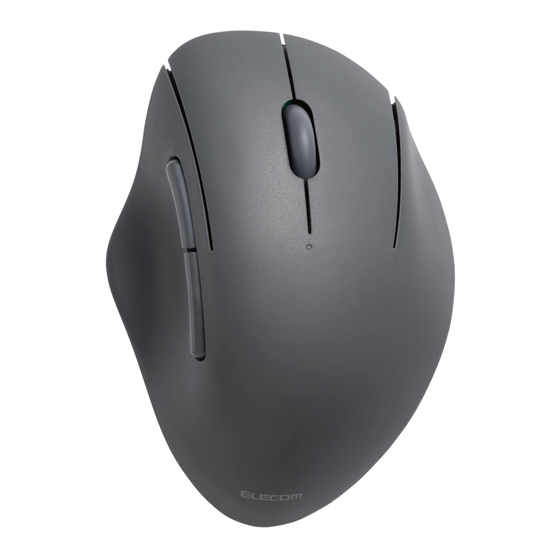
Wireless Mouse
M-SH20BB series
User Manual
Compliant model: M-SH20BBS
Advertisement

Related Manuals for Elecom SHELLPHA M-SH20BBS


Summary of Contents for Elecom SHELLPHA M-SH20BBS
- Page 1 Wireless Mouse M-SH20BB series User Manual Compliant model: M-SH20BBS Precautions This manual describes the important precautions you should take for safe operation of this product. Observe these precautions carefully to avoid personal injury, damage, fire, and other problems. Meaning of symbols WARNING Failure to observe precautions carries the possibility of serious personal injury or death due to fire, electric shock, or other causes.
- Page 2 Failure to observe precautions may result in personal injury due to electric shock or other causes, and may damage other equipment. Prohibited action Mandatory action Situation that needs attention Notes and reference information WARNING If a foreign object (water, metal chips) enters this product, stop using immediately and remove the battery.
-
Page 3: Cleaning The Product
In a moist place or a place where condensation may occur. In an uneven place or a place exposed to vibration. In a place where a magnetic field is generated (such as near a magnet.) In a dusty place. This product does not have a waterproof structure. Use or store in a place not exposed to liquids such as water. - Page 4 Gently soak a cleaning cloth, such as a microfiber cloth, in the disinfectant solution. Make sure there are no loose droplets and gently wipe the product using the cloth. After wiping, dry thoroughly and wipe off any residual liquid. * Do not spray any liquid onto the product directly. Doing so can cause electric malfunctions.
-
Page 5: How To Use
Civil Aeronautics Act. Turn off the power of the wireless mouse before boarding and do not use after boarding. * ELECOM is not liable for any accidents or any indirect or consequential damage incurred due to the failure of this product. - Page 6 Perform the “Back” function on the Web browser. ⑤ “Forward” button Perform the “Forward” function on the Web browser. You will need to install the “ELECOM Mouse Assistant for Mac” from our website to use the “Back” and “Forward” button on Mac. Please refer to “Install ELECOM Mouse Assistant”.
- Page 7 ⑥ LED light During pairing standby state, the LED blinks. The LED will light up for a period of time when the mouse is switched ON. The LED will blink during use when the battery level is low. ⑦ Battery cover Remove this cover to replace the battery.
-
Page 8: Turn The Power On
When paired with only one device on either “CH1” or “CH2”, the existing connection will be lost when you switch to the unpaired channel. Switching back to the channel paired with a connected device will restore the connection. 2) Pair with the selected connected device. To pair, please refer to “How to use”... - Page 9 3) Put the battery cover back on. 4) Slide the power switch/device selection switch on the bottom of the mouse to “CH1” or “CH2”. The LED will light up for a period of time. * When the battery level is running low, the LED will blink for a period of time. Power-saving mode When the mouse is left untouched for a fixed period of time while the power is ON, it automatically shifts to power-saving mode.
- Page 10 2) Remove the battery. 3) Insert the battery according to the instructions on the battery compartment. Ensure that the battery is inserted with the positive (+) and negative (-) terminals oriented correctly. 4) Put the battery cover back on. Pairing with a PC...
- Page 11 Pairing involves registering Bluetooth devices (in this case, this product and your device) with each other, and authorizing a connection between them. This section covers Windows standard Bluetooth functions. Depending on your device or Bluetooth adaptor, unique Bluetooth functions may be used. Please read the respective manuals for each function.
- Page 12 3) Click on “Add device”. 4) Slide the power switch/device selection switch to choose between connected devices. Please refer to “Switch connected device” to switch between connected devices. The selected connected Bluetooth device will be registered under your paired devices. 5) Click “Bluetooth”.
- Page 13 6) When the add device screen is displayed, hold down the pairing button on the underside for 3 seconds and then release. Pairing mode will be activated and the LED will blink. 7) Click on “ELECOM shellpha”.
- Page 14 Pairing begins. 8) When the message changes to “Your device is ready to go!”, click “Done”. 9) Pairing is complete when this product is added to “Bluetooth & devices” and the status is “Connected”.
- Page 15 You can now use the mouse. By downloading and installing the "ELECOM Mouse Assistant" from our company website, functions such as button assignment function and presentation mode can be used. Please proceed to “Install ELECOM Mouse Assistant”. Change the mouse pointer speed Adjust the mouse pointer movement speed on your PC if the mouse pointer moves too fast or too slow.
- Page 16 3) Adjust the “Mouse pointer speed” slider bar to adjust the mouse pointer movement speed. ■ For Windows 10 1) Open “Mouse” properties. From the Start menu, click the Settings icon, select “Devices” → “Mouse”, then click “Additional mouse options” under “Related Settings”. 2) Select the “Pointer Options”...
- Page 17 Change the number of lines scrolled in one wheel turn ■ For Windows 11 1) Click on “Start” on the bottom of the screen and click on “Settings”. The “Settings” page will appear. 2) Click on “Bluetooth & devices” and then “Mouse”.
- Page 18 3) Adjust the “Lines to scroll at a time” slider bar to adjust the number of lines per scroll. ■ For Windows 10 1) Open “Mouse” properties. From the Start menu, click the Settings icon, select “Devices” → “Mouse”, then click “Additional mouse options”...
- Page 19 Turn the power ON 1) Remove the battery cover. 2) Remove the battery insulating tab. 3) Put the battery cover back on.
- Page 20 4) Slide the power switch/device selection switch on the bottom of the mouse to “CH1” or “CH2”. The LED will light up for a period of time. * When the battery level is running low, the LED will blink for a period of time. Power-saving mode When the mouse is left untouched for a fixed period of time while the power is ON, it automatically shifts to power-saving mode.
- Page 21 3) Insert the battery according to the instructions on the battery compartment. Ensure that the battery is inserted with the positive (+) and negative (-) terminals oriented correctly. 4) Put the battery cover back on. Pairing with a PC Pairing involves registering Bluetooth devices (in this case, this product and your device) with each other, and authorizing a connection between them.
- Page 22 The System Settings window will appear. 2) Click on “Bluetooth” to turn on “Bluetooth”. The “Bluetooth” system settings page will appear. 3) Slide the power switch/device selection switch to choose between connected devices. Please refer to “Switch connected device” to switch between connected devices. The selected connected Bluetooth device will be registered under your paired devices.
- Page 23 Pairing mode will be activated and the LED will blink. 5) When "ELECOM shellpha" is detected under "Nearby Devices", click “Connect”. Pairing begins. 6) Pairing is complete when the status of “ELECOM shellpha” changes to “Connected”.
- Page 24 You can now use the mouse. By downloading and installing the "ELECOM Mouse Assistant" from our company website, functions such as button assignment function and presentation mode can be used. Please proceed to “Install ELECOM Mouse Assistant”. Change the mouse pointer speed Adjust the mouse pointer movement speed on your PC if the mouse pointer moves too fast or too slow.
-
Page 25: Iphone, Ipad
2) Adjust the “Tracking speed” slider to adjust the speed of the mouse pointer. Unchecking “Natural scrolling” will cause the scroll direction to be reversed. iPhone, iPad Turn the power ON 1) Remove the battery cover. - Page 26 2) Remove the battery insulating tab. 3) Put the battery cover back on. 4) Slide the power switch/device selection switch on the bottom of the mouse to “CH1” or “CH2”. The LED will light up for a period of time. * When the battery level is running low, the LED will blink for a period of time.
- Page 27 Replacing the battery... 1) Remove the battery cover. 2) Remove the battery. 3) Insert the battery according to the instructions on the battery compartment. Ensure that the battery is inserted with the positive (+) and negative (-) terminals oriented correctly. 4) Put the battery cover back on.
- Page 28 Pairing with an iPad or an iPhone Pairing involves registering Bluetooth devices (in this case, this product and an iPad or an iPhone) with each other, and authorizing a connection between them. Tap to operate the iPad or iPhone device until pairing is complete. The following instructions are for iPadOS Ver.16.11.
- Page 29 4) During the device search, hold down the pairing button on the underside for 3 seconds and then release. Pairing mode will be activated and the LED will blink. 5) Tap on “ELECOM shellpha” when it is detected under “DEVICES”. Pairing begins. 6) When the “Bluetooth Pairing Request” page loads, tap on “Pair”.
- Page 30 7) You can use the mouse when the status shows "Connected" You can now use the mouse. Register custom actions to the buttons. Only the 2 buttons and the wheel can be used under the initial settings. Button 1: Single-Tap Button 2: Secondary Click Follow the steps below to assign all other button functions.
- Page 31 1) Tap on “Accessibility” under “Settings”. 2) Tap on “Touch”. 3. Tap on “AssistiveTouch”. 4. Tap on “AssistiveTouch” to turn ON.
- Page 32 2. Assign custom actions to the buttons. 1) Tap on “Devices” under “POINTER DEVICES”. 2) Tap on “ELECOM shellpha”.
- Page 33 3) Tap on “Customize Additional Buttons...”. 4) When the “Customize Button” page loads, click on the button on the mouse to be added.
- Page 34 * When adding “Button 3”. 5) A list of all assignable functions will load. Tap on the desired function to assign. * When assigning “Screenshot” to “Button 3”.
- Page 35 6) A function is assigned to the button. To assign other buttons, repeat the steps above. When AssistiveTouch is OFF, the Custom Action function is disabled and only the initial right click, left click and wheel scroll functions may be used. Android Turn the power ON 1) Remove the battery cover.
- Page 36 2) Remove the battery insulating tab. 3) Put the battery cover back on. 4) Slide the power switch/device selection switch on the bottom of the mouse to “CH1” or “CH2”. The LED will light up for a period of time. * When the battery level is running low, the LED will blink for a period of time.
- Page 37 Replacing the battery... 1) Remove the battery cover. 2) Remove the battery. 3) Insert the battery according to the instructions on the battery compartment. Ensure that the battery is inserted with the positive (+) and negative (-) terminals oriented correctly. 4) Put the battery cover back on.
-
Page 38: Pairing With An Android Device
Pairing with an Android device. Pairing involves registering Bluetooth devices (in this case, this product and an Android device) with each other, and authorizing a connection between them. Tap to operate the Android device until pairing is complete. Instructions for Galaxy Tab A7 Lite (Android 12) are as follows. There may be differences depending on the OS version or device. - Page 39 5) Slide the power switch/device selection switch to choose between connected devices. Please refer to “Switch connected device” to switch between connected devices. The selected connected Bluetooth device will be registered under your paired devices. 6) Hold down the pairing button at the bottom of the product for 3 seconds and then release.
- Page 40 8) Tap on “ELECOM shellpha” under “Available devices”. 9) Tap on “Pair”.
- Page 41 Pairing begins. 10) Pairing is complete when this product is added to “Paired devices” and the status is “Connected”. You can now use the mouse. Chrome OS Turn the power ON 1) Remove the battery cover. 2) Remove the battery insulating tab. 3) Put the battery cover back on.
- Page 42 4) Slide the power switch/device selection switch on the bottom of the mouse to “CH1” or “CH2”. The LED will light up for a period of time. * When the battery level is running low, the LED will blink for a period of time. Power-saving mode When the mouse is left untouched for a fixed period of time while the power is ON, it automatically shifts to power-saving mode.
- Page 43 3) Insert the battery according to the instructions on the battery compartment. Ensure that the battery is inserted with the positive (+) and negative (-) terminals oriented correctly. 4) Put the battery cover back on. Pairing with a PC Pairing involves registering Bluetooth devices (in this case, this product and your device) with each other, and authorizing a connection between them.
- Page 44 If “Bluetooth” is off, turn it on. 3) Slide the power switch/device selection switch to choose between connected devices. Please refer to “Switch connected device” to switch between connected devices. The selected connected Bluetooth device will be registered under your paired devices. 4) Click on “Pair new device”.
- Page 45 5) During the device search, hold down the pairing button on the underside for 3 seconds and then release. Pairing mode will be activated and the LED will blink. 6) Click on “ELECOM shellpha”. Pairing begins.
- Page 46 7) "ELECOM shellpha connected" will be displayed at the bottom of the screen. Click “Bluetooth” like in step 2. Pairing is complete when “ELECOM shellpha” appears under “Currently connected”.
- Page 47 You can now use the mouse. Change the mouse pointer speed Adjust the mouse pointer movement speed on your PC if the mouse pointer moves too fast or too slow. 1) Click on the quick settings panel on the bottom right. 2) Click on “Settings”.
- Page 48 ELECOM Mouse Assistant must be installed. “ELECOM Mouse Assistant” is a software that allows you to use the mouse more effectively. Using ELECOM Mouse Assistant, users can set the functions they want to the unique buttons and use them to perform the operations they want.
-
Page 49: Specifications
When used on magnetic surfaces such as metal desks: 3 m, When used on non-magnetic surfaces such as wooden desks: 10 m * These values were obtained in ELECOM's test environment and are not guaranteed. Sensor type IR optical sensor... -
Page 50: Troubleshooting
Projected battery lifespan Maximum duration approximately 18 months (estimated operating time when using alkaline battery) * May vary depending on the usage conditions. Power source Any 1 of AA alkaline battery, AA manganese battery or AA nickel- metal hydride rechargeable battery Rated voltage 1.5 V Dimensions... - Page 51 damage to the exterior. We recommend the usage of disposable gloves. Please unplug the USB connector from this product and the PC. When using any alcohol-based products, please check that it is appropriate for the specific purpose and that it is used properly. Please note that in the event that damage or abnormal operation to the product is caused by the cleaning process, the customer will be fully responsible for the cost of repair.
- Page 52 Non-magnetic surface (such as wooden desks): approximately 10 m Magnetic surface (such as steel desks): approximately 3 m * These values were obtained in ELECOM's test environment and are not guaranteed. The 2.4GHz band signal may be shorter depending on the environment you use it in.
- Page 53 2) Click “Bluetooth”. 3) Check the manufacturer of the Bluetooth function installed on your PC. The following steps illustrate the procedure when the Bluetooth function is manufactured by Intel® Corporation. For other manufacturers or if you do not know the manufacturer, check the user manual of your PC or contact the manufacturer of your PC for instructions on how to update the Bluetooth driver.
- Page 54 4) Search for “Intel® Driver & Support Assistant” on your browser and download the installer from Intelʼs website. 5) Follow the instructions of the downloaded installer to install “Intel® Driver & Support Assistant”. 6) Click “Start” and then “All apps”. 7) Click “Intel Driver &...
- Page 55 * The display on your browser may change depending on your PC environment and support page updates. 10) Follow the instructions of the downloaded installer to install the Bluetooth driver. With this, the Bluetooth driver is updated. ⑧ When using a USB Bluetooth receiver, change the connection on the receiver. Depending on the specifications of the PC's USB port or USB hub, other USB 3.0 devices used simultaneously with the mouse may generate noise that can worsen the 2.4 GHz signal in the vicinity.
- Page 56 Connect the Bluetooth receiver to a USB2.0 hub or to an extension cable. Compliance status Model/모델명: M-SH20BBS www.elecom.co.jp/global/certification/ China / 中国 Korea / 대한민국 Singapore...
-
Page 57: Intellectual Property Rights
Chrome, Chrome OS and Android are trademarks of Google LLC. The Bluetooth® wordmark and logos are registered trademarks owned by Bluetooth SIG, Inc. and any use of such marks by ELECOM CO., LTD. is under license. Support information ELECOM CO., LTD. - Page 58 Las especificaciones y la apariencia externa de este producto pueden modificarse sin previo aviso con el fin de mejorar el producto. ELECOM no se hace responsable de los daños o fallos de otros dispositivos causados por el uso de este producto.
- Page 59 Los clientes que compran fuera de Japón deben ponerse en contacto con el distribuidor local del país de compra para realizar consultas. En "ELECOM CO., LTD. (Japón)", no hay servicio de atención al cliente para consultas sobre compras o uso en/desde otros países que no sean Japón.
- Page 60 As trocas serão feitas sob estipulação da garantia ELECOM, mas não estão disponíveis fora do Japão. 如果您对本手册内容有任何反馈或疑问,请与购买本产品的零售商联系。 本产品的规格及外观如有变更以对产品进行改进,恕不另行通知。 因使用本产品而造成其他设备故障或问题时,ELECOM概不负责,敬请知悉。 图片仅供参考,您所收到的实际产品可能有所差异。 出口本产品至海外时,请检查原产国的出口法规。 在日本境外购买产品的客户应与当地的的零售商联系进行咨询。ELECOM株式会社(日本)有限公司 不对日本之外的其他国家的客户提供有关购买或使用的咨询服务。另外,公司不提供日语之外的其他 外语服务。产品如需更换,需要在 ELECOM 保修期规定范围之内,日本境外的产品不提供更换服 务。 若您對本⼿冊的內容有任何回饋或疑問,請聯絡您購買本產品的商店。 為了改進產品,本產品的規格和外觀可能會發⽣變化,恕不事先通知。 ELECOM 對因使⽤本產品⽽造成的其他裝置損壞或故障不承擔責任。 圖片僅⽤於說明⽬的,可能與您的實際產品有所出入。 出⼝這款產品時,需檢查原產國的出⼝規定。 客⼾若⽇本以外地區購買本產品,如有任何問題,應聯絡購買當地的經銷商。「ELECOM CO., LTD. (Japan)」不在⽇本以外的其他地區提供購買或使⽤產品等相關問題的客⼾⽀援。與此同時,除⽇語以 外,不提供其他的外國語⾔服務。您可以根據ELECOM的規定於保固期間要求更換產品,但您不能在...
- Page 61 제공하지 않습니다. 또한 일본어 이외의 외국어는 지원되지 않습니다. 제품 교체는 ELECOM 보증 규정에 따라 이루어지지만 일본 외에서는 교체가 불가능합니다.
Need help?
Do you have a question about the SHELLPHA M-SH20BBS and is the answer not in the manual?
Questions and answers