Ergonomic mouse, multi-device bluetooth or wireless usb, silent click 8 button, 1000/2000 dpi, rechargeable, high-speed scroll tilt, for windows, macos, laptop, pc, tablet (78 pages)
Summary of Contents for Elecom M-IT11DR Series
Page 1
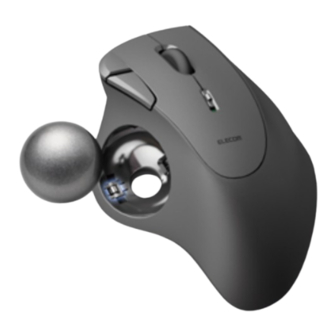
Wireless Trackball Mouse M-IT11DR series User Manual Compliant model: M-IT10DR/M-IT11DR/E01D Precautions This manual describes the important precautions you should take for safe operation of this product. Observe these precautions carefully to avoid personal injury, damage, fire, and other problems. Meaning of symbols...
Page 2
Prohibited action Mandatory action Situation that needs attention Notes and reference information WARNING If a foreign object (water, metal chips) enters the product, immediately stop using the product, remove the receiver unit from the PC, and remove the batteries from the trackball.
In an uneven place or a place exposed to vibration. In a place where a magnetic field is generated (such as near a magnet.) In a dusty place. This product does not have a waterproof structure. Use or store in a place not exposed to liquids such as water.
Page 4
IMPORTANT Do not spray any liquid onto the product directly. Doing so can cause electric malfunctions. Do not use organic solvents or ultraviolet lights. Usage can result in deterioration of the housing components or paints, which can cause damage to the exterior. We recommend the usage of disposable gloves.
Civil Aeronautics Act. Turn off the power of the wireless trackball before boarding and do not use after boarding. * ELECOM is not liable for any accidents or any indirect or consequential damage incurred due to the failure of this product.
Page 6
① Left button To left click on your PC. ② Right button To right click on your PC. ③ Wheel Rotate forward and backward or click like a button to operate your PC. ④ “Back” button Performs the “Back” function on the Web browser. ⑤...
Page 7
You will need to install the “ELECOM Mouse Assistant Mac version” from our website to use the “Back” and “Forward” button on Mac. Refer to “Install ELECOM Mouse Assistant”. ⑥ LED light The light around the wheel lights up red for a few seconds when the power is turned on.
⑬ Battery cover Remove this cover and insert the battery. ⑭ Battery storage compartment Holds the battery. ⑮ Battery removal sheet Used to remove the battery from the battery storage compartment. ⑯ Battery insulating tab Remove this tab before using. Receiver unit ⑰...
Connecting and Configuring the Trackball Windows® Turn the power ON 1) Remove the battery cover. 2) Remove the battery insulating tab. 3) Put the battery cover back on. 4) Remove the receiver unit.
Page 10
5) Slide the power switch to the ON position. The light around the wheel lights up red. * When the battery level is running low, the LED light will blink slowly for a period of time. Power-saving mode When the trackball is left untouched for a fixed period of time while the power is ON, it automatically shifts to power-saving mode.
Page 11
Pull the battery removal sheet to remove the battery. 3) Insert the battery according to the positive (+) and negative (-) marks indicated in the battery compartment. Insert the battery in the correct positive (+) and negative (-) polarity direction. 4) Put the battery cover back on.
Page 12
3) The driver is automatically installed and the trackball can be used. You can now use the trackball. By downloading and installing the "ELECOM Mouse Assistant" from our company website, functions such as button assignment function and presentation mode can be used. Please proceed to “Install ELECOM Mouse...
Page 13
3) Adjust the “Mouse pointer speed” slider bar to adjust the mouse pointer movement speed. ■ For Windows 10 1) Open “Mouse” properties. From the start menu, click the Settings icon, select “Devices” → “Mouse”, then click “Additional mouse options” under “Related Settings”. 2) Select the “Pointer Options”...
Page 14
Change the number of lines scrolled in one wheel turn ■ For Windows 11 1) Click on “Start” on the bottom of the screen and click on “Settings”. The “Settings” page will appear. 2) Click on “Bluetooth & devices” and then “Mouse”. 3) Adjust the “Lines to scroll at a time”...
Page 15
■ For Windows 10 1) Open “Mouse” properties. From the start menu, click the Settings icon, select “Devices” → “Mouse”, then click “Additional mouse options” under “Related Settings”. 2) Select the “Wheel” tab. 3) Change the value of “The following number of lines at a time” under “Roll the wheel one notch to scroll”...
Page 16
Turn the power ON 1) Remove the battery cover. 2) Remove the battery insulating tab. 3) Put the battery cover back on. 4) Remove the receiver unit.
Page 17
5) Slide the power switch to the ON position. The light around the wheel lights up red. * When the battery level is running low, the LED light will blink slowly for a period of time. Power-saving mode When the trackball is left untouched for a fixed period of time while the power is ON, it automatically shifts to power-saving mode.
Page 18
3) Insert the battery according to the positive (+) and negative (-) marks indicated in the battery compartment. Insert the battery in the correct positive (+) and negative (-) polarity direction. 4) Put the battery cover back on. Connect to a PC 1) Start up your PC.
Page 19
3) The driver is automatically installed and the trackball can be used. You can now use the trackball. By downloading and installing the "ELECOM Mouse Assistant" from our company website, functions such as button assignment function and presentation mode can be used. Please proceed to “Install ELECOM Mouse...
Page 20
2) Adjust the “Tracking speed” slider to adjust the speed of the mouse pointer. Unchecking “Natural scrolling” will cause the scroll direction to be reversed. ChromeOS Turn the power ON 1) Remove the battery cover.
Page 21
2) Remove the battery insulating tab. 3) Put the battery cover back on. 4) Remove the receiver unit. 5) Slide the power switch to the ON position.
Page 22
The light around the wheel lights up red. * When the battery level is running low, the LED light will blink slowly for a period of time. Power-saving mode When the trackball is left untouched for a fixed period of time while the power is ON, it automatically shifts to power-saving mode.
Page 23
3) Insert the battery according to the positive (+) and negative (-) marks indicated in the battery compartment. Insert the battery in the correct positive (+) and negative (-) polarity direction. 4) Put the battery cover back on. Connect to a PC 1) Start up your PC.
Page 24
For devices that do not have a USB-A port, please use a USB Type-C hub. Ensure that the connector is correctly oriented to the port. If there is strong resistance when inserting, check the shape and orientation of the connector. Forcibly inserting the connector may damage the connector, and there is a risk of injury.
Page 25
3) Click on “Mouse and touchpad” under “Device”. 4) Adjust the “Mouse speed” slider to adjust the speed of the mouse pointer.
Mouse Assistant must be installed. “ELECOM Mouse Assistant” is a software that allows you to use the mouse more effectively. Using ELECOM Mouse Assistant, users can set the functions they want to the unique buttons and use them to perform the operations they want.
Page 27
confirmation in our verification environment. There is no guarantee of full compatibility with all devices, OS versions and applications. Communication method GFSK Radio frequency 2.4 GHz Radio wave range Maximum length approximately 10 m/33 ft *May vary depending on the environment. Sensor Resolution 500 DPI Sensor type...
Storage environment Temperature: -10 ℃ to 60 ℃ / 14 ℉ to 140 ℉, humidity: 90 % RH conditions (without condensation) Accessories Removal tool × 1 Troubleshooting To disinfect the trackball IMPORTANT Do not spray any liquid onto the product directly. Doing so can cause electric malfunctions.
Page 29
Gently soak a cleaning cloth, such as a microfiber cloth, in the disinfectant solution. Make sure there are no loose droplets and gently wipe the product using the cloth. After wiping, dry thoroughly and wipe off any residual liquid. * Do not spray any liquid onto the product directly. Doing so can cause electric malfunctions.
Page 30
Do not use alcohol, cleaning cloths and other such cleaning tools when cleaning the ball. Cleaning will remove the pre-applied coat of oil on the ball's surface and cause the ball to function poorly. 4) Insert the ball into the trackball housing. Inadequate oil on the surface of the ball may cause the ball to function poorly.
Page 31
When replacing the support parts, take care not to damage the sensor. 1) Use a finger (or a pen) to push the ball out from the under side. 2) Hold onto the included removal tool with your fingers and push it into the notch on the sides of the support part until you hear a click.
Page 32
5) Press the support part in with your finger until you hear a click. 6) Insert the ball into the trackball housing. If the trackball does not work correctly Try the following if the trackball operates abnormally. ① Check that the trackball is turned ON. ②...
Page 33
Non-magnetic surface (such as wooden desks): approximately 10 m Magnetic surface (such as steel desks): approximately 3 m * These values were obtained in ELECOM's test environment and are not guaranteed. The 2.4 GHz band signal may be shorter depending on the environment you use it in.
Page 34
Connect the trackball receiver unit to a USB 2.0 USB hub or extension cable. ⑦ Check the energy saver settings on the connected device. (When using Windows® PC) On Windows, in order to reduce power consumption depending on the PC, the power of the USB-connected product is set to turn off...
Page 35
3) Click ”Windows Tools”. The ”Windows Tools” screen will appear.
Page 37
6) Click ”Power Options”. 7) Click "Change plan settings" to the right of the item selected in "Power Plan". 8) On the ”Edit Plan Settings” screen, click “Change advanced power settings”.
Page 38
9) On the ”Power Options” screen, click the ”+” mark in ”USB settings” from the list, and then click the ”+” mark in ”USB selective suspend setting”. 10) In the drop box next to ”Setting”, select ”Disabled”. If you are using a laptop, there are two items instead of “Settings”: “On battery” and “Plugged in”.
Page 39
11) Click "OK" to confirm the settings. 12) Click the “×” (close) in the upper right corner to close “Edit Plan Settings”. For Windows 10 1) Right-click the Start button at the bottom left of the screen, click “Power Options”, and then click “Additional power settings”...
Page 40
4) On the “Power Options” screen, click the “+” mark in “USB settings” from the list, and then click the “+” mark in “USB selective suspend setting”. 5) In the drop box next to “Setting”, select “Disabled”. If you are using a laptop, there are two items instead of “Settings”: “On battery” and “Plugged in”.
Page 41
6) Click “OK” to confirm the settings. 7) Click the “×” (close) in the upper right corner to close “Edit Plan Settings”. Compliance status Model/모델명/型號: M-IT10DR, E01D www.elecom.co.jp/global/certification/ China / 中国 Korea / 대한민국 Singapore Taiwan / 台灣 Vietnam / Việt Nam...
Specifications and external appearance of this product may be changed without prior notice for the purpose of product improvement. ELECOM is not responsible for any damages to, or failure of other devices caused by using this product. The images are for illustration purposes only and may differ from your actual product.
Page 43
Las especificaciones y la apariencia externa de este producto pueden modificarse sin previo aviso con el fin de mejorar el producto. ELECOM no se hace responsable de los daños o fallos de otros dispositivos causados por el uso de este producto.
Page 44
As especificações e aparência externa deste produto podem ser alteradas sem aviso prévio para fins de melhoria do produto. A ELECOM não é responsável por quaisquer danos ou falhas de outros dispositivos causados pelo uso deste produto. As imagens são apenas para fins ilustrativos e podem diferir do produto real.
Page 45
일본 외 다른 국가에서 구입하는 고객은 문의 사항이 있는 경우 제품 구입 국가의 대리점에 연락하 십시오. ‘ELECOM CO., LTD.(일본)’는 일본 이외의 국가에서 구입 또는 사용 문의에 대한 고객 지원을 제공하지 않습니다. 또한 일본어 이외의 외국어는 지원되지 않습니다. 제품의 교환은 ELECOM 보증...
Need help?
Do you have a question about the M-IT11DR Series and is the answer not in the manual?
Questions and answers