Download Print this page
Elecom M-IT11BR Series User Manual

Elecom M-IT11BR Series User Manual

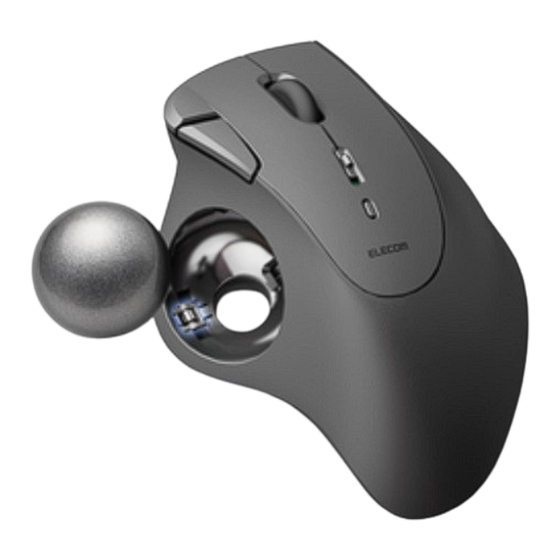
Bluetooth trackball mouse

Advertisement

Quick Links

Precautions
This manual describes the important precautions you should take for safe operation of this
product.
Observe these precautions carefully to avoid personal injury, damage, fire, and other problems.
Meaning of symbols
WARNING
Failure to observe precautions carries the possibility of serious personal injury or death due to
fire, electric shock, or other causes.
CAUTION
Failure to observe precautions may result in personal injury due to electric shock or other
causes, and may damage other equipment.
Bluetooth® Trackball Mouse
M-IT11BR series
User Manual
Compliant model: M-IT10BR, M-IT11BR

Advertisement

loading
Need help?

Need help?

Do you have a question about the M-IT11BR Series and is the answer not in the manual?

Questions and answers

Summary of Contents for Elecom M-IT11BR Series

  • Page 1 Bluetooth® Trackball Mouse M-IT11BR series User Manual Compliant model: M-IT10BR, M-IT11BR Precautions This manual describes the important precautions you should take for safe operation of this product. Observe these precautions carefully to avoid personal injury, damage, fire, and other problems.
  • Page 2 Prohibited action Mandatory action Situation that needs attention Notes and reference information WARNING If a foreign object (water, metal chips) enters this product, stop using immediately and remove the battery. Continuing to use this product as it is may cause a fire or electric shock. If this product behaves abnormally, such as by generating heat or smoke, or giving off...
  • Page 3 In a dusty place. This product does not have a waterproof structure. Use or store in a place not exposed to liquids such as water. Any liquid such as rain, water spray, juice, coffee, steam, and sweat, may cause this product to breakdown.
  • Page 4 Do not spray any liquid onto the product directly. Doing so can cause electric malfunctions. Do not use organic solvents or ultraviolet lights. Usage can result in deterioration of the housing components or paints, which can cause damage to the exterior. We recommend the usage of disposable gloves.
  • Page 5: How To Use

    Civil Aeronautics Act. Turn off the power of the wireless trackball before boarding and do not use after boarding. * ELECOM is not liable for any accidents or any indirect or consequential damage incurred due to the failure of this product.
  • Page 6 ① Left button To left click on your PC. ② Right button To right click on your PC. ③ Wheel Rotate forward and backward or click like a button to operate your PC. ④ “Back” button Performs the “Back” function on the Web browser. ⑤...
  • Page 7 You will need to install the “ELECOM Mouse Assistant Mac version” from our website to use the “Back” and “Forward” button on Mac. Refer to “Install ELECOM Mouse Assistant”. ⑥ LED light The light around the wheel flashes red when this product is in a pairing standby state.
  • Page 8 ⑬ Battery cover Remove this cover and insert the battery. ⑭ Battery storage compartment Holds the battery. ⑮ Battery removal sheet Used to remove the battery from the battery storage compartment. ⑯ Battery insulating tab Remove this tab before using. Removal tool *See “How to replace support parts”...
  • Page 9 3) Put the battery cover back on. 4) Slide the power switch to the ON position. The light around the wheel lights up red. * When the battery level is running low, the LED light will blink slowly for a period of time. Power-saving mode When the trackball is left untouched for a fixed period of time while the power is ON, it automatically shifts to power-saving mode.
  • Page 10 2) Remove the battery. Pull the battery removal sheet to remove the battery. 3) Insert the battery according to the positive (+) and negative (-) marks indicated in the battery compartment. Insert the battery in the correct positive (+) and negative (-) polarity direction. 4) Put the battery cover back on.
  • Page 11 Pairing with a PC Pairing involves registering Bluetooth devices (in this case, this product and your device) with each other, and authorizing a connection between them. This section covers Windows standard Bluetooth functions. Depending on your device or Bluetooth adaptor, unique Bluetooth functions may be used. Please read the respective manuals for each function.
  • Page 12 If “Bluetooth” is off, turn it on. 3) Click on “Add device”.
  • Page 13 4) Click “Bluetooth”. 5) When the add device screen is displayed, hold down the pairing button for 3 seconds and then release. The light around the wheel flashes red when this product is in a pairing standby state.
  • Page 14 6) Click “IST TrackBall”. Pairing begins. 7) When the message changes to “Your device is ready to go!”, click “Done”.
  • Page 15 8) Pairing is complete when this product is added to “Bluetooth & devices” and the status is “Connected”. You can now use the trackball. By downloading and installing the “ELECOM Mouse Assistant” from our company website, functions such as button assignment function and presentation mode can be used. Please proceed to “Install ELECOM Mouse...
  • Page 16 ■ For Windows 11 1) Click on “Start” on the bottom of the screen and click on “Settings”. The “Settings” page will appear. 2) Click on “Bluetooth & devices” and then “Mouse”. 3) Adjust the “Mouse pointer speed” slider bar to adjust the mouse pointer movement speed.
  • Page 17 From the start menu, click the Settings icon, select “Devices” → “Mouse”, then click “Additional mouse options” under “Related Settings”. 2) Select the “Pointer Options” tab. 3) Adjust the “Select a pointer speed” slider bar to adjust the mouse pointer movement speed.
  • Page 18 3) Adjust the “Lines to scroll at a time” slider bar to adjust the number of lines per scroll. ■ For Windows 10 1) Open “Mouse” properties. From the start menu, click the Settings icon, select “Devices” → “Mouse”, then click “Additional mouse options”...
  • Page 19 Turn the power ON 1) Remove the battery cover. 2) Remove the battery insulating tab. 3) Put the battery cover back on.
  • Page 20 4) Slide the power switch to the ON position. The light around the wheel lights up red. * When the battery level is running low, the LED light will blink slowly for a period of time. Power-saving mode When the trackball is left untouched for a fixed period of time while the power is ON, it automatically shifts to power-saving mode.
  • Page 21 3) Insert the battery according to the positive (+) and negative (-) marks indicated in the battery compartment. Insert the battery in the correct positive (+) and negative (-) polarity direction. 4) Put the battery cover back on. Pairing with a PC Pairing involves registering Bluetooth devices (in this case, this product and your device) with each other, and authorizing a connection between them.
  • Page 22 The following instructions are for macOS Ventura (13). 1) From the Apple menu, click on “System Settings...”. The System Settings window will appear. 2) Click on “Bluetooth” to turn on “Bluetooth”. The “Bluetooth” system settings page will appear. 3) During the device search, hold down the pairing button for 3 seconds and then release.
  • Page 23 4) When “IST TrackBall” is detected under “Nearby Devices”, click “Connect”. Pairing begins. 5) Pairing is complete when the status of “IST TrackBall” changes to “Connected”.
  • Page 24 You can now use the trackball. By downloading and installing the “ELECOM Mouse Assistant” from our company website, functions such as button assignment function and presentation mode can be used. Please proceed to “Install ELECOM Mouse Assistant”. Change the mouse pointer speed Adjust the mouse pointer movement speed on your PC if the mouse pointer moves too fast or too slow.
  • Page 25 2) Adjust the “Tracking speed” slider to adjust the speed of the mouse pointer. Unchecking “Natural scrolling” will cause the scroll direction to be reversed. iPhone, iPad Turn the power ON 1) Remove the battery cover.
  • Page 26 2) Remove the battery insulating tab. 3) Put the battery cover back on. 4) Slide the power switch to the ON position. The light around the wheel lights up red. * When the battery level is running low, the LED light will blink slowly for a period of time. Power-saving mode...
  • Page 27 When the trackball is left untouched for a fixed period of time while the power is ON, it automatically shifts to power-saving mode. Moving the trackball restores it from energy saving mode. * For two to three seconds after restoring from energy saving mode, trackball operation may be unstable.
  • Page 28 Insert the battery in the correct positive (+) and negative (-) polarity direction. 4) Put the battery cover back on. Pairing with an iPad or an iPhone Pairing involves registering Bluetooth devices (in this case, this product and an iPad or an iPhone) with each other, and authorizing a connection between them.
  • Page 29 3) During the device search, hold down the pairing button for 3 seconds and then release. The light around the wheel flashes red when this product is in a pairing standby state. 4) Click “Connect” when “IST TrackBall” is detected under “DEVICES”. Pairing begins.
  • Page 30 5) When the “Bluetooth Pairing Request” pop-up appears, tap on “Pair”. 6) You can use the trackball when the status shows "Connected"...
  • Page 31 You can now use the trackball. Register custom actions to the buttons. Only the 2 buttons and the wheel can be used under the initial settings. Button 1: Single-Tap Button 2: Secondary Click Follow the steps below to assign all other button functions. Turn ON AssistiveTouch.
  • Page 32 3) Tap on “AssistiveTouch”. 4) Tap on “AssistiveTouch” to turn ON. Assign custom actions to the buttons. 1) Tap on “Devices” under “POINTER DEVICES”.
  • Page 33 2) Click “IST TrackBall”. 3) Tap on “Customize Additional Buttons...”.
  • Page 34 4) When the “Customize Button” pop-up appears, click on the button on the trackball to be added. * When adding “Button 3”.
  • Page 35 5) A list of all assignable functions will load. Tap on the desired function to assign. * When assigning “Screenshot” to “Button 3”. 6) A function is assigned to the button. To assign other buttons, repeat the steps above.
  • Page 36 When AssistiveTouch is OFF, the Custom Action function is disabled and only the initial right click, left click and wheel scroll functions may be used. Android Turn the power ON 1) Remove the battery cover. 2) Remove the battery insulating tab. 3) Put the battery cover back on.
  • Page 37 4) Slide the power switch to the ON position. The light around the wheel lights up red. * When the battery level is running low, the LED light will blink slowly for a period of time. Power-saving mode When the trackball is left untouched for a fixed period of time while the power is ON, it automatically shifts to power-saving mode.
  • Page 38 3) Insert the battery according to the positive (+) and negative (-) marks indicated in the battery compartment. Insert the battery in the correct positive (+) and negative (-) polarity direction. 4) Put the battery cover back on. Pairing with an Android device. Pairing involves registering Bluetooth devices (in this case, this product and an Android device) with each other, and authorizing a connection between them.
  • Page 39 2) Tap on “Connected devices”. 3) Tap on “Pair new device” 4) Hold down the pairing button for 3 seconds and then release. The light around the wheel flashes red when this product is in a pairing standby state.
  • Page 40 5) Click “IST TrackBall” listed under “Available devices”. 6) Tap on “Pair”.
  • Page 41 Pairing begins. 7) Pairing is complete when this product is added to “Other devices”. You can now use the trackball. Chrome OS Turn the power ON 1) Remove the battery cover. 2) Remove the battery insulating tab.
  • Page 42 3) Put the battery cover back on. 4) Slide the power switch to the ON position. The light around the wheel lights up red. * When the battery level is running low, the LED light will blink slowly for a period of time. Power-saving mode When the trackball is left untouched for a fixed period of time while the power is ON, it automatically shifts to power-saving mode.
  • Page 43 Pull the battery removal sheet to remove the battery. 3) Insert the battery according to the positive (+) and negative (-) marks indicated in the battery compartment. Insert the battery in the correct positive (+) and negative (-) polarity direction. 4) Put the battery cover back on.
  • Page 44 Use your current mouse or the touchpad on your device to operate your device until pairing is complete. The following instructions are for Chrome OS (118.0.5993.86). 1) Click on the battery icon at the bottom right. Bluetooth on the Quick Settings panel. 3) Under “Bluetooth”, click on “Pair new device”.
  • Page 45 The light around the wheel flashes red when this product is in a pairing standby state. 5) Click “IST TrackBall”. Pairing begins.
  • Page 46 6) “IST TrackBall connected” will be displayed at the bottom of the screen. Click “Bluetooth” like in step 2. Pairing is complete when “IST TrackBall” appears under “Currently connected”.
  • Page 47 You can now use the trackball. Change the mouse pointer speed Adjust the mouse pointer movement speed on your PC if the mouse pointer moves too fast or too slow. 1) Click on the battery icon at the bottom right. 2) Click on (settings) on the Quick Settings panel.
  • Page 48 3) Click on “Mouse and touchpad” under “Device”. 4) Adjust the “Mouse speed” slider to adjust the speed of the mouse pointer.
  • Page 49: Product Specifications

    Mouse Assistant must be installed. “ELECOM Mouse Assistant” is a software that allows you to use the mouse more effectively. Using ELECOM Mouse Assistant, users can set the functions they want to the unique buttons and use them to perform the operations they want.
  • Page 50 Supported OS Windows 11/10, Android 12〜13, macOS Ventura 13, iOS・ iPadOS 16 and ChromeOS * Update for each new version of the OS or the installation of a service pack might be required. * Compatibility information was retrieved during operation confirmation in our verification environment.
  • Page 51: Troubleshooting

    Storage environment Temperature: -10 ℃ to 60 ℃ / 14 ℉ to 140 ℉, humidity: 90 % RH conditions (without condensation) Accessories Removal tool × 1 Troubleshooting To disinfect the trackball IMPORTANT Do not spray any liquid onto the product directly. Doing so can cause electric malfunctions.
  • Page 52 * Do not spray any liquid onto the product directly. Doing so can cause electric malfunctions. How to clean the trackball 1) Use a finger (or a pen) to push the ball out from the underside. 2) Use a cotton bud or something similar to clean off the dust accumulated on the contact surfaces of the three support parts.
  • Page 53 Cleaning will remove the pre-applied coat of oil on the ball's surface and cause the ball to function poorly. 4) Insert the ball into the trackball housing. Inadequate oil on the surface of the ball may cause the ball to function poorly. If the ball seems to function poorly, rub it in your hand for around 30 seconds.
  • Page 54 2) Hold onto the included removal tool with your fingers and push it into the notch on the sides of the support part until you hear a click. 3) Pull the removal tool hard to remove the support part. 4) Fit the replacement support part into the inner catch.
  • Page 55 5) Press the support part in with your finger until you hear a click. 6) Insert the ball into the trackball housing. If the trackball does not work correctly Try the following if the trackball operates abnormally. ① Check that the trackball is turned ON. ②...
  • Page 56 Non-magnetic surface (such as wooden desks): approximately 10 m Magnetic surface (such as steel desks): approximately 3 m * These values were obtained in ELECOM's test environment and are not guaranteed. The 2.4GHz band signal may be shorter depending on the environment you use it in.
  • Page 57 2) Click “Bluetooth”. 3) Check the manufacturer of the Bluetooth function installed on your PC.
  • Page 58 The following steps illustrate the procedure when the Bluetooth function is manufactured by Intel® Corporation. For other manufacturers or if you do not know the manufacturer, check the user manual of your PC or contact the manufacturer of your PC for instructions on how to update the Bluetooth driver.
  • Page 59 7) Click “Intel Driver & Support Assistant”. 8) The Intel support page will automatically open on your browser and a list of drivers and software updates that can be used on your PC will be displayed. 9) Download “Intel® Wireless Bluetooth” from the list if available. * The display on your browser may change depending on your PC environment and support page updates.
  • Page 60 ⑧ When using a USB Bluetooth receiver, change the connection on the receiver. Depending on the specifications of the PC's USB port or USB hub, other USB 3.0 devices used simultaneously with the trackball may generate noise that can worsen the 2.4 GHz signal in the vicinity.
  • Page 61: Intellectual Property Rights

    Ventura is a trademark of Apple Inc., registered in the U.S. and other countries and regions. Chrome is a trademark or registered trademark of Google LLC. The Bluetooth® wordmark and logos are registered trademarks owned by Bluetooth SIG, Inc. and any use of such marks by ELECOM CO., LTD. is under license.
  • Page 62: Support Information

    Specifications and external appearance of this product may be changed without prior notice for the purpose of product improvement. ELECOM is not responsible for any damages to, or failure of other devices caused by using this product. The images are for illustration purposes only and may differ from your actual product.
  • Page 63 Las especificaciones y la apariencia externa de este producto pueden modificarse sin previo aviso con el fin de mejorar el producto. ELECOM no se hace responsable de los daños o fallos de otros dispositivos causados por el uso de este producto.
  • Page 64 As especificações e aparência externa deste produto podem ser alteradas sem aviso prévio para fins de melhoria do produto. A ELECOM não é responsável por quaisquer danos ou falhas de outros dispositivos causados pelo uso deste produto. As imagens são apenas para fins ilustrativos e podem diferir do produto real.
  • Page 65 일본 외 다른 국가에서 구입하는 고객은 문의 사항이 있는 경우 제품 구입 국가의 대리점에 연락하 십시오. ‘ELECOM CO., LTD.(일본)’는 일본 이외의 국가에서 구입 또는 사용 문의에 대한 고객 지원을 제공하지 않습니다. 또한 일본어 이외의 외국어는 지원되지 않습니다. 제품의 교환은 ELECOM 보증...

This manual is also suitable for:

M-it10brM-it11brM-it11brwhM-it11brbk