Sign In
Upload
Download
Table of Contents
Contents
Add to my manuals
Delete from my manuals
Share
URL of this page:
HTML Link:
Bookmark this page
Add
Manual will be automatically added to "My Manuals"
Print this page
×
Bookmark added
×
Added to my manuals
Manuals
Brands
Allied Telesis Manuals
Adapter
2711 Series
Installation and user manual
Allied Telesis 2711 Series Installation And User Manual
Fiber fast ethernet adapters
Hide thumbs
1
2
3
4
Table Of Contents
5
6
7
8
9
10
11
12
13
14
15
16
17
18
19
20
21
22
23
24
25
26
27
28
29
30
31
32
33
34
35
36
37
38
39
40
41
42
43
44
45
46
47
48
49
50
51
52
53
54
55
56
57
58
59
60
61
62
63
64
65
66
67
68
69
70
71
72
73
74
75
76
77
78
79
80
81
82
83
84
85
86
87
88
89
90
91
92
93
94
95
96
97
98
99
100
101
102
103
104
105
106
107
108
109
110
111
112
page
of
112
Go
/
112
Contents
Table of Contents
Troubleshooting
Bookmarks
Table of Contents
Table of Contents
Preface
Safety Symbols Used in this Document
Translated Safety Statements
Contacting Allied Telesis
Chapter 1: Overview
Description
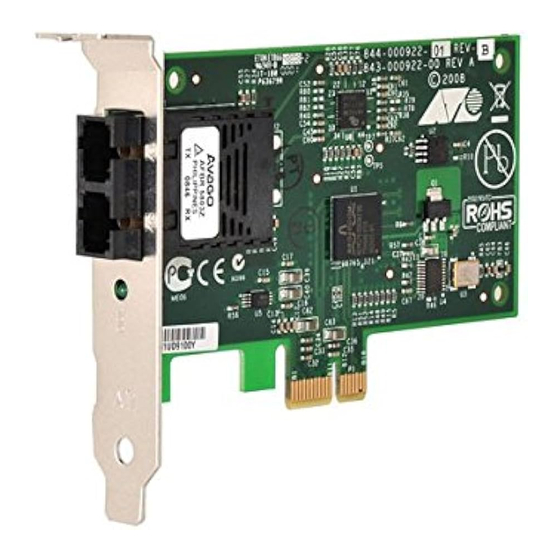
SC Fiber Optic Adapter
LC Fiber Optic Adapter
ST Fiber Optic Adapter
Led
Features
Supported Operating Systems
Windows Driver
Linux Driver
Accessing Documents
Allied Telesis Documents
Contents of Your Shipment
Warranty Registration
Chapter 2: Installing the Hardware
System Requirements
Reviewing Safety Precautions
Pre-Installation Checklist
Replacing the Bracket
Installing a Network Adapter
Connecting the Network Cables
Chapter 3: Installing the Driver Software for Windows Systems
Overview
Guidelines
Installing the Driver Using Device Manager
Updating the Driver Using Device Manager
Installing the Driver Using the Silent Installation Method
Downloading the Driver Software
Installing the Driver Software
Updating the Driver Software
Completing the Adapter Driver Installation
Installing the Software Driver in the Silence Mode
Installing the Driver Silently
Viewing Supported Dpinst Options
Chapter 4: Configuring the Ethernet Interface for Linux Systems
Overview
Configuring an Ethernet Interface on Linux Systems
Configuring an Ethernet Interface on Ubuntu
Configuring an Ethernet Interface on Red hat
Chapter 5: Modifying Advanced Properties
Overview
Guidelines
Accessing Advanced Properties
Qos
Az EEE
ARP Offload
EEE Control Policies
Ethernet@Wirespeed
Flow Control
Interrupt Moderation
Checksum Offload
Ipv4 Checksum Offload
Jumbo Mtu
Large Send Offload
Large Send Offload (Ipv4)
Large Send Offload V2 (Ipv4)
Large Send Offload V2 (Ipv6)
Locally Administered Address
Guidelines for Assigning a Locally Administered Address
Assigning the Locally Administered Address
Network Address
NS Offload
Priority & VLAN
Receive Side Scaling
Maximum Number of RSS Queues
RSS Queues
Speed & Duplex
TCP/UDP Checksum Offload (Ipv4)
TCP/UDP Checksum Offload (Ipv6)
Vlan ID
Wake up Capabilities
Wake on Magic Packet
Wake on Pattern Match
WOL Speed
Chapter 6: Uninstalling the Driver Software
Overview
Guidelines
Uninstalling the Driver Software Using Device Manager
Uninstalling the Driver Software Silently
Chapter 7: Troubleshooting
Checking the Port LED on the Adapter
Troubleshooting Checklist
Testing the Network Connectivity with the 2711 Network Adapter
Testing the 2711 Network Adapter from Another Device
Testing the 2711 Network Adapter from the Host Device
Linux
Appendix A: Specifications
Physical Specifications
Environmental Specifications
Power Specifications
Maximum Cabling Distances
Appendix B: Cleaning Fiber Optic Connectors
Overview
Guidelines
Cleaning Using a Cartridge-Type Cleaner
Cleaning Using a Swab
Advertisement
Quick Links
Download this manual
2711 Series
FIBER FAST ETHERNET ADAPTERS
2711FX/SC
2711FX/LC
2711FX/ST
Installation and User's Guide
613-000525 Rev. C
Table of
Contents
Previous
Page
Next
Page
1
2
3
4
5
Advertisement
Table of Contents
Troubleshooting
Chapter 7: Troubleshooting
99
Troubleshooting Checklist
101
Need help?
Do you have a question about the 2711 Series and is the answer not in the manual?
Ask a question
Questions and answers
Related Manuals for Allied Telesis 2711 Series
Adapter Allied Telesis 2914 Series Installation And User Manual
Fiber network adapters with wake on lan (wol) (114 pages)
Adapter Allied Telesis AT-2914SX/LC-001 Installation And User Manual
Fiber network adapters with wake on lan wol (108 pages)
Adapter Allied Telesis 29M2/SP-BA Installation And User Manual
Fiber network adapter with an sfp port for dell optiplex 50x0; dell optiplex 70x0 (90 pages)
Adapter Allied Telesis 2711FX/SC Installation And User Manual
Fiber fast ethernet adapters (112 pages)
Adapter Allied Telesis 2711FX/LC Installation And User Manual
Fiber fast ethernet adapters (112 pages)
Adapter Allied Telesis 2711FX/ST Installation And User Manual
Fiber fast ethernet adapters (112 pages)
Adapter Allied Telesis AT-2916SX User Manual
Advanced control suite gigabit ethernet network adapters (74 pages)
Adapter Allied Telesis AT-2916LX10/LC-901 Installation Manual
Gigabit ethernet network adapters (140 pages)
Adapter Allied Telesis AT-2700FX Installation Manual
Ethernet network adapters (238 pages)
Adapter Allied Telesis AT-2701FXa/SC Installation & User Manual
At-2701 series fiber fast ethernet adapters (94 pages)
Adapter Allied Telesis AT-WCU200G User Manual
Usb 2.0 54mbps wireless adapter (60 pages)
Adapter Allied Telesis AT-2712FX Installation And User Manual
Secure ethernet network adapters (100 pages)
Adapter Allied Telesis AT-2711FX User Manual
Network adapters, linux user's guide (18 pages)
Adapter Allied Telesis AT-2911GP/SXLC Installation And User Manual
At-2911gp series gigabit fiber ethernet poe+ adapters (152 pages)
Adapter Allied Telesis AT-2916SX Installation And User Manual
At-2900 series gigabit ethernet network interface cards (142 pages)
Adapter Allied Telesis AT-1500T Installation Manual
Ethernet network adapter for isa bus computers and ieee 802.3 compliant lans (44 pages)
This manual is also suitable for:
2711fx/sc
2711fx/lc
2711fx/st
Table of Contents
Print
Rename the bookmark
Delete bookmark?
Delete from my manuals?
Login
Sign In
OR
Sign in with Facebook
Sign in with Google
Upload manual
Upload from disk
Upload from URL


Need help?
Do you have a question about the 2711 Series and is the answer not in the manual?
Questions and answers