Table of Contents
Advertisement
Quick Links
Model Number:
Serial Number:
Date of Installation:
Baxter Mfg, a Division of ITW FEG, LLC • 19220 State Route 162 East • Orting, WA 98360-9236
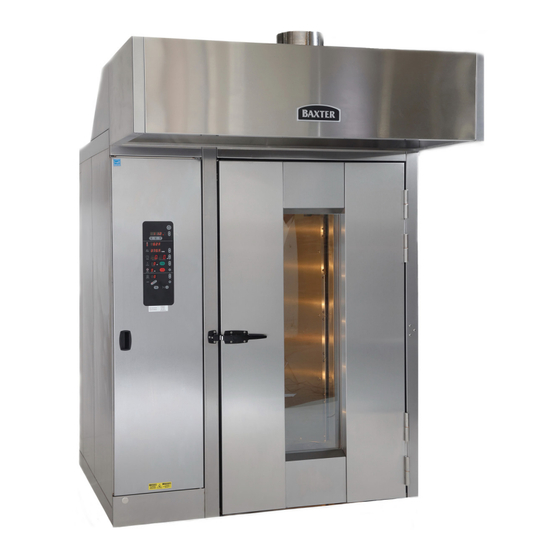
CS500 ROTATING RACK OVEN
WITH ADVANCED ELECTRONIC
___________
___________
___________
Phone: (360) 893-5554 • Fax: (360) 893-1337
www.baxtermfg.com
Operator
OVEN CONTROL
CS500G1
CS500G2
Manual
CS500G2
GAS
GAS
FORM 36825 (May 2024)
Advertisement
Table of Contents

Related Manuals for baxter CS500


Summary of Contents for baxter CS500
- Page 1 ___________ CS500G1 CS500G2 Serial Number: ___________ Date of Installation: ___________ Baxter Mfg, a Division of ITW FEG, LLC • 19220 State Route 162 East • Orting, WA 98360-9236 Phone: (360) 893-5554 • Fax: (360) 893-1337 FORM 36825 (May 2024) www.baxtermfg.com...
- Page 2 OPERATE THIS DEVICE. KEEP AREA AROUND OVEN CLEAR OF COMBUSTIBLES. DO NOT OBSTRUCT COMBUSTION AND VENTILATION OPENINGS ON THE OVEN. DO NOT SPRAY AEROSOLS IN THE VICINITY OF THIS APPLIANCE WHILE IT IS IN OPERATION. © BAXTER MFG., 2024 – 2 –...
-
Page 3: Table Of Contents
GENERAL ............................. 4 INSTALLATION ............................ 4 Warranty ............................4 OPERATION ............................5 CS500 Digital Controls ........................5 Safety Alarm (Standard Feature, No Parameter Setup Required) ..........10 Pulse or Food Service Steam Mode ....................11 Programming the Oven ......................... 12 Customized Operation ........................17 Energy Saving Mode ........................ -
Page 4: General
RETAIN THIS MANUAL FOR FUTURE REFERENCE GENERAL The Baxter CS500 Rack Oven accommodates a roll-in rack. It is equipped with an electronic oven control for baking, roasting and/or steaming applications. A mechanism in the oven ceiling picks up and rotates the rack during the baking or cook cycle. -
Page 5: Operation
OPERATION CS500 DIGITAL CONTROLS – 5 –... - Page 6 Control Guide - Advanced BUTTON ACTION DISPLAY Press to turn the oven ON or OFF. Control panel displays are lit when the oven is on. Oven defaults to Program 0. If oven is turned OFF and back ON within 2 minutes, the oven will come up in the last mode and oven setting.
- Page 7 STEP BUTTON ACTION DISPLAY Press to open or close the vent. The indicator light next to the VENT button is lit when AUTO the vent cycle is enabled. TIME Use to cool down the oven. To enable this feature, set a temperature at least 25°F (14°C) cooler than the oven temperature.
- Page 8 Oven Preheat For best results, the oven must be preheated to bake temperature before baking begins. 1. The door must be closed for oven to heat. The rack carrier will lift and rotate only during timed bake. NOTE: The rack carrier will be in the unload position from the last bake. If the rack carrier was moved out of the home position, the rack carrier will lift and turn to the unload position when the door is opened.
- Page 9 Loading Procedure 1. Type B and C rack carriers are equipped with stops on both ends. For B lifts, ensure stop flap is in the up position to load the rack on the rack carrier. For C lifts, push rack stop to the left after rack is loaded.
-
Page 10: Safety Alarm (Standard Feature, No Parameter Setup Required)
570 degrees. Disconnect the electrical power to the machine and follow lockout / tagout procedures. There may be multiple circuits. Be sure all circuits are disconnected. Shut off gas. Contact your authorized Baxter service office. – 10 –... -
Page 11: Pulse Or Food Service Steam Mode
PULSE OR FOOD SERVICE STEAM MODE This mode can be used to provide steam on a periodic basis throughout operation. When this mode is enabled, the STEAM TIMER controls how many seconds of steam are provided to the oven, while a value entered in the Parameter 14 (Steam timer mode) setup controls how frequently the steam is operated. -
Page 12: Programming The Oven
PROGRAMMING THE OVEN Single Step Recipes The recipe menu stores up to 99 recipes that can be recalled by number when needed. A recipe is a set of baking instructions (temperature, time & steam time, vent and fan delay settings) that the operator defines for any baking operation. - Page 13 Multi-Step Recipes Additional steps can be entered within the original recipe number. Up to four individual steps can be added by the operator, each with different bake settings. For example, Recipe 1 has temperature, time, steam, and fan delay time settings set by the operator. This is known as Step 1.
- Page 14 Editing the Recipes 1. With the oven in the OFF mode, press and hold the UP arrow in the STEPS section. While pressing and holding the UP arrow, press the POWER ON OFF button for 3 seconds. When all the displays light, the oven is in the recipe mode.
- Page 15 Clear All Recipes 1. Switch the oven into the off mode. 2. Press and hold the RECIPE DOWN button then press and hold the POWER ON OFF button until you hear a single short beep, followed by a longer beep. This long beep indicates that the recipes have been cleared.
- Page 16 Using the Recipes 1. With the oven on, press the RECIPE UP or DOWN arrows to select the desired recipe number (1- 99). The TEMP, TIMER, STEAM, and FAN DELAY settings are displayed. 2. Confirm that the oven is at the set temperature. 3.
-
Page 17: Customized Operation
CUSTOMIZED OPERATION The CS500 oven controls have the capability of being customized to fit your own personal needs using the setup mode. Before entering the setup mode, read all the instructions to make sure you are completely clear on what to do. - Page 18 Setup Guide SETUP SETUP ITEM DISPLAY NUMBER Network Number RS485 network number, default is 1. Maximum Temperature This is the maximum temperature at which the oven can be set. Range is Setpoint 50°F to 525°F (10°C to 275°C). Default is 525°F. Preheat Temperature This is the default temperature setpoint when the oven is first turned on (Program 0).
- Page 19 STDY = steady Test Mode Password Test mode password, range 0x0000 to 0xFFFF. This is used by the Baxter Oven Manager application and is required to put the oven into test mode. The default password value is a ‘0000’. While editing the parameter, pressing the time down key sets the password to the default, pressing the time up key sets the password to a random value.
- Page 20 SETUP SETUP ITEM DISPLAY NUMBER Recipe Quick Time Mode 0 = Disabled. Recipes 20 to 39 shall use minutes. [default] 1 = Enabled. Recipes 20-39 shall use minutes and seconds. Show Total Time Mode 0 = Disabled. Show individual step times. [default] 1 = Enabled.
-
Page 21: Energy Saving Mode
ENERGY SAVING MODE Set back Set back mode provides the ability to dial down the set temperature of the oven automatically when it is not being used, but needs to be in a standby mode for baking. When the oven is switched to set back temperature, the heating system remains in standby mode until it reaches that temperature. -
Page 22: Shutdown
SHUTDOWN NOTE: Before restarting a gas oven, the power switch and the gas burner valve must be off for a minimum of 5 minutes. 1. Remove all remaining product. NOTE: Vent can be used to evacuate steam from oven. 2. Allow the oven to cool, then press the POWER ON/OFF button. If desired, quicker cool down time can be accomplished through the use of the COOL DOWN button. -
Page 23: Troubleshooting
3. Make sure the gas shutoff valve and gas valve are in the ON position. 4. Press the ON button to turn the oven back on. If the above suggestions do not remedy the problem, contact a Baxter authorized service office. ALARMS AND DISPLAY MESSAGES... -
Page 24: Cleaning
CLEANING Disconnect the electrical power to the machine and follow lockout / tagout procedures. There may be multiple circuits. Be sure all circuits are disconnected. The rack oven and its parts are hot. Use care when operating, servicing or cleaning the rack oven. -
Page 25: Maintenance
Owner Preventive Maintenance Procedure. PREVENTIVE MAINTENANCE The CS500 Rack Oven must be kept on a regular preventive maintenance schedule. Ovens require specific preventive maintenance based on usage and environmental factors. The failure to have the oven properly maintained by following recommended preventive maintenance procedures may result in higher repair costs, shortened equipment life, or unsafe operating conditions. -
Page 26: Owner Preventive Maintenance Procedure
OWNER PREVENTIVE MAINTENANCE PROCEDURE INTRODUCTION This customer preventive maintenance (PM) section includes procedures to inspect for proper operation and cleaning of components. Owner Preventive Maintenance Procedures are written for gas ovens. They can also be used for electric ovens by omitting the steps that refer to components found only on gas ovens. To maintain the safety and performance of bakery ovens a program of scheduled periodic maintenance must be implemented. - Page 27 Clean and Vacuum Components and Control/Burner Compartment Area (Gas Only) 1. Clean the control/burner compartment (Fig. 2) area of dust and/or lint accumulation. 2. Vacuum the control/burner compartment floor of dust and/or lint accumulation. 3. Gain access to the top of oven and clean dust that may have accumulated on top of circulation blower motor (Fig.
- Page 28 Fig. 6 door, door will need to be adjusted. If door sweep needs replacement or adjustment, contact your local Baxter authorized service office. 3. Check interior door release (Fig. 7) for proper operation. 4. Check door switch for proper operation.
- Page 29 (Fig. 13) when button is pressed. Fig. 11 C. Check that vent gasket is intact. Fig. 12 Fig. 13 Visually Inspect Electrical Connections 1. Inspect all wiring connections for discoloration. If discoloration is visible, contact your local Baxter authorized service office. – 29 –...
- Page 30 A. Turn on main gas supply and set oven control to call for heat and make sure convection fan is running. B. Once flame is established, disconnect tubing from hood pressure switch hose. Burner flame should go out. C. Reconnect tubing. Burner should establish a flame. If not, contact your local Baxter authorized service office. – 30 –...
- Page 31 B. Once flame is established, disconnect tubing from draft inducer pressure switch. Burner flame should go out. C. Reconnect tubing. Burner should establish a flame. If not, contact your local Baxter authorized service office. Verify Operation of Steam 1. Check steam system for proper operation.
- Page 32 t f i l i l b y t i l l a y f i t i n y f i √ = f i t – 32 – FORM 36825 (May 2024) PRINTED IN U.S.A.
Need help?
Do you have a question about the CS500 and is the answer not in the manual?
Questions and answers