Table of Contents
Advertisement
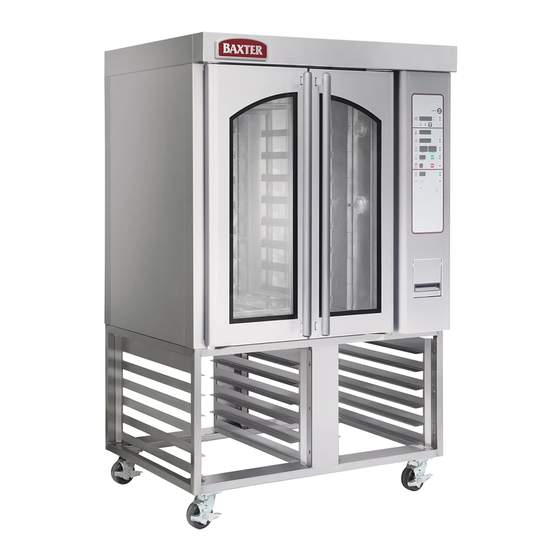
OV310G MODEL SHOWN
This Manual is prepared for the use of trained Baxter Service
Technicians and should not be used by those not properly
qualified.
This manual is not intended to be all encompassing. If you have
not attended a Baxter Service School for this product, you should
read, in its entirety, the repair procedure you wish to perform to
determine if you have the necessary tools, instruments and skills
required to perform the procedure. Procedures for which you do
not have the necessary tools, instruments and skills should be
performed by a trained Baxter Service Technician.
The reproduction, transfer, sale or other use of this Manual,
without the express written consent of Baxter, is prohibited.
This manual has been provided to you by ITW Food Equipment
Group LLC ("ITW FEG") without charge and remains the property
of ITW FEG, and by accepting this manual you agree that you will
return it to ITW FEG promptly upon its request for such return at
any time in the future.
A product of Baxter MFG. Co., Inc
SERVICE MANUAL
OV310 Series Mini Rack Oven
Installation Instructions
OV310G
OV310E
- NOTICE -
19220 State Route 162 East Orting, WA 98360
ML-132515
ML-132516
F25422 Rev. B (0917)
Advertisement
Table of Contents

Related Manuals for baxter OV310 Series


Summary of Contents for baxter OV310 Series
-
Page 1: Installation Instructions
ML-132516 OV310G MODEL SHOWN - NOTICE - This Manual is prepared for the use of trained Baxter Service Technicians and should not be used by those not properly qualified. This manual is not intended to be all encompassing. If you have... -
Page 2: Table Of Contents
OV310 Series Mini Rack Oven Installation Instructions TABLE OF CONTENTS IMPORTANT FOR YOUR SAFETY ............... . . 3 IMPORTANT FOR YOUR SAFETY . -
Page 3: Important For Your Safety
OV310 Series Mini Rack Oven Installation Instructions - IMPORTANT FOR YOUR SAFETY IMPORTANT FOR YOUR SAFETY IMPORTANT FOR YOUR SAFETY THIS MANUAL HAS BEEN PREPARED FOR PERSONNEL QUALIFIED TO INSTALL GAS EQUIPMENT, WHO SHOULD PERFORM THE INITIAL FIELD START-UP AND ADJUSTMENTS OF THE EQUIPMENT COVERED... -
Page 4: Service Updates
OV310 Series Mini Rack Oven Installation Instructions - SERVICE UPDATES SERVICE UPDATES SERVICE UPDATES September 2017 • Added OV310/OV310 HIGH ALTITUDE CORRECTION CHART. F25422 Rev. B (0917) Page 4 of 16... -
Page 5: General
OV310 Series Mini Rack Oven Installation Instructions - GENERAL GENERAL within 30" of radiant heat or grease vapor source, a INTRODUCTION vent guard is required. A 1" to 4" back clearance is recommended for These instructions are for the OV310 Series Mini Rack plumbing rear drain connection. -
Page 6: Oven Mounted On Casters (Gas Ovens Only)
OV310 Series Mini Rack Oven Installation Instructions - GENERAL CAN/CGA-B149-2, Installation for Propane NOTE: Plumbing connections must comply with Burning Appliances and Equipment (latest applicable sanitary, safety and plumbing codes and edition). provide adequate backflow protection to comply with applicable federal, state and local codes. - Page 7 OV310 Series Mini Rack Oven Installation Instructions - GENERAL 8" DIA connection collar. Combustion vent can • Oven start-up must be performed by an be directly vented or indirectly (canopy hood) Authorized Servicer. outside. Direct venting requires draft diverter. All •...
-
Page 8: Installing Oven
OV310 Series Mini Rack Oven Installation Instructions - INSTALLING OVEN INSTALLING OVEN This manual is written for OV310 Mini Rack Ovens. Before installing oven, compare parts to packing list to ensure all parts were received. Wait as long as possible before removing plastic protective covering from panels and doors. -
Page 9: Initial Start-Up
OV310 Series Mini Rack Oven Installation Instructions - INSTALLING OVEN INITIAL START-UP Disconnect the electrical power to the machine and follow lockout / tagout procedures. There may be multiple circuits. Be sure all circuits are disconnected. NOTE: Remove all protective plastic sheeting from oven surfaces and wipe down to remove all fingerprints, prior to heating oven. - Page 10 OV310 Series Mini Rack Oven Installation Instructions - INSTALLING OVEN NOTE: Refer to oven installation checklist and Verify oven rack rotates and baking complete during initial start-up. compartment circulation fan is turning. If not, door switches will need to be adjusted, as Verify flue draft (direct vent with gas oven only).
- Page 11 OV310 Series Mini Rack Oven Installation Instructions - INSTALLING OVEN Attach a manometer to the 1/8" NPT outlet With the oven doors closed loosen door pressure tap and one to the 1/8" NPT inlet switch screws and position door switch pressure tap on the gas valve and turn the bracket until door switch closes.
- Page 12 OV310 Series Mini Rack Oven Installation Instructions - INSTALLING OVEN Fig. 13 If a door will not remain closed loosen the (top and bottom) corresponding strikers and slide the strikers away from the door hinge point. Fig. 11 Ensure the top of the doors and the bottom of the doors are even.
- Page 13 OV310 Series Mini Rack Oven Installation Instructions - INSTALLING OVEN Fig. 15 Fig. 16 Rack stopping position adjustment. Initial heating of oven (All Ovens). If rack is adjusted without customer's typical bake Place a thermocouple 1/2" away from air product load weight on it, position rack louver and near the vertical center of right approximately 5°...
- Page 14 OV310 Series Mini Rack Oven Installation Instructions - INSTALLING OVEN Close loading doors and set the control baking temperature to 400F. (200C.) and bake timer for 60 minutes. Check the temperature reading on the thermocouple meter when the at the exact time the heat light on the controller goes out.
-
Page 15: Ov310/Ov310 High Altitude Correction Chart
OV310 Series Mini Rack Oven Installation Instructions - INSTALLING OVEN Fig. 19 OV310/OV310 HIGH ALTITUDE CORRECTION CHART ALTITUDE CORRECTION CHART OV310G OV310G Natural Gas Propane Gas Orifice #52 Orifice #60 ELEVATION IN FEET Orifice Diameter 0.0635 Orifice Diameter 0.0400 Manifold Pressure... -
Page 16: Final Checks
OV310 Series Mini Rack Oven Installation Instructions - INSTALLING OVEN ALTITUDE CORRECTION CHART OV310G OV310G Natural Gas Propane Gas Orifice #54 Orifice #65 ELEVATION IN FEET Orifice Diameter 0.0550 Orifice Diameter 0.0350 Manifold Pressure Manifold Pressure Oven Rating BTU/Hr Oven Rating BTU/Hr "W.C.
Need help?
Do you have a question about the OV310 Series and is the answer not in the manual?
Questions and answers