Table of Contents
Advertisement
Quick Links
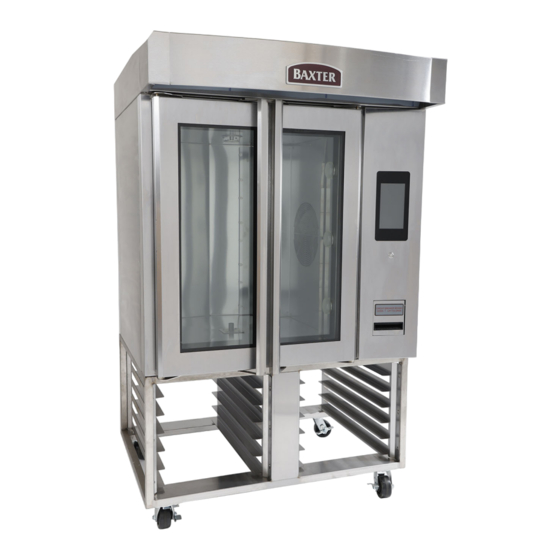
OV320G & OV320E MINI ROTATING RACK
OVENS WITH SMART TOUCH
Model Number:
Serial Number:
Date of Installation:
Baxter Mfg, a Division of ITW FEG, LLC • 19220 State Route 162 East • Orting, WA 98360-9236
___________
___________
___________
Phone: (360) 893-5554 • Fax: (360) 893-1337
www.baxtermfg.com
Operator
Manual
ML-132592
OV320G
ML-132582
OV320E
CONTROL
TM
FORM 36822 Rev. B (November 2023)
Advertisement
Table of Contents

Related Manuals for baxter OV320G


Summary of Contents for baxter OV320G
- Page 1 ___________ Serial Number: ___________ ___________ Date of Installation: Baxter Mfg, a Division of ITW FEG, LLC • 19220 State Route 162 East • Orting, WA 98360-9236 Phone: (360) 893-5554 • Fax: (360) 893-1337 FORM 36822 Rev. B (November 2023) www.baxtermfg.com...
- Page 2 OPERATE THIS DEVICE. KEEP AREA AROUND OVEN CLEAR OF COMBUSTIBLES. DO NOT OBSTRUCT COMBUSTION AND VENTILATION OPENINGS ON THE OVEN. DO NOT SPRAY AEROSOLS IN THE VICINITY OF THIS APPLIANCE WHILE IT IS IN OPERATION. © BAXTER MFG., 2023 – 2 –...
-
Page 3: Table Of Contents
TABLE OF CONTENTS GENERAL ............................. 5 INSTALLATION ............................ 5 Warranty ............................5 OPERATION ............................6 Basic Operation ..........................6 Operating Modes ..........................7 Auto Mode ........................... 7 Manual Mode ..........................7 Smart™ Touch Toolbox ......................7 Display Screen Buttons ........................8 Auto Mode Buttons ........................ - Page 4 MAINTENANCE ..........................28 General ............................28 As Needed ..........................28 Daily ............................28 Weekly ............................28 Bi-Monthly ..........................28 Preventive Maintenance ......................28 Service and Parts Information ....................... 28 Removing the Rack ........................29 To remove rack from oven ......................29 OWNER PREVENTIVE MAINTENANCE PROCEDURES .............
-
Page 5: General
RETAIN THIS MANUAL FOR FUTURE REFERENCE GENERAL Models OV320G (Gas) and OV320E (Electric) Mini Rotating Rack Ovens feature the choice of four rack configurations: • Eight 18" x 26" (45.7 cm x 66 cm) pan capacity rack with 4" (10.2 cm) slide spacing •... -
Page 6: Operation
OPERATION BASIC OPERATION For best results, the oven must be preheated to bake temperature before baking begins. 1. The doors must be closed for oven to heat. The rack will rotate only during timed bake. NOTE: The rack will be in the unload position from the last bake. If the rack was moved out of the home position, the rack will turn to the unload position when the doors are opened. -
Page 7: Operating Modes
Manual, Data Exchange, and Client Parameters. Fig. 1 Fig. 2 NOTE: The Smart Touch control can also be adjusted to operate in Classic Manual Mode (Fig. 4). This mode emulates the traditional Baxter keypad control. Fig. 3 Fig. 4 – 7 –... -
Page 8: Display Screen Buttons
Auto Mode Buttons BUTTON NAME ACTION Shows preset Baxter recipes. These can be copied to My Recipes Baxter Recipes and then modified. Location of customer recipes. Recipes can be copied, created, My Recipes modified, or deleted here. -
Page 9: Manual Mode Buttons
BUTTON NAME ACTION Stop Touch Stop to end a bake/cook cycle in process. Touch end to finish a bake/cook cycle. NOTE: After bake/cook time ends, touch time display to add time using the keypad. Manual Mode Buttons BUTTON NAME ACTION Shows set and current temperature. -
Page 10: Classic Manual Mode Display And Buttons
BUTTON NAME ACTION Touch Start to initiate a bake/cook cycle and all parameters. Oven status will display. Start Green Start button means oven is preheated. Yellow Start button means oven is preheating. Stop Touch Stop to end a bake/cook cycle in process. Touch End to finish a bake/cook cycle. -
Page 11: Toolbox Buttons
Default Password = 0000. Touch to enter Client Parameters screen. Client Parameters Default Password = 0000. Installation For use by Baxter authorized servicers only. Parameters For use by Baxter authorized servicers only. Technical Parameters This area of the display shows: •... -
Page 12: Using Auto Mode
USING AUTO MODE The Auto Mode guides the user through all the oven features for recipe setup. A recipe is a set of baking/ cooking instructions (temperature, bake, steam, and fan delay settings) that the operator defines for any baking/cooking operation. Recipes created in the Manual Mode CAN be saved. Use Auto Mode when creating recipes to save and for multi-step recipes. - Page 13 6. Touch the Time window (Fig. 9) to set the desired bake/cook time for this step of the recipe. A keypad should be displayed. 7. Enter the desired bake/cook time on the keypad (Fig. 10). Touch the green check mark when finished. The recipe window should appear with the set bake/cook time.
- Page 14 10. Touch the Steam button (Fig. 13) and enter the steam time using the keypad. The recipe window should appear with the set steam time. 11. Touch the Add button (Fig. 13) to add another step after the current step to the recipe. The recipe window should be displayed with a step 2 window (Fig.
- Page 15 16. Touch the Photo button (Fig. 17) to add an image from the Photos Library to the recipe. The Photos Library window should be displayed. 17. Touch the Photos Library button (Fig. 18). Available photos should be displayed. Fig. 17 Fig.
- Page 16 20. Touch the Summary button to review all steps (Fig. 21). The Summary Review window will appear. NOTE: The Summary Review window will display all settings for each step in a recipe and the total elapsed time and remaining time in a recipe. 21.
-
Page 17: Using A Recipe
Using a Recipe Preset recipes are available under the Baxter button and custom created recipes are available under My Recipes. Recipes can be viewed by photos or by a list. NOTE: Recipes can be modified before starting the bake/cook cycle. Consider whether the recipe should be copied first before modifying. -
Page 18: Manual Mode
• Classic Mode - This mode emulates the traditional Baxter controls for ovens. The user will have access to manually enter temperature, time, steam, fan delay, and vent options, and stop bake/ cook cycle in process. - Page 19 4. Touch the Timer Setting Display (Fig. 31) to set the desired bake/ cook time. A keypad should be displayed. 5. Enter the desired bake/cook time on the keypad (Fig. 32). Touch the green check mark when finished. The Manual Mode screen should appear with the set bake/cook time.
-
Page 20: Using Classic Manual Mode
USING SMART TOUCH TOOLBOX MODE This Smart Touch Toolbox Mode (Fig. 36) is used to access the User Manual, Data Exchange, and Client Parameters Screens. The Installation Parameters and Technical Parameters are for use by Baxter authorized servicers only. User Manual Screen The User Manual Screen (Fig. -
Page 21: Data Exchange Screen
Data Exchange Screen The Data Exchange Screen is used to allow the user to import and export various data types via Universal Serial Bus (USB) drive. Touch the button on the screen for the data parameter to import, export, or view. Insert the USB drive before touching any buttons. -
Page 22: Parameters Table
Parameters Table RANGE or PARAMETER DESCRIPTION DEFAULT VALUE Language Language selection English (En) English (En) Spanish (Esp) French (Fr) Brightness Adjust screen brightness 100% 10 - 100% Sound level Sound level adjustment 0 - 100% No. of end of cooking beeps Adjust the number of beeps at the end of Infinite 1 -11... -
Page 23: Auto Off
Auto Off The Auto On/Auto Off times shown in Client parameters allow the user to set a useable time frame for the oven. If the oven is outside of these times, the oven will shut down automatically. NOTE: This feature can be disabled by setting both values to 12:00AM. Example #1: The default ON value of 12:00AM and OFF value of 10:00PM allows the oven to be used from 12am to 10pm. -
Page 24: Shutdown
SHUTDOWN The mini-rack oven and its parts are hot. Use care when operating, servicing or cleaning the oven. Hot air and steam are released from the oven interior when the loading door is opened. To avoid burns, open the door slowly and keep clear of the opening. NOTE: Before restarting a gas oven, the power switch and the gas burner valve must be off for a minimum of 5 minutes. -
Page 25: Troubleshooting
3. Make sure the gas shutoff valve and gas valve are in the ON position. 4. Press the ON button to turn the oven back on. If the above suggestions do not remedy the problem, contact a Baxter authorized service office. OTHER TROUBLESHOOTING TOPICS... - Page 26 COLOR CODE DESCRIPTION Action Green Close Loading Door Close door. If door is closed, contact a Baxter authorized servicer. Yellow Heating Error Manual reset high temperature limit tripped. Heat disabled. • Bake/cook cycle can continue but heat is disabled. Bake/cook time may need to be extended.
-
Page 27: Cleaning
CLEANING The mini-rack oven and its parts are hot. Use care when operating, servicing or cleaning the oven. Disconnect the electrical power to the machine and follow lockout / tagout procedures. • Allow the oven to cool. • Clean the outside of the oven daily with a clean, damp cloth. •... -
Page 28: Maintenance
MAINTENANCE The mini-rack oven and its parts are hot. Use care when operating, servicing or cleaning the oven. Disconnect the electrical power to the machine and follow lockout / tagout procedures. GENERAL As Needed • Inspect the area around the oven. The area must be free and clear from combustibles. There must be no obstructions to the air flow. -
Page 29: Removing The Rack
REMOVING THE RACK To remove rack from oven When oven doors are opened, rack will rotate and stop in the loading position. This is the same position for removing or reinstalling the rack. 1. Ensure that oven is cool before trying to remove the oven rack. 2. - Page 30 3. Lift up on bottom plate and remove from the four shoulder bolts. Remove bottom plate from oven cavity. See figure 48. Fig. 48 4. Lift up on rack the top plate of the rack has cleared the locator pins. Slide the oven rack toward yourself and out of baking chamber.
-
Page 31: Owner Preventive Maintenance Procedures
OWNER PREVENTIVE MAINTENANCE PROCEDURES INTRODUCTION This customer preventive maintenance (PM) section includes procedures to inspect for proper operation and cleaning of components. Owner Preventive Maintenance Procedures are written for gas ovens. They can also be used for electric ovens by omitting the steps that refer to components found only on gas ovens. Customer PMs should be conducted bi-monthly per OSHA Bakery Oven Inspection Standard 29 CFR 1910.263(l)(9)(ii). -
Page 32: Inspect Oven Lamps
Inspect Oven Lamps 1. Lamps should be on when oven is powered. 2. If not, replace lamps. Twist lamp cover (Fig. 50) to disengage from lamp sockets and remove from socket. 3. Reverse procedure to install new lamp. Clean and Vacuum Components and Burner Area 1. -
Page 33: Inspect Rack Lift And Rotation Assemblies
Inspect Rack Lift and Rotation Assemblies NOTE: Before performing rack inspection, observe condition of rack rotation belt. 1. Check rack rotation belt. Gain access to the top of oven and loosen the screws securing rack rotation assembly cover (Fig. 54). Lift cover from top of oven. -
Page 34: Inspect Cavity Vent
Inspect Cavity Vent 1. Check cavity vent for proper operation. Push VENT button on control panel to open vent and push again to close vent. Vent button is located in the lower right hand corner of the control panel area. Visually check that vent opens (Fig. -
Page 35: Verify Ignition Module Safety Lockout Functions (Gas Only)
Verify Ignition Module Safety Lockout Functions (Gas Only) 1. Verify ignition module safety lockout functions. Turn on the oven and close the doors. Turn off the gas supply to the oven. Set the oven control to call for heat and make sure convection fan is running. Remove screw securing the control panel door and swing the door open to access the burner compartment area. -
Page 36: Verify Operation Of Steam
2. Verify operation of draft inducer pressure switch. Turn incoming power off to oven. Remove screw securing control panel door and swing door open to access burner compartment area. Loosen hose clamp (Fig. 59) and remove vacuum tube from the vacuum switch. NOTE: Some ovens may have rectangular-shaped vacuum switches. - Page 37 – 37 –...
- Page 38 t f i l i l b y t i l l a y f i t i n y f i √ = f i t – 38 – FORM 36822 Rev. B (November 2023) PRINTED IN U.S.A.
Need help?
Do you have a question about the OV320G and is the answer not in the manual?
Questions and answers