Table of Contents
Advertisement
Quick Links
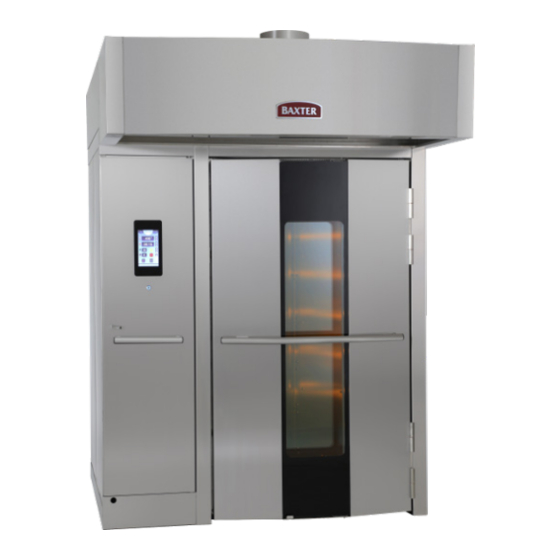
OV520 ROTATING RACK OVEN WITH
Model Number:
Serial Number:
Date of Installation:
Baxter Mfg, a Division of ITW FEG, LLC • 19220 State Route 162 East • Orting, WA 98360-9236
SMART TOUCH
___________
___________
___________
Phone: (360) 893-5554 • Fax: (360) 893-1337
www.baxtermfg.com
Operator
Manual
OV520G1
OV520G2
CONTROL
TM
FORM 36764 Rev. B (October 2020)
Advertisement
Table of Contents

Related Manuals for baxter OV520G1


Summary of Contents for baxter OV520G1
- Page 1 ___________ Serial Number: ___________ ___________ Date of Installation: Baxter Mfg, a Division of ITW FEG, LLC • 19220 State Route 162 East • Orting, WA 98360-9236 Phone: (360) 893-5554 • Fax: (360) 893-1337 FORM 36764 Rev. B (October 2020) www.baxtermfg.com...
- Page 2 OPERATE THIS DEVICE. KEEP AREA AROUND OVEN CLEAR OF COMBUSTIBLES. DO NOT OBSTRUCT COMBUSTION AND VENTILATION OPENINGS ON THE OVEN. DO NOT SPRAY AEROSOLS IN THE VICINITY OF THIS APPLIANCE WHILE IT IS IN OPERATION. © BAXTER MFG., 2020 – 2 –...
-
Page 3: Table Of Contents
TABLE OF CONTENTS GENERAL ..............................5 INSTALLATION ............................5 WARRANTY ............................5 OPERATION ............................5 Basic Operation ..........................5 Rack Loading ..........................6 Rack Unloading ..........................6 OPERATING MODES......................... 7 Auto Mode ............................7 Manual Mode ..........................7 Smart™ Touch Toolbox ......................... 7 DISPLAY SCREEN BUTTONS ...................... - Page 4 Weekly ............................27 Monthly ............................27 Bi-Monthly ............................ 27 Annually ............................27 PREVENTIVE MAINTENANCE ......................27 SERVICE AND PARTS INFORMATION ................... 27 OWNER PREVENTIVE MAINTENANCE PROCEDURE ..............28 INTRODUCTION ..........................28 Tools Used for Inspection Procedure ................... 28 PREVENTIVE MAINTENANCE PROCEDURE ................28 Inspect Oven Lamps ........................
-
Page 5: General
RETAIN THIS MANUAL FOR FUTURE REFERENCE GENERAL The Baxter OV520 Rack Oven accommodates a roll-in rack. It is equipped with the Smart Touch™ control for baking, roasting, and/or steaming applications. A mechanism in the oven ceiling picks up and rotates the rack during the baking/cooking cycle. -
Page 6: Rack Loading
3. The oven will preheat to the default preheat temperature. See Client Parameters for information about setting the default preheat temperature. See Auto Mode or Manual Mode for instructions on how to adjust the temperature. 4. For optimum steaming capability, allow 30 minutes after the oven has reached the set temperature for the steam system to charge. -
Page 7: Operating Modes
Manual, Data Exchange, and Client Parameters. NOTE: The Smart Touch control can also be adjusted Fig. 1 Fig. 2 to operate in Classic Manual Mode (Fig. 4). This mode emulates the traditional Baxter keypad control. Fig. 3 Fig. 4 – 7 –... -
Page 8: Display Screen Buttons
Auto Mode Buttons BUTTON NAME ACTION Shows preset Baxter recipes. These can be copied to My Recipes Baxter Recipes and then modified. Location of customer recipes. Recipes can be copied, created, My Recipes modified, or deleted here. -
Page 9: Manual Mode Buttons
BUTTON NAME ACTION Stop Touch Stop to end a bake/cook cycle in process. Touch end to finish a bake/cook cycle. NOTE: After bake/cook time ends, touch time display to add time using the keypad. Manual Mode Buttons BUTTON NAME ACTION Shows set and current temperature. -
Page 10: Classic Manual Mode Display And Buttons
BUTTON NAME ACTION Touch Start to initiate a bake/cook cycle and all parameters. Oven status will display. Start Green Start button means oven is preheated. Yellow Start button means oven is preheating. Stop Touch Stop to end a bake/cook cycle in process. Touch End to finish a bake/cook cycle. -
Page 11: Toolbox Buttons
Default Password = 0000. Touch to enter Client Parameters screen. Client Parameters Default Password = 0000. Installation For use by Baxter authorized servicers only. Parameters For use by Baxter authorized servicers only. Technical Parameters This area of the display shows: •... -
Page 12: Using Auto Mode
USING AUTO MODE The Auto Mode guides the user through all the oven features for recipe setup. A recipe is a set of baking/ cooking instructions (temperature, bake, steam, and fan delay settings) that the operator defines for any baking/cooking operation. Recipes created in the Manual Mode CAN be saved. Use Auto Mode when creating recipes to save and for multi-step recipes. - Page 13 6. Touch the Time window (Fig. 9) to set the desired bake/cook time for this step of the recipe. A keypad should be displayed. 7. Enter the desired bake/cook time on the keypad (Fig. 10). Touch the green check mark when finished. The recipe window should appear with the set bake/cook time.
- Page 14 10. Touch the Steam button (Fig. 13) and enter the steam time using the keypad. The recipe window should appear with the set steam time. 11. Touch the Add button (Fig. 13) to add another step after the current step to the recipe. The recipe window should be displayed with a step 2 window (Fig.
- Page 15 16. Touch the Photo button (Fig. 17) to add an image from the Photos Library to the recipe. The Photos Library window should be displayed. 17. Touch the Photos Library button (Fig. 18). Available photos should be displayed. Fig. 17 Fig.
- Page 16 20. Touch the Summary button to review all steps (Fig. 21). The Summary Review window will appear. NOTE: The Summary Review window will display all settings for each step in a recipe and the total elapsed time and remaining time in a recipe. 21.
-
Page 17: Using A Recipe
Using a Recipe Preset recipes are available under the Baxter button and custom created recipes are available under My Recipes. Recipes can be viewed by photos or by a list. NOTE: Recipes can be modified before starting the bake/cook cycle. -
Page 18: Manual Mode
• Classic Mode - This mode emulates the traditional Baxter controls for ovens. The user will have access to manually enter temperature, time, steam, fan delay, and vent options, and stop bake/ cook cycle in process. - Page 19 4. Touch the Timer Setting Display (Fig. 31) to set the desired bake/ cook time. A keypad should be displayed. 5. Enter the desired bake/cook time on the keypad (Fig. 32). Touch the green check mark when finished. The Manual Mode screen should appear with the set bake/cook time.
-
Page 20: Using Classic Manual Mode
USING SMART TOUCH TOOLBOX MODE This Smart Touch Toolbox Mode (Fig. 36) is used to access the User Manual, Data Exchange, and Client Parameters Screens. The Installation Parameters and Technical Parameters are for use by Baxter authorized servicers only. User Manual Screen The User Manual Screen (Fig. -
Page 21: Data Exchange Screen
Data Exchange Screen The Data Exchange Screen is used to allow the user to import and export various data types via Universal Serial Bus (USB) drive. Touch the button on the screen for the data parameter to import, export, or view. Insert the USB drive before touching any buttons. -
Page 22: Parameters Table
Parameters Table RANGE or PARAMETER DESCRIPTION DEFAULT VALUE Language Language selection English (En) English (En) Spanish (Esp) French (Fr) Brightness Adjust screen brightness 100% 10 - 100% Sound level Sound level adjustment 0 - 100% No. of end of cooking beeps Adjust the number of beeps at the end of Infinite 1 -11... -
Page 23: Shutdown
SHUTDOWN The rack oven and its parts are hot. Use care when operating, servicing, or cleaning the rack oven. Hot air and steam are released from the oven interior when the loading door is opened. To avoid burns, open the door slowly and keep clear of the opening. NOTE: Before restarting a gas oven, the power switch and the gas burner valve must be off for a minimum of 5 minutes. -
Page 24: Troubleshooting
3. Make sure the gas shutoff valve and gas valve are in the ON position. 4. Press the ON button to turn the oven back on. If the above suggestions do not remedy the problem, contact a Baxter authorized service office. OTHER TROUBLESHOOTING TOPICS... - Page 25 COLOR CODE DESCRIPTION Action Green Close Loading Door Close door. If door is closed, contact a Baxter authorized servicer. Yellow Heating Error Manual reset high temperature limit tripped. Heat disabled. • Bake/cook cycle can continue but heat is disabled. Bake/cook time may need to be extended.
-
Page 26: Cleaning
CLEANING Disconnect the electrical power to the machine and follow lockout / tagout procedures. There may be multiple circuits. Be sure all circuits are disconnected. The rack oven and its parts are hot. Use care when operating, servicing or, cleaning the rack oven. -
Page 27: Maintenance
It is the owner’s responsibility to make sure preventive maintenance is performed on the rack oven. This will ensure continued safe and reliable operation. Contact an authorized Baxter service office to provide this skilled service for you. -
Page 28: Owner Preventive Maintenance Procedure
OWNER PREVENTIVE MAINTENANCE PROCEDURE INTRODUCTION This customer PM section includes procedures to inspect for proper operation and cleaning of components. Owner Preventive Maintenance Procedures are written for gas ovens. They can also be used for electric ovens by omitting the steps that refer to components found only on gas ovens. To maintain the safety and performance of bakery ovens, a program of scheduled periodic maintenance must be implemented. -
Page 29: Clean And Vacuum Components And Control/Burner Compartment Area (Gas Only)
Clean and Vacuum Components and Control/Burner Compartment Area (Gas Only) 1. Clean the control/burner compartment (Fig. 45) area of dust and/or lint accumulation. 2. Vacuum the control/burner compartment floor of dust and/or lint accumulation. 3. Gain access to the top of oven and clean dust that may have accumulated on top of circulation blower motor (Fig. -
Page 30: Inspect Door Components
Inspect Door Components 1. Check loading door latch. A. Check door gasket for good condition. If door gasket needs replacement, contact your local Baxter authorized service office. B. Check that the loading door lock ramps are clean (Fig. 48) and rollers on the door move up and down and spin freely (Fig. - Page 31 E. Pull out on handle (Fig. 56) to open glass door. If glass door needs to be adjusted, contact your local Baxter authorized service office. Failure to contact service for glass door adjustment may result in the glass breaking.
-
Page 32: Inspect Air Louvers
C. Check that vent gasket is intact. Fig. 59 Vent Open Vent Closed Fig. 60 Fig. 61 Visually Inspect Electrical Connections 1. Inspect all wiring connections for discoloration. If discoloration is visible, contact your local Baxter authorized service office. – 32 –... -
Page 33: Verify Inition Module Safety Lockout Functions (Gas Only)
J. Observe LED light through hole in control box cover (Fig. 62). The ignition module should go into lockout after three trials for ignition. (See chart below.) K. If the proper results have been obtained, proceed to step 2; if not contact your local Baxter authorized service office. -
Page 34: Verify Operation Of Steam
Burner flame should go out. C. Reconnect tubing. Burner should establish a flame. If not, contact your local Baxter authorized service office. 3. Verify draft inducer pressure switch (Fig. 64) operation. A. Set oven control to call for heat and make sure convection fan is running. -
Page 35: Notes
NOTES – 35 –... - Page 36 t f i l i l b y t i l l a y f i t i n y f i √ = f i t – 36 – FORM 36764 Rev. B (October 2020) PRINTED IN U.S.A.
Need help?
Do you have a question about the OV520G1 and is the answer not in the manual?
Questions and answers