
Related Manuals for Ruijie Reyee RG-RAP62-OD


Summary of Contents for Ruijie Reyee RG-RAP62-OD
- Page 1 Ruijie Reyee RG-RAP62-OD Access Point Installation Guide Document version: 1.0 Date: 2024-06-26 Copyright © 2024 Ruijie Networks...
- Page 2 Ruijie Networks reserves the right to modify the content of the document without any notice or prompt. This manual is designed merely as a user guide. Ruijie Networks has tried its best to ensure the accuracy and reliability of the content when compiling this manual, but it does not guarantee that the content of the manual is completely free of errors or omissions, and all the information in this manual does not constitute any explicit or implicit warranties.
-
Page 3: Preface
Preface Audience This document is intended for: Network engineers Technical support and servicing engineers Network administrators Technical Support Official Website of Ruijie Reyee: https://reyee.ruijie.com Technical Support Website: https://reyee.ruijie.com/en-global/support Case Portal: https://www.ruijienetworks.com/support/caseportal Community: https://community.ruijienetworks.com ... - Page 4 Note An alert that contains additional or supplementary information that if not understood or followed will not lead to serious consequences. Specification An alert that contains a description of product or version support. Note This manual provides installation steps, troubleshooting, technical specifications, and usage guidelines for cables and connectors.
-
Page 5: Table Of Contents
Contents Preface ..............................I 1 Product Overview ..........................1 1.1 About the RG-RAP62-OD ......................1 1.2 Package Contents........................1 1.3 Product Appearance ........................2 1.3.1 Appearance ........................2 1.3.2 Port and Button ......................3 1.4 Technical Specifications ......................4 1.5 Power Supply Technical Specifications ..................6 1.6 Cooling ............................ - Page 6 3.2 Before You Begin ........................11 3.3 Safety Precautions During Installation ..................12 3.4 Installing the AP ........................12 3.4.1 Installing the AP ......................12 3.4.2 Mounting the AP on a Wall ................... 13 3.4.3 Mounting the AP on a Pole ..................15 3.5 Bundling Cables ........................
- Page 7 7.1.1 2500BASE-T/1000BASE-T/100BASE-TX ..............21 7.2 Cabling Recommendations...................... 22...
-
Page 8: Product Overview
Product Overview About the RG-RAP62-OD The RG-RAP62-OD 3000M dual-band gigabit wireless access point (AP) is launched by Ruijie Reyee for Wi-Fi coverage. Supporting the IEEE 802.11a/b/g/n/ac/ax protocols and the MIMO technology, this AP can operate in both 2.4 GHz and 5 GHz frequency bands, delivering a maximum data rate of 573 Mbps in the 2.4 GHz band and 2401 Mbps in the 5 GHz band. -
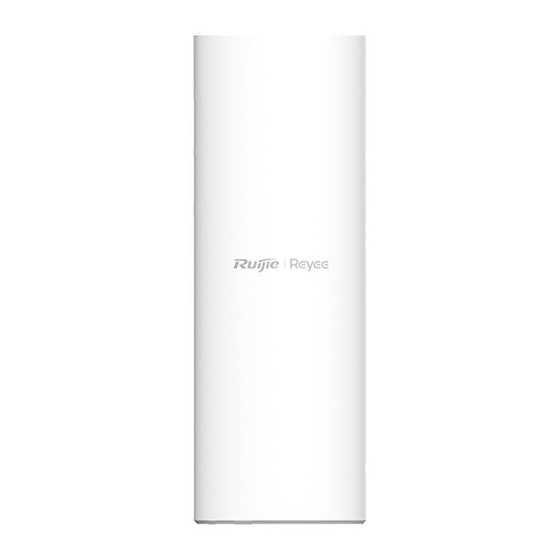
Page 9: Product Appearance
Installation Guide Product Overview Product Appearance 1.3.1 Appearance Figure 1-1 Appearance... -
Page 10: Port And Button
Installation Guide Product Overview 1.3.2 Port and Button Figure 1-2 Port and Button Table 1-2 Components on the Rear Panel Component Description LAN/PoE port 1 x 10/100/1000 BASE-T port with auto-negotiation, PoE-capable. Press and hold for less than 2 seconds: Restart the device. Reset button Press and hold for more than 5 seconds: Restore the device to factory settings. -
Page 11: Technical Specifications
Installation Guide Product Overview Status Description The device is recovering. The device is starting up. Note: Do not power off the device when the LED is in this state. Solid blue The device is operating properly and no alarm is generated. Technical Specifications Table 1-4 Specifications... - Page 12 Installation Guide Product Overview 11ax: 80 MHz: –82 dBm (MCS0), –57 dBm (MCS9), –52 dBm (MCS11) 11ax: 160 MHz: –75 dBm (MCS0), –55 dBm (MCS9), –50 dBm (MCS11) Max. Transmit Frequency bands and maximum Effective Isotropic Radiated Power (EIRP): Power Note Country-specific restrictions apply.
-
Page 13: Power Supply Technical Specifications
When a 24 V passive PoE adapter is used for power supply, ensure that the adapter supplies an output voltage of 24 V and a maximum output current of 1 A. Use a Ruijie-certified PoE adapter. The following table lists the relationship between the power supply mode, data rate, and power input. -
Page 14: Cooling
Installation Guide Product Overview IEEE 802.3af-compatiblepower supply 2976 mbps (Wi-Fi ≤ 13.5 W 2 x 2 2 x 2 performance and coverage degrade.) Cooling The RG-RAP62-OD access point adopts a fanless design. Therefore, a sufficient clearance must be maintained around the device for cooling. -
Page 15: Preparing For Installation
Installation Guide Preparing for Installation Preparing for Installation Safety Precautions Note To prevent device damage and physical injury, please read the safety precautions carefully in this chapter. The following safety precautions do not cover all possible hazardous situations. 2.1.1 General Safety Precautions ... -
Page 16: Installation Environment Requirements
Installation Guide Preparing for Installation Find the location of the emergency power supply switch in the room before installation. Cut off the power supply first in case of an accident. Be sure to make a careful check before shutting down the power supply. ... -
Page 17: Tools
Installation Guide Preparing for Installation Tools Table 2-2 Tools Common Phillips screwdriver, hex wrench, cables, Ethernet cable, cage nut, diagonal plier, cable ties Tools ESD gloves, wire stripper, crimping plier, RJ45 crimping plier, wire cutter, and waterproof Special Tools adhesive tape Meters Multimeter Relevant... -
Page 18: Installing The Ap
Installation Guide Installing the AP Installing the AP Caution Before installing the AP, make sure that you have carefully read the requirements described in Chapter 2. Installation Flowchart Before You Begin Carefully plan and arrange the installation position, networking mode, power supply, and cabling before installation. -
Page 19: Safety Precautions During Installation
Installation Guide Installing the AP Safety Precautions During Installation This AP can be mounted on a wall or a pole with a diameter ranging from 40 mm to 70 mm (1.57 in. to 2.76 in.). If the diameter of the pole is out of this range, please prepare a hose clamp that can hold the pole. The thickness of the hose clamp should be at least 2.5 mm (0.10 in.). -
Page 20: Mounting The Ap On A Wall
Installation Guide Installing the AP (2) Insert the Ethernet cable into the LAN/PoE port of the AP. (3) Install the rear cover. 3.4.2 Mounting the AP on a Wall Use the supplied mounting plate, wall anchors, and Philips pan head screws to mount the AP on a wall. (1) Drill two screw holes on the wall, with a distance of 54 ±... - Page 21 Installation Guide Installing the AP (2) Fix the mounting plate to the wall (pay attention to the orientation of the mounting plate). After adjusting the installation position, use two Philips pan head screws to secure the mounting plate to the wall. (3) Align the slots on the back of the AP with the square feet on the mounting plate, and slide the AP into the mounting plate slowly to ensure that the AP is securely fixed.
-
Page 22: Mounting The Ap On A Pole
Installation Guide Installing the AP 3.4.3 Mounting the AP on a Pole (1) Take out two cable ties and thread them through the square holes on the back of the AP. (2) Press the AP against on the pole, and tighten the cable ties. Bundling Cables 3.5.1 Precautions... -
Page 23: Checklist After Installation
Installation Guide Installing the AP (2) Secure the cables in the cable management trough of the mounting plate. (3) Route the cables under the AP and run them in straight line. Checklist After Installation (1) Checking the AP ○ Verify that the external power supply matches with the requirement of the AP. ○... -
Page 24: Debugging
Installation Guide Debugging Debugging Setting Up the Configuration Environment Power on the AP using a standard PoE or 24 V passive PoE adapter. Verify that the power cord is properly connected and compliant with safety requirements. Connect the AP to the PC using an Ethernet cable. Powering on the AP 4.2.1 Checklist Before Power-On... -
Page 25: Monitoring And Maintenance
Installation Guide Monitoring and Maintenance Monitoring and Maintenance Monitoring When RG-RAP62-OD is operating, you can monitor its status by observing the LEDs. Maintenance If the hardware is faulty, please contact the local distributor. -
Page 26: Troubleshooting
Check whether the LED is normal. Check whether cables are properly connected with ports. Contact Ruijie technical support to check whether hardware faults exist. Common Faults The status LED is off after the AP is powered on. - Page 27 Installation Guide Troubleshooting ○ Move the client device closer to the AP.
-
Page 28: Appendixes
Installation Guide Appendixes Appendixes Connectors and Media 7.1.1 2500BASE-T/1000BASE-T/100BASE-TX The 2500BASE-T/1000BASE-T/100BASE-TX port is a 100/1000/2500 Mbps port that supports auto MDI/MDIX Crossover. Compliant with the IEEE 802.3bz standard, 2500BASE-T requires a Category 6 (Cat 6) or Category 5e (Cat 5e) 100-ohm UTP or STP (recommended) cable with a maximum distance of 100 meters (328 feet). - Page 29 Installation Guide Appendixes Socket Plug 4, 5, 7, 8 Not Used Not Used Figure 7-2 show feasible connections of the straight-through and crossover twisted pairs for a 100BASE-TX port. Figure 7-2 100BASE-TX Twisted Pair Connection Cabling Recommendations During installation, route cable bundles upward or downward along the sides of the rack depending on the actual situation in the equipment room.
- Page 30 Installation Guide Appendixes Figure 7-3 Bundling up Cables (1) Cables of different types (such as power cords, signal cables, and grounding cables) should be separated in cabling and bundling. Mixed bundling is disallowed. When they are close to each other, you are advised to adopt crossover cabling.
- Page 31 Installation Guide Appendixes Figure 7-5 Bundling up Cables (3) Cables not to be assembled or remaining parts of cables should be folded and placed in a proper position of the rack or cable trough. The proper position refers to a position that does not affect device running or damage the device or cable.
- Page 32 Installation Guide Appendixes Power cords of the same type and in the same cabling direction should be bundled up into cable bunches, with cables in cable bunches clean and straight. Binding by using buckles should be performed according to Table 7-2. Table 7-2 Cable Bunch Cable Bunch Diameter...
Need help?
Do you have a question about the Reyee RG-RAP62-OD and is the answer not in the manual?
Questions and answers