Ruijie Reyee RG-RAP2260 Hardware Installation And Reference Manual
Hide thumbs
Also See for Reyee RG-RAP2260:
- Hardware installation and reference manual (26 pages) ,
- Configuration manual (219 pages) ,
- Cookbook (121 pages)

Related Manuals for Ruijie Reyee RG-RAP2260


Summary of Contents for Ruijie Reyee RG-RAP2260
- Page 1 Ruijie Reyee RG-RAP2260 Access Point Hardware Installation and Reference Guide Document Version: V1.0 Date: 2023.01.10 Copyright © 2023 Ruijie Networks...
- Page 2 Due to product version upgrades or other reasons, the content of this document will be updated from time to time. Ruijie Networks reserves the right to modify the content of the document without any notice or prompt. This manual is for reference only. Ruijie Networks endeavors to ensure content accuracy and will not shoulder...
-
Page 3: Preface
Intended Audience This document is intended for: Network engineers Technical support and servicing engineers Network administrators Technical Support The official website of Ruijie Reyee: https://www.ruijienetworks.com/products/reyee Technical Support Website: https://www.ruijienetworks.com/support Case Portal: https://caseportal.ruijienetworks.com Community: https://community.ruijienetworks.com... - Page 4 Note This manual provides the device installation steps, hardware troubleshooting, module technical specifications, and specifications and usage guidelines for cables and connectors. It is intended for the users who have some experience in installing and maintaining network hardware. At the same time, it is assumed that the users are already familiar with the related terms and concepts.
-
Page 5: Table Of Contents
Contents Preface ..................................I Product Overview .............................. 1 Product Appearance .......................... 1 1.1.1 Front Panel of the AP ......................... 1 1.1.2 Rear Panel of the AP ........................2 Technical Specifications ........................2 Power Supply ............................. 4 Cooling Solution ..........................4 Preparing for Installation ........................... - Page 6 Installing the Access Point ....................... 10 Removing the Access Point ......................12 Connecting Cables ........................... 12 Bundling Cables..........................12 Checking after Installation ....................... 13 Verifying Operating Status ..........................14 Setting up a Configuration Environment ..................14 Checklist ............................14 4.2.1 Checklist before Power-on .......................
-
Page 7: Product Overview
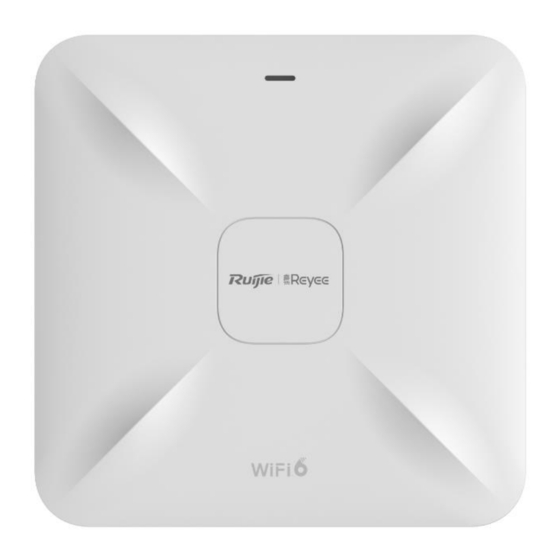
The RG-RAP2260 is a dual-radio ceiling-mounted wireless access point (AP) with one 2.5GE port, delivering an access rate of up to 3000 Mbps per device. The AP is designed by Ruijie Networks for indoor Wi-Fi coverage scenarios within medium- and large-sized areas. -
Page 8: Rear Panel Of The Ap
Hardware Installation and Reference Guide Product Overview 1.1.2 Rear Panel of the AP Figure 1-2 Rear Panel of RG-RAP2260 Table 1-2 Rear Panel Specifications Item Description Reset Button Press for less than 2s: The device is restarting. Press the Reset button for 2s to 5s: The device does not respond. Press for more than 5s: The device restores the factory settings. - Page 9 Hardware Installation and Reference Guide Product Overview 802.11a/n/ac/ax: 5.150 GHz to 5.350 GHz, 5.470 GHz to 5.725 GHz , 5.725 GHz to 5.850 GHz Antenna Type 2.4 GHz, two spatial streams, 2 x 2 MIMO 5 GHz, two spatial streams, 2 x 2 MIMO Max Throughput 2.4 GHz: up to 574 Mbps 5 GHz: up to 2402 Mbps...
-
Page 10: Power Supply
The RG-RAP2260 AP can be powered either with a power adapter or through Power over Ethernet (PoE). Use DC power adapters with specifications recommended by Ruijie. The power adapter is customer-supplied. If the AP adopts PoE power supply, connect the LAN1/2.5G/PoE port on the AP to the PoE-capable port on a switch or a PoE device with an Ethernet cable. -
Page 11: Preparing For Installation
Hardware Installation and Reference Guide Preparing for Installation 2 Preparing for Installation 2.1 Safety Precautions To avoid device damage and physical injury, please read the safety precautions carefully before installing the device. The following safety precautions may not cover all possible dangers. 2.2 Installation Precautions ... -
Page 12: Installation Environment Requirements
Hardware Installation and Reference Guide Preparing for Installation even fatal damages to humans and devices. Direct or indirect contact with a wet object (or your finger) on the high voltage and power line can be fatal. 2.5 Installation Environment Requirements The device must be installed indoors. -
Page 13: Power Supply Requirements
PoE+ injector: Compliant with IEEE 802.3at The DC input power should be greater than the power actually consumed by the system. Use DC power adapters with specifications recommended by Ruijie. Please use Ruijie certified PoE injectors. 2.5.6 EMI Requirements ... -
Page 14: Tools
Hardware Installation and Reference Guide Preparing for Installation 2.6 Tools Common Tools Phillips screwdrivers, power cords, Ethernet cables, fastening bolts, diagonal pliers, and binding straps Special Tools Wire stripper, crimping pliers, crystal connector crimping pliers, and wire cutter Meter Multimeter, bit error rate tester (BERT) The device is delivered without a tool kit. -
Page 15: Installing The Access Point
Hardware Installation and Reference Guide Installing the Access Point 3 Installing the Access Point The RG-RAP2260 series must be fixed and installed indoors. Before installing the AP, make sure you have carefully read the requirements described in Chapter 2. 3.1 Installation Procedure 3.2 Before You Begin Carefully plan and arrange the installation position, networking mode, power supply and cabling before installation. -
Page 16: Installing The Access Point
Hardware Installation and Reference Guide Installing the Access Point Cut off the power switch before cleaning the device. Do not wipe the device with a damp cloth. Do not wash the device with liquid. Do not open the enclosure when the AP is working. ... - Page 17 Hardware Installation and Reference Guide Installing the Access Point Connect the Ethernet cable to the LAN port on the rear panel of the AP (The LAN1/2.5G/PoE port is PoE-capable). Figure 3-2 Connecting the Ethernet Cable to the LAN Port Align the square feet on the rear of the AP to the mounting holes on the bracket. Slide the AP into the holes until it clicks into place.
-
Page 18: Removing The Access Point
Hardware Installation and Reference Guide Installing the Access Point Install the Ethernet cables before securing the AP on the bracket. The AP can be installed in any of four directions on the mounting bracket depending on how you route the Ethernet cable. The square feet should fit easily into the mounting slots. -
Page 19: Checking After Installation
Hardware Installation and Reference Guide Installing the Access Point (3) Bundle the twisted pairs closely along the bottom of the device and in a straight line wherever possible. 3.8 Checking after Installation Checking Cable Connection Make sure the UTP/STP cable matches with the interface type. ... -
Page 20: Verifying Operating Status
Hardware Installation and Reference Guide Verifying Operating Status 4 Verifying Operating Status 4.1 Setting up a Configuration Environment Use a power adapter or PoE to power on the AP. Verify that the power supply is properly connected to the AP and compliant with safety requirements. ... -
Page 21: Monitoring And Maintenance
Hardware Installation and Reference Guide Monitoring and Maintenance 5 Monitoring and Maintenance 5.1 Monitoring When RG-RAP2260 is operating, you can monitor its status by observing the LED. 5.2 Hardware Maintenance If the hardware is faulty, please contact the technical support personnel of Ruijie Networks. -
Page 22: Troubleshooting
Check the device installation Check the power connection Check the LEDs on the device Check the cable connection Contact Technical Support of Ruijie Networks 6.2 Common Troubleshooting Procedures 6.2.1 The LED does not light up after the AP is powered on ... - Page 23 Hardware Installation and Reference Guide Troubleshooting (2) Verify that the cables are properly connected. (3) Verify that the AP is correctly configured. (4) Move the client to adjust the distance between the client and the AP.
-
Page 24: Appendix
Hardware Installation and Reference Guide Appendix 7 Appendix 7.1 Appendix A Connectors and Media 2.5GBASE-T/1000BASE-T/100BASE-TX/10Base-T The 2.5GBASE-T/1000BASE-T/100BASE-TX/10BASE-T is a 10/100/1000Mbps auto-negotiation port that supports auto MDI/MDIX. Compliant with IEEE 802.3bz, 2.5GBASE-T requires 100-ohm CAT5e UTP or STP (STP is recommended) with a maximum distance of 100 meters (328 feet). - Page 25 Hardware Installation and Reference Guide Appendix Figure 7-3 shows wiring of straight-through and crossover cables for 100BASE-TX/10BASE-T. Figure 7-3 100BASE-TX/10BASE-T Connection...
-
Page 26: Appendix B Cabling Recommendations
Hardware Installation and Reference Guide Appendix 7.2 Appendix B Cabling Recommendations During installation, route cable bundles upward or downward along the sides of the rack depending on the actual situation in the equipment room. All cable connectors should be placed at the bottom of the cabinet rather than be exposed outside of the cabinet. Power cords should be routed upward or downward beside the cabinet close to the location of the DC power distribution cabinet, AC power outlet, or lightning protection box. - Page 27 Hardware Installation and Reference Guide Appendix Figure 7-5 Cutting off Excess Cable Tie If cables are to be bent, bind them first but do not tie cable ties within the bend to avoid stress on the cables, which may otherwise cause the wires inside to break, as shown in Figure 7-6.
- Page 28 Hardware Installation and Reference Guide Appendix Figure 7-7 Fastening Cable Lugs Note: 1. Flat washer 2. Spring washer 3. Nut 4. Flat washer When using a stiff cable, fix it near the cable lug to avoid stress on the lug and cable. ...
Need help?
Do you have a question about the Reyee RG-RAP2260 and is the answer not in the manual?
Questions and answers